In this tutorial, you will learn how to install and setup Nessus scanner on Ubuntu 20.04. Nessus is the de-facto industry standard vulnerability assessment solution. It is one of the most widely deployed vulnerability assessment solution world-wide.

Nessus features high-speed asset discovery, configuration auditing, target profiling, malware detection, sensitive data discovery, and more. Nessus supports more technologies than competitive solutions, scanning operating systems, network devices, hypervisors, databases, web servers, and critical infrastructure for vulnerabilities, threats, and compliance violations. With the world’s largest continuously-updated library of vulnerability and configuration checks, and the support of Tenable’s expert vulnerability research team, Nessus sets the standard for vulnerability scanning speed and accuracy.
Installing Nessus Scanner on Ubuntu 20.04
There are different versions of Nessus scanners that you can use for vulnerability assessment:
In this tutorial, we will learn how to install and setup Nessus Professional trial version scanner on Ubuntu 20.04. Some of the features provided by the Nessus professional trial version include;
- Real-Time Vulnerability Updates
- Vulnerability Scanning
- Unlimited Scans
- 32 IPs Per Scanner
- Web Application Scanning
- Exportable Reports
- Free for 7 days
To install Nessus Professional trial version on Ubuntu 20.04;
Obtain the Trail activation code
In order to get the Nessus professional trial version activation code, you need to register an account on Nessus activation code page. Once you have registered an account, login to your trials account and obtain activation code. You will receive instructions in your email inbox.
Download Nessus Professional Installer
Navigate to Nessus downloads page and grab Ubuntu installation package. Nessus 10.0.1 is the current stable release as of this writing.
You can simply execute the command below to download Nessus 10.0.1 Ubuntu installer.
wget -O Nessus-10.0.1-Ubuntu1110_amd64.deb https://www.tenable.com/downloads/api/v1/public/pages/nessus/downloads/15341/download?i_agree_to_tenable_license_agreement=trueCalculate the checksum hash of the downloaded file and compare it with the checksum hash as provided on the downloads page.
md5sum Nessus-10.0.1-Ubuntu1110_amd64.debd33decc18d4064d559021cc949e59156 Nessus-10.0.1-Ubuntu1110_amd64.debEnsure that the hashes match before you can proceed with installation.
Install Nessus Scanner on Ubuntu
Next, install Nessus professional trial version on Ubuntu 20.04 by running the command below;
apt install ./Nessus-10.0.1-Ubuntu1110_amd64.debAs the installation runs, you will see such information on how to start and access Nessus web user interface.
Reading package lists... Done
Building dependency tree
Reading state information... Done
Note, selecting 'nessus' instead of './Nessus-10.0.1-Ubuntu1110_amd64.deb'
The following NEW packages will be installed:
  nessus
0 upgraded, 1 newly installed, 0 to remove and 42 not upgraded.
Need to get 0 B/50.3 MB of archives.
After this operation, 0 B of additional disk space will be used.
Get:1 /root/Nessus-10.0.1-Ubuntu1110_amd64.deb nessus amd64 10.0.1 [50.3 MB]
Selecting previously unselected package nessus.
(Reading database ... 84755 files and directories currently installed.)
Preparing to unpack .../Nessus-10.0.1-Ubuntu1110_amd64.deb ...
Unpacking nessus (10.0.1) ...
Setting up nessus (10.0.1) ...
Unpacking Nessus Scanner Core Components...
Created symlink /etc/systemd/system/nessusd.service → /lib/systemd/system/nessusd.service.
Created symlink /etc/systemd/system/multi-user.target.wants/nessusd.service → /lib/systemd/system/nessusd.service.

 - You can start Nessus Scanner by typing /bin/systemctl start nessusd.service
 - Then go to https://ubuntu20:8834/ to configure your scanner
Running Nessus Deamon
Start and enable Nessus Professional service to run on system boot.
systemctl enable --now nessusdChecking the status;
systemctl status nessusd
● nessusd.service - The Nessus Vulnerability Scanner
     Loaded: loaded (/lib/systemd/system/nessusd.service; enabled; vendor preset: enabled)
     Active: active (running) since Thu 2021-11-18 09:39:53 CET; 5s ago
   Main PID: 416742 (nessus-service)
      Tasks: 12 (limit: 18715)
     Memory: 32.9M
     CGroup: /system.slice/nessusd.service
             ├─416742 /opt/nessus/sbin/nessus-service -q
             └─416743 nessusd -q

Nov 18 09:39:53 pentest systemd[1]: Started The Nessus Vulnerability Scanner.
Nov 18 09:39:55 pentest nessus-service[416743]: Cached 0 plugin libs in 0msec
Nov 18 09:39:55 pentest nessus-service[416743]: Cached 0 plugin libs in 0mse
Set up and Activate Nessus Professional
After initial installation you are required to set up and activate Nessus. Login to UI, using the URL as shown in the installation output: https://<your-hostname-or-IP>:8834/.
If UFW is running, open port 8834/tcp to allow external access;
ufw allow 8834/tcpNext, access Nessus professional from browser to finalize the setup. Accept the SSL warning as an exception and proceed.
Choose Nessus Type to Run
When you first access Nessus, you are prompted to choose the Nessus you want to deploy.
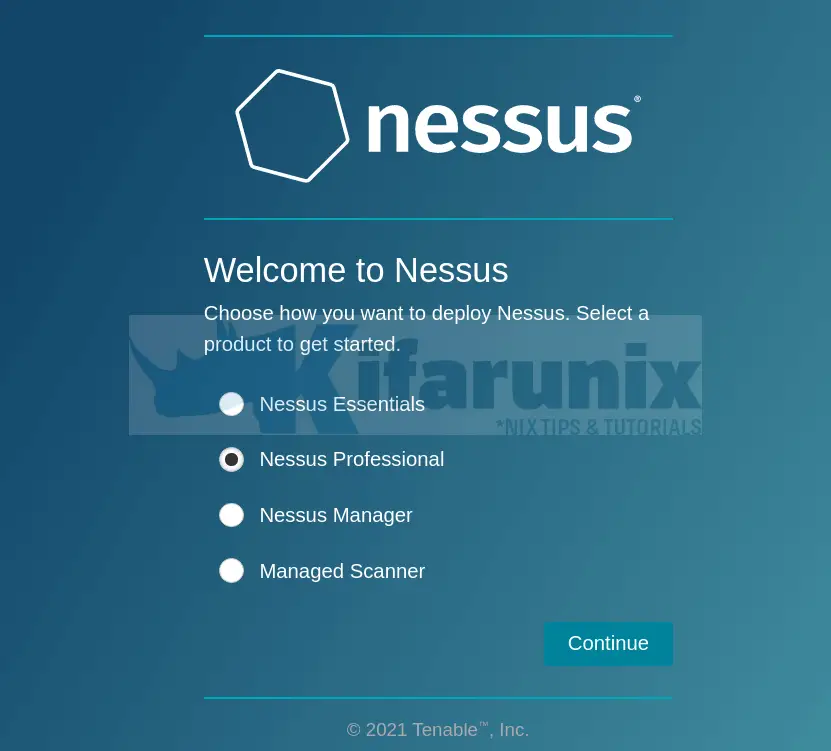
In our case, we choose Nessus Professional and continue.
Registering Nessus Professional Trial version
Copy the key from the trials account page and paste it to activate the trial version.
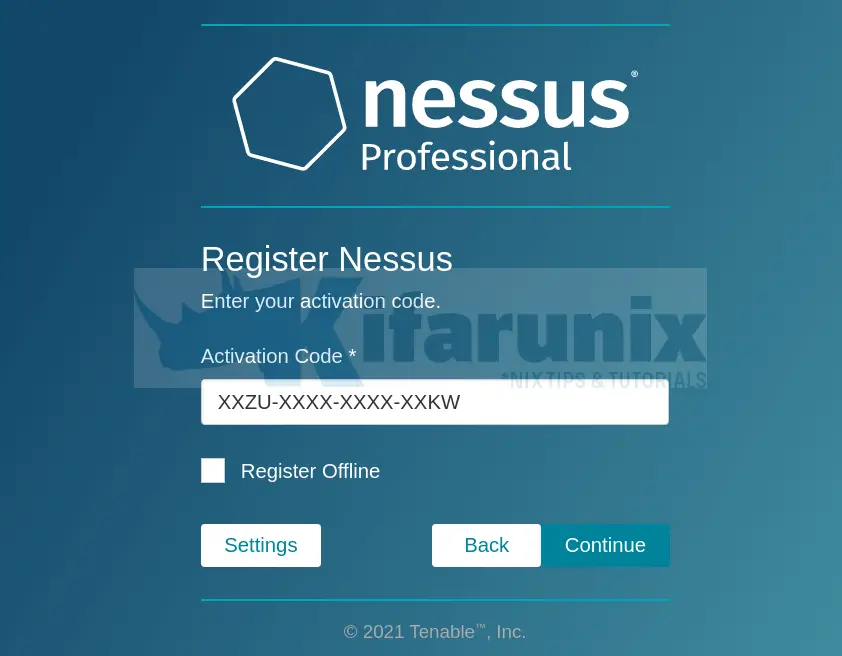
Click Continue
Create Nessus Administrator Account
Next, you are required to create an admin account.
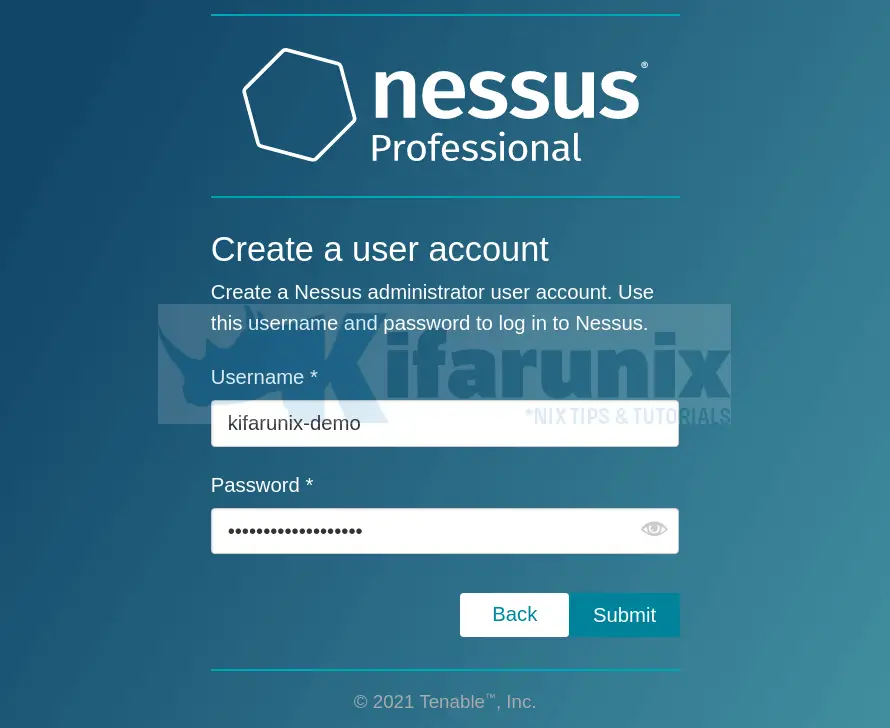
Click submit once done.
Once the Nessus setup is complete, it will start to initialize by downloading and compiling the plugins needed for scanning. This may take a while though.
After the initialization is done, such an interface welcomes you.
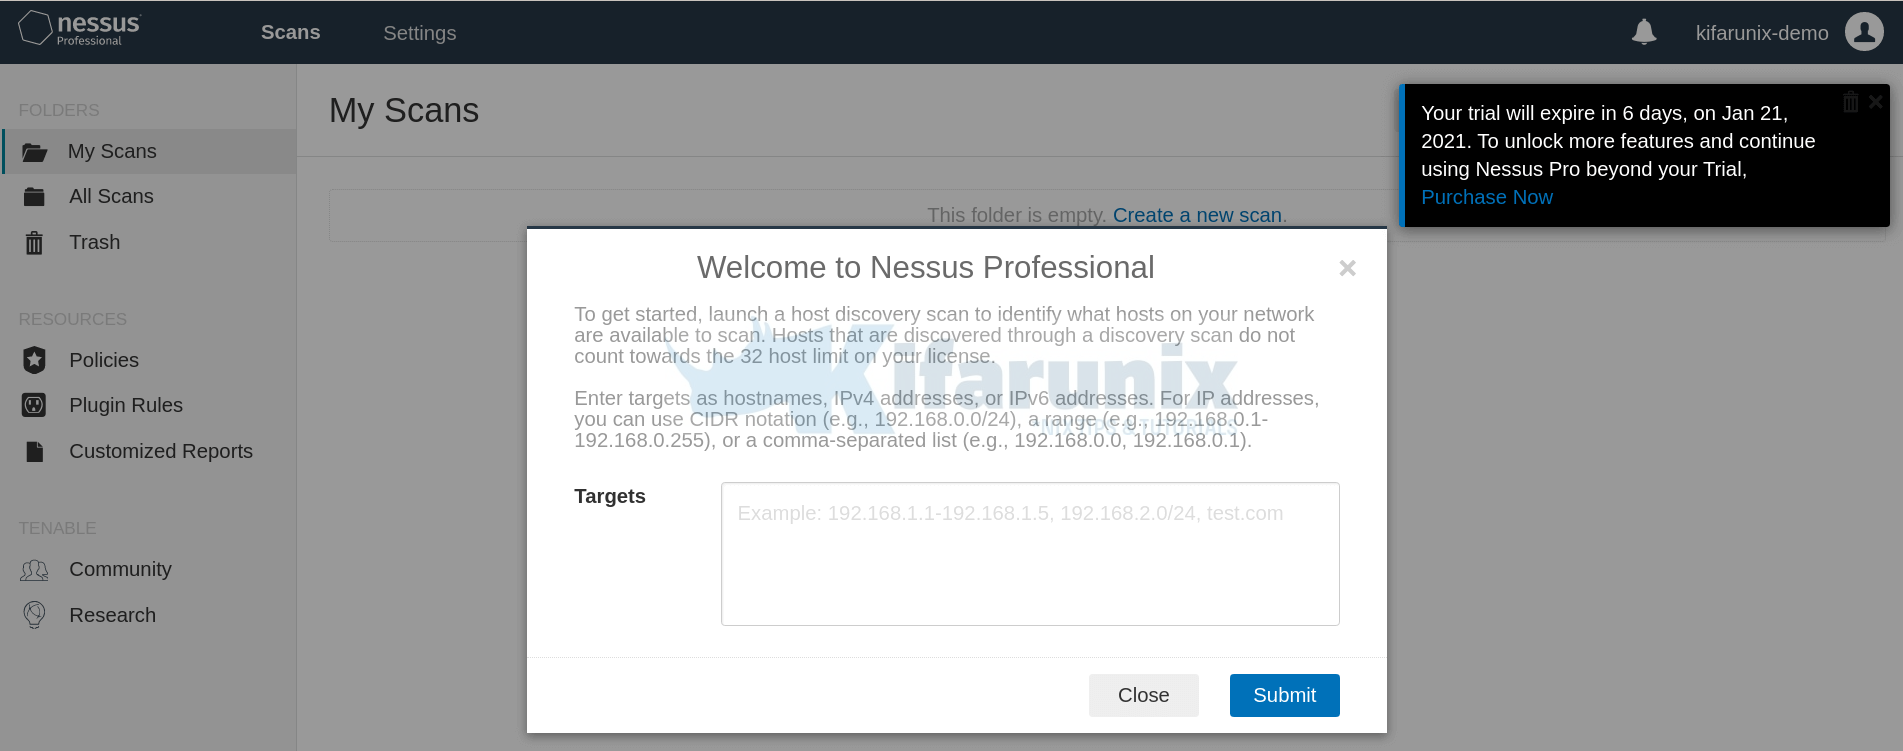
Adding Scan Targets
You can choose to add hosts that you want to scan. You can use hostnames, IPv4 addresses, or IPv6 addresses. For IP addresses, you can use CIDR notation (e.g., 192.168.0.0/24), a range (e.g., 192.168.0.1-192.168.0.255), or a comma-separated list (e.g., 192.168.0.0, 192.168.0.1).
Sample scans dashboard.
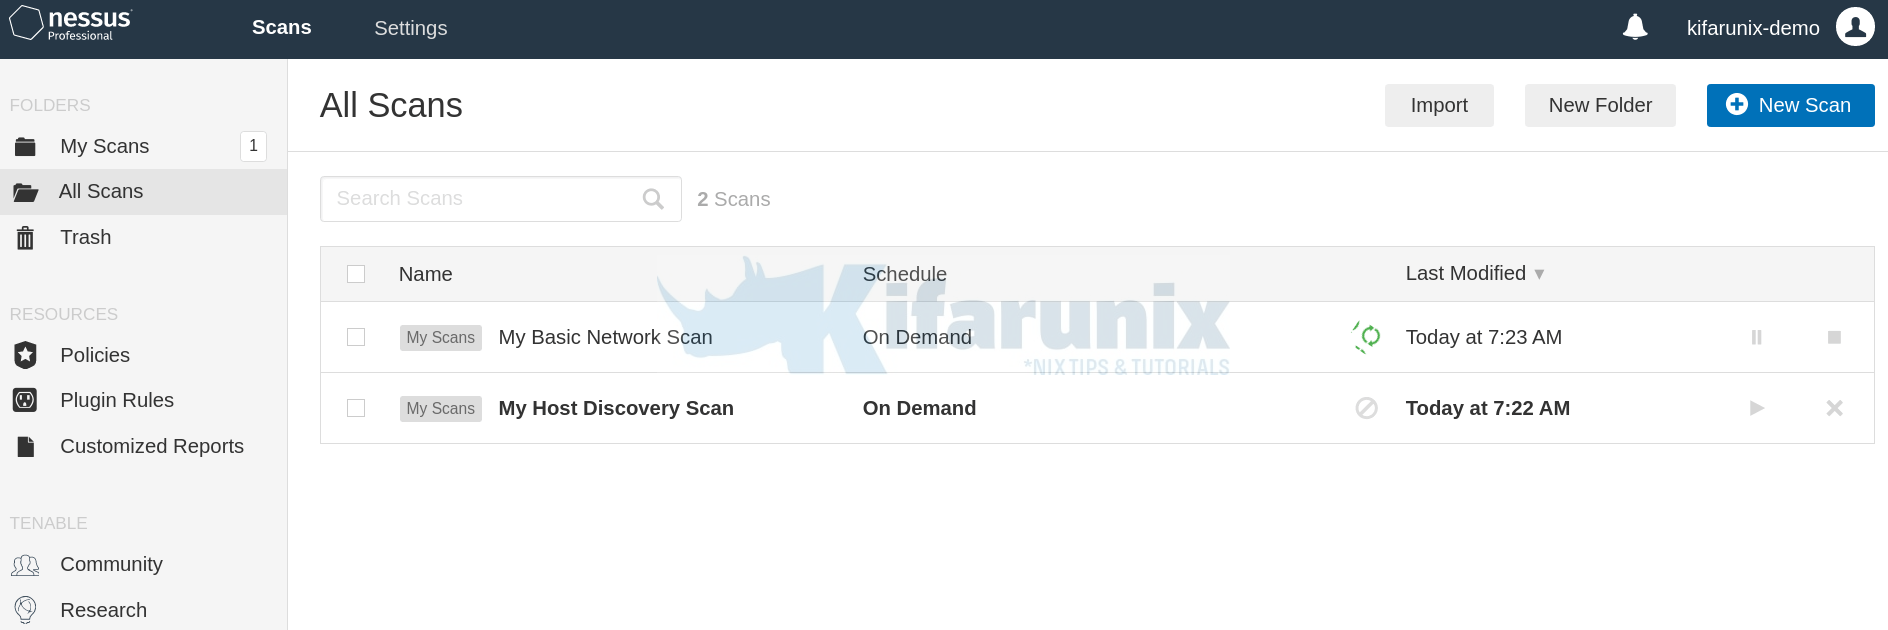
You can further customize your scanner by creating scan rules and policies.
That marks the end of our tutorial on how to install and setup Nessus on Ubuntu 20.04.
Further Reading
You can utilize the Nessus User guide on how to use Nessus scanner;
Nessus Professional 10.x User Guide
Other Tutorials
How to Scan a Remote Host using Nessus Vulnerability Scanner
How to Install and Use Nikto Web Scanner on Ubuntu 18.04
How to Install RKHunter (RootKit Hunter) On Ubuntu 18.04
Install OpenVAS 10 (GVM) on Debian 10 Buster

