Welcome to our guide on how to install WonderCMS on Debian 10 Buster. WonderCMS is a small, light and simple, free and opensource flat file Content Management System that is build with PHP, jQuery, and HTML/CSS. It enables users to maintain their websites without the need for the databases. Read more about WonderCMS features.
Install WonderCMS on Debian 10 Buster
Prerequisites
Before you can install WonderCMS on Debian 10 Buster, there are a number of requirements that must be met. These include;
- PHP version 7.1 or greater
- cURL extension
- mbstring extension
- Zip extension
- mod_rewrite module enabled
- any type of server (Apache, NGINX, IIS)
Install WonderCMS Requirements
Before you can proceed, ensure that the requirements listed above are installed on your Debian 10 Buster system.
To begin with, update and upgrade your system packages.
apt update
apt upgrade
Install Apache Web server, PHP and the required extensions. PHP 7.3 is the default available version on Debian 10 Buster.
apt install php php-mbstring php-curl php-zipBy default, PHP installs with it Apache web server and the required libraries. When installed, Apache is started and enabled to run on system boot.
systemctl status apache2● apache2.service - The Apache HTTP Server
Loaded: loaded (/lib/systemd/system/apache2.service; enabled; vendor preset: enabled)
Active: active (running) since Tue 2019-08-20 06:45:46 EDT; 2s ago
Docs: https://httpd.apache.org/docs/2.4/
Main PID: 14535 (apache2)
Tasks: 6 (limit: 1150)
Memory: 15.0M
CGroup: /system.slice/apache2.service
├─14535 /usr/sbin/apache2 -k start
├─14539 /usr/sbin/apache2 -k start
├─14540 /usr/sbin/apache2 -k start
├─14541 /usr/sbin/apache2 -k start
├─14542 /usr/sbin/apache2 -k start
└─14543 /usr/sbin/apache2 -k startsystemctl is-enabled apache2
enabledWant to use Nginx instead? See our article on how to install Wonder CMS with Nginx.
Install WonderCMS with Nginx on Debian 10
You can also verify the version of PHP installed;
php -vPHP 7.3.4-2 (cli) (built: Apr 13 2019 19:05:48) ( NTS )
Copyright (c) 1997-2018 The PHP Group
Zend Engine v3.3.4, Copyright (c) 1998-2018 Zend Technologies
with Zend OPcache v7.3.4-2, Copyright (c) 1999-2018, by Zend TechnologiesConfigure PHP timezone by running the command below;
sed -i 's/;date.timezone =/date.timezone = Europe\/Berlin/' /etc/php/7.3/apache2/php.iniDownload WonderCMS
As of this writing, WonderCMS 2.7.0 is the latest version. Navigate to the downloads page and grab it. You can simply pull it by running the command below;
wget https://github.com/robiso/wondercms/releases/download/2.7.0/WonderCMS-2.7.0.zipInstall WonderCMS on Debian 10 Buster
Installing WonderCMS is as simple as extracting the zipped file to your web root directory. There is No configuration needed.
apt install zip
unzip WonderCMS-2.7.0.zip -d /var/www/html/
Set the owner and group ownership of the WonderCMS web directory to Apache web user.
chown -R www-data:www-data /var/www/html/wondercmsYou can as well install it directly by pulling WonderCMS git directory;
apt install git
git clone https://github.com/robiso/wondercms.git /var/www/html/wondercms
The change the owner and group permission.
chown -R www-data:www-data /var/www/html/wondercmsCreate WonderCMS Apache Configuration
Create WonderCMS Apache configuration file with the following content.
vim /etc/apache2/sites-available/wondercms.conf<VirtualHost *:80>
ServerAdmin webmaster@localhost
ServerName wondercms.example.com
DocumentRoot /var/www/html/wondercms
Redirect /wondercms/loginURL /loginURL
<Directory /var/www/html/wondercms/>
Options FollowSymlinks
AllowOverride All
Require all granted
</Directory>
ErrorLog ${APACHE_LOG_DIR}/wondercms-error.log
CustomLog ${APACHE_LOG_DIR}/wondercms-access.log combined
</VirtualHost>Note that the url, /wondercms/loginURL is redirected to /loginURL.
Save and quit the configuration file and run configuration test;
apachectl configtestEnable WonderCMS site
a2ensite wondercms.confDisable default Apache site.
a2dissite 000-default.confEnable Apache rewrite module
a2enmod rewriteRestart Apache to activate the new configuration.
systemctl restart apache2Accessing WonderCMS
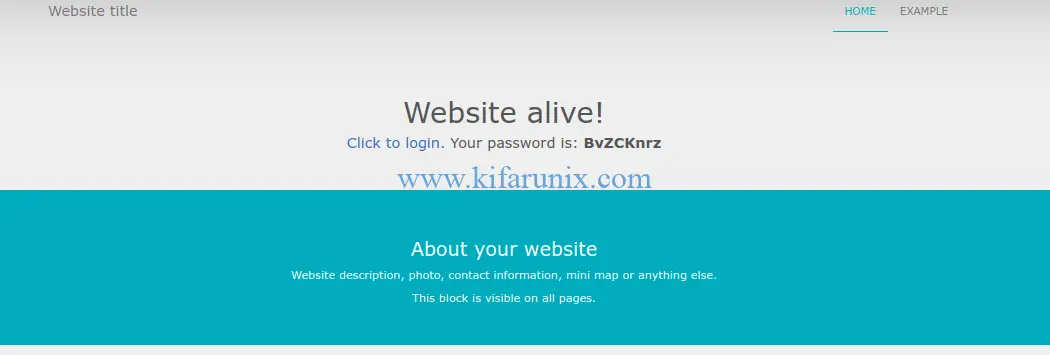
You can now access WonderCMS from browser using the address http://wondercms.example.com.

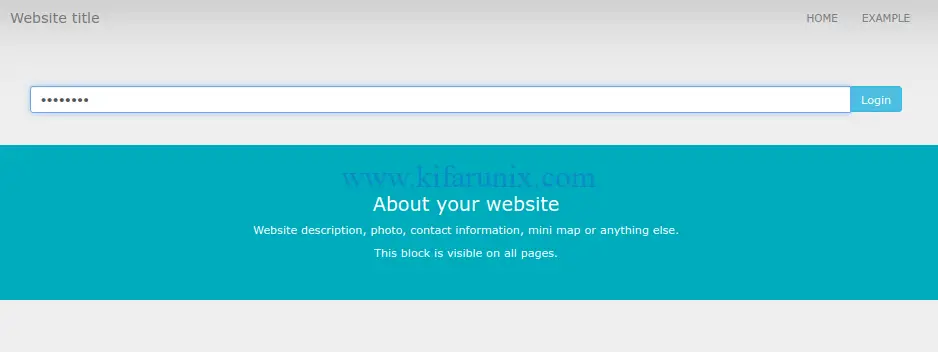
Click on “Click to login” to login to your site using the provided password.

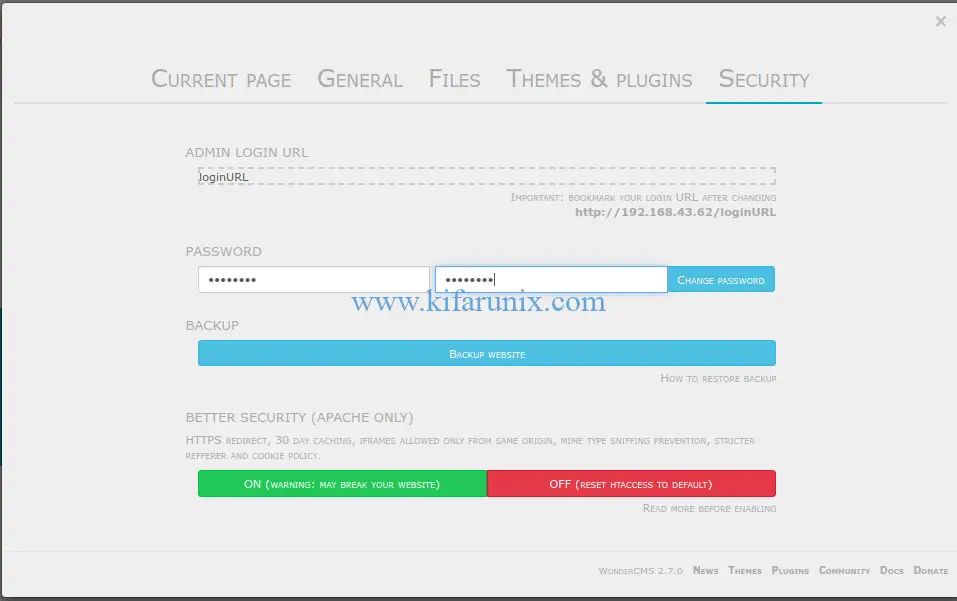
Change the default password by navigating to Settings > Security.

You have successfully installed WonderCMS on Debian 10 Buster. You can now explore WonderCMS. Enjoy.
Here are 5 WonderCMS safety recommended tips;
- Change the default password and default login URL immediately. The default login URL will then automatically disappear from your footer.
- Install themes and plugins only from sources you trust.
- Regularly update WonderCMS and always create backups.
- WonderCMS supports running JavaScript anywhere. Be careful not to paste random JavaScript code.
- WonderCMS supports uploading SVG’s, which could also contain JavaScript code. Don’t get tricked into uploading malicious SVG’s. If in doubt, avoid uploading SVG file extensions.
Learn more about WonderCMS on their wiki page.
Other Tutorials;
Install Automad CMS on Debian 10/Ubuntu 18.04
Install and Use Docker on Debian 10 Buster
Install Kolide Fleet Osquery Fleet Manager on Debian 10
Install Osquery on Debian 10 Buster

