In this guide, we are going to learn how to install Automad CMS on Debian 10 /Ubuntu 18.04. Automad is a file-based content management system and template engine written in PHP. It stores all content in human readable text files instead of the database and thus a site created with Automad is fully portable, easy to install and can be version controlled by using Git or Mercurial.
Installing Automad CMS on Debian 10/Ubuntu 18.04
Prerequisites
Automad is written in PHP and thus it requires a web server with PHP and PHP extensions installed in order to run. Here is a list of the minimum system requirements;
- Apache or Nginx web server
- PHP 7.4+
- On Apache servers, the mod_rewrite module should be enabled
Run System Update
Run the commands below to update and upgrade your system packages.
apt updateInstall PHP and Required PHP Modules
Once the system update is done, proceed to install the required PHP and PHP modules. Automad, as of this writing requires PHP 7.4+ as of this writing, as per the system requirements page.
PHP 7.2 is the default PHP version available on the default Ubuntu 18.04 repositories while PHP 7.3 is the default PHP versions on Debian 10.
Thus, to install PHP 7.4 on Ubuntu 18.04/Debian 10;
Add the third party PPA repositories that provides PHP 7.4 packages;
Ubuntu 18.04:
add-apt-repository ppa:ondrej/php --yes &> /dev/nullDebian 10:
apt -y install lsb-release apt-transport-https ca-certificates wget -qO /etc/apt/trusted.gpg.d/php.gpg https://packages.sury.org/php/apt.gpgecho "deb https://packages.sury.org/php/ $(lsb_release -sc) main" > /etc/apt/sources.list.d/php.listRe-update the package cache;
apt updateThen run the command below to install PHP and the required extensions as well the Apache web server.
apt install php7.4 php7.4-zip php7.4-curl php7.4-mbstring php7.4-gd php7.4-xml php7.4-xmlrpc php7.4-soap -yVerify the version of PHP installed;
Ubuntu 18.04
php -vDebian 10 Buster
php -vThe output of both commands should be same;
PHP 7.4.28 (cli) (built: Feb 17 2022 16:06:19) ( NTS )
Copyright (c) The PHP Group
Zend Engine v3.4.0, Copyright (c) Zend Technologies
    with Zend OPcache v7.4.28, Copyright (c), by Zend Technologies
Apache web server is set to run and enabled to run on system boot.
systemctl status apache2
● apache2.service - The Apache HTTP Server
   Loaded: loaded (/lib/systemd/system/apache2.service; enabled; vendor preset: enabled)
  Drop-In: /lib/systemd/system/apache2.service.d
           └─apache2-systemd.conf
   Active: active (running) since Wed 2022-02-23 18:30:23 EAT; 3s ago
  Process: 14290 ExecStop=/usr/sbin/apachectl stop (code=exited, status=0/SUCCESS)
  Process: 14295 ExecStart=/usr/sbin/apachectl start (code=exited, status=0/SUCCESS)
 Main PID: 14312 (apache2)
    Tasks: 6 (limit: 2317)
   CGroup: /system.slice/apache2.service
           ├─14312 /usr/sbin/apache2 -k start
           ├─14316 /usr/sbin/apache2 -k start
           ├─14317 /usr/sbin/apache2 -k start
           ├─14318 /usr/sbin/apache2 -k start
           ├─14321 /usr/sbin/apache2 -k start
           └─14322 /usr/sbin/apache2 -k start

Feb 23 18:30:23 cms.kifarunix-demo.com systemd[1]: Stopped The Apache HTTP Server.
Feb 23 18:30:23 cms.kifarunix-demo.com systemd[1]: Starting The Apache HTTP Server...
Feb 23 18:30:23 cms.kifarunix-demo.com systemd[1]: Started The Apache HTTP Server.
To confirm is Apache is set to run on system boot, run the command below.
systemctl is-enabled apache2If the output is enabled, otherwise, enable it to run on boot by running;
systemctl enable apache2Download Automad CMS Installation Files
There are different ways in which you can install Automad; using Composer, Docker or manual download.
We use manual method in this guide.
Run the command below to download the Automad CMS installation files to the web root directory you defined in the Automad CMS Apache configuration file above.
wget -qO automad-master.zip https://codeload.github.com/marcantondahmen/automad/zip/refs/heads/masterInstall Automad CMS on Debian/Ubuntu
Installing Automad CMS is as simple as unzipping the download files to Automad CMS web root directory.
Extract Automad CMS Files
apt install zip -yunzip -q automad-master.zip -d /var/www/html/Check the contents;
ls /var/www/html/automad-master index.htmlAutomad Files are under the automad-master directory.
Configure Apache For Automad CMS
Create Apache configuration file for Automad CMS with the following content;
tee /etc/apache2/sites-available/automadcms.conf << 'EOL'
<VirtualHost *:80>
     ServerAdmin [email protected]
     DocumentRoot /var/www/html/automad-master
     ServerName cms.kifarunix-demo.com

     <Directory /var/www/html/automad-master>
          Options FollowSymlinks
          AllowOverride All
          Require all granted
     </Directory>

    ErrorLog ${APACHE_LOG_DIR}/error.log
    CustomLog ${APACHE_LOG_DIR}/access.log combined

</VirtualHost>
EOL
Save the configuration file and quit and check configuration syntax.
apachectl configtestIf all is well, you should get Syntax OK.
Next, disable Apache default site and enable Automd CMS site
a2dissite 000-default.confa2ensite automadcms.confEnable Apache Rewrite module;
a2enmod rewriteSet the user and group ownership of the Automad CMS files to web server www-data.
chown -R www-data: /var/www/html/automad-master
chmod -R 755 /var/www/html/automad-master
Restart Apache2
systemctl restart apache2Accessing Automad CMS
You can now access your Automad CMS site via http://<your-defined-domain-name>.

Create Automad CMS User Account
To create Automad CMS user account, enter the Automad CMS dashboard, http://<domain>/dashboard.

Fill in the username and password and download the user registration form and copy it under the /config directory within your Automad CMS project directory.
For example, in my case the accounts.php file is downloaded to ~/downloads directory. To preserver the permissions, copy the file as www-data.
sudo -u www-data cp ~/accounts.php /var/www/html/automad-master/config/Login to Automad CMS Site
Once you have the accounts form in place, login to Automad CMS via http://automadcms.example.com/dashboard

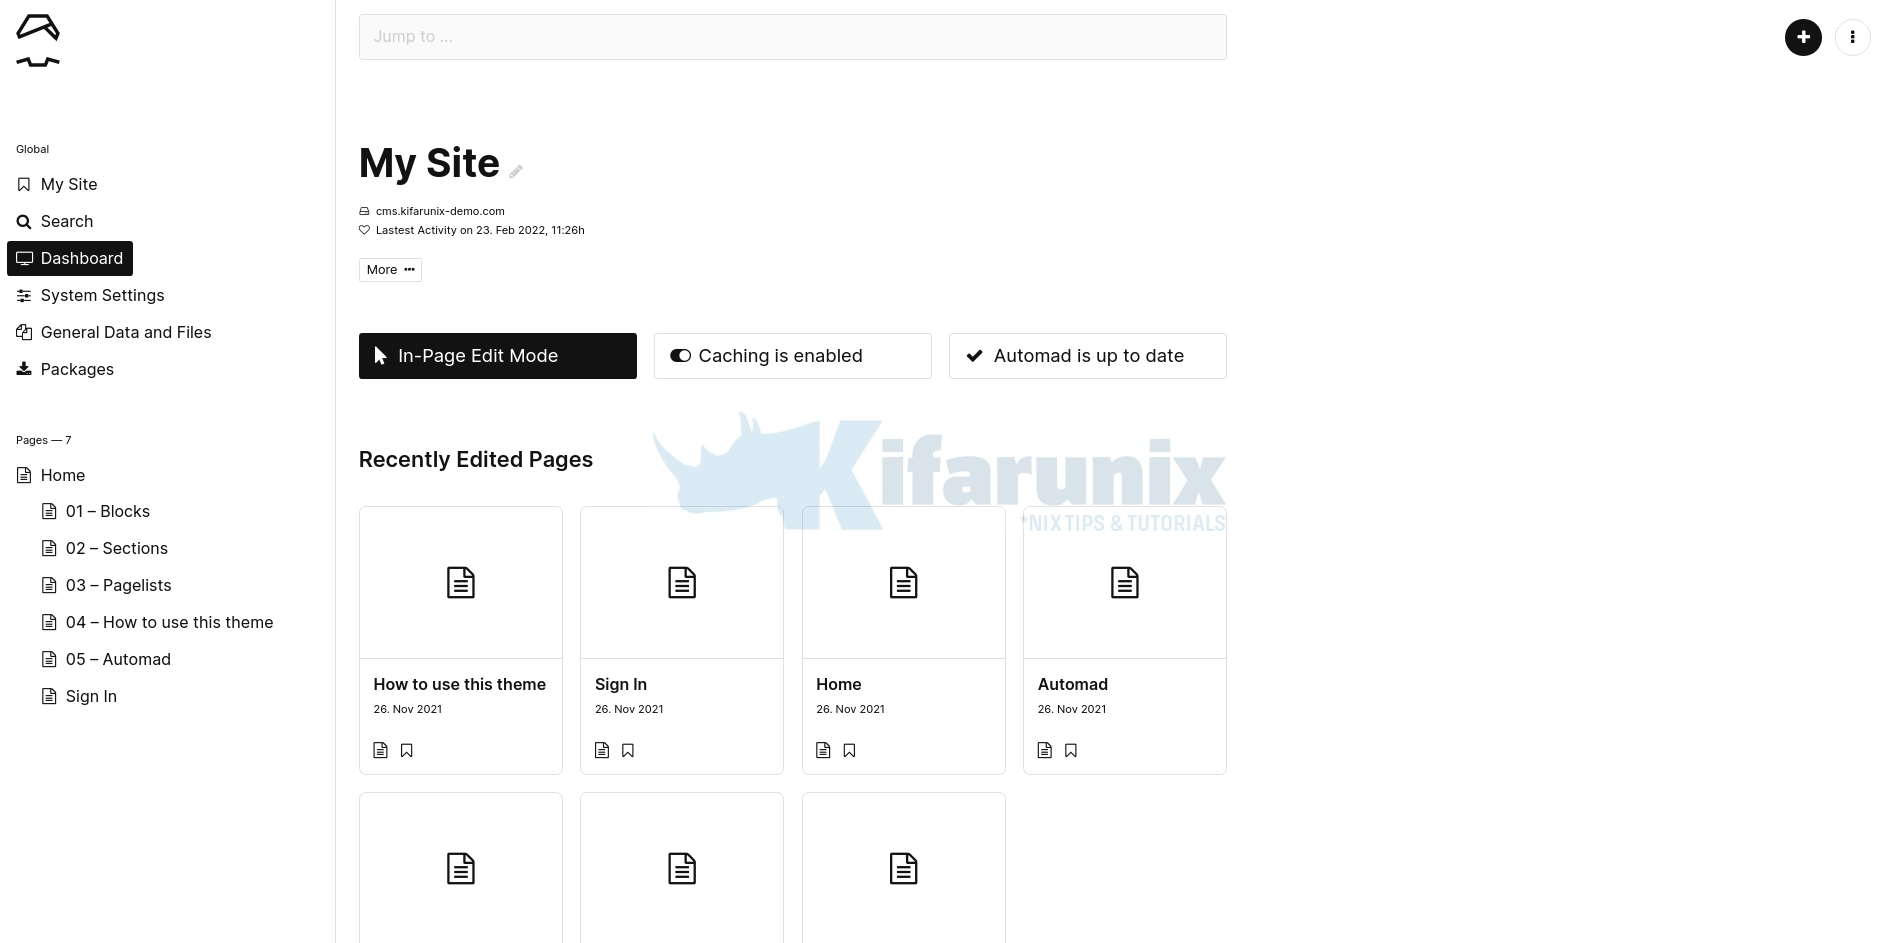
And there you go. You get to Automad CMS admin dashboard.

You have successfully installed Automad CMS on Debian 10/Ubuntu 18.04. You can now explore it. Enjoy.
Read more about Automad CMS on;
Related Tutorials;
Install WonderCMS with Nginx on Debian 10

