In this tutorial, you will learn how to install ELK stack 8 on Debian 12 systems. Elastic/ELK stack 8.x has been released making it another major version release after Elastic 7.x. As of this writing, Elastic 8.8.1 is the current release version.
Table of Contents
Installing ELK Stack 8 on Debian 12
Install Vanilla Debian 12 Server
You can check how to install Debian 12 server on VirtualBox by following the guide below;
Install Debian 12 on VirtualBox
System Hardware Requirements
This is dependent on your setup use cases and how much data you are expecting to process, data retention period, the desired performance etc. No standard is same for everyone. So provide “enough!”
Set system Hostname
Begin by setting your system hostname;
hostnamectl set-hostname elk.kifarunix-demo.comUpdate DNS records locally on hosts file if you dont have DNS server;
echo "192.168.57.66 elk.kifarunix-demo.com elk" >> /etc/hostsInstall Elastic Stack 8 Repositories
To install Elastic Stack 8 on Debian 12, you need to install Elastic Stack 8 repositories as follows.
Install Elastic stack 8 repository signing key.
apt install sudo gnupg2 apt-transport-https curl vim -ywget -qO - https://artifacts.elastic.co/GPG-KEY-elasticsearch | \
gpg --dearmor > /etc/apt/trusted.gpg.d/elk.gpgInstall the Elastic Stack 8 repository;
echo "deb https://artifacts.elastic.co/packages/8.x/apt stable main" \
> /etc/apt/sources.list.d/elastic-8.list
Run system update;
apt updateInstalling ELK Stack 8 on Debian 12
Elastic stack is made up of various opensource tools; Elasticsearch, Logstash, Kibana, and Beats.
The order of installation is;
- Elasticsearch
- Kibana
- Logstash
- Beats
Install Elasticsearch 8 on Debian 12
You can install Elasticsearch 8 automatically from Elastic repos installed above by executing the command below;
apt install elasticsearch -yDuring the installation, the Elastic Security features will be enabled by default;
- Authentication and authorization are enabled.
- TLS for the transport and HTTP layers is enabled and configured.
- Elastic super user account (elastic) and its password is created.
Reading package lists... Done
Building dependency tree... Done
Reading state information... Done
The following NEW packages will be installed:
  elasticsearch
0 upgraded, 1 newly installed, 0 to remove and 0 not upgraded.
Need to get 597 MB of archives.
After this operation, 1,236 MB of additional disk space will be used.
Get:1 https://artifacts.elastic.co/packages/8.x/apt stable/main amd64 elasticsearch amd64 8.8.1 [597 MB]
Fetched 597 MB in 4min 27s (2,231 kB/s)
Selecting previously unselected package elasticsearch.
(Reading database ... 28970 files and directories currently installed.)
Preparing to unpack .../elasticsearch_8.8.1_amd64.deb ...
Creating elasticsearch group... OK
Creating elasticsearch user... OK
Unpacking elasticsearch (8.8.1) ...
Setting up elasticsearch (8.8.1) ...
--------------------------- Security autoconfiguration information ------------------------------

Authentication and authorization are enabled.
TLS for the transport and HTTP layers is enabled and configured.

The generated password for the elastic built-in superuser is : ALL16n6Xv5yJclrWt5Sc

If this node should join an existing cluster, you can reconfigure this with
'/usr/share/elasticsearch/bin/elasticsearch-reconfigure-node --enrollment-token <token-here>'
after creating an enrollment token on your existing cluster.

You can complete the following actions at any time:

Reset the password of the elastic built-in superuser with
'/usr/share/elasticsearch/bin/elasticsearch-reset-password -u elastic'.

Generate an enrollment token for Kibana instances with
 '/usr/share/elasticsearch/bin/elasticsearch-create-enrollment-token -s kibana'.

Generate an enrollment token for Elasticsearch nodes with
'/usr/share/elasticsearch/bin/elasticsearch-create-enrollment-token -s node'.

-------------------------------------------------------------------------------------------------
### NOT starting on installation, please execute the following statements to configure elasticsearch service to start automatically using systemd
 sudo systemctl daemon-reload
 sudo systemctl enable elasticsearch.service
### You can start elasticsearch service by executing
 sudo systemctl start elasticsearch.service
Configure Elasticsearch 8 on Debian 12
Since we are running a basic setup single node cluster, we will go with the default settings.
If you check the Elasticsearch configuration file,/etc/elasticsearch/elasticsearch.yml, you will see the security setting enabled;
cat /etc/elasticsearch/elasticsearch.yml
#----------------------- BEGIN SECURITY AUTO CONFIGURATION -----------------------
#
# The following settings, TLS certificates, and keys have been automatically
# generated to configure Elasticsearch security features on 25-06-2023 10:20:02
#
# --------------------------------------------------------------------------------

# Enable security features
xpack.security.enabled: true

xpack.security.enrollment.enabled: true

# Enable encryption for HTTP API client connections, such as Kibana, Logstash, and Agents
xpack.security.http.ssl:
  enabled: true
  keystore.path: certs/http.p12

# Enable encryption and mutual authentication between cluster nodes
xpack.security.transport.ssl:
  enabled: true
  verification_mode: certificate
  keystore.path: certs/transport.p12
  truststore.path: certs/transport.p12
# Create a new cluster with the current node only
# Additional nodes can still join the cluster later
cluster.initial_master_nodes: ["elk.kifarunix-demo.com"]

# Allow HTTP API connections from anywhere
# Connections are encrypted and require user authentication
http.host: 0.0.0.0

# Allow other nodes to join the cluster from anywhere
# Connections are encrypted and mutually authenticated
#transport.host: 0.0.0.0

#----------------------- END SECURITY AUTO CONFIGURATION -------------------------
Without comment lines, this is how the default Elasticsearch 8 configuration looks like;
grep -Ev '^#|^$' /etc/elasticsearch/elasticsearch.yml
path.data: /var/lib/elasticsearch
path.logs: /var/log/elasticsearch
xpack.security.enabled: true
xpack.security.enrollment.enabled: true
xpack.security.http.ssl:
  enabled: true
  keystore.path: certs/http.p12
xpack.security.transport.ssl:
  enabled: true
  verification_mode: certificate
  keystore.path: certs/transport.p12
  truststore.path: certs/transport.p12
cluster.initial_master_nodes: ["elk.kifarunix-demo.com"]
http.host: 0.0.0.0
Of course you can update the cluster name, node name, the host and the port details.
Adjust Elasticsearch JVM Settings
Next, configure JVM heap size to no more than half the size of your memory. In this case, our test server has 2G RAM and the heap size is set to 512M for both maximum and minimum sizes.
echo -e '-Xms512m\n-Xmx512m' > /etc/elasticsearch/jvm.options.d/jvm-heap.optionsAdjust the minimum and maximum memory size based on your setup.
Save and exit the file.
Running Elasticsearch
Start and enable Elasticsearchto run on system boot;
systemctl daemon-reloadsystemctl enable --now elasticsearchTo check the status;
systemctl status elasticsearch
● elasticsearch.service - Elasticsearch
     Loaded: loaded (/lib/systemd/system/elasticsearch.service; enabled; preset: enabled)
     Active: active (running) since Sun 2023-06-25 06:25:01 EDT; 3s ago
       Docs: https://www.elastic.co
   Main PID: 2338 (java)
      Tasks: 77 (limit: 3510)
     Memory: 853.8M
        CPU: 32.907s
     CGroup: /system.slice/elasticsearch.service
             ├─2338 /usr/share/elasticsearch/jdk/bin/java -Xms4m -Xmx64m -XX:+UseSerialGC -Dcli.name=server -Dcli.script=/usr/share/elasticsearch/bin/elasticsearch -Dcli.l>
             ├─2394 /usr/share/elasticsearch/jdk/bin/java -Des.networkaddress.cache.ttl=60 -Des.networkaddress.cache.negative.ttl=10 -Djava.security.manager=allow -XX:+Alw>
             └─2414 /usr/share/elasticsearch/modules/x-pack-ml/platform/linux-x86_64/bin/controller

Jun 25 06:24:45 elk.kifarunix-demo.com systemd[1]: Starting elasticsearch.service - Elasticsearch...
Jun 25 06:25:01 elk.kifarunix-demo.com systemd[1]: Started elasticsearch.service - Elasticsearch.
You can as well verify ES status using curl command. Replace the IP/domain name accordingly.
curl https://elk.kifarunix-demo.com:9200 --cacert /etc/elasticsearch/certs/http_ca.crt -u elasticWhen prompted, enter the Elasticsearch password generated above.
If you get such an output, then all is well.
{
  "name" : "elk.kifarunix-demo.com",
  "cluster_name" : "elasticsearch",
  "cluster_uuid" : "oOQp0G9cSzOqZgBYYk6O_g",
  "version" : {
    "number" : "8.8.1",
    "build_flavor" : "default",
    "build_type" : "deb",
    "build_hash" : "f8edfccba429b6477927a7c1ce1bc6729521305e",
    "build_date" : "2023-06-05T21:32:25.188464208Z",
    "build_snapshot" : false,
    "lucene_version" : "9.6.0",
    "minimum_wire_compatibility_version" : "7.17.0",
    "minimum_index_compatibility_version" : "7.0.0"
  },
  "tagline" : "You Know, for Search"
}
Also, check the ports are opened;
ss -altnp | grep 9200
LISTEN 0 4096 *:9200 *:* users:(("java",pid=2394,fd=423))
You can also confirm the heap size set above;
curl "https://elk.kifarunix-demo.com:9200/_cat/nodes?v&h=heap*" \
--cacert /etc/elasticsearch/certs/http_ca.crt -u elastic
Sample output;
heap.current heap.percent heap.max
     366.7mb           71    512mb
Install Kibana 8 on Debian 12
Since we already setup Elastic repos, simply install Kibana 8 by running the command;
apt install kibana
Reading package lists... Done
Building dependency tree... Done
Reading state information... Done
The following NEW packages will be installed:
  kibana
0 upgraded, 1 newly installed, 0 to remove and 0 not upgraded.
Need to get 281 MB of archives.
After this operation, 750 MB of additional disk space will be used.
Get:1 https://artifacts.elastic.co/packages/8.x/apt stable/main amd64 kibana amd64 8.8.1 [281 MB]
Fetched 281 MB in 2min 0s (2,351 kB/s)
Selecting previously unselected package kibana.
(Reading database ... 30281 files and directories currently installed.)
Preparing to unpack .../kibana_8.8.1_amd64.deb ...
Unpacking kibana (8.8.1) ...
Setting up kibana (8.8.1) ...
Creating kibana group... OK
Creating kibana user... OK
Created Kibana keystore in /etc/kibana/kibana.keystore
Configure Kibana
Kibana is set to run on localhost:5601 by default. To allow external access, edit the configuration file and replace the value of server.host with an interface IP.
vim /etc/kibana/kibana.yml# Kibana is served by a back end server. This setting specifies the port to use.
server.port: 5601
...
# To allow connections from remote users, set this parameter to a non-loopback address.
#server.host: "localhost"
server.host: "192.168.57.66"
Those are the only changes we will make for now.
Generate Kibana Enrollment Token
Next, generate an enrollment token for Kibana using the command below;
/usr/share/elasticsearch/bin/elasticsearch-create-enrollment-token -s kibanaeyJ2ZXIiOiI4LjguMSIsImFkciI6WyIxMC4wLjIuMTU6OTIwMCJdLCJmZ3IiOiI3ODJjNWVkM2VjZmNmMDhiZjY5ZTVlMjkzYmI5YjYwYWEzYzQ2MTliZTAxYjJhMDZmNjUzYmQ0NWY5MzBiZjUyIiwia2V5IjoiU29NbThvZ0JTLW9zaVdSdmQ0UFU6OXRqZ2RvVTVSeHk4TlR4N0tnekY2ZyJ9Generate Kibana Encryption Keys
Also generate Kibana Encryption keys;
xpack.encryptedSavedObjects.encryptionKey: Used to encrypt stored objects such as dashboards and visualizationsxpack.reporting.encryptionKey: Used to encrypt saved reportsxpack.security.encryptionKey: Used to encrypt session information
These can be generated using the command below;
/usr/share/kibana/bin/kibana-encryption-keys generateSample output;
...
Settings:
xpack.encryptedSavedObjects.encryptionKey: 0e1d3ac4c4ca57beacae544c0a04e5c6
xpack.reporting.encryptionKey: 9f4f49f945013181aa99e093b5531822
xpack.security.encryptionKey: 1a2ecd8b1b7745a020589c05fa29893e
Insert these lines into Kibana config file, kibana.yml.
echo -e "xpack.encryptedSavedObjects.encryptionKey: 0e1d3ac4c4ca57beacae544c0a04e5c6
xpack.reporting.encryptionKey: 9f4f49f945013181aa99e093b5531822
xpack.security.encryptionKey: 1a2ecd8b1b7745a020589c05fa29893e" >> /etc/kibana/kibana.yml
With all comment lines removed, this is how our Kibana configuration looks like;
grep -Ev '^#|^$' /etc/kibana/kibana.yml
server.port: 5601
server.host: "192.168.57.66"
logging:
  appenders:
    file:
      type: file
      fileName: /var/log/kibana/kibana.log
      layout:
        type: json
  root:
    appenders:
      - default
      - file
pid.file: /run/kibana/kibana.pid
xpack.encryptedSavedObjects.encryptionKey: 0e1d3ac4c4ca57beacae544c0a04e5c6
xpack.reporting.encryptionKey: 9f4f49f945013181aa99e093b5531822
xpack.security.encryptionKey: 1a2ecd8b1b7745a020589c05fa29893e
If you need to secure Kibana 8 by proxying it with Nginx, you can check how to on our previous by following the link below;
Configure Nginx with SSL to Proxy Kibana
Running Kibana
Once the installation is done, start and enable Kibana 8 to run on system boot.
systemctl enable --now kibanaConfirm Kibana status after some seconds;
systemctl status kibana
● kibana.service - Kibana
     Loaded: loaded (/lib/systemd/system/kibana.service; enabled; preset: enabled)
     Active: active (running) since Sun 2023-06-25 06:46:52 EDT; 29s ago
       Docs: https://www.elastic.co
   Main PID: 2913 (node)
      Tasks: 11 (limit: 3510)
     Memory: 328.5M
        CPU: 13.987s
     CGroup: /system.slice/kibana.service
             └─2913 /usr/share/kibana/bin/../node/bin/node /usr/share/kibana/bin/../src/cli/dist

Jun 25 06:47:04 elk.kifarunix-demo.com kibana[2913]: [2023-06-25T06:47:04.315-04:00][INFO ][plugins-service] Plugin "cloudExperiments" is disabled.
Jun 25 06:47:04 elk.kifarunix-demo.com kibana[2913]: [2023-06-25T06:47:04.315-04:00][INFO ][plugins-service] Plugin "cloudFullStory" is disabled.
Jun 25 06:47:04 elk.kifarunix-demo.com kibana[2913]: [2023-06-25T06:47:04.315-04:00][INFO ][plugins-service] Plugin "cloudGainsight" is disabled.
Jun 25 06:47:04 elk.kifarunix-demo.com kibana[2913]: [2023-06-25T06:47:04.343-04:00][INFO ][plugins-service] Plugin "profiling" is disabled.
Jun 25 06:47:04 elk.kifarunix-demo.com kibana[2913]: [2023-06-25T06:47:04.432-04:00][INFO ][http.server.Preboot] http server running at http://192.168.57.66:5601
Jun 25 06:47:04 elk.kifarunix-demo.com kibana[2913]: [2023-06-25T06:47:04.767-04:00][INFO ][plugins-system.preboot] Setting up [1] plugins: [interactiveSetup]
Jun 25 06:47:04 elk.kifarunix-demo.com kibana[2913]: [2023-06-25T06:47:04.769-04:00][INFO ][preboot] "interactiveSetup" plugin is holding setup: Validating Elasticsearch c>
Jun 25 06:47:04 elk.kifarunix-demo.com kibana[2913]: [2023-06-25T06:47:04.806-04:00][INFO ][root] Holding setup until preboot stage is completed.
Jun 25 06:47:04 elk.kifarunix-demo.com kibana[2913]: i Kibana has not been configured.
Jun 25 06:47:04 elk.kifarunix-demo.com kibana[2913]: Go to http://192.168.57.66:5601/?code=777867 to get started.
From the status output, you will see such lines;
Kibana has not been configured.Go to http://192.168.57.66:5601/?code=777867 to get started.You will have to copy and access the provided URL on browser to complete the setup.
Access Kibana 8 Dashboard
You can now access Kibana 8 from your browser using the url provided above, http://192.168.57.66:5601/?code=777867. It could be different for you.
If UFW is running, Open Kibana 8 port;
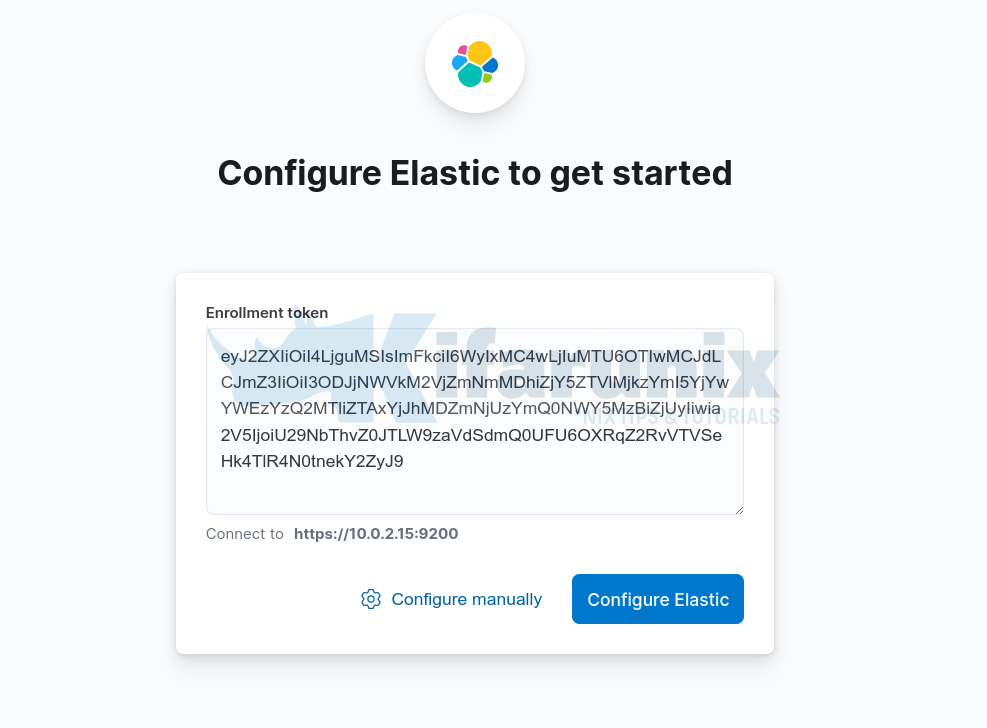
ufw allow 5601/tcpUpon accessing Kibana 8 interface, on the welcome page, you will be required to configure Elastic to get started.
So just copy the Kibana token generated above using the /usr/share/elasticsearch/bin/elasticsearch-create-enrollment-token -s kibana, command and paste on the box.

Once you paste the token, click Configure Elastic. It will then save the settings, configure and restart Elasticsearch.
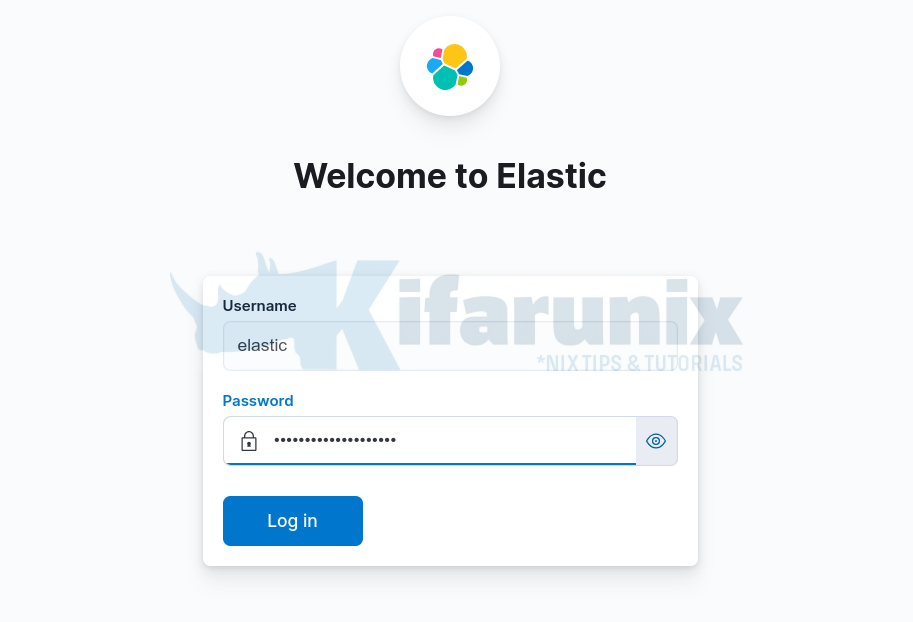
You are then taken to Login page. Login using the generated Elastic user credentials.

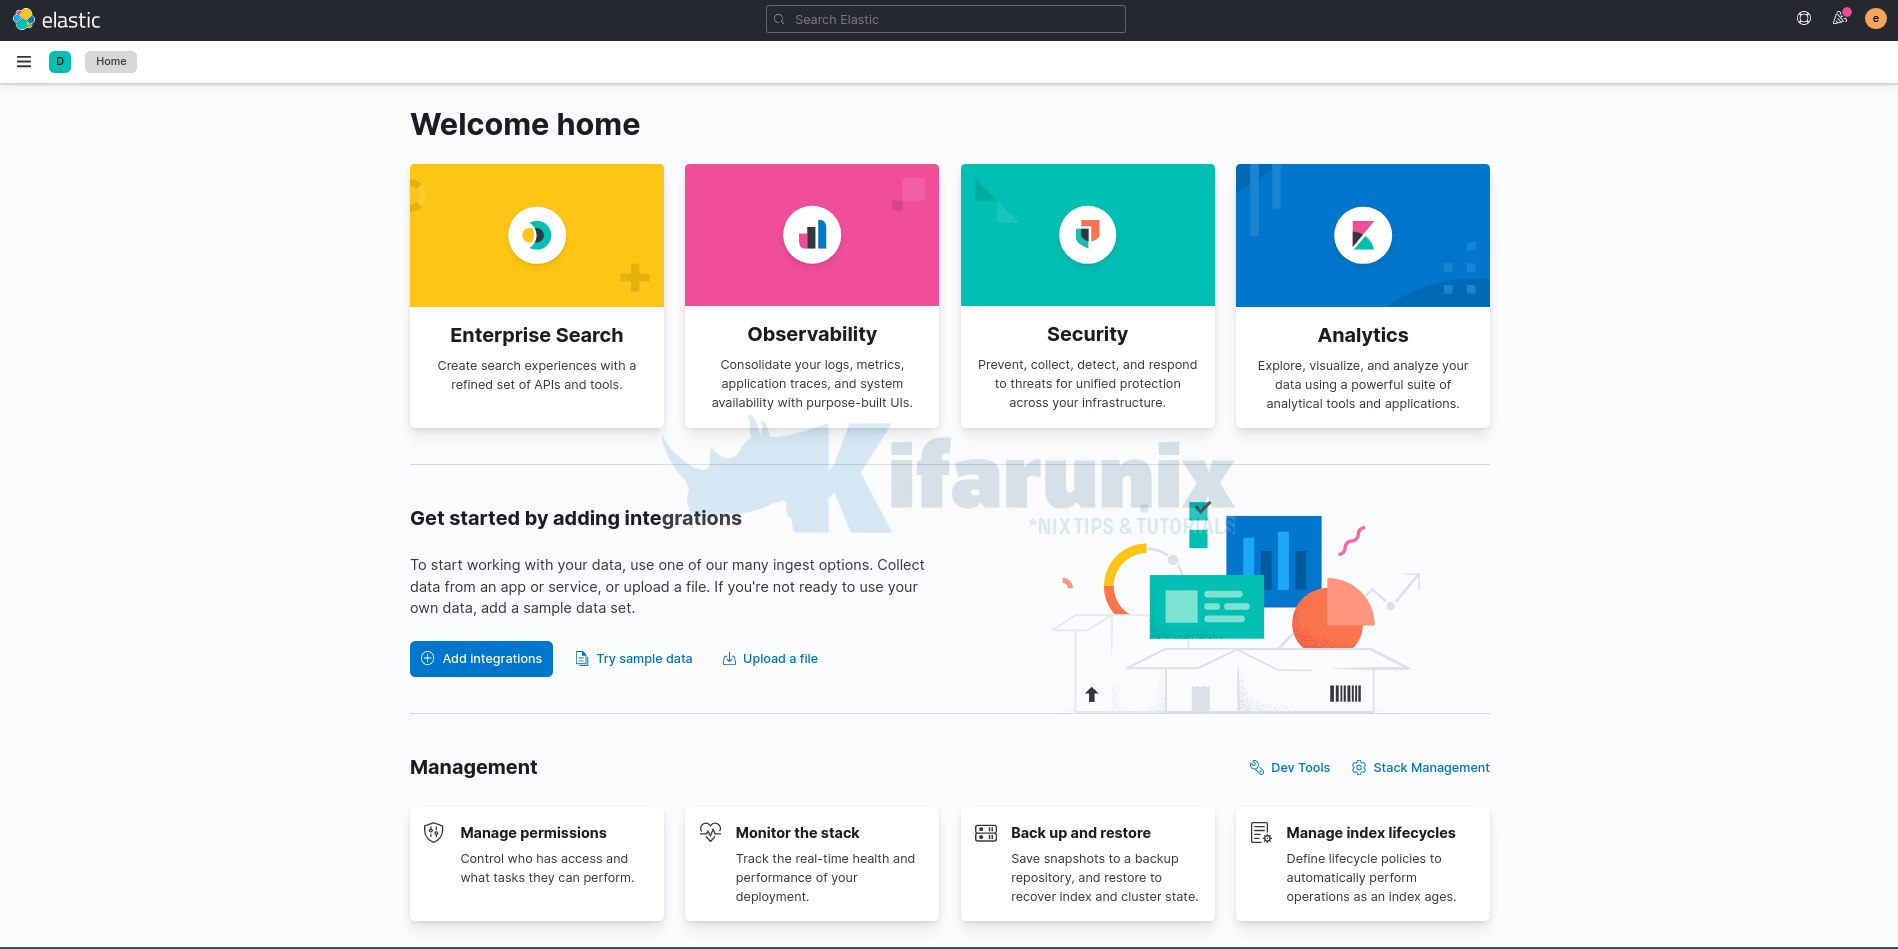
On the welcome page, click Explore on my own to proceed to Kibana 8 dashboard.

You can install other components, Logstash and Filebeat!
Install Filebeat 8 on Debian 12
Other Tutorials
Configure Logstash Elasticsearch Basic Authentication

