Apache Guacamole is a clientless HTML5 web based remote desktop gateway that makes it easy to access remote servers and desktops through a web browser. It supports standard protocols like VNC, RDP, and SSH.
In this tutorial, we are going to learn how to setup Guacamole web-based remote desktop access tool on Ubuntu 18.04 server and demonstrate how to access a remote Linux server as well as a remote windows 7 server.
You might as well be interested in running the same setups in Debian 9.8. Check the link below;
How to Install and Setup Guacamole on Debian 9.8
How to Install and Configure Guacamole on Fedora 29
Want to transfer files over Guacamole? Check our guide by following the link below;
How to Enable RDP/SSH File Transfer Over Guacamole
Install and Setup Guacamole on Ubuntu 18.04
Installing Guacamole on Ubuntu 18.04
Guacamole is made up of two parts; guacamole-server, which provides the guacd proxy and related libraries, and guacamole-client which provides the client to be served by the servlet container which is usually Tomcat.
While guacamole-client is available in binary form, the guacamole-server must be built from source and therefore before we can proceed with installation, we need to first install all the required dependencies.
Install Required Dependencies
Run the command below to install all the requires dependencies.
apt install -y  gcc-6 g++-6 libcairo2-dev libjpeg-turbo8-dev libpng-dev \
libossp-uuid-dev libavcodec-dev libavutil-dev libswscale-dev libfreerdp-dev \
libpango1.0-dev libssh2-1-dev libvncserver-dev libssl-dev libvorbis-dev libwebp-dev
You can find a comprehensive description of all the required and the optional dependencies here.
Install Tomcat Servlet
Apache Tomcat is used to serve guacamole client content to users that connects to guacamole server via the web browser. To install Tomcat, run the command below;
apt install tomcat8 tomcat8-admin tomcat8-common tomcat8-user -yIf UFW is running, allow Tomcat through it.
ufw allow 8080
ufw reload
Building guacamole-server on Ubuntu 18.04
guacamole-server contains all the native, server-side components required by Guacamole to connect to remote desktops. To build guacamole server, download the latest source code from Guacamole releases page.
Guacamole 0.9.14 is the latest release as of this writing. You can simply run the command below to download it;
wget http://archive.apache.org/dist/guacamole/0.9.14/source/guacamole-server-0.9.14.tar.gzOnce the download is done, extract and navigate to the source code directory as shown below.
tar xzf guacamole-server-0.9.14.tar.gz
cd guacamole-server-0.9.14
In the source directory, run the configure script. This script will determine the libraries that are available on your system and will select the appropriate components for building guacamole server based on what is installed.
You can also set the script to install a startup script for guacd as shown below.
./configure --with-init-dir=/etc/init.dIf the script executes successfully, you should be able to see the output similar to the one shown below.
...output snipped...
------------------------------------------------
guacamole-server version 0.9.14
------------------------------------------------

   Library status:

     freerdp ............. yes
     pango ............... yes
     libavcodec .......... yes
     libavutil ........... yes
     libssh2 ............. yes
     libssl .............. yes
     libswscale .......... yes
     libtelnet ........... no
     libVNCServer ........ yes
     libvorbis ........... yes
     libpulse ............ no
     libwebp ............. yes
     wsock32 ............. no

   Protocol support:

      RDP ....... yes
      SSH ....... yes
      Telnet .... no
      VNC ....... yes

   Services / tools:

      guacd ...... yes
      guacenc .... yes

   Init scripts: /etc/init.d

Type "make" to compile guacamole-server.
Now that the configure script has not complained, go ahead and compile the code as shown below;
make CC=gcc-6
...output cut..
make[2]: Leaving directory '/home/amos/guacamole-server-0.9.14/src/guacenc'
make[2]: Entering directory '/home/amos/guacamole-server-0.9.14'
make[2]: Nothing to be done for 'all-am'.
make[2]: Leaving directory '/home/amos/guacamole-server-0.9.14'
make[1]: Leaving directory '/home/amos/guacamole-server-0.9.14
Once the compilation is done, run make install to install the components that were built.
make installOnce the installation is done, run the ldconfig command to create the necessary links and cache to the most recent shared libraries found in the guacamole server directory.
ldconfigStart and enable guacd (Guacamole Daemon) to run on boot.
systemctl enable guacd
systemctl start guacd
Installing Guacamole Client
guacamole-client contains all Java and JavaScript components of Guacamole (guacamole, guacamole-common, guacamole-ext, and guacamole-common-js). These components make up the web application that will serve the HTML5 Guacamole client to users that connect to your server. This web application will then connect to guacd on behalf of connected users in order to serve them any remote desktop they are authorized to access.
In this tutorial, we are going to install the binary form of the guacamole-client. If you want to build it from the source code, see how to do so here.
To download the client, run the command below. You can check the latest version from the releases page.
wget http://archive.apache.org/dist/guacamole/0.9.14/binary/guacamole-0.9.14.warDeploying Guacamole Client
Once the download above is done, it is time to deploy Guacamole.
Create Guacamole configuration directory
mkdir /etc/guacamoleMove the download guacamole-client binary to the configuration file created above as shown below;
mv guacamole-0.9.14.war /etc/guacamole/guacamole.warCreate a symbolic link of the guacamole client to Tomcat webapps directory as shown below;
ln -s /etc/guacamole/guacamole.war /var/lib/tomcat8/webapps/Once the .war file is in place, you may need to restart Tomcat to force Tomcat to deploy the new web application, and the guacd daemon must be started if it isn’t running already
systemctl restart tomcat8
systemctl restart guacd
Setup Guacamole on Ubuntu 18.04
Guacamole is now successfully installed even though in its current state, it is completely unconfigured, and further steps are required to add Guacamole users and a connections.
Guacamole’s default authentication method reads all users and connections from a single file called user-mapping.xml.
Guacamole has two major configuration files; /etc/guacamole which is referenced by the GUACAMOLE_HOME environment variable and /etc/guacamole/guacamole.properties which is the main configuration file used by Guacamole and its extensions.
Other guacamole configurations reside in /etc/guacamole/extensions/and /etc/guacamole/lib/ directories. We therefore have to create these directories.
mkdir /etc/guacamole/{extensions,lib}Add the guacamole home directory environment variable to tomcat8 configuration file.
echo "GUACAMOLE_HOME=/etc/guacamole" >> /etc/default/tomcat8Define how Guacamole connects to guacd
To define how Guacamole connects to guacd, create the guacamole.properties file under /etc/guacamole with the following content.
vim /etc/guacamole/guacamole.propertiesguacd-hostname: localhost
guacd-port: 4822
user-mapping: /etc/guacamole/user-mapping.xml
auth-provider: net.sourceforge.guacamole.net.basic.BasicFileAuthenticationProviderAfter that, save the configuration file and link the Guacamole configurations to Tomcat servlet as shown below.
ln -s /etc/guacamole /usr/share/tomcat8/.guacamoleSet the default authentication
Guacamole’s default authentication module consists of a mapping of usernames to configurations in an XML format, the user-mapping.xml in this case. In this file, we will define the user allowed to access Guacamole web UI, the servers to connect to and the method of connection. Therefore, run the command below to create this file with the following contents.
vim /etc/guacamole/user-mapping.xml<user-mapping>
<!-- Per-user authentication and config information -->
<!-- A user using md5 to hash the password
amos user and its md5 hashed password below is used to
login to Guacamole Web UI-->
<authorize
username="amos"
password="d6a6bc0db10694a2d90e3a69648f3a03"
encoding="md5">
<!-- First authorized connection -->
<connection name="Ubuntu-Server">
<protocol>ssh</protocol>
<param name="hostname">192.168.43.154</param>
<param name="port">22</param>
<param name="username">mibey</param>
</connection>
<!-- Second authorized connection -->
<connection name="Windows 7">
<protocol>rdp</protocol>
<param name="hostname">192.168.43.218</param>
<param name="port">3389</param>
<param name="username">mibeyki</param>
</connection>
</authorize>
</user-mapping>To generate md5 hash for the password, run either of the commands below;
echo -n password | openssl md5printf '%s' password | md5sumBe sure to replace password with your strong password.
Restart both Tomcat and guacd to effect the changes.
systemctl restart tomcat8
systemctl restart guacd
Verify the Setup
Now that we have done almost all the configurations, it is time to test it up. To access the Guacamole web interface. navigate to web browser and enter your url in the format, http://server-IP:8080/guacamole.
Want to run Guacamole in production with SSL/TLS enabled? See our guide on how to configure Guacamole SSL/TLS with Nginx Reverse Proxy using the link below;
Configure Guacamole SSL/TLS with Nginx Reverse Proxy
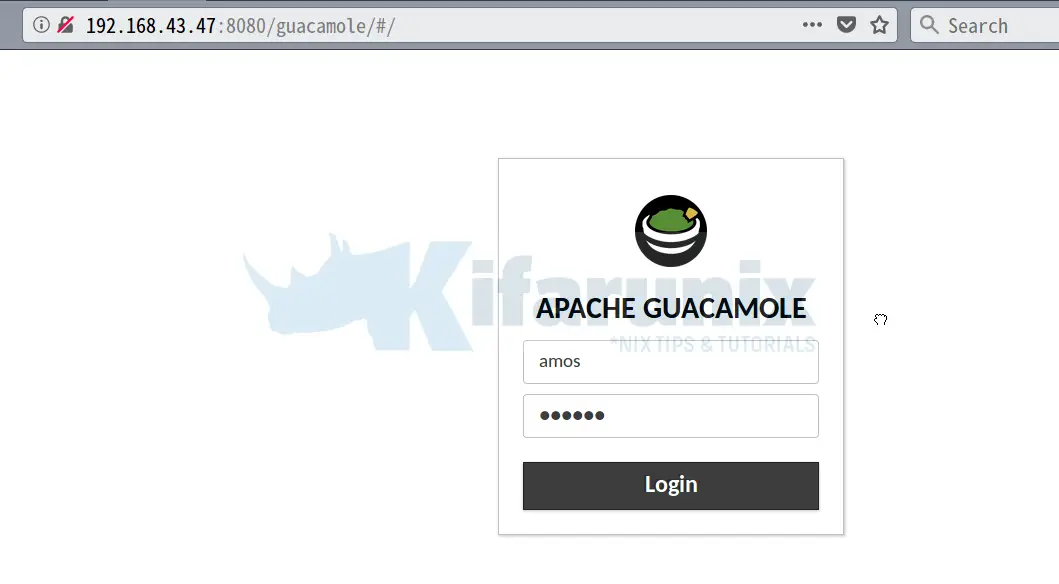
If everything is okay, you should see a login prompt as shown in the screenshot below.

Enter your username and password set above and login to Guacamole Dashboard.

There you go.
To login to any of the servers, just click on it and you will be prompted to enter the password for the user defined in the user-mapping.xml.
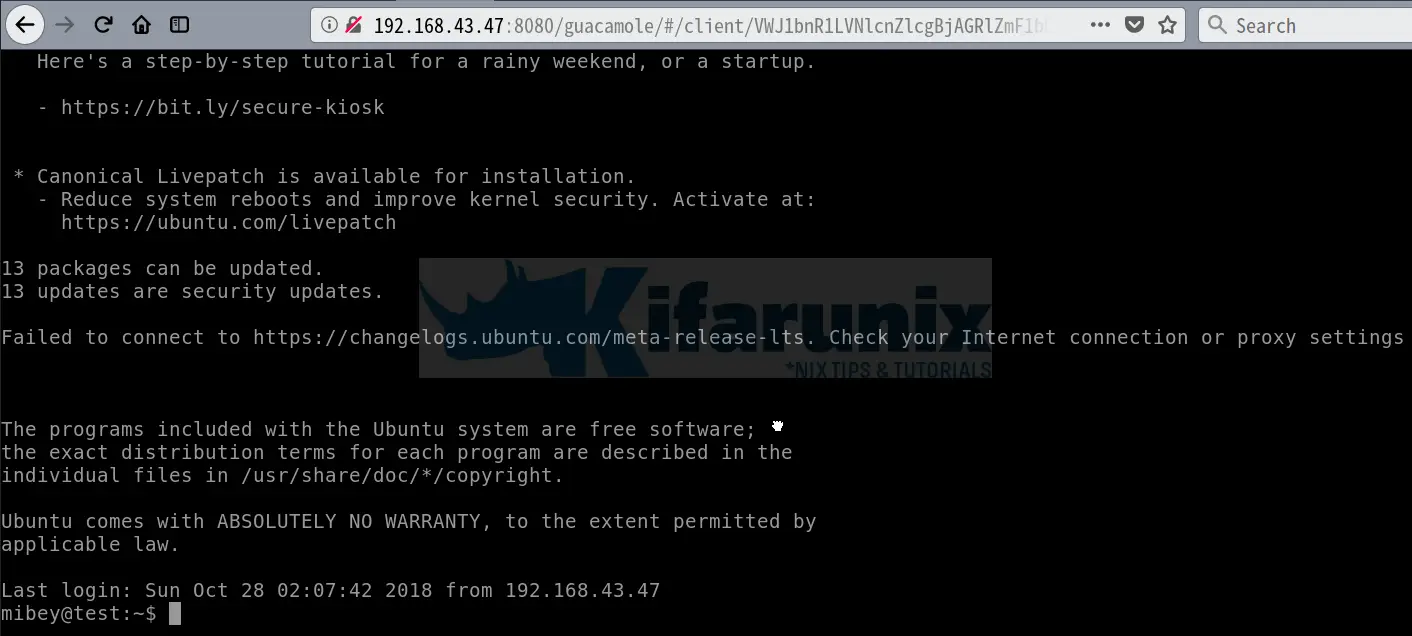
For example to login to Ubuntu server, click on it, enter password at for user mibey at prompt and there you are, inside Ubuntu server. See the screenshot below.

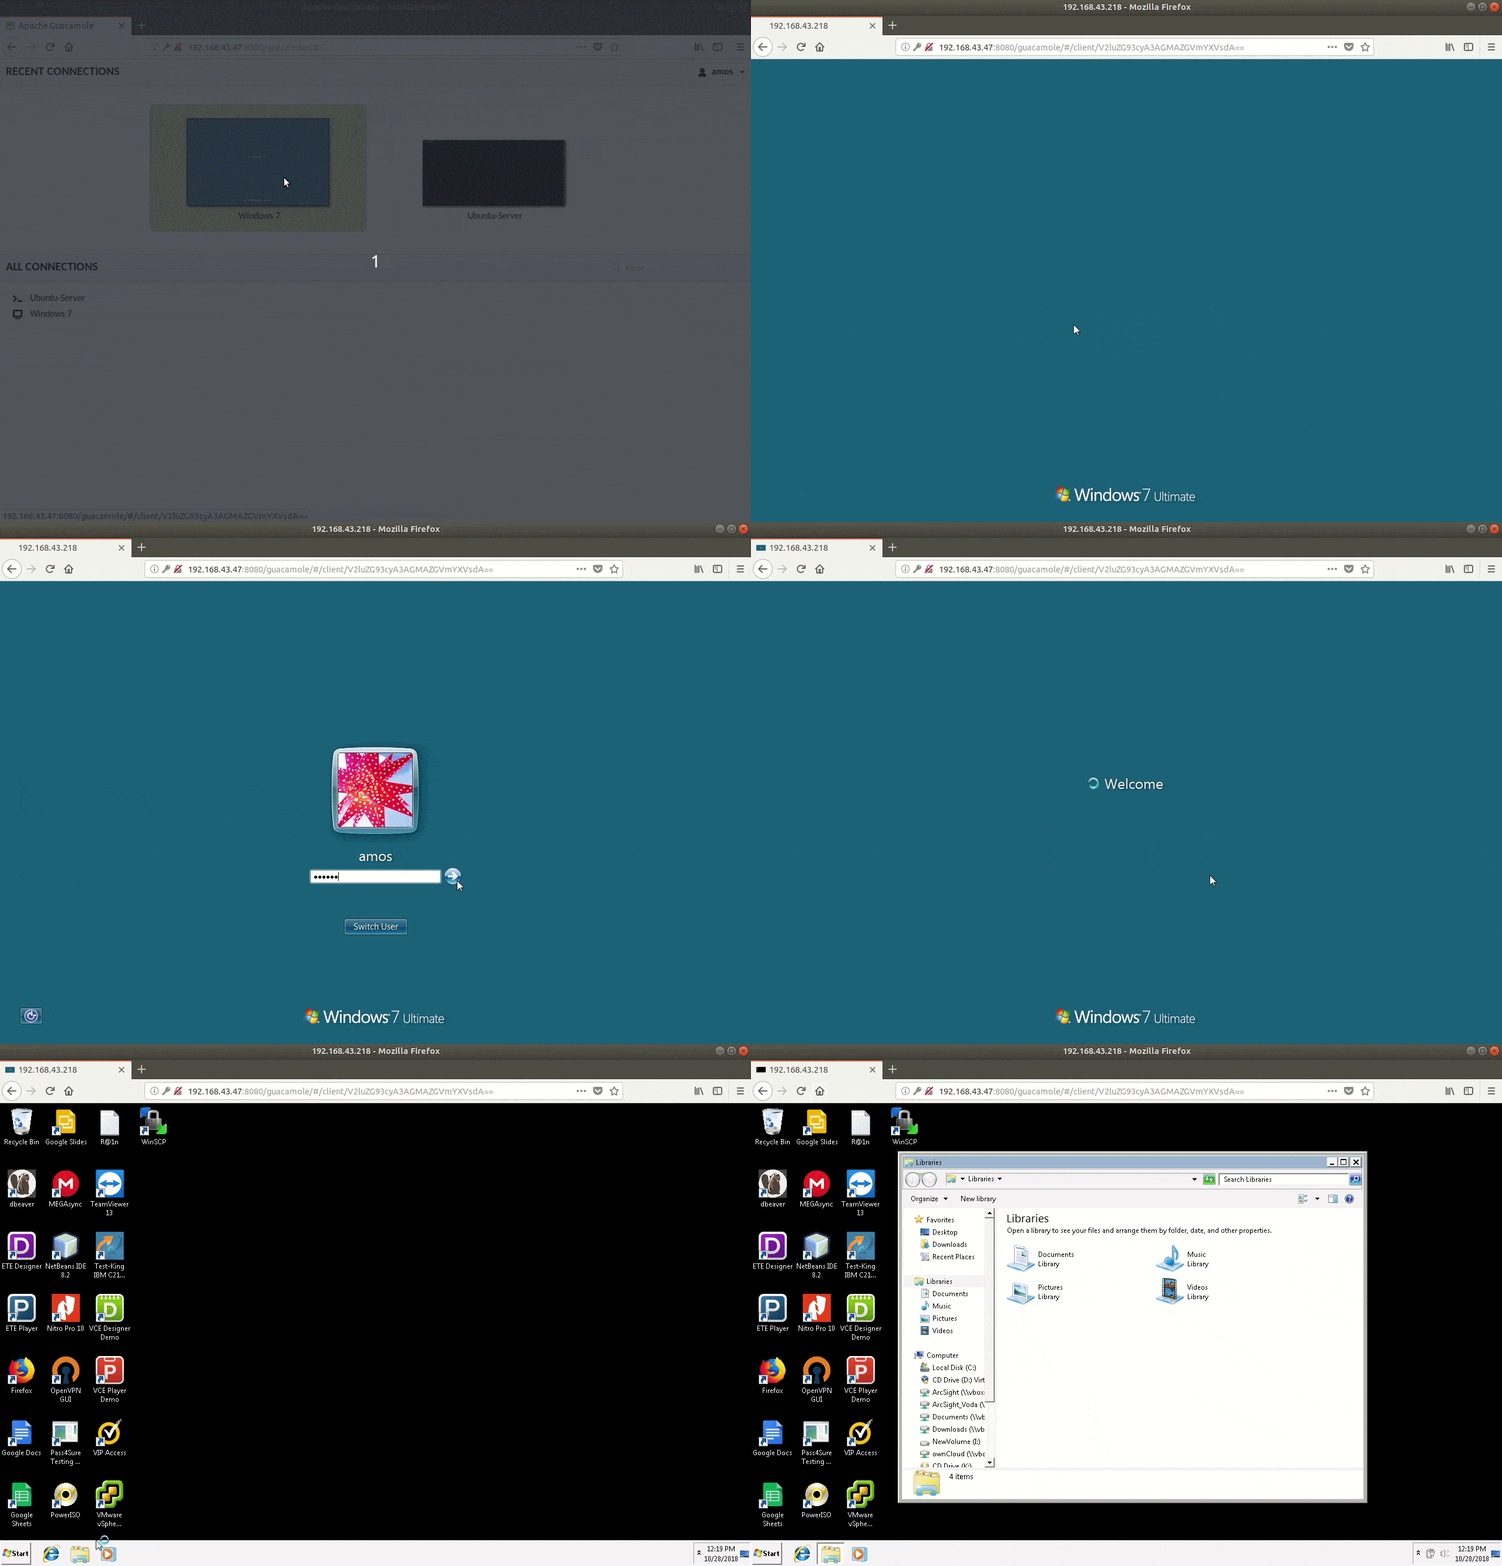
To login to Windows 7 system, see below demo.

You have now successfully installed Guacamole Web based Remote desktop access tool.
That concludes our guide on how to install and setup Guacamole on Ubuntu 18.04 for accessing your remote devices via web browser.
Are you looking for IT system administration jobs? Please check them here.
Reference:
You can check our other articles for Ubuntu 18.04 by following the links below;
How to Install Acutenix on Ubuntu 18.04
How to Install and Use WPScan WordPress Vulnerability Scanner Ubuntu 18.04
How to Install and Setup OpenVAS 9 Vulnerability Scanner on Ubuntu 18.04
How to Install and Use Nikto Web Scanner on Ubuntu 18.04
How to Install and Configure Nessus Scanner on Ubuntu 18.04/CentOS 7


Hi Amos
This is the best ever instructions to build my first Guacamole. it simply works without a hiccup. Really thanks a lot
Hello Nafith, am glad this guide helped you.
Hi Amos.
Thank you for the detailed instructions to build Guacamole and is working perfectly.
Need your help to enable file transfer between Remote server and local machine over RDP
Hello Manoj
Kindly check our article on how to enable file transfer here.
Thank you.
Thank You
Request your help in setting URL.. I have done all the required steps as mentioned but unable to run the URL
Hello Akshara, how are you trying to access your guacamole server? using the IP address or the hostname?
I would be interested in instructions on how to harden the Guacamole server for public access. Does Guacamole support LetsEncrypt?
Hi Joe.
You can configure Nginx as a reverse proxy, with Let’s Encrypt certificate. You can check our guide on configuring Guacamole SSL/TLS with Nginx as reverse proxy(with self-signed certificate). It may help.
thanks for your guide.. After copying word by word i cannot get it to work. tried 3 times. getting 192.168.118.125 refused to connect. No idea what is going wrong 🙁
Hi Kevin.
Sorry to hear that. But when do you get this error? when accessing guacamole via the browser?
You need to check if UFW is running and if port 8080 is opened.
hello,
I am done all the step to install gucamole.
but I am getting invalid login on http://my-ip:8080/guacamole.
my tomcat server is running successfully on port 8080 .
my user-mapping file is in /etc/guacamole.
and i have changed the username and password according to me.
can you please help
getting a notification:
while running the command
$systemctl enable guacd
guacd.service is not a native service, redirecting to systemd-sysv-install.
Executing: /lib/systemd/systemd-sysv-install enable guacd.
Hi Rohit, Kindly check the Tomcat logs, catalina.out, for any would be error.
yes i have check it.
At first it didn’t find guacamole.properties. I don’t know why.
then I have again set the $GUACAMOLE_HOME.
this is my catalina.out file.
https://pastebin.com/uWagJ9WF
can you please see and help.
“rsohlot” is my system user.
thank you
The error, “Authentication attempt from 192.168.0.6 for user “rsohlot” failed.”, means exactly what it states. Ensure that your are using the correct username and correct md5 hash for your correct password”.
Thank you
thank you for your guidance.
my md5 hash was wrong.
keep teaching us better things 🙂
Great, You most welcome. Enjoy
hello amos, please help me why on my guacamole – settings page there isn’t any menu like user. I hope you can help me. Thank you !
Hi Deni,
Did you add users to the /etc/guacamole/user-mapping.xml file?
look at this picture
https://drive.google.com/file/d/1h1HAl_tHLWR5CWL6RovbiQmgRdHPPM_6/view?usp=sharing
Excellent excellent article. Thank you very much for sharing this. From London, UK
Well written article. Followed instructions and worked like a charm.
Hi, great article
Made all steps, but I cannot connect to an Ubuntu server.
What is your pwd for mibey user?
How to setup it?
“`
ssh
192.168.43.154
22
mibey
“`
Thanx
You might be missing some step. For the password, it is the password of the user on the system you are accessing, please replace the usernames accordingly.
My options page is limited. How do I add the ability to add connection options? I followed your tutorial and updated but used 1.1.0 instead but still don’t have the full settings in the web interface.
Is there an easy way to add the web based connection options? Updated to 1.1.0 and still do not have those options. Is this something I need to add during to build process?
Web administration for managing users and connections is not available if you configured user mapping authentication. If you want to be able to manage users and connections from the web interface you can use MySQL.
Just a detail, after installing Guacamole as discribed, i got a blank login page, i ha to go to catalina.properties file and remove the ” on the line containing the extension…
First thank you for the very helpful guide. I made after a cupole of tries.
But I have a problem:
for ssh to localhost no problem.
for vnc to localhost after a few seconds it discennect me but i saw it’s a libraty problem.
For rdp to windows it gives me the wrong arguments count error and i can’t find any solution anywhere (I have nla enabled so i pass user and and password in user mapping that is mandatory). I tired with two client but it’s the same.
I also tried to redownload the client but still not working.
FYI i use apache proxy pass on windows to forward reqeust to guacamole.
Any tips?
Thank you
Hello Alessandro, have you managed to fix the issue?
hello, I have tried the same documentation for installing version 1.2.0 but when i try running it on browser it shows ERR_EMPTY_RESPONSE. I am using Ubuntu Server 18.04 LTS in Azure Cloud.
Can you help with this?
Hi,I am using Ubuntu 18.04 LTS VM in azure and tried this setup in the VM.But while opening it in browser http://myip:8080/guacamole It shows
This page isn’t working
52.188.115.16 didn’t send any data.
ERR_EMPTY_RESPONSE I am using version 1.2.0 for guacamole client and server.
can you help here?
HI ,Need your help
I Install guacamole following the documentation when i Try to connect using RDP ,Guacamole is conneted to the PC and diconnect sortly and pop-up Error RDP Server is unvalaible
can you help me to resolve this problem.
Thanks