In this tutorial, you will learn how to enable Secure Shell (SSH) server on OPNsense. SSH is one of the defacto secure methods of logging into a remote computer or server over an unsecured network. Thus enabling its use on a system is paramount for any system administration tasks.
Enabling Secure Shell (SSH) server on OPNsense
So you have installed OPNsense and can be able to login via web gui but login via ssh is timing out?
ssh -v [email protected]
OpenSSH_8.2p1 Ubuntu-4ubuntu0.5, OpenSSL 1.1.1f  31 Mar 2020
debug1: Reading configuration data /etc/ssh/ssh_config
debug1: /etc/ssh/ssh_config line 19: Applying options for *
debug1: Connecting to 192.168.10.23 [192.168.10.23] port 22.
debug1: connect to address 192.168.10.23 port 22: Connection timed out
ssh: connect to host 192.168.10.23 port 22: Connection timed out
Well this is possible because by default, Secure Shell server is not enabled on OPNsense.
To enable SSH server on OPNsense;
- login via web GUI
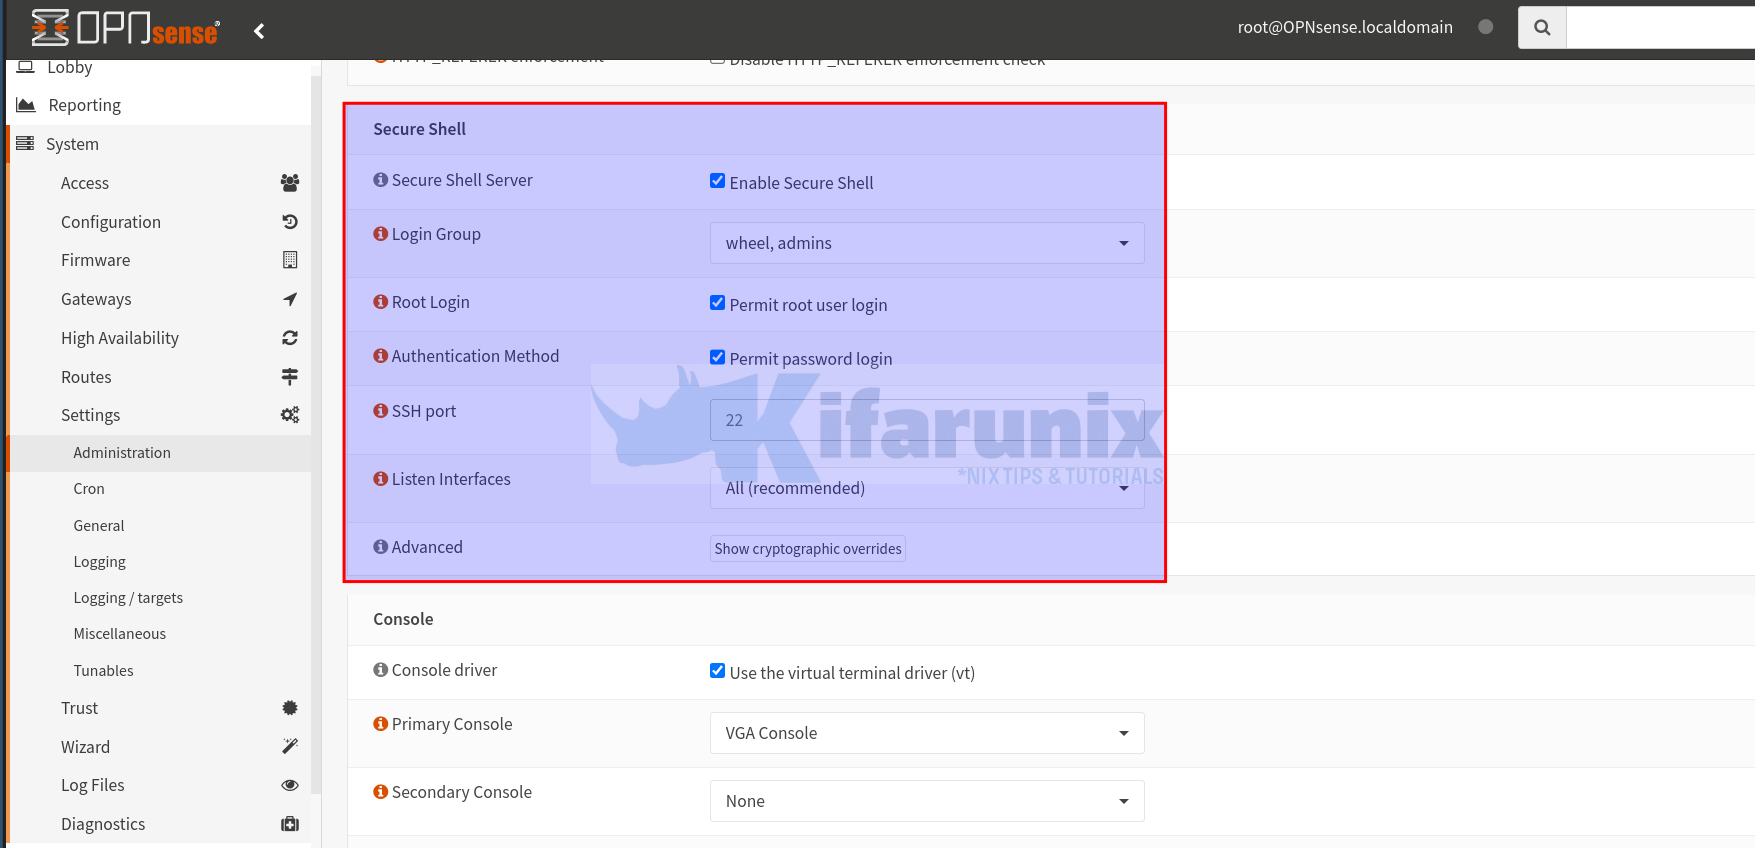
- Navigate to System > Settings > Administration.
- Under Secure Shell section, check Enable Secure Shell
- To login as root, check Permit root user login and if you are using password authentication method, check Permit password login.
- If you want, you can bind SSH to listen on specific interface.
- See the screenshot below.
Once you are done , scroll down and click the save the button to apply the changes.
You can now try to login again via ssh and you should be able to get the ssh login prompt.
ssh [email protected]
The authenticity of host '192.168.10.23 (192.168.10.23)' can't be established.
ECDSA key fingerprint is SHA256:tv4s9PaG0I9m8MVNLWd4ZO9k1tFL5eNMTg8zM2QwEkI.
ECDSA key fingerprint is MD5:f9:70:91:ed:7e:83:e6:8c:42:af:f1:ae:26:f8:5f:97.
Are you sure you want to continue connecting (yes/no)? yes
Warning: Permanently added '192.168.10.23' (ECDSA) to the list of known hosts.
Password for [email protected]:
There you go. You have enabled ssh server on OPNsense and can now login via ssh.
That is it on how to enable Secure Shell (SSH) server on OPNsense.


Could you please add some articles about Sensei plugin on OPNsense? Does it really worth switching over to OPNsense because of this plugin?