In this guide, we are going to learn how to install Zabbix server on Debian 10 Buster. Zabbix is an enterprise class monitoring solution for any kind of IT infrastructure, services, applications, cloud resources.
Installing Zabbix Server on Debian 10 Buster
Zabbix can be built from the source code or can be installed from Zabbix repository. In this guide, we are going to use Zabbix repository.
Install Zabbix APT repository
Debian 10 Buster do not include Zabbix repository by default. Hence, you can install it by running the command below. Note that Zabbix 4.2 is the current stable release as of this writing.
wget https://repo.zabbix.com/zabbix/4.2/debian/pool/main/z/zabbix-release/zabbix-release_4.2-1+buster_all.deb
apt install ./zabbix-release_4.2-1+buster_all.deb
Next, run system update.
apt update -y
apt upgrade -y
Install Zabbix Server, Frontend and Agent
Zabbix uses the LAMP stack components, Apache, MariaDB and PHP. To install these components, run the command below;
apt install zabbix-server-mysql zabbix-frontend-phpThe above command installs Apache 2.43, Mariadb 10.3 and PHP 7.3
apache2 -v
Server version: Apache/2.4.38 (Debian)
Server built:   2019-04-07T18:15:40
php -v
PHP 7.3.4-2 (cli) (built: Apr 13 2019 19:05:48) ( NTS )
Copyright (c) 1997-2018 The PHP Group
Zend Engine v3.3.4, Copyright (c) 1998-2018 Zend Technologies
with Zend OPcache v7.3.4-2, Copyright (c) 1999-2018, by Zend Technologiesmariadb -V
mariadb Ver 15.1 Distrib 10.3.15-MariaDB, for debian-linux-gnu (x86_64) using readline 5.2Also, if you need to monitor the Zabbix server itself, you need to install Zabbix agent.
apt install zabbix-agentCreate Zabbix MariaDB Database and User
Once the installation of the Zabbix components completes, begin by creating a MariaDB database for Zabbix and a Zabbix user.
However, run mysql_secure_installation MariaDB initial security script to remove anonymous users, test databases and to disable remote root login.
Note that by default, MariaDB 10.3 uses unix socket for authentication and hence, you can login without password set (Even if you set password with mysql_secure_installation). Therefore, you can login by just typing mysql or mysql -u root.
mysql -u rootCreate Zabbix database.
create database zabbixdb;Create the Zabbix database user and grant all the privileges on Zabbix database.
grant all on zabbixdb.* to zabbixadmin@localhost identified by 'Str0NGPass';Reload the privilege tables to ensure that all changes made take effect immediately and exit the database.
flush privileges;
quit
If you need enable root user password authentication, login to database and run the command below;
mysql -u root
SET old_passwords=0;
ALTER USER root@localhost IDENTIFIED BY 'StronGP@SS';
flush privileges;
quit
Next, import initial Zabbix database schema and data to the newly create database.
zcat /usr/share/doc/zabbix-server-mysql/create.sql.gz | mysql -u zabbixadmin -p zabbixdbNext, open the Zabbix configuration file and set the value of DBName, DBUser, DBPassword to reflect your settings. Also, configure local database connection.
...
DBHost=localhost
...
DBName=zabbixdb
...
DBUser=zabbixadmin
...
DBPassword=Str0NGPass
Configure PHP for Zabbix frontend
Zabbix frontend is written in PHP. On of the configuration that is required is to set the PHP timezone. Hence, edit the file, and set the timezone for PHP 7.
vim /etc/zabbix/apache.conf
...
    <IfModule mod_php7.c>
        php_value max_execution_time 300
        php_value memory_limit 128M
        php_value post_max_size 16M
        php_value upload_max_filesize 2M
        php_value max_input_time 300
        php_value max_input_vars 10000
        php_value always_populate_raw_post_data -1
        # php_value date.timezone Europe/Riga
        php_value date.timezone Africa/Nairobi
    </IfModule>
Restart Apache Web server.
systemctl restart apache2The Zabbix frontend configuration will be finalized from the web UI.
Running Zabbix server and Agent
Once you are done with the configuration, restart the Zabbix server and agent and enable them to run on system boot.
systemctl restart zabbix-server zabbix-agent
systemctl enable zabbix-server zabbix-agent
Configure Zabbix Web User Interface
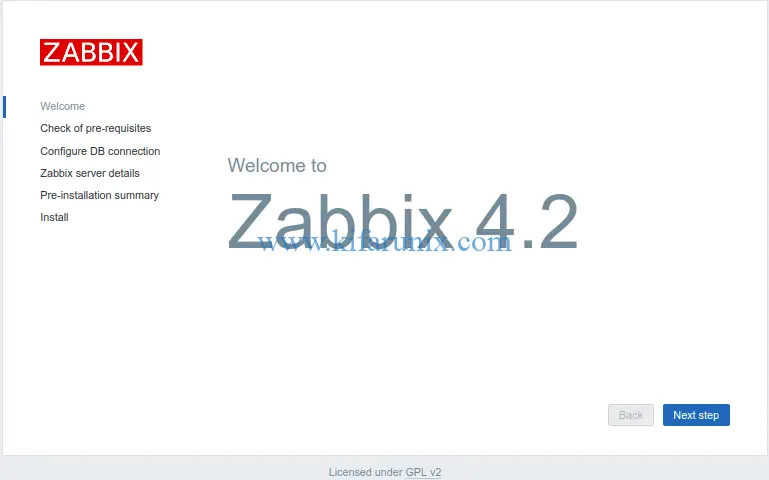
To complete Zabbix installation, navigate to the browser and access your Zabbix server via the address http://<server-IP>/zabbix. When access the address above, the first page you land on is Zabbix welcome page.
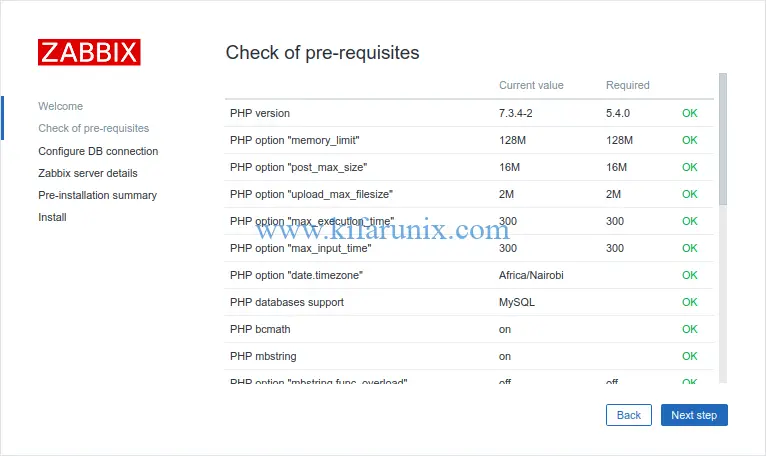
Click Next Step to verify if all the Zabbix requirements have been met.
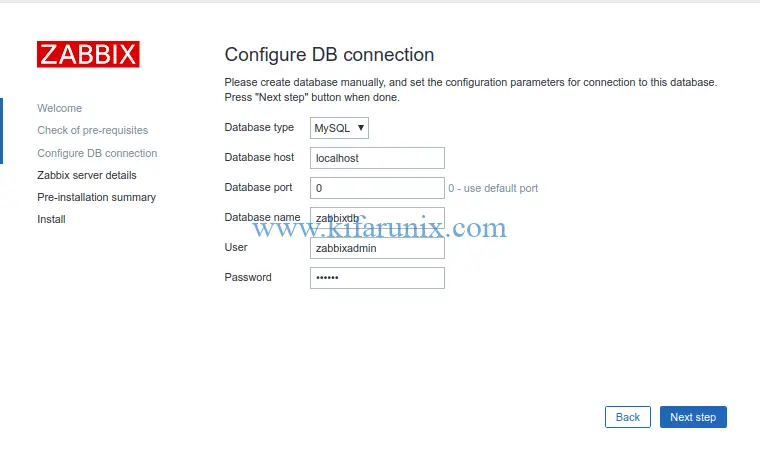
Configure Zabbix database connection using the connection details set above.
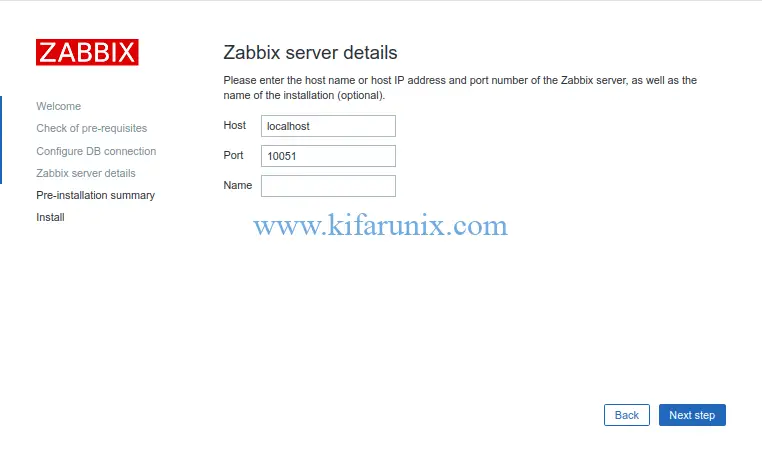
Setup the Zabbix server details. You can leave the default settings.
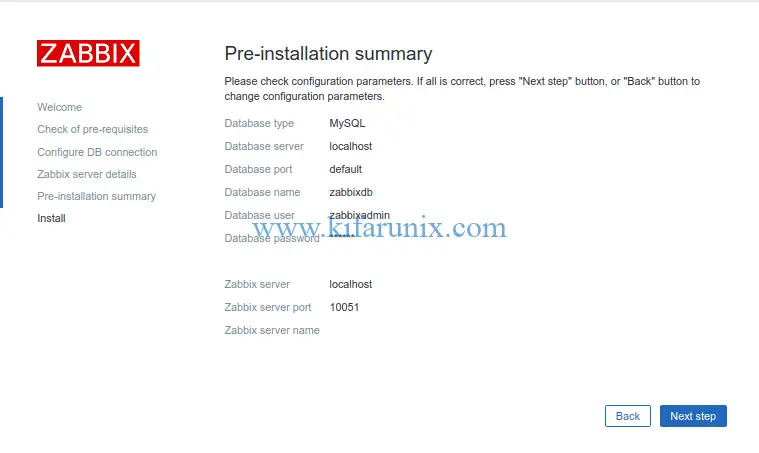
On the Pre-installation summary, verify if all the configurations are fine.
If all is well, click Next step to finish the installation. If all is well, you should see Zabbix installation congratulatory message.
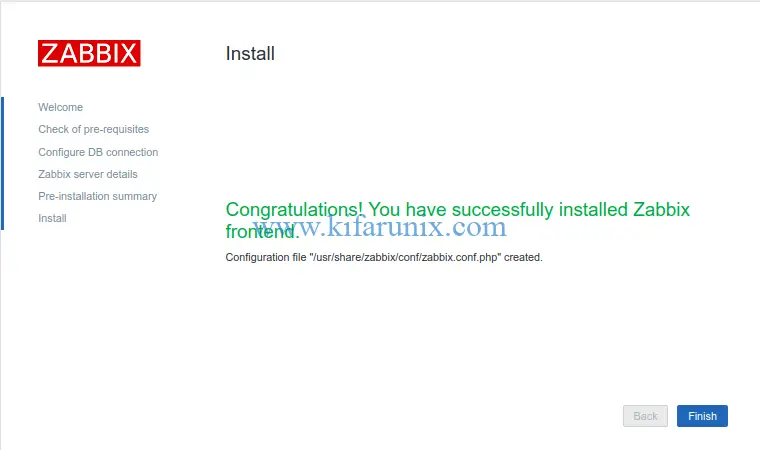
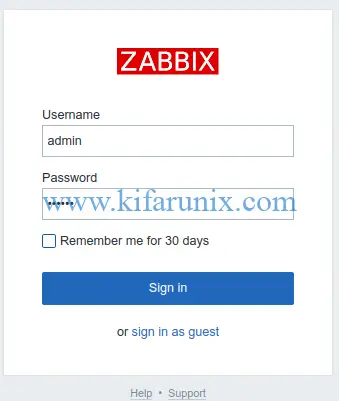
You have successfully setup Zabbix Frontend. Click Finish to get to Zabbix login interface.
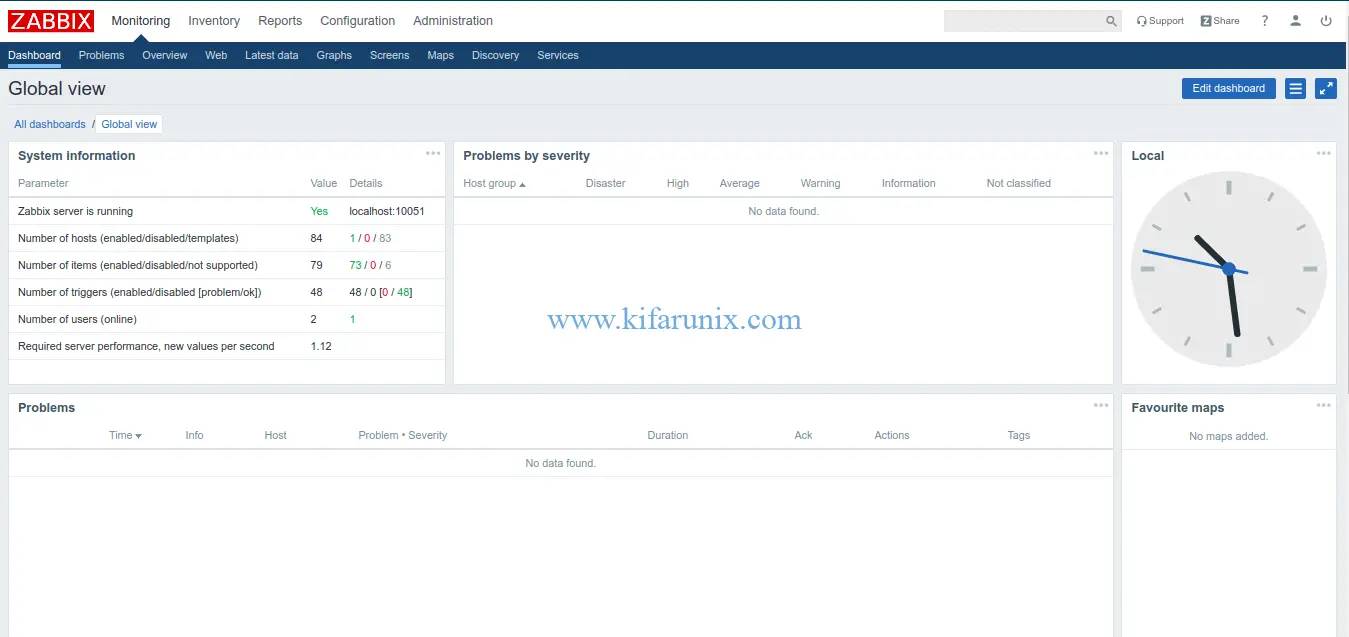
The default login credentials are admin as the username and zabbix as the password. When you successfully login to Zabbix, you should land on the default dashboard.
Well, there you go. You have successfully installed Zabbix server on Debian 10 Buster. In our next guide, we will how to monitor remote hosts using Zabbix server.
Related Tutorials
How to Install and Configure Zabbix 4.0 from Source on Fedora 29/Fedora 28/CentOS 7
Install Nagios Core on Debian 10 Buster
Install and Configure SNMP on Debian 10 Buster
How to install and configure AlienVault OSSIM 5.5 on VirtualBox


Perfect tuto.
Thank you !
Nice tuto.
Many thanks!