In this tutorial, you will learn how to install Checkmk monitoring agents on Linux. Monitoring agents enables remote monitoring of system metrics such as system load, memory and disk usage e.t.c.
In our previous tutorial, we learnt how to install Checkmk monitoring tool on Ubuntu 20.04 system.
How to Monitor IT Infrastructure using Checkmk
If you noticed, when first installed, no host/services are monitored by default installation of Checkmk.
Installing Checkmk Monitoring Agents on Linux
In this tutorial, we will learn how to install Checkmk monitoring agents on Ubuntu, Debian and CentOS systems.
You need to install the agent on the monitoring server as well.
Install Checkmk Monitoring Agents on Ubuntu/Debian
Download Checkmk Agent for Ubuntu/Debian
Checkmk provides an easy way to download the montoring agents for various Operating systems.
On the Checkmk monitoring server web interface, navigate to Setup > Agents > Windows, Linux, Solaris,AIX.

Install Checkmk Monitoring Agents on Ubuntu/Debian
From the list of available agents, click the third option to download an installer for Ubuntu/Debian systems.
Once you have downloaded the installer, then install it by running the command below;
apt install ./check-mk-agent_2.0.0p12-31293648899edb8d_all.debDownload and Install Checkmk Agent on CentOS/RHEL
Similarly, download the agent for CentOS/RHEL (RPM) from the list of available agents on the Checkmk UI.
Once you have the Checkmk RPM package, run the command below to install it.
yum localinstall check-mk-agent-2.0.0p12-31293648899edb8d.noarch.rpmAdd Hosts to Checkmk Monitoring Platform
Once you have the agents installed, the next step would to be add these hosts to Checkmk monitoring server.
On the Navigation menu, click Setup > Hosts > Hosts. Such an interface opens up.

Click Add host to monitoring.
Adding Localhost/Checkmk Monitoring Server
I will start by adding the Checkmk server, and hence, enter the hostname as localhost.

Next, click Save & go to connection tests to test the connectivity to the localhost and verify if the agent is installed.
Sample connection checks;
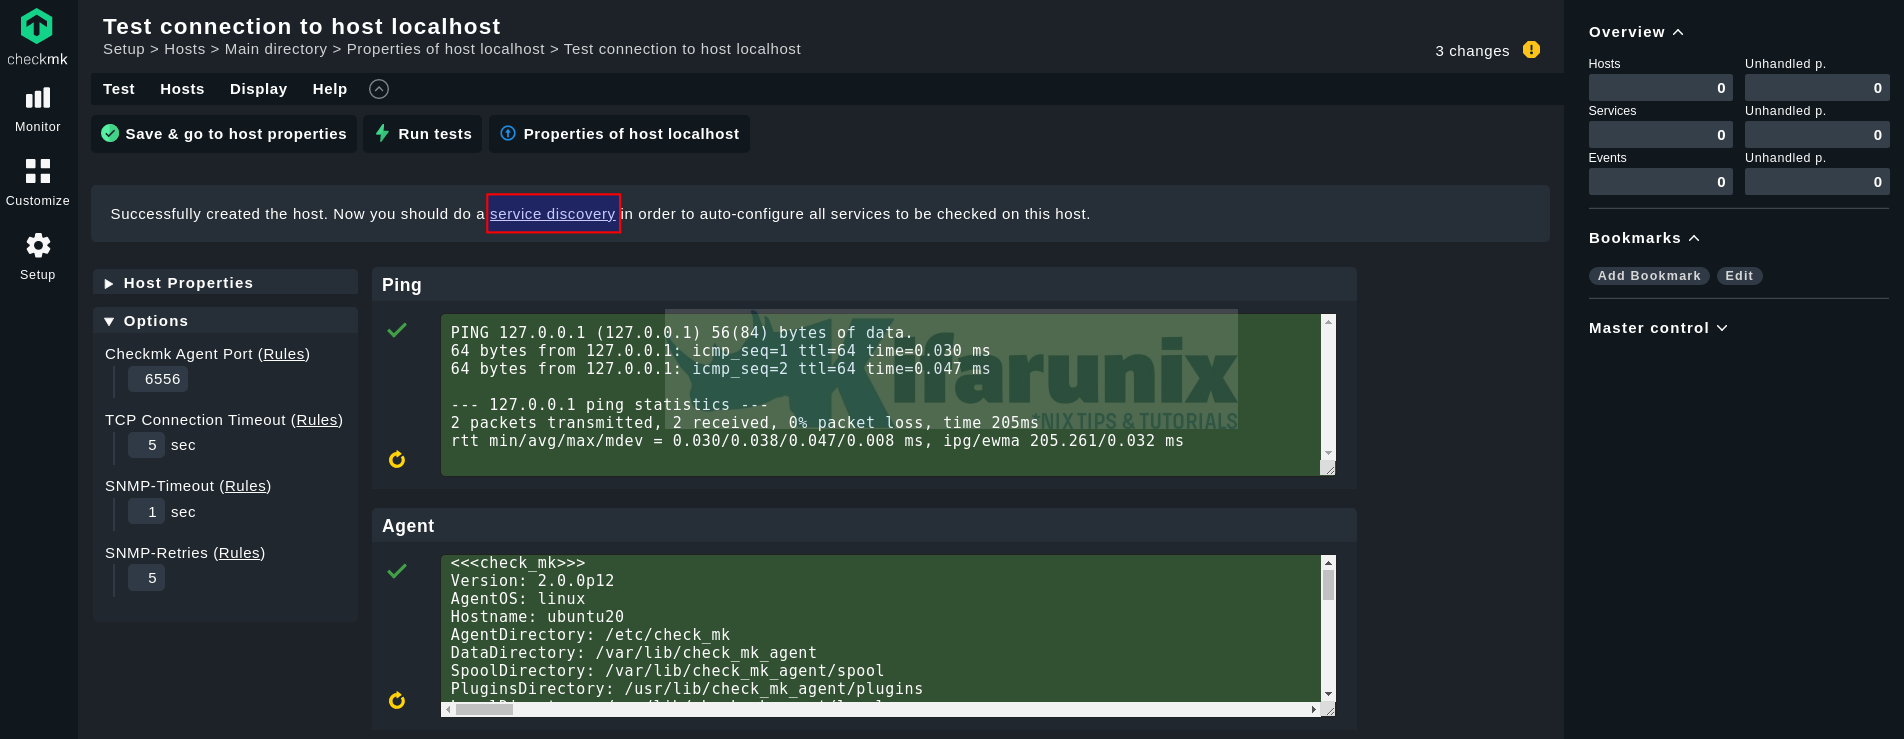
SNMP check will fail, if no SNMP agents are installed/configured on the remote hosts yet. We are not using SNMP in this setup.
Host Service Discovery
If the connection to the host is okay, proceed to do a service discovery in order to auto-configure all services to be checked on this host.
This will run a full service scan on the host and such output is shown after a short while.
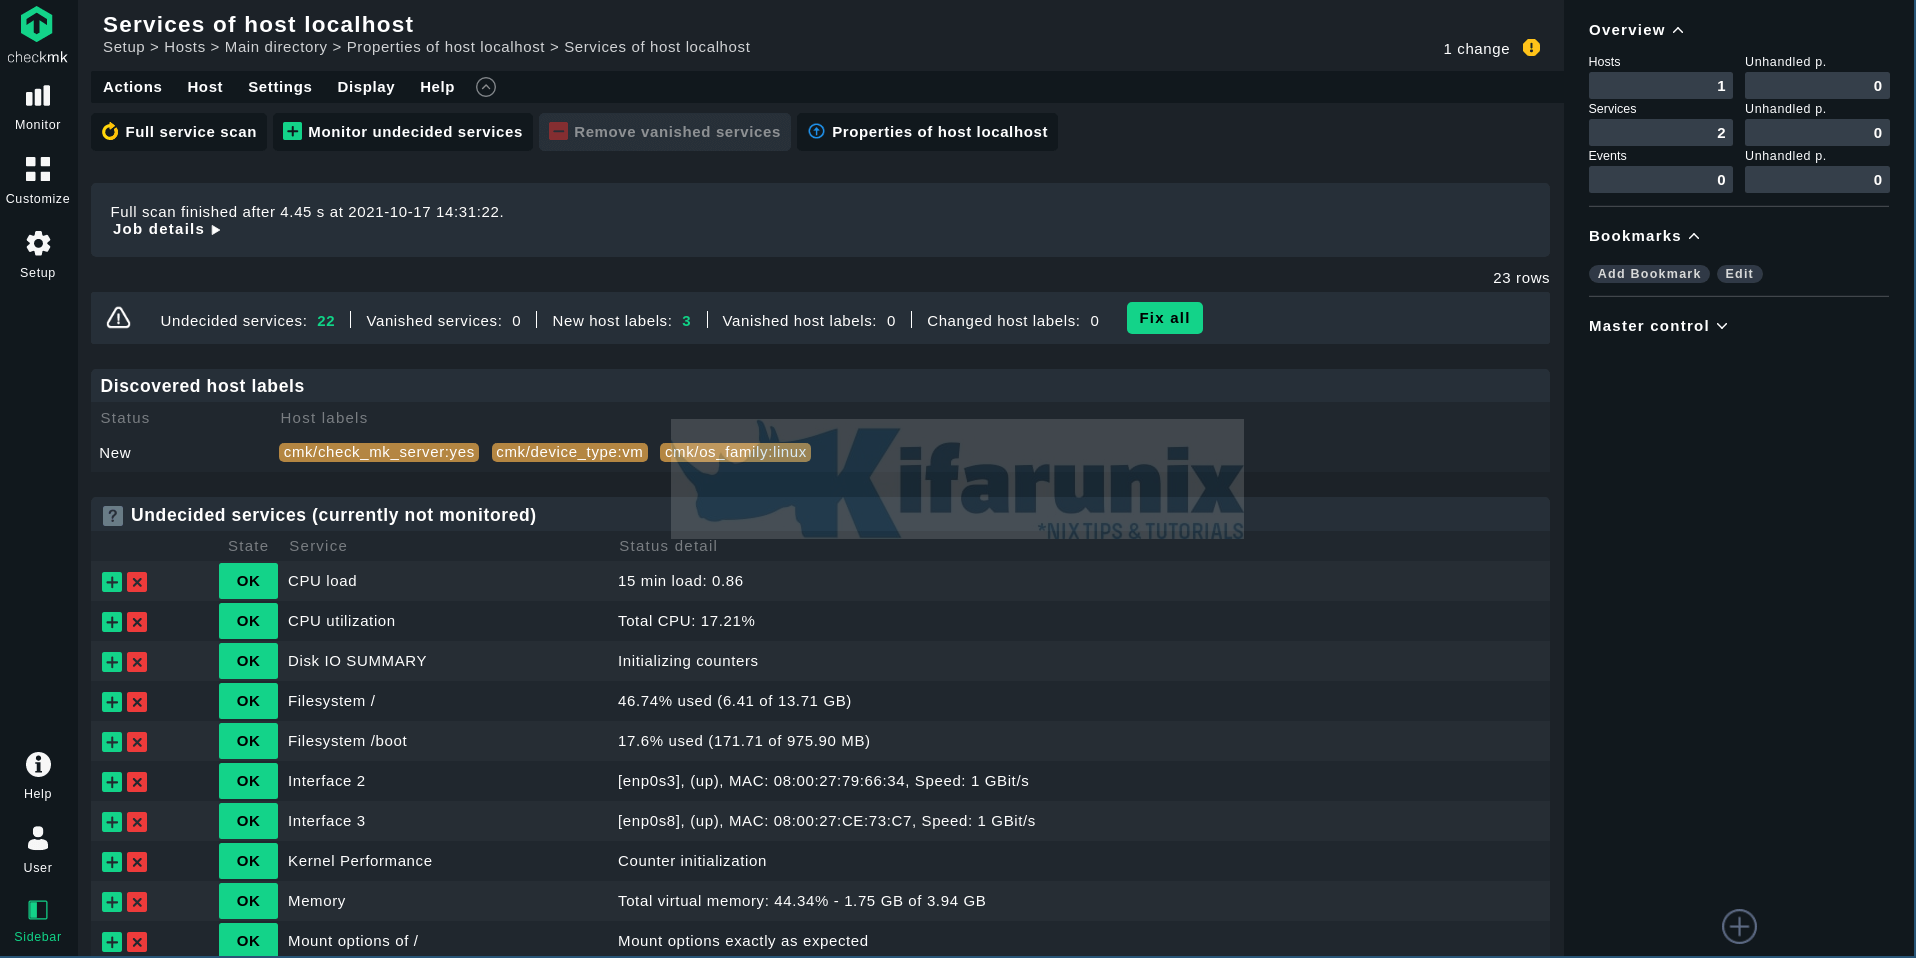
To start monitoring services that are currently not monitored, click Fix all.
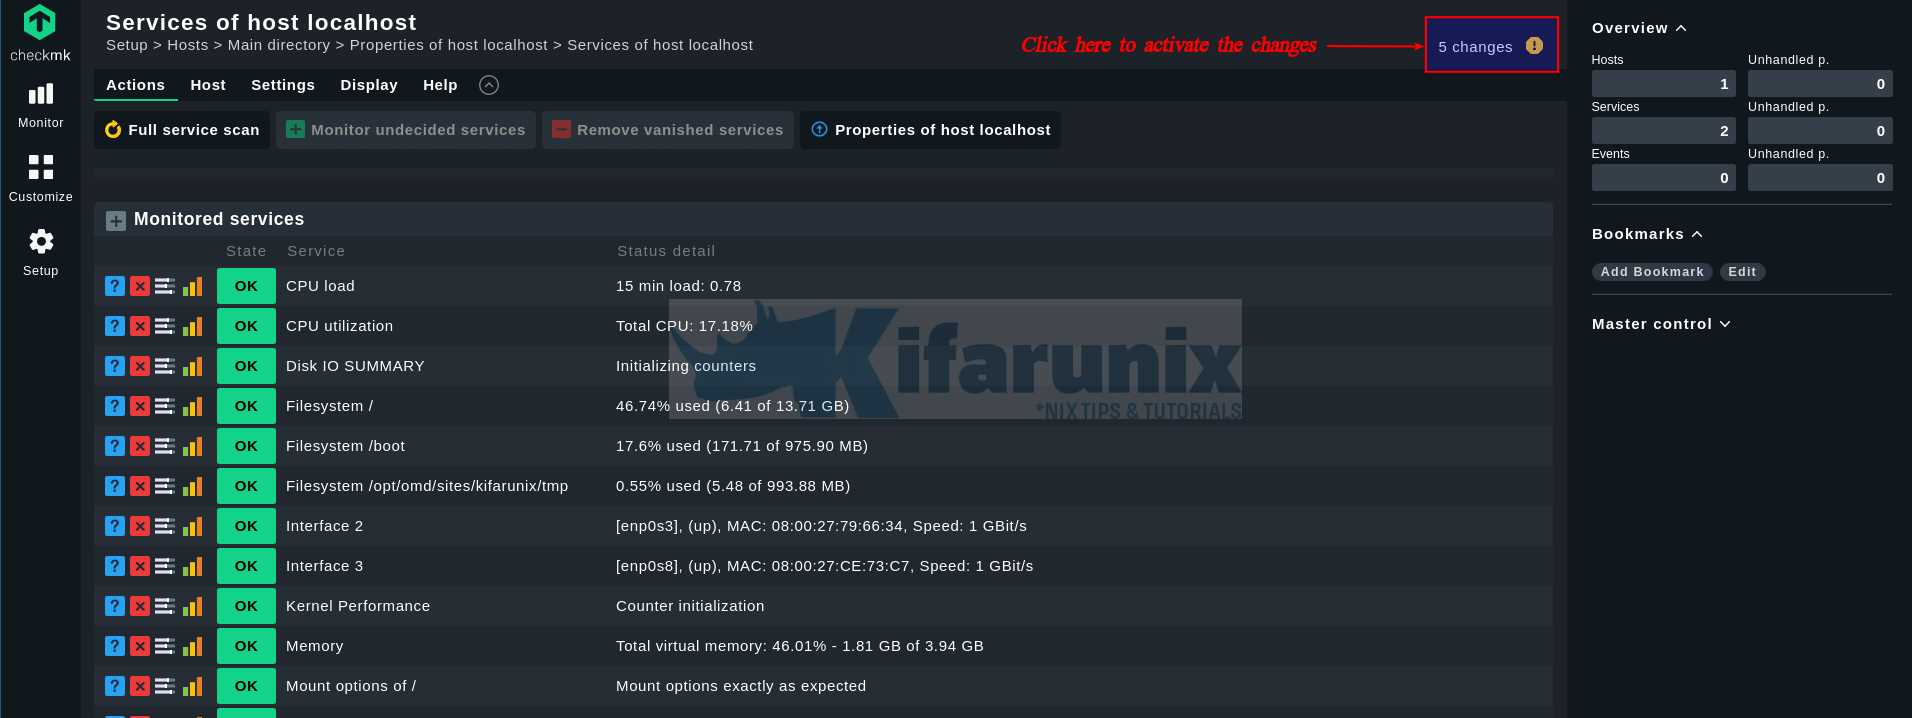
The monitored services interface now changes like as shown below;
Activate pending changes
Next, you need to write the changes.
On the interface, click the notification icon, with the number of changes, on the right. See the highlighted section in the screenshot above.
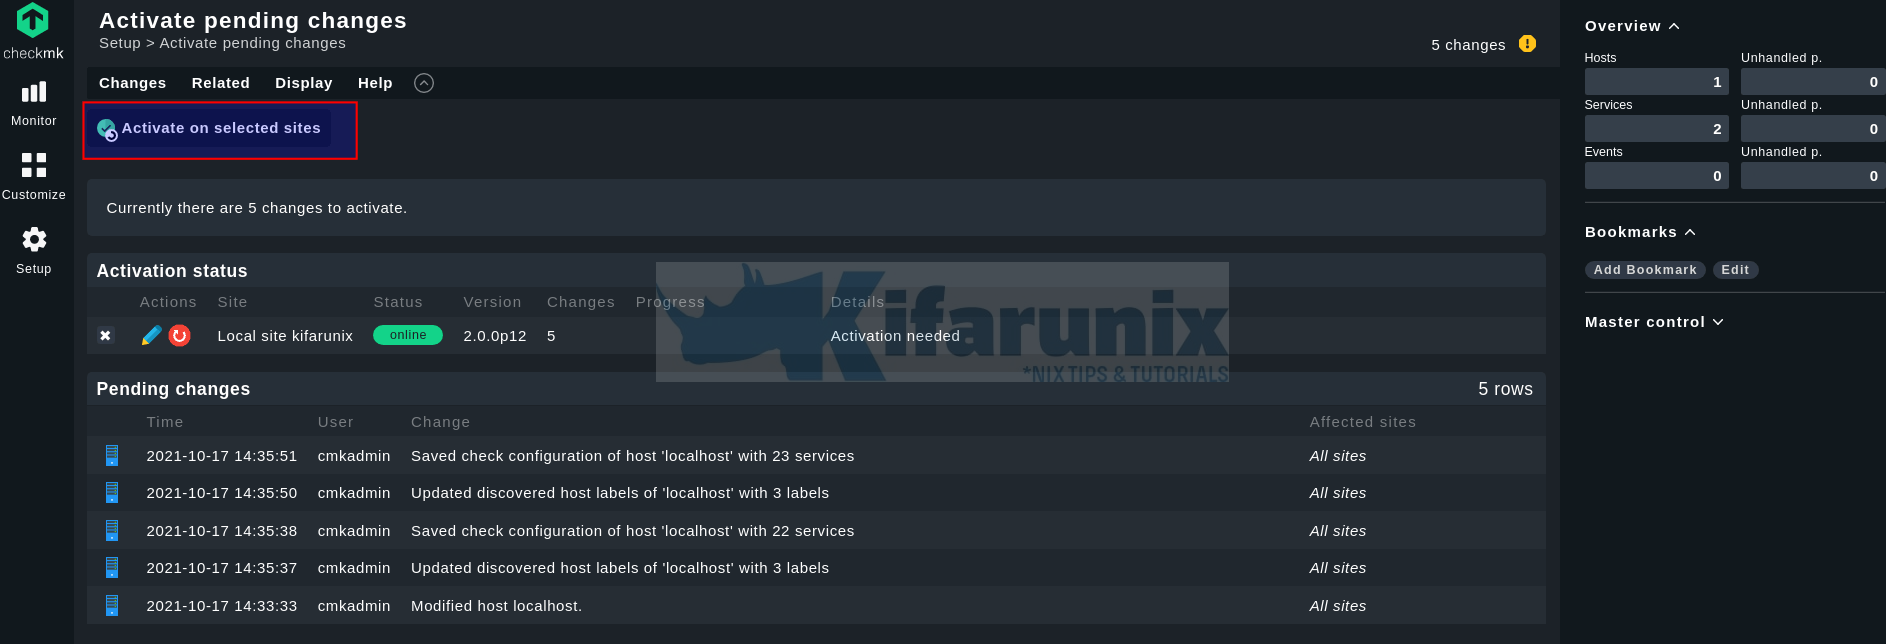
Next, click Activate on selected sites to save the changes. Once the changes are activated, you should see progress as success.
Add Remote Hosts to Checkmk Monitoring
For the remote hosts, ensure that TCP port 6556 is open on firewall.
For Ubuntu/Debian systems that have UFW running, you can open the port as follows. Replace CHECKMK-SERVER-IP with Checkmk server IP.
ufw allow from CHECKMK-SERVER-IP to any port 6556 proto tcp comment "Allow Checkmk monitoring"Once CentOS/RHEL/Rocky Linux, open the port on firewalld. You can create a new zone for monitoring;
firewall-cmd --new-zone=checkmk-monit --permanentfirewall-cmd --zone=checkmk-monit --add-source=CHECKMK-SERVER-IP/MASK --permanentfirewall-cmd --zone=checkmk-monit --add-port=6556/tcp --permanentfirewall-cmd --reloadNext, you can follow the same procedure to enroll the remote hosts that already have the Checkmk agents installed.
In our setup, we have added three hosts in total; localhost, a debian 11 system and a Rocky Linux 8 system.
You can see all hosts under Setup > Hosts > Hosts;

You can also check an overview of all hosts from Monitor > Overview > All Hosts.

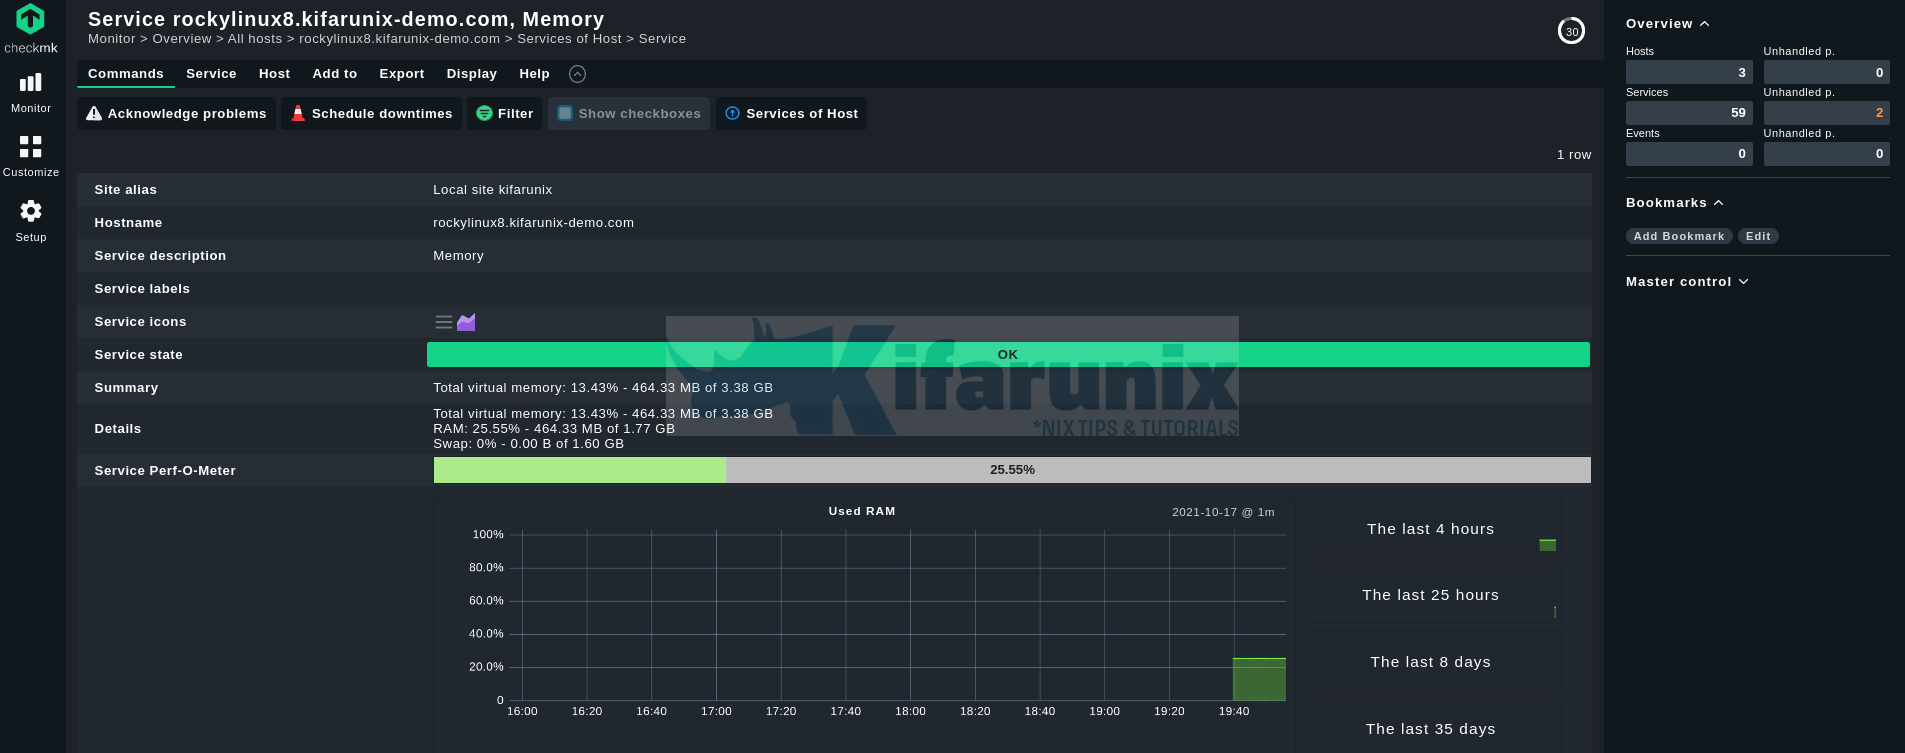
You can click on one of the hosts to have an overview of the associated services and view the graphical representation.
Once the service overview page opens up, you can click like memory, to view graphical representation.
Awesome tool, isn’t it?
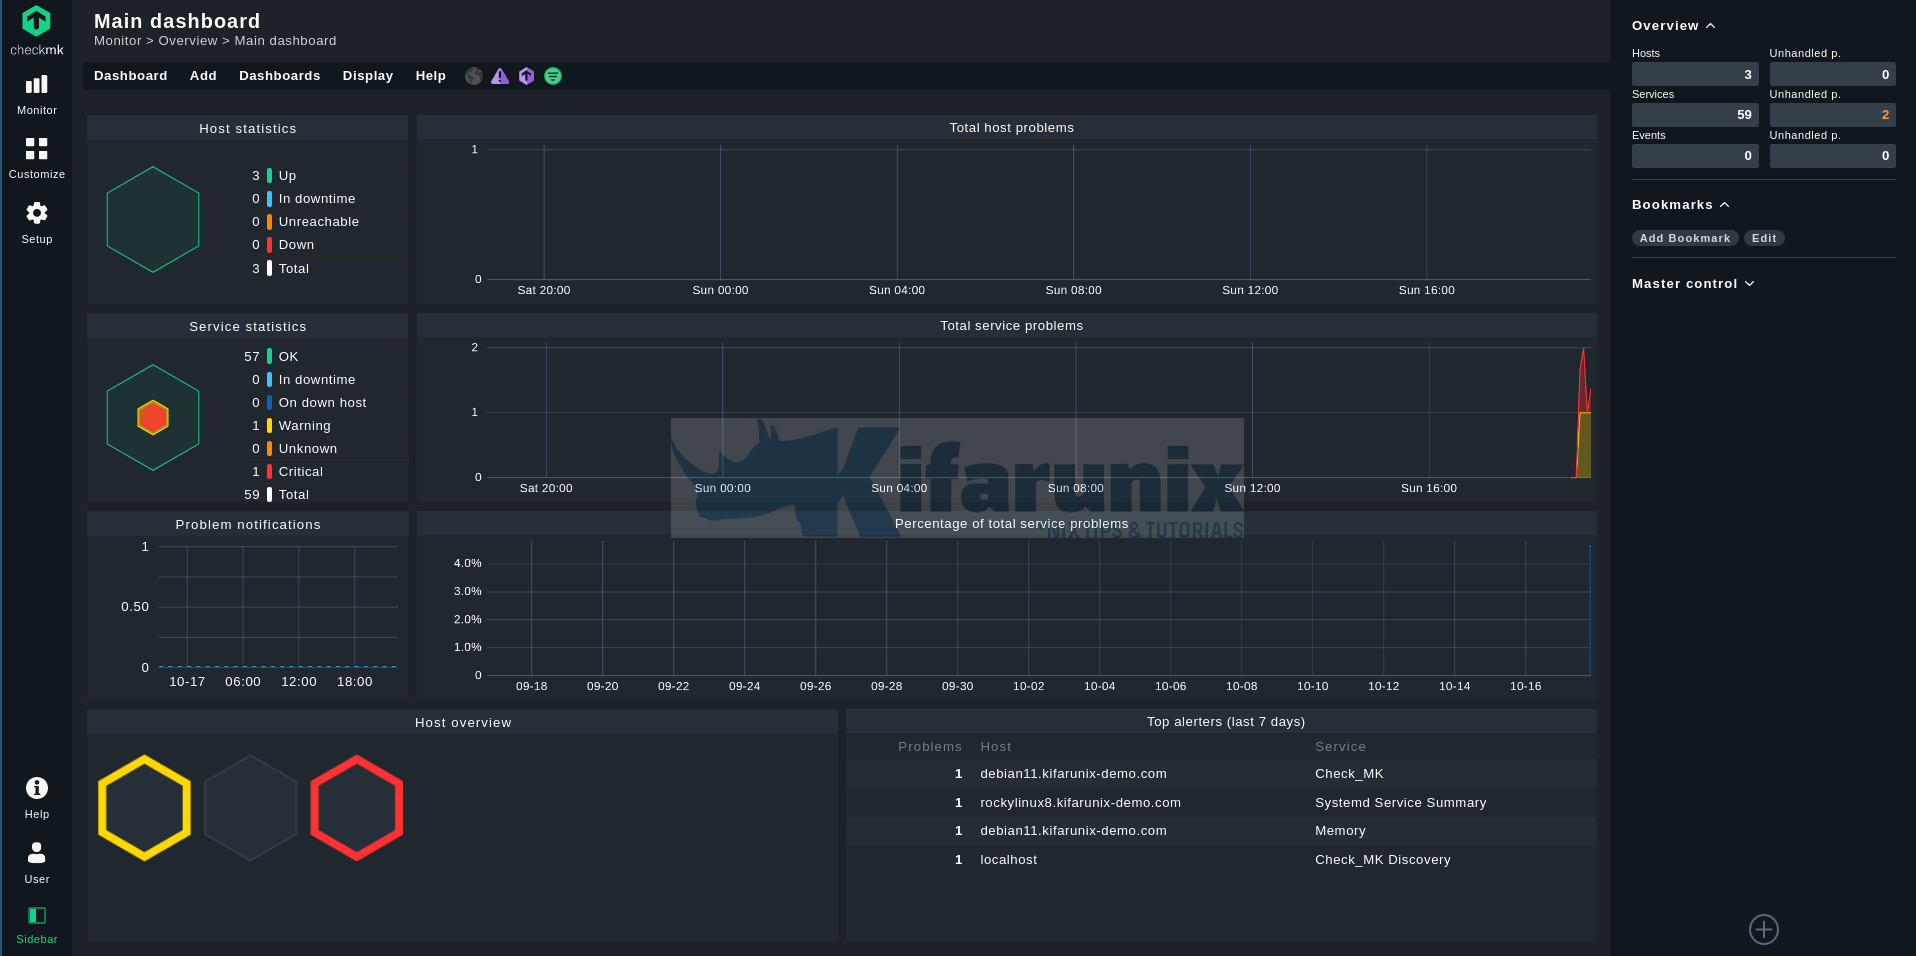
Main Dashboard status;
Stay tuned for more tutorials on this awesome tool.
Reference
Other Tutorials
Install ELK Stack on Debian 11

