In this tutorial we are going to learn how to install and configure Nagios Core from Repos on Ubuntu 18.04. Nagios is an enterprise grade free and open source software that can be used to monitor servers, applications and networks. It also offers alerting services for servers, switches, applications and services. Nagios supports both agentless and agent based monitoring.
Ubuntu 18.04 default APT repos do not provide latest versions of Nagios Core. Nagios Core 4.4.5 is the current stable release version. Ubuntu 18.04 APT repos provide Nagios Core 3.5.1.
Thus, this guide is a bit dated.
To ensure you are running latest version of Nagios Core server on Ubuntu 18.04, check the guide below on how to build Nagios Core from source on Ubuntu 18.04.
Install and Configure Nagios Core From Source on Ubuntu 18.04
Install Nagios Core from Repos on Ubuntu 18.04
There are two ways in which Nagios can be installed;
- From the Ubuntu repositories using the package manager (may not contain the latest features and bug fixes)
- Can be compiled from the source which ensures an up to-date installation.
In this tutorial, we will learn how to install Nagios Core On Ubuntu 18.04 from the repos.
If you want to build Nagios from source code on Ubuntu 18.04, then follow the link below;
Install and Configure Nagios Core on Ubuntu 18.04
Run system update
Before you can install Nagios from repos, ensure that apache http server as well as the necessary php modules are already installed. See installation command below:
apt -y install apache2 php php-cgi libapache2-mod-php php-common php-pear php-mbstringOnce the above packages are install, install Nagios and the plugins to monitor Nagios server itself.
apt -y install nagios3 nagios-plugins-basicDuring installation you will be required to select the mail server configuration type that best meets your needs as well as the admin password for login in to Nagios web console.
...
Please select the mail server configuration type that best meets your needs.

No configuration:
Should be chosen to leave the current configuration unchanged.
Internet site:
Mail is sent and received directly using SMTP.
Internet with smarthost:
Mail is received directly using SMTP or by running a utility such
as fetchmail. Outgoing mail is sent using a smarthost.
Satellite system:
All mail is sent to another machine, called a 'smarthost', for delivery.
Local only:
The only delivered mail is the mail for local users. There is no network.

1. No configuration 2. Internet Site 3. Internet with smarthost 4. Satellite system 5. Local only

General type of mail configuration: 1


Configuring nagios3-cgi
-----------------------

Please provide the password to be created with the "nagiosadmin" user.

This is the username and password you will use to log in to your nagios installation after configuration is complete. If you do not provide a password, you will have to configure access to nagios yourself.

Nagios web administration password: Enter you password

Password confirmation: Confirm your password
...
After you enter the above details, installation will proceed. Once the installation is complete, configure Nagios as follows:
Configure Nagios to check external commands and enable the use of CGI command interface by editing Nagios configuration file and changing the value of check_external_commands to 1 as shown below.
vim /etc/nagios3/nagios.cfg
...
# EXTERNAL COMMAND OPTION
# This option allows you to specify whether or not Nagios should check
# for external commands (in the command file defined below). By default
# Nagios will *not* check for external commands, just to be on the
# cautious side. If you want to be able to use the CGI command interface
# you will have to enable this.
# Values: 0 = disable commands, 1 = enable commands

check_external_commands=1
...
To limit access to Nagios Server to specific hosts or networks, open the nagios apache configuration file and comment out the line; Allow From All and specify the hosts/networks to allow as shown below.
vim /etc/nagios3/apache2.conf
 ...
    <IfVersion < 2.3>
        Order Allow,Deny
        # Allow From All
        Allow From localhost 192.168.0.0/24
    <IfVersion>
...
For my case since this is just for learning purposes, I will leave the defaults settings, Allow From All.
Edit the nagios service configuration file and make the changes as follows;
143   if ! check_started; then
144     if ! check_named_pipe; then
145        log_action_msg "named pipe exists - removing"
146        rm -f $nagiospipe
147     fi
148     if check_config; then
149       start_daemon -n $NICENESS -p $THEPIDFILE $DAEMON -d $NAGIOSCFG
150       chmod o+rw /var/lib/nagios3/rw/nagios.cmd
151       ret=$?
152     else
This lines add the read write permissions to the external command file, a file that Nagios checks for external command requests and is also where the command CGI will write commands that are submitted by users. Since the file is deleted every time its contents are processed, this ensures that the permissions are set whenever new file is created.
Change the group of the /var/lib/nagios3/ to apache www-data group.
chgrp -R www-data /var/lib/nagios3/Set the read and execute permissions on the group of directory holding the external command files, /var/lib/nagios3/rw/.
chmod 750 /var/lib/nagios3/rw/Start and enable both apache and nagios to start on boot.
systemctl enable apache2;systemctl start apache2
systemctl enable nagios3;systemctl start nagios3
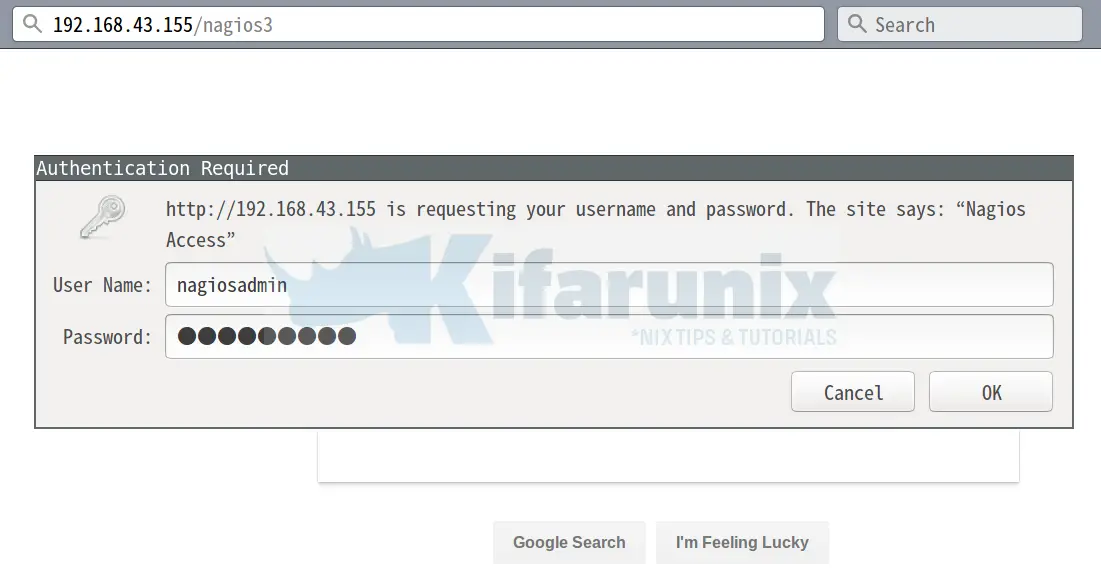
Now access the Nagios web interface using the following URL, http://<ip-address>/nagios3.
You will prompted to enter the basic authentication username and password to access the dashboard.

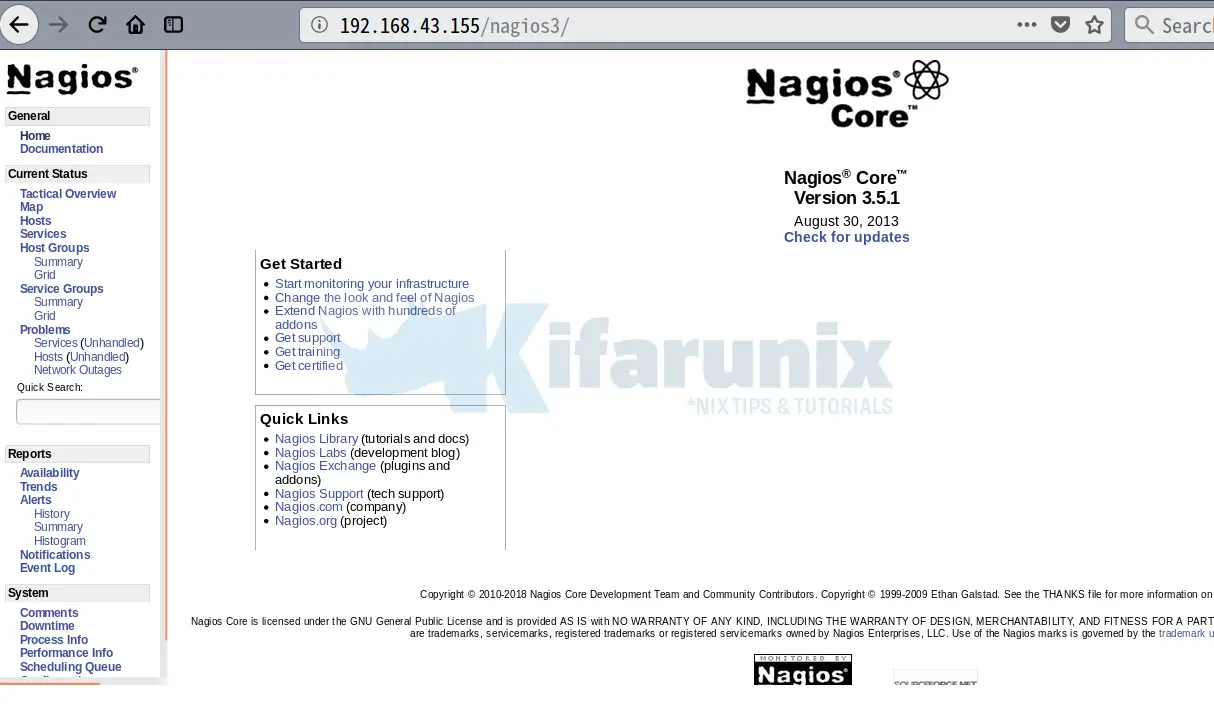
Login as nagiosadmin using the password you set above. When you login, this dashboard below welcomes you.

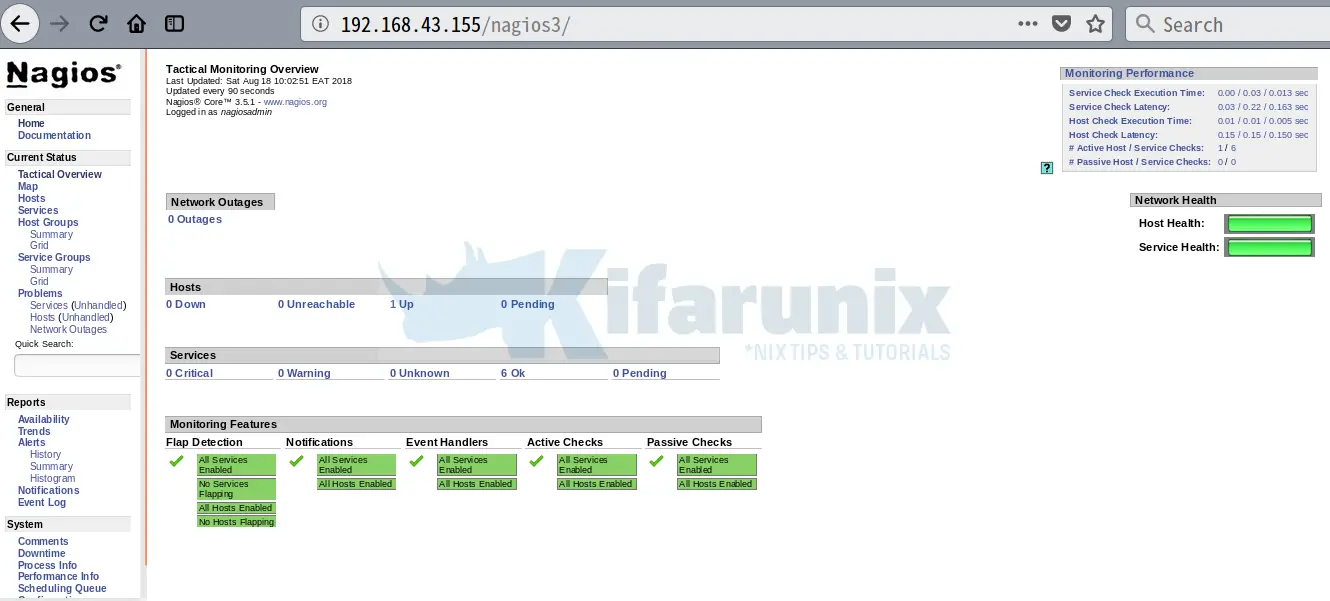
You can view system status by clicking on the Tactical Overview option on the left panel under Current Status.

There you go, you have successfully installed and configured Nagios Core on Ubuntu 8.04 and that marks the end of our guide on how to install Nagios Core from Repos on Ubuntu 18.04.
Nagios Related Tutorials
Monitor Linux Hosts using Nagios check_by_ssh Plugin
Add Hosts to Nagios Server For Monitoring

