You are running a virtual machine on a VirtualBox with multiple snapshots and you want to resize the root partition of the specific partition without losing data? Well, this guide on how to resize root partition of VirtualBox VM snapshot using the Gparted Live CD.
Resize Root Partition of VirtualBox VM Snapshot
Download Gparted Live CD ISO
GParted is a free partition manager that enables you to resize, copy, and move partitions without data loss. It is however a good practise have a backup just in case things go south. Navigate to the Gparted Downloads page and download it. You can simply use wget.
wget https://downloads.sourceforge.net/gparted/gparted-live-1.0.0-3-amd64.isoPoweroff the Virtual Machine
To resize a root partition of a Virtual Machine containing the snapshot whose root partition you want to resize, you need to power that VM off. Well, you can power off the VM from the VirtualBox interface or simply use the vboxmanage command as shown below;
vboxmanage controlvm VM_NAME poweroffReplace VM_NAME with the name of the virtual machine in question.
Find the Name of the Snapshot
Open the Virtual Media Manager and find the name of the virtual machine snapshot whose root partition is to be resized.

Resize Root Partition of VirtualBox VM Snapshot
Once you have identified the name of the virtual machine snapshot to resize, proceed to resize the disk. Snapshots are located on the snapshots folder.
vboxmanage modifymedium disk VirtualBox\ VMs/debian9/Snapshots/{ff94f0a8-9695-4c6f-b3a9-39baba8e5566}.vdi --resize 30720The original disk size is 12GB and we have resized it to 30GB
Attach GParted Live CD ISO
Next, attach the GParted Live CD iso to your vm with a snapshot to be resized.
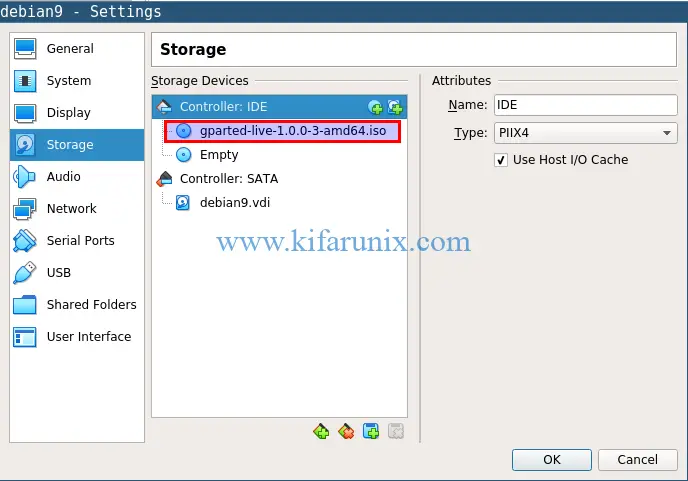
Once you have attached the iso, set the boot order such that optical disk comes first.
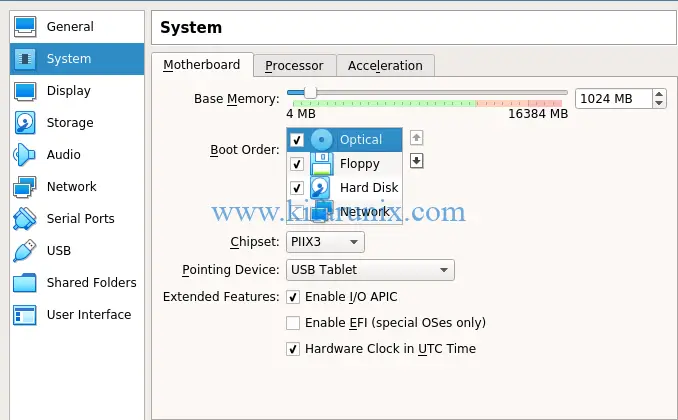
start your virtual machine.
When the virtual machine starts, let it boot with GParted Live default settings.
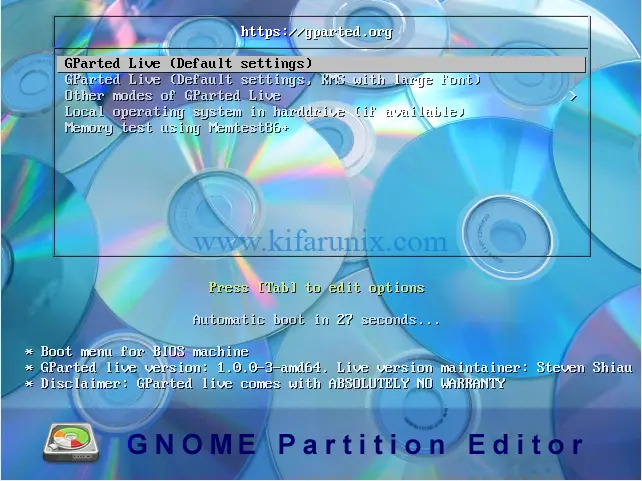
Select your keymap, your preferred language and continue to startx to use Gparted automatically.
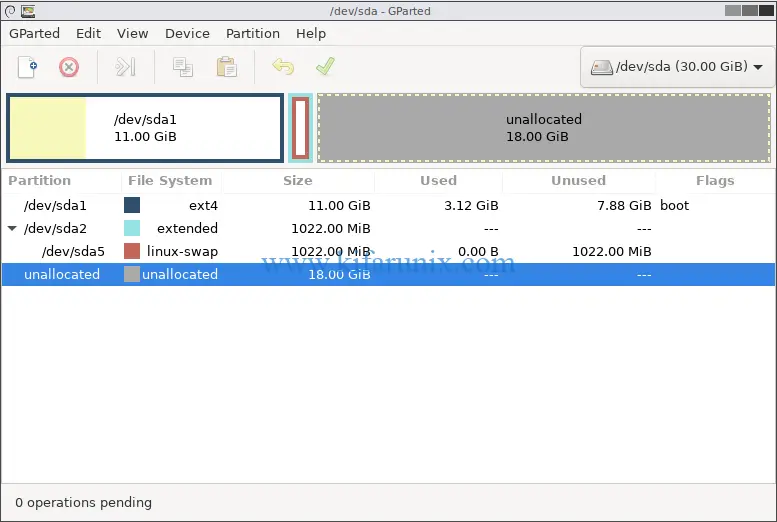
As you can see, the unallocated space is 18GB.
To resize the root partition to unallocated space, we are going to first delete the extended and swap partition. Hence, right click and delete it.
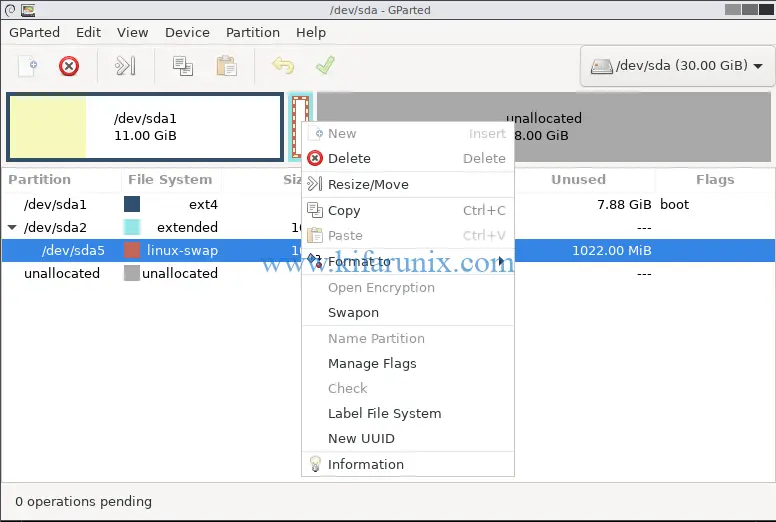
Next, right click on the root partition, in this case, it is /dev/sda and select resize and set the new partition size.
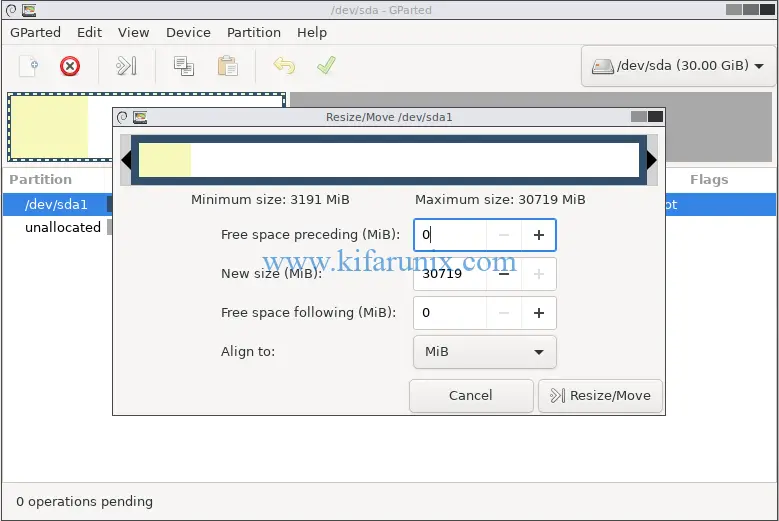
Click resize to extend the partition size. After that, click the tick to save the changes.
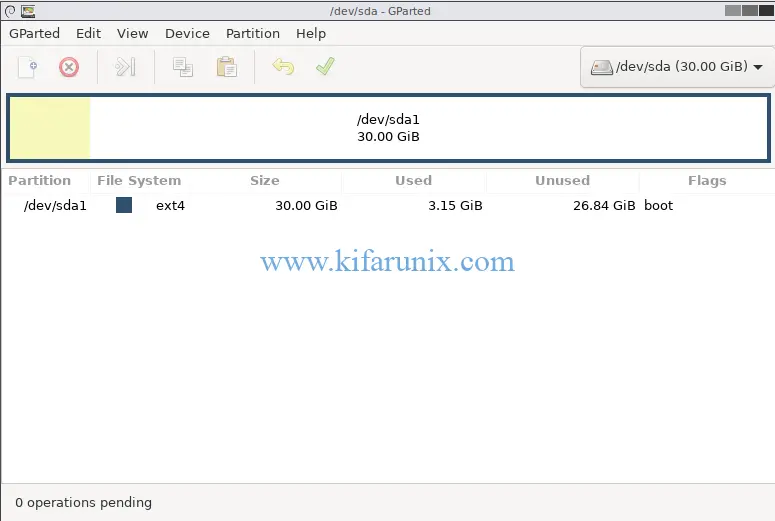
You should now have resized your disk.
Poweroff the virtual machine and detach the Gparted Live CD iso and boot your system.
When the system boots, you can check the disk size by running the df -h command.
df -h /dev/sda1Filesystem Size Used Avail Use% Mounted on
/dev/sda1 30G 1.9G 27G 7% /There you go. That is it on how to resize root partition of VirtualBox VM snapshot using the Gparted Live CD.
You can check our other articles by following the links below;
Install VirtualBox Guest Additions on Debian 10 Buster
Install Debian 10 Buster on VirtualBox

