
Follow through this guide to learn how to install Wubuntu Linux on VirtualBox. According to wubuntu.org;
Wubuntu – Linux with Windows appearance, without any hardware restrictions.
Wubuntu is an operating system based on Ubuntu LTS that has a similar appearance to Windows using the open-source themes. Wubuntu also comes with a set of advanced tools called PowerTools that allows you to use features such as Control Panel and Windows-style network and general settings, Android emulation interface with video acceleration, synchronization with OneDrive, improved Wine compatibility for applications .exe and .msi and is fully compatible with any hardware. It does not require TPM, Secure Boot, POPCNT or any other absurd requirements. Wubuntu is already shipped with Copilot, Edge, Teams, PowerShell, Skype and much more!
https://www.wubuntu.org
Table of Contents
Installing Wubuntu Linux on VirtualBox 7
Download Wubuntu Installation ISO
Navigate to the Wubuntu downloads page and grab an installation ISO file. We will be downloading a free edition ISO.
You also realize that there is different flavors:
- Wubuntu Plasma – Windows 11 Theme
- Wubuntu Cinnamon – Windows 10 Theme
- Linuxfx RedSand 11.4.4 Plasma LTS
We will be installing Wubuntu Plasma – Windows 11 Theme. You can download the flavor of your choice.
You can also obtain the ISO file and pull down using wget or curl command.
wget https://sourceforge.net/projects/windows-ubuntu/files/windows11-theme/windows-ubuntu-11.4.4-copilot-win11-plasma-amd64.isoRecommended Hardware Requirements
For the Wubuntu plasma edition, the recommended system requirements:
- 2 GHz dual-core processor or better
- 2 GB system memory (4 GB is highly recommended)
- 25 GB of free hard drive space (SSD is highly recommended)
Create Wubuntu Virtual Machine on VirtualBox 7
Open VirtualBox manager and create a new Virtual Machine for Wubuntu
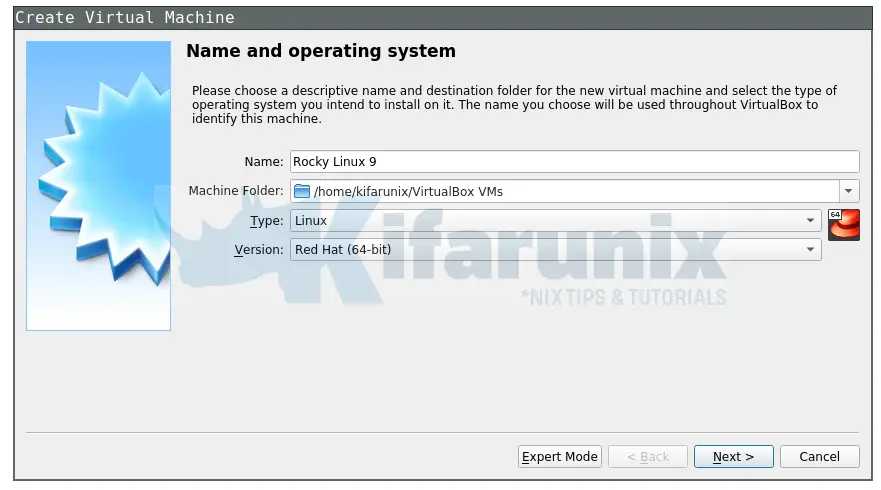
Name and Operating System of the VM
To begin with;
- set the name of the virtual machine
- set the installation folder
- select the ISO image that will be used to install Wubuntu
- The OS type and version should be auto-detected. If not, choose accordigly.
VirtualBox 7 supports unattended guest VM installation. Unfortunately, Wubuntu doesn’t support unattended installation as of this writing. So let’s skip unattended guest installation.

Set the VM Hardware Specs
Next, assign the VM required RAM and vCPUs.

VM Virtual Hard Disk
Create a Virtual hard disk for your VM. Choose the disk size of your preference.

Virtual Machine Setup Summary
Go through the virtual machine setup summary and when you are happy with the configuration press Finish to create the virtual machine. Alternatively you can go back and modify the configuration.

Attach Network Interfaces to Wubuntu VM
Open the virtual machines settings and navigate to the Network settings.
By default, first interface attached is NAT. This is required to give the VM Internet access.
Next, attach a host-only interface to allow you access the vm from the host!

Click Ok when done attaching the networks to the VM.
You can do more pre-install configs if you want!
Install Wubuntu on VirtualBox
When done with pre-install configs, click Start to start the installation. When the VM starts, double click Install System icon from the desktop.

Next;
- Choose you installation language

- Choose your region.

- Choose your keyboard layout. (Will go with default, English (US))
- Configure your partitions. I chose Erase disk to go with automatic partition.

- Setup your user account on the VM:
- Your Name
- Your username
- Computer’s name
- Password
- Choose whether or not to disable need for password during login!

- Install Wubuntu on VirtualBox
When installation is complete, click Done restart the VM;

When prompted, press ENTER to remove the installation medium file.
Login to Wubuntu Plasma Desktop
Once the vm reboots, enter your credentials on the login interface;

Wubuntu desktop

And there you go! You have successfully installed Wubuntu on VirtualBox.
To optimize the VM functionality, install VirtualBox guest additions.
