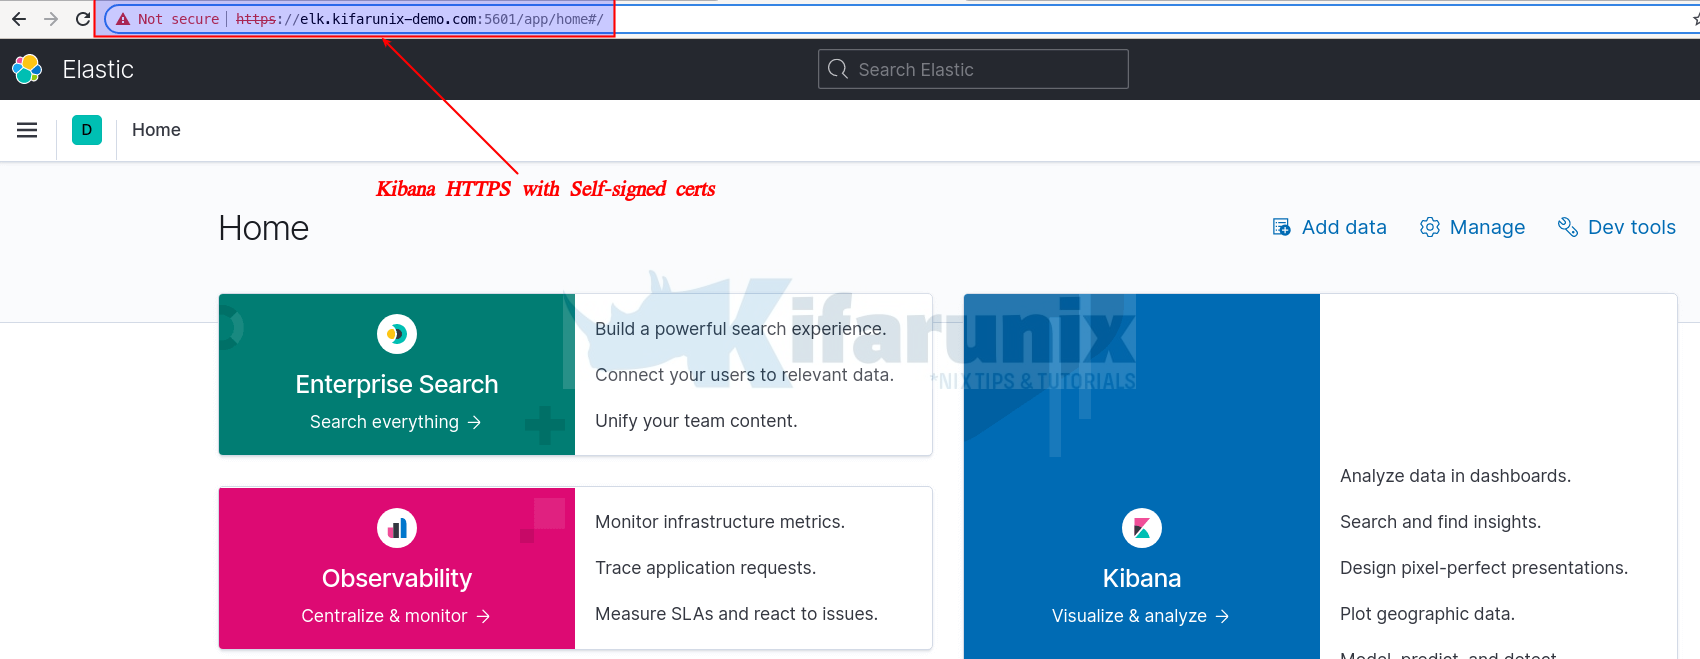
In this tutorial, you will learn how to enable Kibana HTTPS connection. HTTPS connections ensures that data is encrypted in transit.
Kibana supports only TLS encryption protocol. With TLS, X.509 certificates are used to encrypt the data-in-transit. This kind of encryption is asymetric because each certificate contains a public key and a private key which are used for cryptographic operations. Kibana supports certificates and private keys in PEM or PKCS#12 format.
Enabling Kibana HTTPS connection
Install ELK Stack
Of course, you need to be having ELK or Kibana running to enable HTTPS.
However, if you don’t already have ELK stack, you can use the guides in the links below;
Install ELK Stack on Ubuntu 20.04
Installing ELK Stack on CentOS 8
Enabling Kibana HTTPS connection
Once you have Kibana/ELK installed, you can then proceed to enable Kibana with TLS/SSL to enable you encrypt traffic between the browser and Kibana.
Obtain TLS Certificates and Private Key
You can choose to obtain a commercially trusted certificates and keys from an public CA of your preference.
Similarly, you can use self-signed certificates for your non-public facing Kibana.
If you opt to use the self-signed certificates, then there are two options. You can either obtain the TLS certs and key using;
Generate Kibana Self Signed TLS Certs and Key using OpenSSL
To generate Kibana Self Signed TLS certs and key using openssl, run the commands below. Be sure to replace the respective details in your certificate.
mkdir /etc/ssl/kibanaopenssl genrsa -out /etc/ssl/kibana/kibana-key.key 2048openssl req -new -x509 -sha512 -key /etc/ssl/kibana/kibana-key.key -out /etc/ssl/kibana/kibana-ca.crt -subj "/C=US/ST=Utah/L=Lehi/O=Kifarunix-demo/OU=IT/CN=*.kifarunix-demo.com"openssl req -new -key /etc/ssl/kibana/kibana-key.key -out /etc/ssl/kibana/kibana-ca.csr -subj "/C=US/ST=Utah/L=Lehi/O=Kifarunix-demo/OU=IT/CN=*.kifarunix-demo.com"openssl x509 -req -in /etc/ssl/kibana/kibana-ca.csr -CA /etc/ssl/kibana/kibana-ca.crt -CAkey /etc/ssl/kibana/kibana-key.key -CAcreateserial -sha512 -out /etc/ssl/kibana/kibana-cert.crt -days 3650Set Kibana as the owner of the TLS certs and key;
chown -R kibana: /etc/ssl/kibanaGenerate Kibana Self Signed TLS Certs using elasticsearch-certutil
If you don’t want to use OpenSSL to generate your Kibana TLS certs and key, then you can use the elasticsearch-certutil tool as follows.
Create directory to store the certs files;
mkdir /etc/ssl/kibanaGenerate the certs:
/usr/share/elasticsearch/bin/elasticsearch-certutil cert -name kibana-certs -dns localhost,*.kifarunix-demo.com -sThe command will generate a PKCS#12 file with the name you provided on the command line. However, it will prompt you to enter the certificate file name as well as whether to use the password.
Sample output. For each, Press ENTER to choose default name provided/blank password or provide the name/password and press ENTER respectively.
Please enter the desired output file [kibana-certs.p12]:
Enter password for kibana-certs.p12 :
This places the cert file in the /usr/share/elasticsearch/ with the name kibana-certs.p12.
You can copy it to the directory created for the certs above;
cp /usr/share/elasticsearch/kibana-certs.p12 /etc/ssl/kibanaEnsure Kibana user owns this file.
chown -R kibana: /etc/ssl/kibana
Enabling Kibana HTTPS Connection
Install TLS Certs in PEM format in Kibana
If you generated your certificates and keys using OpenSSL, then open Kibana configuration file, /etc/kibana/kibana.yml, for editing and uncomment the lines;
...
#server.ssl.enabled: false
#server.ssl.certificate: /path/to/your/server.crt
#server.ssl.key: /path/to/your/server.key
...
#elasticsearch.ssl.certificateAuthorities: [ "/path/to/your/CA.pem" ]
...
And update the paths to the generated certificate and key.
vim /etc/kibana/kibana.ymlSuch that the line may look like;
...
server.ssl.enabled: true
server.ssl.certificate: /etc/ssl/kibana/kibana-cert.crt
server.ssl.key: /etc/ssl/kibana/kibana-key.key
...
# Optional
server.ssl.certificateAuthorities: /etc/ssl/kibana/kibana-ca.crt
...
Install TLS Certs in PKCS#12 format in Kibana
If you generated your certificates and keys using elasticsearch-certutil, then open Kibana configuration file, /etc/kibana/kibana.yml, for editing and uncomment the line #server.ssl.enabled: false and change the value to true.
Also add the line, server.ssl.keystore.path: "/path/to/p12/file"
Simply run the command below;
echo -e 'server.ssl.enabled: true\nserver.ssl.keystore.path: "/etc/ssl/kibana/kibana-certs.p12"' >> /etc/kibana/kibana.ymlIf your certs is encrypted with a password, add the decryption password to your Kibana keystore by running the command below;
/usr/share/kibana/bin/kibana-keystore add server.ssl.keyPassphraseIf you used an empty password, then enter the line, server.ssl.keystore.password: "", in kibana.yml.
echo 'server.ssl.keystore.password: ""' >> /etc/kibana/kibana.ymlOtherwise, you might experience such error, Error: PKCS#12 MAC could not be verified. Invalid password.
Generate PEM Files from PKCS cert files
If you generated the PKCS file, you can generate the PEM files from it as follows;
- Generate the CA certificate;
openssl pkcs12 -in /etc/ssl/kibana/kibana-certs.p12 -nodes -nokeys -cacerts -out /etc/ssl/kibana/kibana-ca.crt- Generate the Certificate file;
openssl pkcs12 -in /etc/ssl/kibana/kibana-certs.p12 -out /etc/ssl/kibana/kibana-cert.crt -nokeys- Generate the Key file
openssl pkcs12 -in /etc/ssl/kibana/kibana-certs.p12 -out /etc/ssl/kibana/kibana-key.key -nodes -nocertsOnce you have them in PEM format, change ownership to Kibana and can install them as shown above;
chown -R kibana: /etc/ssl/kibanaRestart Kibana Service
systemctl restart kibanaCheck the logs to ensure Kibana is working fine.
Verify Kibana HTTPS configuration
curl -sk -vvv "https://elk.kifarunix-demo.com:5601" --capath /etc/ssl/kibana/ 2>&1 | awk 'BEGIN { cert=0 } /^* Server certificate:/ { cert=1 } /^*/ { if (cert) print }'* Server certificate:
* subject: C=US; ST=Utah; L=Lehi; O=Kifarunix-demo; OU=IT; CN=*.kifarunix-demo.com
* start date: May 25 18:52:15 2021 GMT
* expire date: May 23 18:52:15 2031 GMT
* issuer: C=US; ST=Utah; L=Lehi; O=Kifarunix-demo; OU=IT; CN=*.kifarunix-demo.com
* SSL certificate verify result: self signed certificate (18), continuing anyway.
* Connection #0 to host elk.kifarunix-demo.com left intactOn the Browser, you can navigate to https://<server-hostname>:5601
When prompted, accept the self signed ssl warning and proceed.

And that concludes our guide on how to enable HTTPS connection.
Reference
Configure Kibana to enable TLS
Other Tutorials
Integrate Wazuh Manager with ELK Stack

