Welcome to our tutorial on how to monitor squid access logs with Graylog server. Graylog is a leading open-source log management tool that provides real time collection, storage, analysis and enrichment of machine data.
Learn how to install Graylog 3 on CentOS 7 by following the link below.
How to Install Graylog 3.0 Server on CentOS 7
Monitor Squid Access Logs with Graylog server
Well, once you have setup your Graylog server, the next step would to ingest logs from various endpoints for analysis. This guide focuses on monitoring Pfsense squid proxy logs on Graylog. The Pfsense has been configured to forward Squid access logs to a central Rsyslog Server running on Ubuntu 18.04. You can as well forward Squid access logs directly to your Graylog server
You can check our link below on how to configure Rsyslog as a central log server on Ubuntu 18.04.
How to Configure Remote Logging with Rsyslog on Ubuntu 18.04
Create Graylog Squid logs Input
In order to get your data to Graylog server, you need to configure Graylog message inputs to accept the data being sent from various endpoints. In this guide, we are going to configure Graylog to receive Squid data on a Syslog UDP port 5140. Be sure to use ports > 1024 to avoid permission issues with privileged ports (<1024).
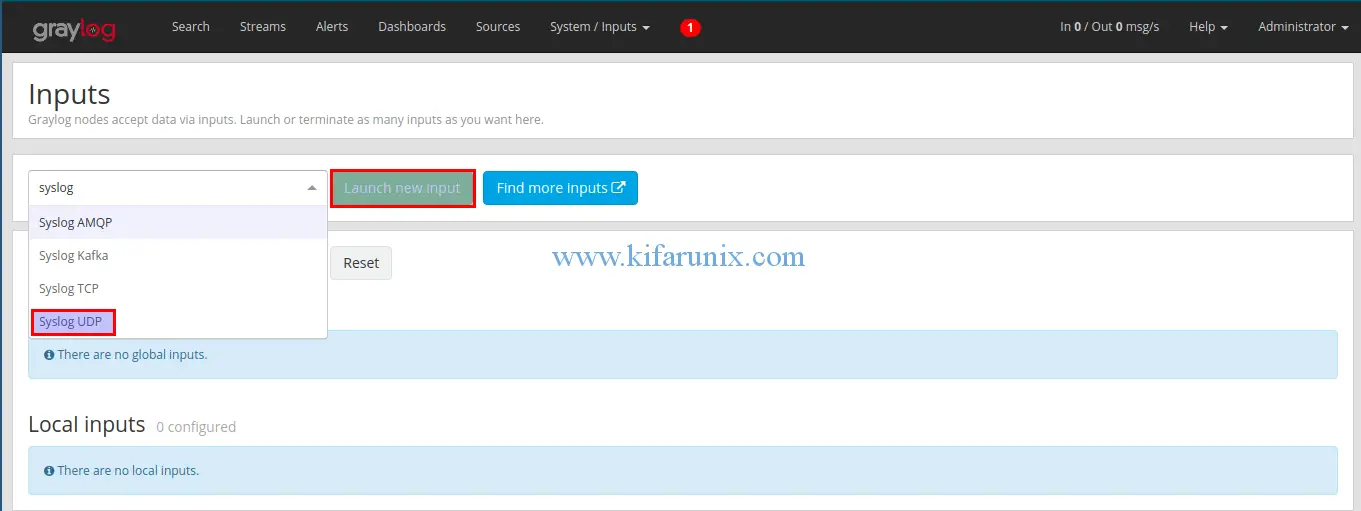
Therefore, login to your Graylog server and navigate to System > Inputs. On the Inputs configuration page, select the type of input, in this guide, Syslog UDP and click Launch new input.

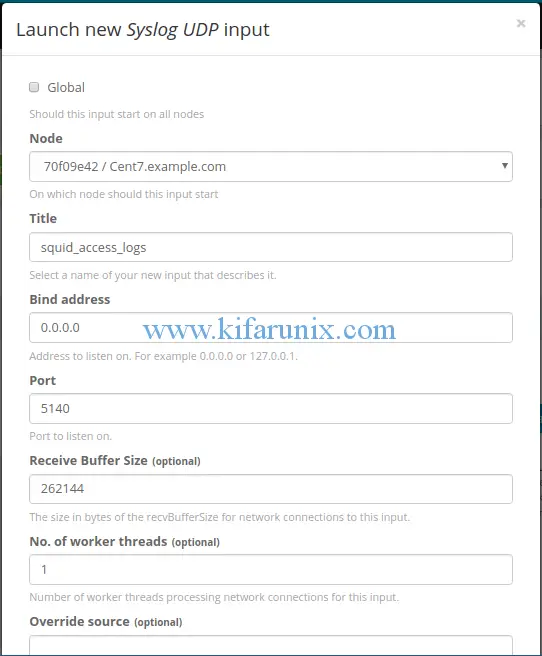
Syslog UDP input configuration wizard opens up. Select your Graylog node, Set the name of the input (Title), set the bind address (leave the default 0.0.0.0) and the port to listen on (5140 in this case). Then leave out other settings with defaults.

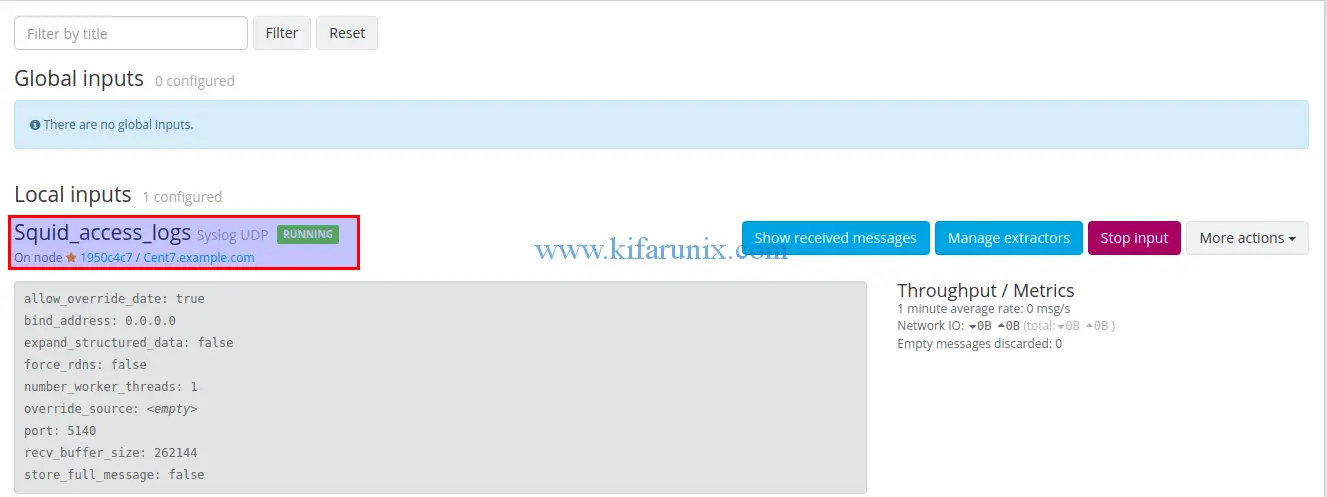
Once you are done, click the save button at the bottom of the configuration wizard to save the changes. If all is well, the Syslog UDP input will start to run immediately you save it.

Configure Remote Log Forwarding
Since Squid access logs are stored on a central Ubuntu 18.04 log server in this demo, we will go ahead and configure rsyslog to forward logs to Graylog server.
Configure Rsyslog Forwarding
In our central log server, Squid access logs are stored under, /var/log/remotelogs/pfsense/squid/access.logs. Hence, to configure Rsyslog to forward these logs, create a new configuration file as shown below;
vim /etc/rsyslog.d/60-squid.conf$ModLoad imfile
$InputFileName /var/log/remotelogs/pfsense/squid/access.log
$InputFileTag squid-access
$InputFileStateFile stat-squid-access
$InputFileSeverity info
$InputFileFacility local7
$InputRunFileMonitor
local7.* @192.168.43.98:5140;RSYSLOG_SyslogProtocol23FormatCheck Rsyslog for any misconfigurations;
rsyslogd -N1Restart Rsyslog
systemctl restart rsyslogTo verify that the logs are getting to Graylog server, you can use tcpdump command.
tcpdump -i enp0s8 src 192.168.43.142 and "udp port 5140"View Squid Access Logs on Graylog server
To verify that logs are being received on the defined Graylog input, click show received messaged on your local input.

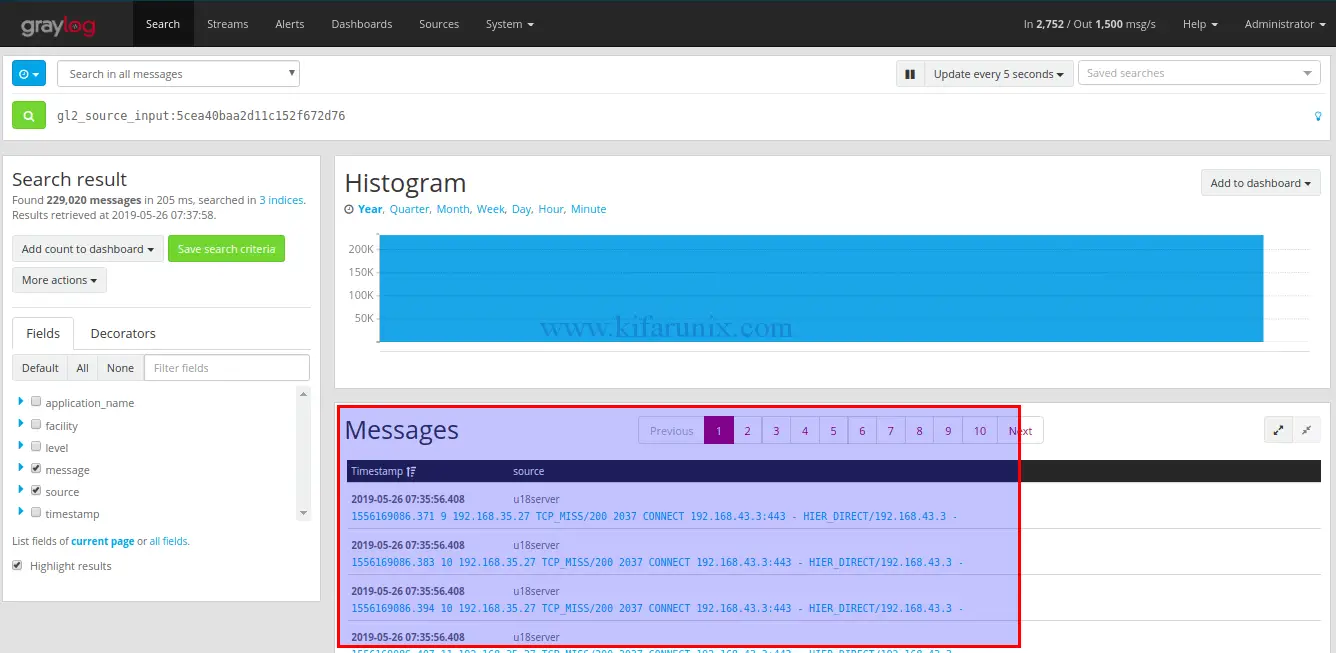
When you click on show received messages, you are redirected to Graylog search dashboard where you can view you messages.

There you go. You got your Squid access logs on your Graylog server, However, the logs have not been parsed correctly simply because these logs do not conform rules defined in syslog RFCs. Therefore, you need to define Extractors to instruct Graylog nodes on how to extract data from any text in the received Squid log messages.
See our next guide on how to create Graylog squid access logs extractor.
Otherwise, you can try the Content packs from Graylog Marketplace to see if you can get any that works for your Squid logs.
Other related monitoring guides;
Nagios SNMP Monitoring of Linux Hosts on AlienVault USM/OSSIM
Configure Nagios Availability Monitoring on AlienVault USM/OSSIM

