This guide will take you through how to install Redmine on Fedora Linux. Redmine is a cross-platform as well as cross-database flexible project management web application and we are using Fedora 39 specifically on this blog post.
Redmine has quite a number of features that are described on Redmine features page.
Table of Contents
Installing Redmine on Fedora Linux
Create Redmine System User
In this guide, we will install Redmine on /opt/redmine directory and run it as non-privileged redmine system user.
As such, create a redmine system user (or any other non-privileged system user that Redmine will run as for that case) and assign the /opt/redmine as its home directory.
useradd -r -m -d /opt/redmine redmine
Consult man useradd to learn what the options used above means.
Install Apache HTTP Server
To install Apache HTTP server on Fedora Linux, simply execute;
dnf install httpd
Start and enable Apache HTTP server to run on system boot;
systemctl enable httpd --now
Next, since we will be using Apache as our HTTP server, add Apache to Redmine group.
usermod -aG redmine apache
Install MariaDB Database Backend
Redmine supports a number of database back-ends such as PostgreSQL, MySQL/MariaDB, MSSQL. In this demo, we are using MariaDB 10.x.
dnf install mariadb-serverrun the command below to start and enable MariaDB server on system boot;
systemctl enable --now mariadbRun initial MariaDB database secure script to remove default databases, test tables, disable remote root login;
mysql_secure_installationCreate Redmine Database and Database User
Once the database backend is installed, login and create the database and database user for Redmine. Replace the database name accordingly.
mysql -u root -p
create database redminedb;
Create and grant the user all privileges on the database created. Replace the database user and password accordingly.
grant all on redminedb.* to redmineadmin@localhost identified by 'P@ssWorD';
Reload privileges tables and quit.
flush privileges;
quit
Download and Install Redmine
Install Required Dependencies
Begin by installing the dependencies required to build Redmine.
dnf install ruby-devel \
	rpm-build \
	wget \
	libxml2-devel \
	vim \
	make \
	openssl-devel \
	automake \
	libtool \
	ImageMagick \
	ImageMagick-devel \
	mariadb-devel \
	gcc \
	httpd-devel \
	libcurl-devel \
	gcc-c++ -y
Install Ruby on Fedora Linux
Redmine also requires Ruby interpreter which is installed automatically with the dependencies above.
Verify installed version.
ruby -v
ruby 3.2.2 (2023-03-30 revision e51014f9c0) [x86_64-linux]Redmine version 5.1 supports upto Ruby 3.1 as of this post update! We used Ruby 3.2.2 and it seems to work!
Download and Install Redmine
In order to install the latest version of Redmine, navigate to the Download’s page and grab the latest stable release version.
You can simply download and extract the Redmine tarball to the Redmine install directory, /opt/redmine.
VER=5.1.0curl -s https://www.redmine.org/releases/redmine-$VER.tar.gz | \
sudo -u redmine tar xz -C /opt/redmine/ --strip-components=1You should now have redmine files under /opt/redmine.
ls -alh /opt/redmine
total 188K
drwx------. 17 redmine redmine 4.0K Nov 13 06:30 .
drwxr-xr-x.  3 root    root      21 Nov 13 05:32 ..
drwxr-xr-x.  8 redmine redmine   97 Oct 31 00:50 app
-rw-r--r--.  1 redmine redmine  863 Oct 31 00:50 appveyor.yml
-rw-r--r--.  1 redmine redmine   18 Jul 19 00:00 .bash_logout
-rw-r--r--.  1 redmine redmine  144 Jul 19 00:00 .bash_profile
-rw-r--r--.  1 redmine redmine  522 Jul 19 00:00 .bashrc
drwxr-xr-x.  2 redmine redmine   78 Oct 31 00:50 bin
drwxr-xr-x.  5 redmine redmine 4.0K Oct 31 00:50 config
-rw-r--r--.  1 redmine redmine  129 Oct 31 00:50 config.ru
-rw-r--r--.  1 redmine redmine  538 Oct 31 00:50 CONTRIBUTING.md
drwxr-xr-x.  3 redmine redmine   21 Oct 31 00:50 db
drwxr-xr-x.  2 redmine redmine  113 Oct 31 00:50 doc
drwxr-xr-x.  5 redmine redmine   58 Oct 31 00:50 extra
drwxr-xr-x.  2 redmine redmine   23 Oct 31 00:50 files
-rw-r--r--.  1 redmine redmine 3.5K Oct 31 00:50 Gemfile
drwxr-xr-x.  2 redmine redmine   38 Oct 31 00:50 .github
-rw-r--r--.  1 redmine redmine  823 Oct 31 00:50 .gitignore
-rw-r--r--.  1 redmine redmine  694 Oct 31 00:50 .hgignore
drwxr-xr-x.  6 redmine redmine   85 Oct 31 00:50 lib
drwxr-xr-x.  2 redmine redmine   23 Oct 31 00:50 log
-rw-r--r--.  1 redmine redmine   81 Oct 31 00:50 package.json
drwxr-xr-x.  2 redmine redmine   20 Oct 31 00:50 plugins
drwxr-xr-x.  8 redmine redmine 4.0K Oct 31 00:50 public
-rwxr-xr-x.  1 redmine redmine  275 Oct 31 00:50 Rakefile
-rw-r--r--.  1 redmine redmine  205 Oct 31 00:50 README.rdoc
-rw-r--r--.  1 redmine redmine  56K Oct 31 00:50 .rubocop_todo.yml
-rw-r--r--.  1 redmine redmine 5.3K Oct 31 00:50 .rubocop.yml
-rw-r--r--.  1 redmine redmine   42 Oct 31 00:50 .stylelintignore
-rw-r--r--.  1 redmine redmine 1009 Oct 31 00:50 .stylelintrc
drwxr-xr-x. 15 redmine redmine 4.0K Oct 31 00:50 test
drwxr-xr-x.  8 redmine redmine   95 Oct 31 00:50 tmp
drwxr-xr-x.  2 redmine redmine    6 Oct 31 00:50 vendor
-rw-r--r--.  1 redmine redmine  51K Oct 31 00:50 yarn.lock
Configure Redmine Database Connection Settings
First switch to Redmine’s user account.
su - redmine
Rename the sample Redmine configuration.
cp config/configuration.yml{.example,}
Rename the sample dispatch CGI configuration file under the public folder as shown below;
cp public/dispatch.fcgi{.example,}
Rename the sample the database configuration file.
cp config/database.yml{.example,}
Next, open the database configure file for editing and and configure it to set the Redmine database connection details.
vim config/database.yml
Replace the database name, database user and the password accordingly.
...
production:
  adapter: mysql2
  database: redminedb
  host: localhost
  username: redmineadmin
  password: "P@ssWorD"
  # Use "utf8" instead of "utfmb4" for MySQL prior to 5.7.7
  encoding: utf8mb4
...
Save and exit the file.
Install Ruby Dependencies
Next, install required Ruby dependencies. Note that this step should be executed as Redmine user created above. If you are still logged in as Redmine user, proceed. Otherwise, switch to redmine user.
su - redmine
Install Bundler for managing gem dependencies.
gem install bundlerOnce the bundler installation is done, you can now install required gems dependencies.
bundle config set --local path 'vendor/bundle'bundle config set --local without 'development test'
bundle install
Generate Secret Session Token
To prevent tempering of the cookies that stores session data, you need to generate a random secret key that Rails uses to encode them.
bundle exec rake generate_secret_token
Create Database Schema Objects
Create Rails database structure by running the command below;
RAILS_ENV=production bundle exec rake db:migrate
Once the database migration is done, insert default configuration data into the database by executing;
RAILS_ENV=production REDMINE_LANG=en bundle exec rake redmine:load_default_data
Configure FileSystem Permissions
Ensure that the following directories are available on Redmine directory, /opt/redmine.
- tmp and tmp/pdf
- public and public/plugin_assets
- log
- files
If they do not exist, simply create them and ensure that they are owned by the user used to run Redmine.
for i in tmp tmp/pdf public/plugin_assets; do [ -d $i ] || mkdir -p $i; done
chown -R redmine:redmine files log tmp public/plugin_assets
chmod -R 755 /opt/redmine/
Testing Redmine Installation
The setup of Redmine on Fedora Linux is now done. You can test Redmine using WEBrick by executing the command below;
You can now test Redmine using WEBrick by executing the command below;
su - redmineAdd webrick to Gemfile;
echo 'gem "webrick"' >> GemfileInstall webrick gem and test the installation;
bundle installbundle exec rails server -u webrick -e productionSample output;
=> Booting WEBrick
=> Rails 6.1.7.6 application starting in production http://0.0.0.0:3000
=> Run `bin/rails server --help` for more startup options
[2023-11-13 08:03:05] INFO  WEBrick 1.8.1
[2023-11-13 08:03:05] INFO  ruby 3.2.2 (2023-03-30) [x86_64-linux]
[2023-11-13 08:03:05] INFO  WEBrick::HTTPServer#start: pid=4022 port=3000
You can now access Redmine via the browser using the address, http://Server-IP:3000/.
Before that, open port 3000/tcp on firewalld. Run the commands below as privileged user.
firewall-cmd --add-port=3000/tcp --permanent
firewall-cmd --reload
Once the port is opened, navigate to the browser and access Redmine. You should see a welcome page.

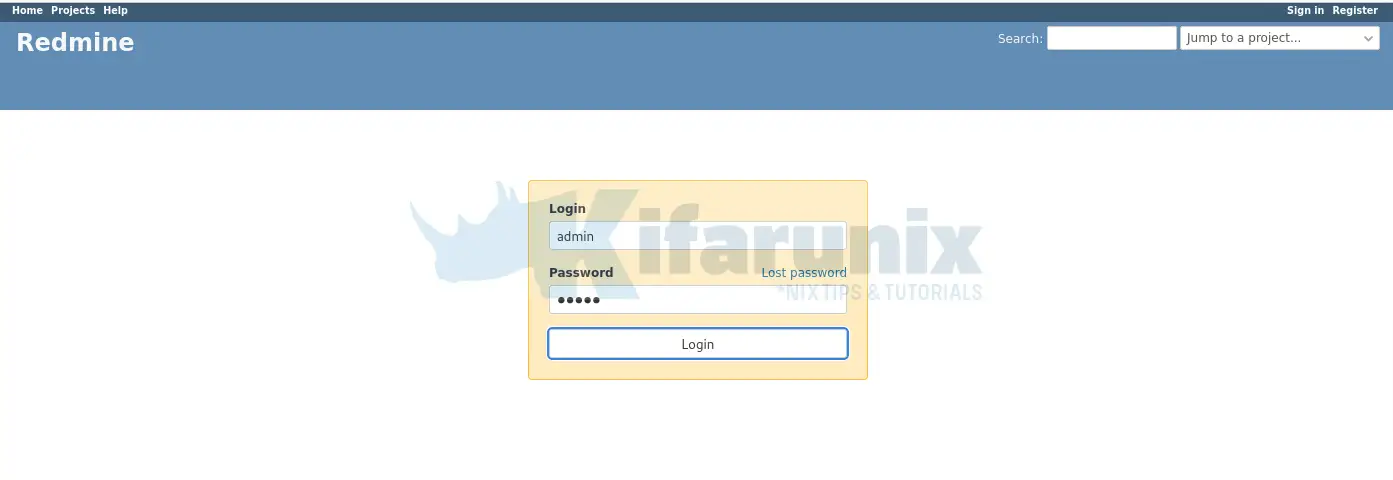
Click sign in at the top right corner and use the credentials:
- User:
admin - Password:
admin
To stop Redmine foreground run, just press CTRL+C.
Configure Apache for Redmine
Once you have confirmed that Redmine is working fine after the testing, you need to configure Apache HTTP server for Redmine.
Install Apache Passenger Module
Phusion Passenger is a web application server that can be used to server Redmine on production environments.
Therefore, switch to Redmine user created above to install the Phusion Passenger Apache module;
su - redminegem install passenger --no-documentNext, install Passenger Apache module. Replace the version of the Passenger accordingly.
passenger-install-apache2-moduleFollow through the installation guide to install Phusion Passenger. When prompted to choose a language, select Ruby and press Enter.
Welcome to the Phusion Passenger Apache 2 module installer, v6.0.18.

This installer will guide you through the entire installation process. It
shouldn't take more than 3 minutes in total.

Here's what you can expect from the installation process:

 1. The Apache 2 module will be installed for you.
 2. You'll learn how to configure Apache.
 3. You'll learn how to deploy a Ruby on Rails application.

Don't worry if anything goes wrong. This installer will advise you on how to
solve any problems.

Press Enter to continue, or Ctrl-C to abort.


--------------------------------------------

Which languages are you interested in?

Use  to select.
If the menu doesn't display correctly, press '!'

 ‣ ⬢  Ruby
   ⬢  Python
   ⬡  Node.js
   ⬡  Meteor

--------------------------------------------

Checking for required software...

 * Checking for C compiler...
      Found: yes
      Location: /usr/bin/cc
 * Checking for C++ compiler...
      Found: yes
      Location: /usr/bin/c++
 * Checking for Curl development headers with SSL support...
      Found: yes
      curl-config location: /usr/bin/curl-config
      Header location: /usr/include/curl/curl.h
      Version: libcurl 8.2.1
      Usable: yes
      Supports SSL: yes
 * Checking for Zlib development headers...
      Found: yes
      Location: /usr/include/zlib.h
 * Checking for Apache 2...
      Found: yes
      Location of httpd: /usr/sbin/httpd
      Apache version: 2.4.58
 * Checking for Rake (associated with /usr/bin/ruby)...
      Found: yes
      Location: /usr/bin/ruby /opt/redmine/bin/rake
 * Checking for OpenSSL support for Ruby...
      Found: yes
 * Checking for RubyGems...
      Found: yes
 * Checking for Ruby development headers...
      Found: yes
      Location: /usr/include/ruby.h
 * Checking for rack...
      Found: yes
 * Checking for OpenSSL development headers...
      Found: yes
      Location: /usr/include/openssl/ssl.h
 * Checking for Apache 2 development headers...
      Found: yes
      Location of apxs2: /usr/bin/apxs
 * Checking for Apache Portable Runtime (APR) development headers...
      Found: yes
      Location: /usr/bin/apr-1-config
      Version: 1.7.3
 * Checking for Apache Portable Runtime Utility (APU) development headers...
      Found: yes
      Location: /usr/bin/apu-1-config
      Version: 1.6.3

--------------------------------------------

Checking whether there are multiple Apache installations...
Only a single installation detected. This is good.

--------------------------------------------
Compiling and installing Apache 2 module...
You could as well install Phusion Passenger from the RPM repos but as of this writing, couldn’t find any repos providing it on Fedora 39.
Once the module compilation is done, you are provided with how configure the module on Apache,
...
Almost there!

Please edit your Apache configuration file, and add these lines:

   LoadModule passenger_module /opt/redmine/.local/share/gem/ruby/gems/passenger-6.0.18/buildout/apache2/mod_passenger.so

     PassengerRoot /opt/redmine/.local/share/gem/ruby/gems/passenger-6.0.18
     PassengerDefaultRuby /usr/bin/ruby


After you restart Apache, you are ready to deploy any number of web
applications on Apache, with a minimum amount of configuration!

Press ENTER when you are done editing.
Create Redmine Apache Configuration file
Before you can press Enter to complete the Module installation and setup, open a new login session as privileged user and create/update the Redmine Apache configuration file.
Create Apache virtual host configuration for Redmine with the following content and configure it to load the passenger modules. Replace the Server Name accordingly and ensure it is resolvable if using domain name. You can as well change the default port if you want.
vim /etc/httpd/conf.d/redmine.confListen 3000
LoadModule passenger_module /opt/redmine/.local/share/gem/ruby/gems/passenger-6.0.18/buildout/apache2/mod_passenger.so
<IfModule mod_passenger.c>
PassengerRoot /opt/redmine/.local/share/gem/ruby/gems/passenger-6.0.18
PassengerDefaultRuby /usr/bin/ruby
</IfModule>
<VirtualHost *:3000>
ServerName redmine.kifarunix-demo.com
DocumentRoot "/opt/redmine/public"
CustomLog logs/redmine_access.log combined
ErrorLog logs/redmine_error_log
LogLevel warn
<Directory "/opt/redmine/public">
Options Indexes ExecCGI FollowSymLinks
Require all granted
AllowOverride all
</Directory>
</VirtualHost>
Verify Apache configuration syntax.
httpd -t
Syntax OK
Once the installation and setup of Apache Passenger module is complete, restart Apache
systemctl restart httpd
Press ENTER on the Passenger module installation shell to validate the configurations.
Press ENTER when you are done editing.


--------------------------------------------

Validating installation...

 * Checking whether this Passenger install is in PATH... (!)

   Please add /opt/redmine/.local/share/gem/ruby/gems/passenger-6.0.18/bin to PATH.
   Otherwise you will get "command not found" errors upon running
   any Passenger commands.

   Learn more at about PATH at:

     https://www.phusionpassenger.com/library/indepth/environment_variables.html#the-path-environment-variable

 * Checking whether there are no other Passenger installations... (!)

   You are currently validating against Phusion Passenger(R) 6.0.18, located in:

     /opt/redmine/.local/share/gem/ruby/gems/passenger-6.0.18/bin/passenger

   Besides this Passenger installation, the following other
   Passenger installations have also been detected:

     /opt/redmine/bin/passenger

   Please uninstall these other Passenger installations to avoid
   confusion or conflicts.

 * Checking whether Apache is installed... ✓
 * Checking whether the Passenger module is correctly configured in Apache... ✓

Detected 0 error(s), 2 warning(s).
Press ENTER to continue.


--------------------------------------------

Deploying a web application

To learn how to deploy a web app on Passenger, please follow the deployment
guide:

  https://www.phusionpassenger.com/library/deploy/apache/deploy/

Enjoy Phusion Passenger, a product of Phusion® (www.phusion.nl) :-)
https://www.phusionpassenger.com

Passenger® is a registered trademark of Phusion Holding B.V.
Check if anything is listening on Port 3000.
ss -altnp
That is awesome.
Access Redmine from Browser
Since we have already opened port 3000/tcp on firewallD, you should be able to access Redmine web interface now.
Replace the server-IP-or-Hostname accordingly.
http://server-IP-or-Hostname:3000
Ensure the port is opened on the firewall.
Default login credentials given above.

If you get the error below;
We're sorry, but something went wrong.
The issue has been logged for investigation. Please try again later.
You may also come across such errors in Apache logs;
tail -f /var/log/httpd/error_log[ pid=20914 ] **************** LOOK ABOVE FOR CRASH DETAILS ****************
[ W 2023-11-13 08:45:56.7052 20325/T4 age/Wat/AgentWatcher.cpp:94 ]: Passenger core (pid=20914) crashed with signal SIGABRT, restarting it...
[ N 2023-11-13 08:45:56.7285 21003/T1 age/Cor/CoreMain.cpp:1340 ]: Starting Passenger core...
[ N 2023-11-13 08:45:56.7287 21003/T1 age/Cor/CoreMain.cpp:256 ]: Passenger core running in multi-application mode.
[ W 2023-11-13 08:45:56.7352 21003/T1 age/Cor/CoreMain.cpp:1007 ]: WARNING: potential privilege escalation vulnerability detected. Phusion Passenger(R) is running as root, and part(s) of the Passenger root path (/opt/redmine/.local/share/gem/ruby/gems/passenger-6.0.18) can be changed by non-root user(s):
- /opt/redmine/.local/share/gem/ruby/gems/passenger-6.0.18 is not secure: it can be modified by user redmine
- /opt/redmine/.local/share/gem/ruby/gems is not secure: it can be modified by user redmine
- /opt/redmine/.local/share/gem/ruby is not secure: it can be modified by user redmine
- /opt/redmine/.local/share/gem is not secure: it can be modified by user redmine
- /opt/redmine/.local/share is not secure: it can be modified by user redmine
- /opt/redmine/.local is not secure: it can be modified by user redmine
- /opt/redmine is not secure: it can be modified by user redmine
Please either fix up the permissions for the insecure paths, or install Passenger in a different location that can only be modified by root.
[ N 2023-11-13 08:45:56.7352 21003/T1 age/Cor/CoreMain.cpp:1015 ]: Passenger core online, PID 21003
[ N 2023-11-13 08:45:58.7776 21003/T4 age/Cor/SecurityUpdateChecker.h:519 ]: Security update check: no update found (next check in 24 hours)
You need to sort your SELinux permissions.
Phusion Passenger when not installed from the repositories does not come with SELinux policy modules and thus may not work well with SELinux enabled.
To make this simple, just disable SELinux and reboot your system and then access Redmine again on browser.
setenforce 0sed -i 's/=enforcing/=disabled/' /etc/selinux/configOtherwise if you want to keep SELinux running, generate a custom SELinux module for Phusion Passenger for any denied entry in /var/log/audit/audit.log and install it. For example;
dnf install policycoreutils-python-utils
grep -i denied /var/log/audit/audit.log | grep -i Passenger | audit2allow -a -M passenger
This command generated a policy package that can be installed by running;
semodule -i passenger.pp
With SELinux issues fixed, login to Redmine using admin for both user and password.
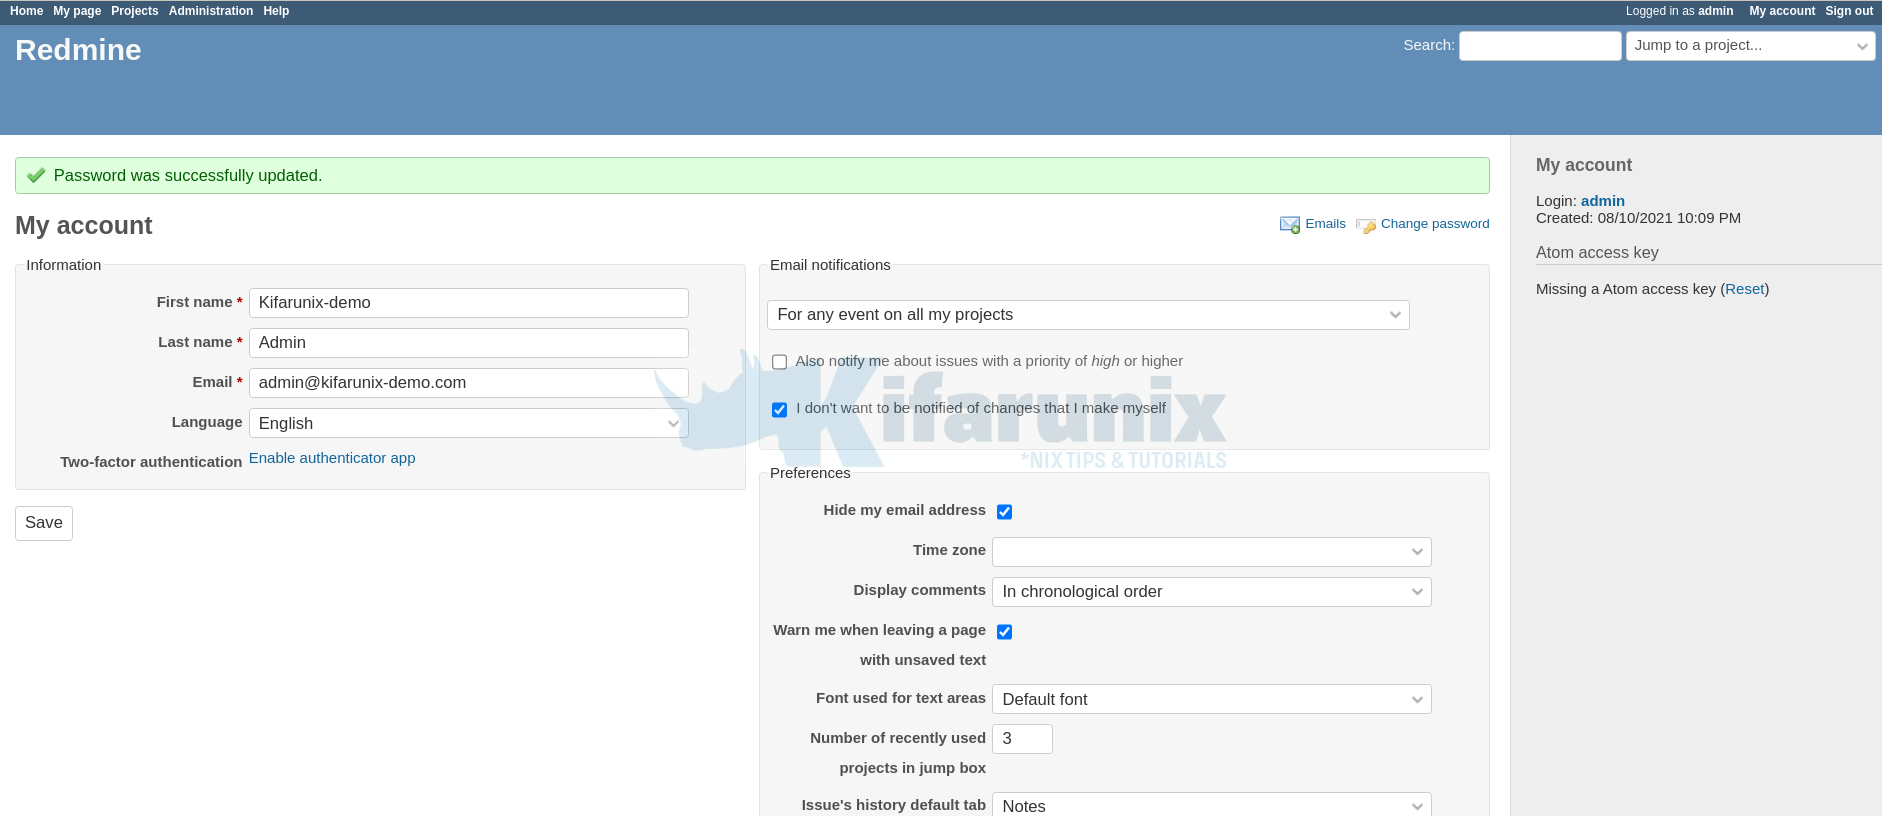
You are prompted to reset the password. Do reset and proceed to login to Redmine web interface.
After login, reset the password and proceed to setup your Redmine profile on Fedora Linux.

Once your profile is setup, you can jump to new project.

Read more on how to use Redmine User Guide.

