Welcome to our tutorial on how to install NoMachine on Ubuntu 24.04/Ubuntu 22.04. NoMachine is a remote desktop tool just like VNC, TeamViewer. It is designed to work across several platforms such as Windows, Mac and Linux to give users access to the physical desktop of the remote computer. NoMachine provides the best, fastest and highest quality remote desktop experience.
Table of Contents
Install NoMachine on Ubuntu 24.04/Ubuntu 22.04
Install NoMachine on Ubuntu
Note that in order for NoMachine to work, you need to install both on the remote desktop system you need to access as well as on the desktop system you are connecting from.
NoMachine is not available on Ubuntu 24.04/Ubuntu 22.04 default repositories. Therefore, you need to download the DEB binary package from NoMachine For Linux Downloads page.
On the Download page, select the version of NoMachine for your respective Ubuntu 24.04/Ubuntu 22.04 system architecture.
To find your Ubuntu system architecture type, use hostnamectl or uname -m command;
hostnamectl | grep Architecture:Sample output
Architecture: x86-64or
uname -mx86_64In our case, we will download the DEB binary package for the 64-bit Ubuntu 24.04/Ubuntu 22.04 system.
You can simply navigate to NoMachine x86_64 Debian Binary packages page and grab your package.
Or simply execute the command below to download NoMachine debian binary. Replace the value of VER with the current stable release version of NoMachine.
VER=8.11.3_4wget https://download.nomachine.com/download/${VER%.*}/Linux/nomachine_${VER}_amd64.debOnce the download is done, run either of the commands below to install the package;
sudo dpkg -i nomachine_${VER}_amd64.debOr simply use APT so as to fix any would be package dependencies issue;
sudo apt install ./nomachine_${VER}_amd64.debReading package lists... Done
Building dependency tree... Done
Reading state information... Done
Note, selecting 'nomachine' instead of './nomachine_8.11.3_4_amd64.deb'
The following NEW packages will be installed:
nomachine
0 upgraded, 1 newly installed, 0 to remove and 23 not upgraded.
Need to get 0 B/55.8 MB of archives.
After this operation, 230 MB of additional disk space will be used.
Get:1 /root/nomachine_8.11.3_4_amd64.deb nomachine amd64 8.11.3-4 [55.8 MB]
Selecting previously unselected package nomachine.
(Reading database ... 262768 files and directories currently installed.)
Preparing to unpack .../nomachine_8.11.3_4_amd64.deb ...
Unpacking nomachine (8.11.3-4) ...
Setting up nomachine (8.11.3-4) ...
NX> 700 Starting installation at: Mon, 19 Feb 2024 22:35:03.
NX> 700 Using installation profile: Ubuntu.
NX> 700 Installation log is: /usr/NX/var/log/nxinstall.log.
NX> 700 Installing nxrunner version: 8.11.3.
NX> 700 Installing nxplayer version: 8.11.3.
NX> 700 Installing nxnode version: 8.11.3.
NX> 700 Installing nxserver version: 8.11.3.
NX> 700 Installation completed at: Mon, 19 Feb 2024 22:35:14.
NX> 700 NoMachine was configured to run the following services:
NX> 700 NX service on port: 4000
Running NoMachine on Ubuntu 24.04/Ubuntu 22.04
Once the installation completes, the NoMachine package is now available in your system.
You can launch it from the applications menu. Also, you should be able to see the !M icon on the system tray.
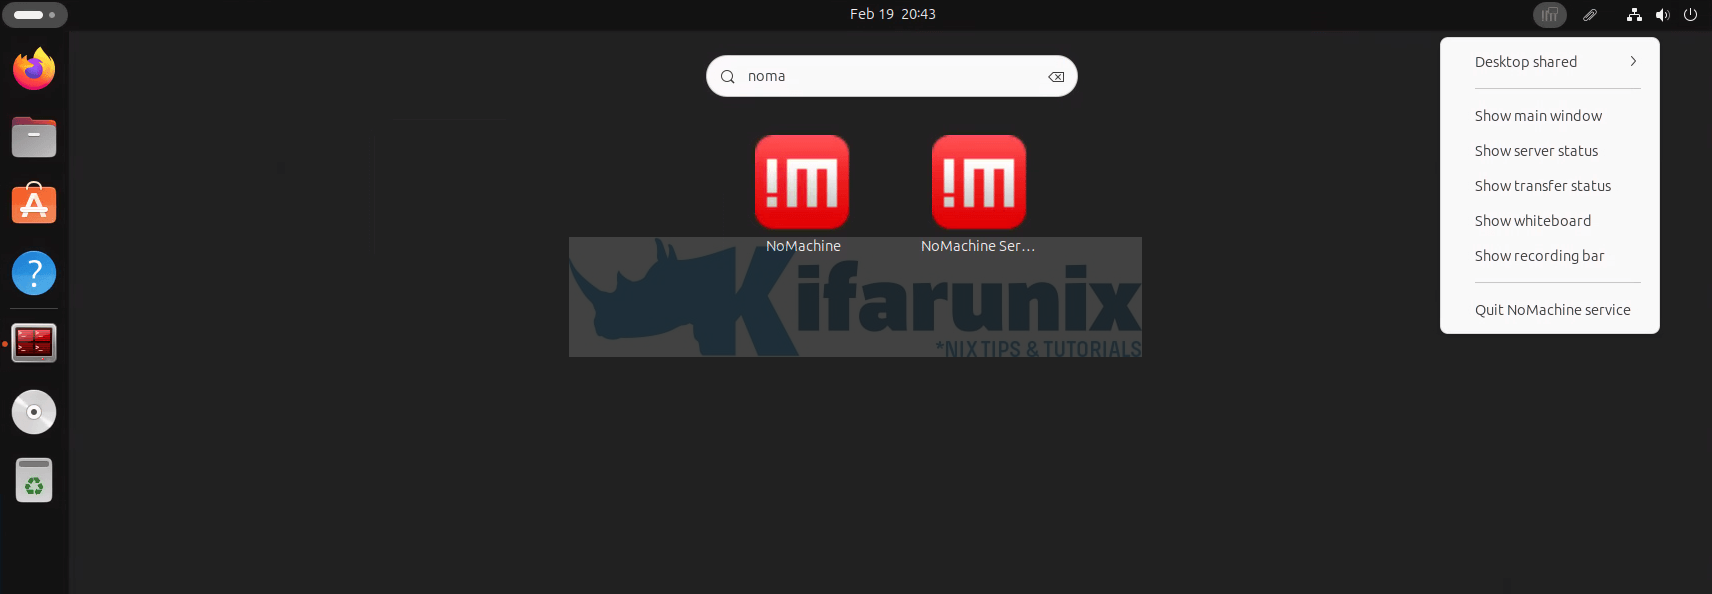
Configuring NoMachine on Ubuntu 24.04/Ubuntu 22.04
NoMachine can be configured as a server or a client depending on how you are using it.
To access the NoMachine settings:
- click on the !M icon in the system tray or NoMachine service from the system apps as shown in the screenshot above.
- click Show the Service status
- Click on Server preferences settings to access !M server settings.
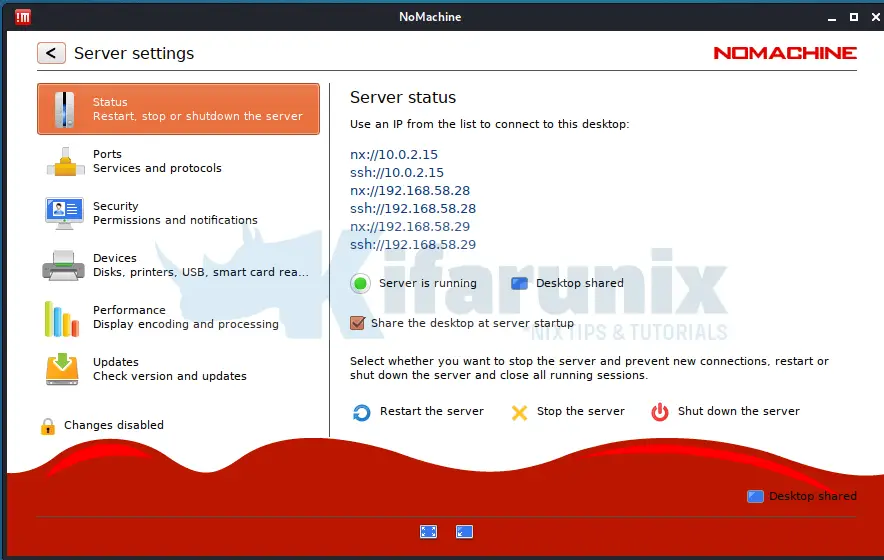
Under the Ports tab, you can uncheck the Advertise this computer on the local network.

Under the Security tab, you need to uncheck the Require permission to let users connect option if you are running unattended remote desktop system.
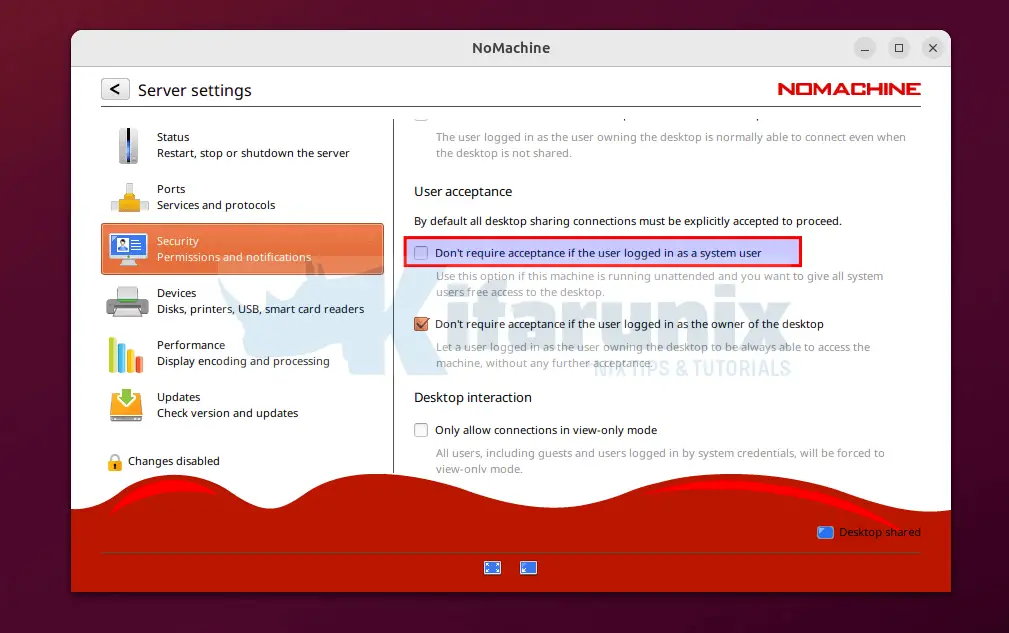
Go through other tabs for more configuration options.
When done setting up NoMachine on your Ubuntu desktop, restart NoMachine server.
Open NoMachine Server Port on Firewall
You may need to open these ports, 4000/tcp, 4011:4999/udp on firewall to access NoMachine. See how to control NoMachine ports on Firewall;
Control NoMachine Ports on Firewall
Connecting to Remote Desktop Computer using NoMachine
As stated above, for NoMachine remote connections to work, both desktop computers must have NoMachine software installed.
Assuming your client desktop machine has NoMachine already installed launch it and click NoMachine client icon or simply click the !M icon on the system tray and click Show Main Window.
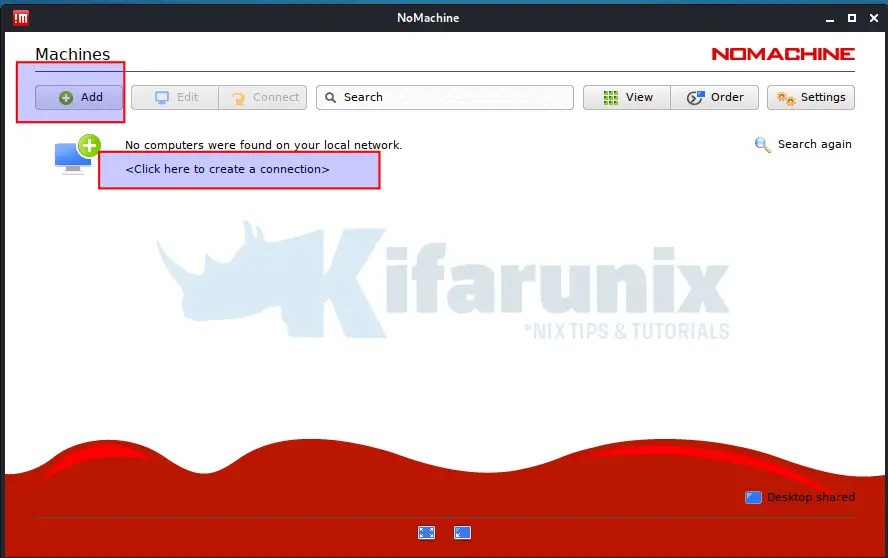
NoMachine try to search for any local NoMachine connections.
If it dont find any, click on the +add button to create new connection.
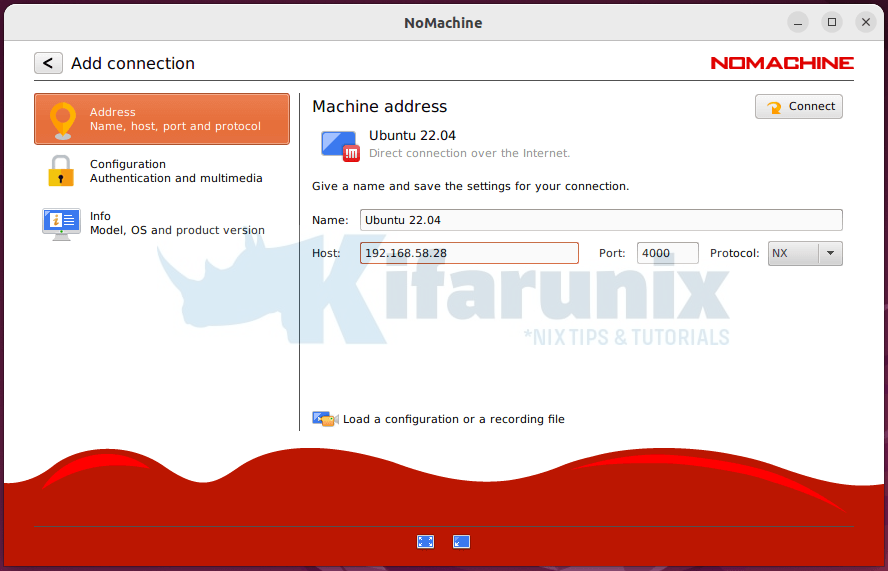
Set the connection name, IP address, Port (4000) and Protocol (NX).
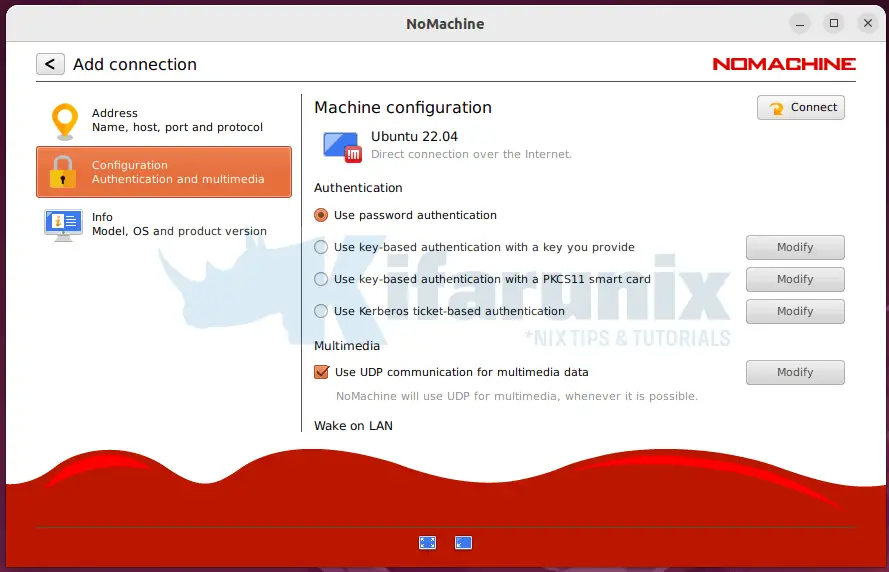
Setup the Authentication and Multimedia
- Use Password for authentication
- Use UDP port for multimedia
To initiate a remote connection:
- click Connect or simply right a connection name and start a connection.
- Next, verify the authenticity of the host by accepting the certificate fingerprint.
- Enter your remote access credentials.
Be sure to allow remote connections if at all you enabled the need for permissions to connect on the remote desktop.
Upon successful login, you should land on the desktop of the remote system.
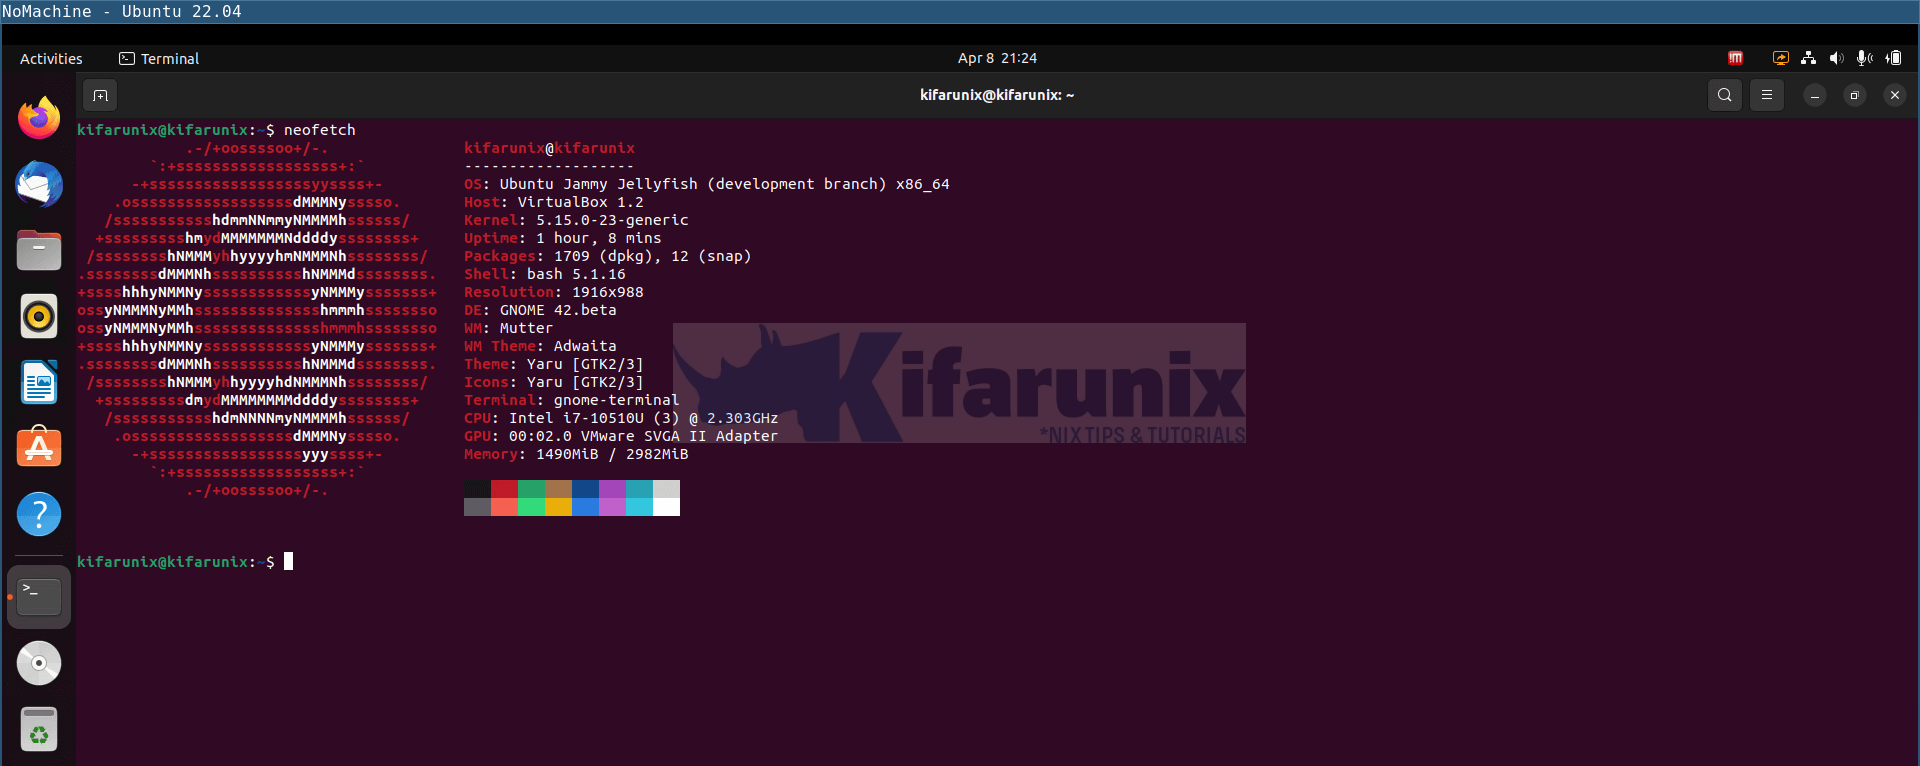
And there you go. You can now seamlessly use NoMachine for remote desktop connections to your Ubuntu 24.04/Ubuntu 22.04 desktop.
That marks the end of our tutorial on how to install NoMachine on Ubuntu.

