In this tutorial, you will learn how to install and setup Teleport access plane on Linux. According to the documentation page, Teleport is a Certificate Authority and an Access Plane for your infrastructure. With Teleport you can:
- Set up Single Sign-On and have one place to access your SSH servers, Kubernetes, Databases, Desktops, and Web Apps.
- Use your favorite programming language to define access policies to your infrastructure.
- Share and record interactive sessions across all environments.
Some of the notable features for Teleport include;
- Server Access: Single Sign-On, short-lived certificates, and audit for SSH servers.
- Application Access: Provide secure access to internal dashboards and web applications.
- Kubernetes Access: Single Sign-On, audit and unified access for Kubernetes clusters.
- Database Access: Secure access to SQL and NoSQL databases.
- Desktop Access: Secure browser-based access to desktop environments.
- Cloud: Connect your nodes, web apps, kubernetes clusters and databases to Teleport as a service.
- Enterprise: OIDC, SAML, compliance controls and commercial support.
Install and Setup Teleport Access Plane on Linux
Teleport is available in two editions: community and enterprise edition.
We will be using the community edition in this example setup.
Install Teleport on Linux
In this example tutorial, we are using an Ubuntu 20.04 system. Hence, to install Teleport on Ubuntu 20.04 Linux server;
Install Teleport repository GPG signing key;
wget -qO- https://deb.releases.teleport.dev/teleport-pubkey.asc \
| gpg --dearmor > /etc/apt/trusted.gpg.d/teleport.gpg
Install Teleport repository on Ubuntu 20.04;
echo "deb https://deb.releases.teleport.dev/ stable main" > /etc/apt/sources.list.d/teleport.listUpdate package cache;
apt updateInstall Teleport on Ubuntu 20.04 Linux;
apt install teleportConfigure Teleport on Linux
Next, you need to configure Teleport for secure SSH access.
- Set DNS resolvable hostnames for Teleport Server
Set the hostname of the Teleport server and update the DNS records accordingly.
hostnamectl set-hostname teleport.kifarunix-demo.comIf you don’t have a DNS server, set the name resolution on hosts file;
echo "192.168.59.23 teleport.kifarunix-demo.com teleport" >> /etc/hostsUpdate your domain names accordingly.
- Generate SSL/TLS certificates for Teleport Server
For a secured access to Teleport web interface, you need to generate SSL/TLS certificates. This can be the commercially signed certificates (if your Teleport is public facing) or self-signed (if your instance is local).
In this setup, we will use self-signed SSL certs and thus, the command below can be ran to generate them.
NOTE: The certificate must have a subject that corresponds to the domain of your Teleport host, e.g., *.kifarunix-demo.com. Replace the domain names accordingly.
openssl req -x509 -nodes -newkey rsa:4096 \
-keyout /var/lib/teleport/teleport.key \
-out /var/lib/teleport/teleport.pem -sha256 -days 3650 \
-subj "/C=US/ST=Oregon/L=Portland/O=Company Name/OU=Org/CN=*.kifarunix-demo.com"- Generate Teleport Configuration file
Once you have setup the domain name and generates the SSL certs, run the command below to generate Teleport configuration file.
teleport configure -o /etc/teleport.yaml  \
    --cluster-name=kifarunix-demo.com \
    --public-addr=teleport.kifarunix-demo.com:443 \
    --cert-file=/var/lib/teleport/teleport.pem \
    --key-file=/var/lib/teleport/teleport.key
This is the sample configuration file;
cat /etc/teleport.yamlversion: v2
teleport:
nodename: ubuntu20
data_dir: /var/lib/teleport
log:
output: stderr
severity: INFO
format:
output: text
ca_pin: []
diag_addr: ""
auth_service:
enabled: "yes"
listen_addr: 0.0.0.0:3025
cluster_name: kifarunix-demo.com
proxy_listener_mode: multiplex
ssh_service:
enabled: "yes"
labels:
env: example
commands:
- name: hostname
command: [hostname]
period: 1m0s
proxy_service:
enabled: "yes"
web_listen_addr: 0.0.0.0:443
public_addr: teleport.kifarunix-demo.com:443
https_keypairs:
- key_file: /var/lib/teleport/teleport.key
cert_file: /var/lib/teleport/teleport.pem
acme: {}
You can create your config file and you can test its validity using the --test option.
teleport configure --test /etc/teleport.yaml- Start Teleport Service
Next, start and enable Teleport service to run on system boot;
systemctl enable --now teleportCheck the status;
systemctl status teleport
● teleport.service - Teleport SSH Service
     Loaded: loaded (/lib/systemd/system/teleport.service; enabled; vendor preset: enabled)
     Active: active (running) since Sat 2022-03-18 15:02:19 UTC; 24s ago
   Main PID: 2144 (teleport)
      Tasks: 8 (limit: 2274)
     Memory: 36.2M
     CGroup: /system.slice/teleport.service
             └─2144 /usr/local/bin/teleport start --pid-file=/run/teleport.pid

Mar 18 15:02:21 teleport.kifarunix-demo.com teleport[2144]: 2022-03-18T15:02:21Z [DB:SERVIC] INFO Starting Postgres proxy server on 0.0.0.0:443. service/service.go:3158
Mar 18 15:02:21 teleport.kifarunix-demo.com teleport[2144]: 2022-03-18T15:02:21Z [DB:SERVIC] INFO Starting Database TLS proxy server on 0.0.0.0:443. service/service.go:3176
Mar 18 15:02:21 teleport.kifarunix-demo.com teleport[2144]: 2022-03-18T15:02:21Z [PROXY:SER] INFO Starting proxy gRPC server on [::]:443. service/service.go:3210
Mar 18 15:02:21 teleport.kifarunix-demo.com teleport[2144]: 2022-03-18T15:02:21Z [PROXY:SER] INFO Starting TLS ALPN SNI proxy server on [::]:443. service/service.go:3239
Mar 18 15:02:21 teleport.kifarunix-demo.com teleport[2144]: 2022-03-18T15:02:21Z INFO [NODE:1:CA] Cache "node" first init succeeded. cache/cache.go:742
Mar 18 15:02:21 teleport.kifarunix-demo.com teleport[2144]: 2022-03-18T15:02:21Z [PROC:1]    INFO Service node is creating new listener on 0.0.0.0:3022. service/signals.go>
Mar 18 15:02:21 teleport.kifarunix-demo.com teleport[2144]: 2022-03-18T15:02:21Z [NODE:1]    INFO Service 9.0.1:v9.0.1-0-g7bbe6f15c is starting on 0.0.0.0:3022 sqlite cach>
Mar 18 15:02:21 teleport.kifarunix-demo.com teleport[2144]: 2022-03-18T15:02:21Z [NODE:1]    INFO Service 9.0.1:v9.0.1-0-g7bbe6f15c is starting on 0.0.0.0:3022. utils/cli.>
Mar 18 15:02:21 teleport.kifarunix-demo.com teleport[2144]: [NODE]         Service 9.0.1:v9.0.1-0-g7bbe6f15c is starting on 0.0.0.0:3022.
Mar 18 15:02:21 teleport.kifarunix-demo.com teleport[2144]: 2022-03-18T15:02:21Z [PROC:1]    INFO The new service has started successfully. Starting syncing rotation
- Create Teleport Admin User
Run the command below to generate Teleport admin user. The Teleport users can be created using the tctl command in the format;
tctl users add --roles=ROLES [<flags>] <account>Thus;
tctl users add --roles=editor,access kifarunix-adminTo get the permissions of the role;
tctl get role/roleFor example;
tctl get role/editortctl will generate a signup token and give you a URL to share with a user. A user will have to complete account creation by visiting the URL.
Sample command output;
User "kifarunix-admin" has been created but requires a password. Share this URL with the user to complete user setup, link is valid for 1h:
https://teleport.kifarunix-demo.com:443/web/invite/1c2fd60cad32df99a65b75081f78bbda

NOTE: Make sure teleport.kifarunix-demo.com:443 points at a Teleport proxy which users can access.
- Finalize Teleport Setup on Browser
You can now access the link provided, which is valid for one hour (by default, can be adjusted using the --ttl).
If the firewall is running on the server, ensure you open port 443/tcp to allow external access.
https://teleport.kifarunix-demo.com:443/web/invite/1c2fd60cad32df99a65b75081f78bbdaYou can access the URL on browser.
Click Get Started to create an account.
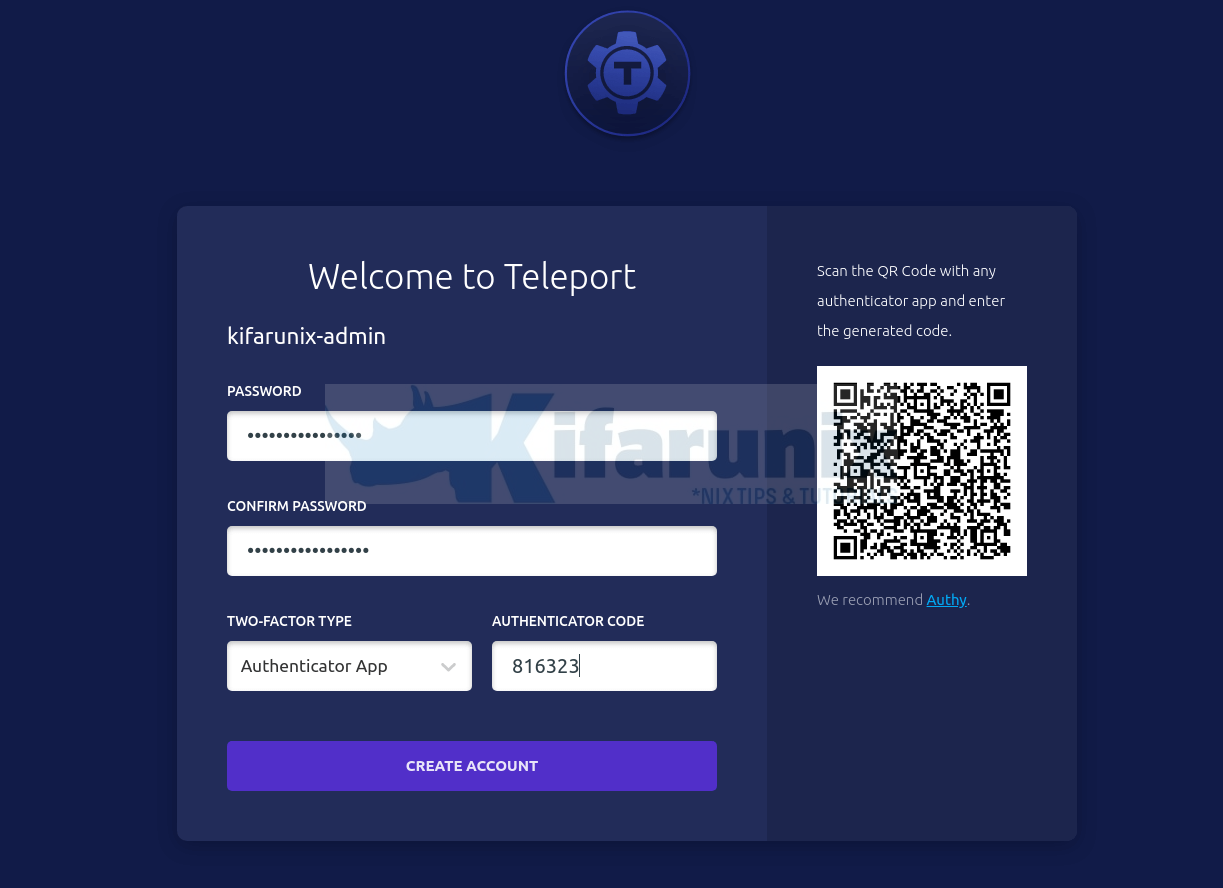
Set the password for your account and generate 2FA code by scanning the QR code using any authenticator app. I used Duo Mobile in this example.
Enter the 2FA code and proceed to create Teleport admin account.
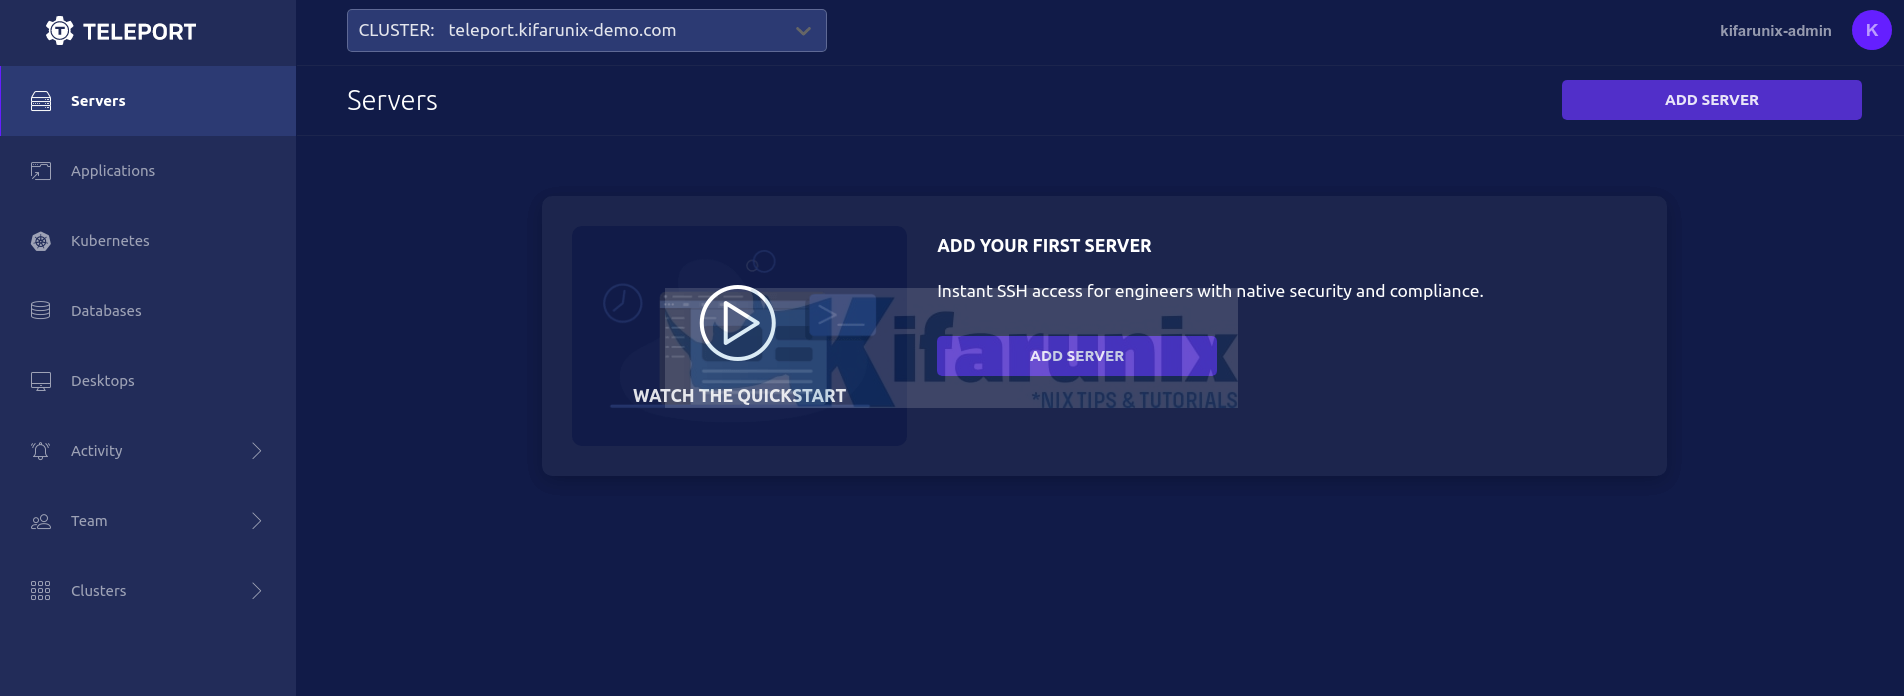
And there you go.
You can now proceed to add servers for secure access to the Teleport access plane.
Read more on Teleport Admin Guide
Other Tutorials
Mount Remote Filesystem Over SSH using SSHFS


