
Deploying Single Node OpenShift (SNO) using the Agent-Based Installer on KVM provides a fast, repeatable way to create a fully functional OpenShift cluster without dedicated hardware. Whether you’re building a lab environment, validating configurations, or preparing for production deployments, running SNO on KVM closely mirrors the installation workflow used on physical servers while requiring far fewer resources.
This guide walks through the complete deployment process, from preparing the KVM virtual machine and generating the agent ISO to completing the installation and validating the cluster. By the end, you’ll have a working Single Node OpenShift deployment and a clear understanding of the configuration choices that make the installation reliable.
Table of Contents
How to Deploy Single Node OpenShift (SNO) on KVM
What Single Node OpenShift Really Is
Single node OpenShift, usually written SNO, is a full OpenShift Container Platform cluster where the control plane and the compute role live on the same machine. There is one node. That node runs etcd, the Kubernetes API server, the controller manager, the scheduler, every cluster operator, the ingress controller, and your workloads.
It is not a stripped down distribution. It is not MicroShift, and it is not OKD. It is the same product with the same operators, the same OperatorHub, the same oc client, and the same upgrade path. What you give up is high availability, and that is the entire trade.
Three technical facts define the topology, and all three come straight from the Red Hat documentation:
controlPlane.replicasis set to1andcompute.replicasis set to0. Setting compute to zero is what makes the control plane node schedulable for ordinary workloads. Those two values together are what produce a single node cluster.- OVN-Kubernetes is the network plugin. Red Hat states plainly that OpenShiftSDN is not supported with single node OpenShift, and OVN-Kubernetes is the default and the only allowed plugin type for single node clusters.
- On bare metal and on certified hypervisors,
platform.none: {}is what you set ininstall-config.yaml. The only exceptions are AWS, Google Cloud, and Azure, which use their own platform values.
etcd runs as a single member. There is no quorum to lose because there is no quorum. If the node reboots, the cluster is down until it comes back. If the disk dies, the cluster is gone. Plan around that fact rather than pretending it is not there.
When SNO is the Right Call, and When it is Not
Single Node OpenShift is designed for environments where a small hardware footprint is more important than built-in high availability. Running the entire control plane and your workloads on a single machine simplifies deployment and reduces infrastructure costs, but it also means the cluster has a single point of failure. Understanding that trade-off is the key to deciding whether SNO is the right architecture.
SNO is well suited for the following scenarios:
- Edge and remote sites. Retail stores, factory floors, cell sites, ships, and other remote locations where deploying and maintaining a three-node control plane is impractical. The site itself is often the failure domain, making a single-node cluster an acceptable design.
- Labs and training. A single-node cluster provides the complete OpenShift experience, including the Kubernetes API, Operators, and cluster services, while requiring only one machine. It is an excellent platform for learning OpenShift, preparing for certification exams such as EX280, or building demonstrations.
- Development and CI. Ephemeral clusters created for development, testing, or continuous integration pipelines rarely require high availability. SNO minimizes resource usage while providing a production-grade OpenShift environment.
- Small production workloads. Applications that are stateless or protected by higher-level redundancy mechanisms can run successfully on SNO. In these deployments, resiliency is provided by the application architecture or by multiple independent sites rather than by the cluster itself.
SNO is a poor fit for the following scenarios:
- High-availability workloads. Every OpenShift update requires the node to reboot, making both the control plane and hosted workloads temporarily unavailable.
- Future migration to a three-node control plane. A Single Node OpenShift cluster cannot be converted into a highly available control plane after installation. While additional worker nodes can be added, the control plane remains a single node for the lifetime of the cluster.
- Replicated software-defined storage. Solutions such as OpenShift Data Foundation in replicated mode require multiple nodes. SNO deployments typically use LVM Storage or external storage systems instead.
If high availability is a requirement but hardware resources are limited, consider a Compact Cluster, where three nodes perform both control-plane and worker roles. OpenShift also supports two-node topologies with an arbiter or fencing for specific deployment scenarios. Refer to the links below:
How to Deploy Multinode OpenShift Cluster Using UPI/User Provisioned Infrastructure
How to Deploy an OpenShift Cluster Using Agent-Based Installer (Bootable ISO, KVM & Bare Metal)
Understanding the Single Node OpenShift installation options
Red Hat supports multiple ways to deploy Single Node OpenShift (SNO). Although each method ultimately produces the same cluster, they differ significantly in how they handle configuration, networking, validation, and automation. Choosing the right installation workflow is less about getting OpenShift running and more about how easy it will be to rebuild, troubleshoot, and maintain the cluster later.
For this guide, I use the Agent-Based Installer because it combines the simplicity of Assisted Installer with the flexibility of a fully offline, declarative deployment. Before explaining why, it is worth understanding the alternatives.
Method 1: Assisted Installer
The Assisted Installer is the quickest path to a working SNO cluster. After signing in to the Red Hat Hybrid Cloud Console, you create a new cluster, select Install Single Node OpenShift (SNO), complete the wizard, and download a discovery ISO. Once the target system boots from that ISO, it registers with the Assisted Installer service, appears as a discovered host, and the installation is started from the web console.
For proof-of-concept deployments and internet-connected labs, this workflow is difficult to beat. However, the cluster configuration exists primarily inside the web interface rather than as version-controlled files. That makes it less suitable for environments where deployments need to be reproduced consistently or audited over time.
Method 2: Manual Bootstrap-in-Place with coreos-installer
This workflow uses the OpenShift installer to generate a Bootstrap-in-Place configuration, downloads the Red Hat Enterprise Linux CoreOS (RHCOS) live ISO, and embeds the generated Ignition configuration into the ISO using coreos-installer.
The approach is fully supported and works in disconnected environments, but it is also the most hands-on installation method. Static networking is typically configured through kernel arguments or custom Ignition modifications, and there are no Assisted Installer pre-flight validations before installation begins.
One important operational consideration documented by Red Hat is that the certificates embedded in the generated live ISO are valid for only 24 hours. If installation does not begin within that window, the installer assets must be regenerated before creating a new ISO.
Many community tutorials build on this workflow by scripting static networking or relying on temporary /etc/hosts entries for name resolution. While these techniques can work in laboratory environments, they fall outside the declarative workflow supported by the installer and are more difficult to reproduce consistently.
Method 3: Agent-Based Installer
The Agent-Based Installer packages the Assisted Installer service into a bootable ISO that you generate locally. Instead of configuring the cluster through a web interface, you define it using two declarative files: install-config.yaml and agent-config.yaml. Running a single command generates the installation ISO, which contains everything required to deploy the cluster.
When the system boots, the embedded Assisted Installer validates the host, configures the environment, and performs the installation locally. For Single Node OpenShift, the only node also serves as the rendezvous host responsible for orchestrating the deployment.
This is the workflow used throughout this guide because it offers several practical advantages:
- Declarative configuration. The complete cluster definition lives in
install-config.yamlandagent-config.yaml, making deployments repeatable and suitable for version control. - Disconnected operation. Because the Assisted Installer service is embedded inside the ISO, installation does not depend on the Hybrid Cloud Console or an internet connection.
- Built-in validation. The installer validates both the configuration files and the target host before installation begins, catching common mistakes such as duplicate MAC addresses, unsupported network settings, or invalid node definitions.
- Native networking support. Static IP addresses, VLANs, and bonded interfaces are described using NMState instead of kernel arguments or custom Ignition modifications.
- Explicit installation disk selection. Using
rootDeviceHints, you can identify the installation target precisely, reducing the risk of installing onto the wrong disk in systems with multiple storage devices. - A consistent workflow across cluster sizes. The same installation process applies to Single Node OpenShift, Compact Clusters, and highly available multi-node deployments, making the knowledge transferable as your infrastructure grows.
The Agent-Based Installer provisions the cluster, but it does not provision the underlying infrastructure. Creating the virtual machine, powering on a physical server, or mounting the ISO through virtual media remains your responsibility.
Method 4: Installer-Provisioned Infrastructure (Cloud)
Public cloud deployments on AWS, Microsoft Azure, and Google Cloud use the standard installer-provisioned infrastructure (IPI) workflow with controlPlane.replicas: 1 and compute.replicas: 0. Unlike bare-metal deployments, these platforms still require a temporary bootstrap node during installation and have different infrastructure requirements.
Because this guide focuses on KVM and bare-metal deployments, cloud-based SNO installations are outside its scope.
Beyond individual deployments
Managing a handful of SNO clusters is straightforward with the Agent-Based Installer. Managing hundreds is a different challenge.
For large-scale edge deployments, Red Hat recommends combining GitOps Zero Touch Provisioning (ZTP) with Red Hat Advanced Cluster Management and SiteConfig or ClusterInstance resources. Image-based installation is another supported approach that deploys a preconfigured Single Node OpenShift image to multiple target systems. These workflows build on the same deployment concepts covered in this guide but target fleet-scale operations rather than individual clusters.
Installation Methods Comparison
| Feature | Assisted Installer | Manual Bootstrap-in-Place | Agent-Based Installer |
|---|---|---|---|
| Configuration stored as files | No | Partial | Yes |
| Works in disconnected environments | No | Yes | Yes |
| Static networking | Web wizard | Kernel arguments or Ignition | NMState |
| Explicit disk selection | Wizard | bootstrapInPlace.installationDisk | rootDeviceHints |
| Built-in pre-flight validation | Yes | No | Yes |
| Suitable for version control | No | Partial | Yes |
| Uses the same workflow for multi-node clusters | Yes | No | Yes |
| Requires the Hybrid Cloud Console | Yes | No | No |
Hardware and Platform Requirements
This guide was tested using OpenShift Container Platform 4.22. The Agent-Based Installer workflow, configuration files, and installation process have remained consistent across recent OpenShift releases, so the same steps also apply to OpenShift 4.19 and later with only minor changes, such as the release image and installation binaries. Always review the release notes for the version you intend to deploy before starting the installation.
Minimum Hardware Requirements
Red Hat documents the following minimum resources for a Single Node OpenShift cluster.
| Resource | Minimum |
|---|---|
| CPU | 8 vCPUs |
| Memory | 16 GB RAM |
| Storage | 120 GB |
These values should be treated as the minimum required to complete the installation rather than the resources needed for a comfortable production deployment. Additional Operators, such as OpenShift Virtualization, OpenShift Data Foundation, or Service Mesh, can increase both CPU and memory requirements significantly.
One point worth understanding is the distinction between vCPUs and physical CPU cores. If Hyper-Threading (Intel) or Simultaneous Multithreading (SMT) is enabled, each hardware thread is presented as a separate vCPU. Although an eight-thread system technically satisfies the minimum requirement, it often struggles once cluster Operators and user workloads are running.
Recommended Hardware
For a responsive lab environment or a small production deployment, I would recommend substantially more resources than the documented minimum.
| Resource | My Recommendation |
|---|---|
| CPU | 16 physical cores or better |
| Memory | 64 GB RAM |
| System disk | 300 GB or larger NVMe SSD |
| Additional storage | A second dedicated disk when using LVM Storage |
If you plan to install OpenShift Virtualization, Red Hat recommends providing a second local storage device of at least 50 GiB for virtual machine storage.
Validate the Installation Storage Before Deployment
Before installing Single Node OpenShift, validate the storage that will host the cluster.
The disk used during installation becomes the storage location for RHCOS, /var/lib/etcd, container images, logs, and workloads. A slow storage layer can make the cluster unreliable even when CPU and memory requirements are met.
The storage you test depends on your deployment type:
- Bare metal: Test the physical disk that will be selected with
rootDeviceHints. - KVM or any other Hypervisor: Test the filesystem, volume, or block device that will store the SNO VM disk (
raw,qcow2, or another virtual disk format).
Red Hat provides the etcd-perf benchmark to measure storage latency before deployment.
Example:
sudo mkdir -p /mnt/storage/etcd-testsudo podman run \
--volume /mnt/storage/etcd-test:/var/lib/etcd:Z \
quay.io/openshift-scale/etcd-perf
Replace /mnt/storage with the location of the storage that will back the OpenShift installation disk.
The important metric is 99th percentile fsync latency. Red Hat recommends keeping this below 10 ms.
If the storage does not meet this requirement, fix the storage before deploying OpenShift. It is much easier to replace a slow disk or move a VM disk to better storage before installation than to troubleshoot a slow cluster afterward.
Platform Requirements
Beyond hardware, a few platform requirements are worth planning for before installation begins.
- Administration host. Use a separate Linux workstation or server (or better known as a bastion host) to generate the installation assets and monitor the deployment. This system runs
openshift-installandocbut is not part of the cluster. - Supported processor architectures. Single Node OpenShift supports x86_64, arm64, ppc64le, and s390x.
- Supported deployment platforms. SNO can be deployed on bare metal and supported virtualization platforms. For most on-premises deployments, the installation uses
platform: none. - Baseboard Management Controller (BMC). A BMC is required only if you intend to boot the installation ISO through virtual media or automate deployment using out-of-band management. This requirement does not apply when deploying a virtual machine on KVM.
- Persistent networking. The cluster node should always receive the same IP address, either through a DHCP reservation or a static configuration. OpenShift depends on stable communication between components such as the Kubernetes API server and etcd, making persistent addressing a deployment requirement rather than a convenience.
Planning the Installation: Names, Networking, and Storage
Most installation failures are caused long before the Agent-Based Installer ISO is generated. Cluster names, network ranges, DNS records, and the installation disk all become part of the cluster definition during deployment. While some settings can be changed later, many cannot. Spending a few minutes planning these values now is far easier than rebuilding the cluster after installation.
Before creating install-config.yaml and agent-config.yaml, decide on the following values.
| Item | Example | Notes |
|---|---|---|
| Cluster name | sno | Becomes metadata.name. Use lowercase letters, numbers, and hyphens. |
| Base domain | kifarunix.com | Becomes baseDomain. Cannot be changed after installation. |
| Cluster FQDN | sno.kifarunix.com | <cluster-name>.<base-domain> |
| Node hostname | sno-01 | Define explicitly in agent-config.yaml. |
| Node IP address | 10.185.10.250 | Static address or permanent DHCP reservation. |
| Default gateway | 10.185.10.10 | Must be reachable from the node. |
| DNS server | 10.184.10.51 | Must host the required OpenShift DNS records. |
| Machine network | 10.185.10.0/24 | The physical network containing the node. |
| Cluster network | 10.128.0.0/14 | Pod network. Leave the default unless it overlaps with an existing network. |
| Service network | 172.30.0.0/16 | Service IP range. Leave the default unless it conflicts with your environment. |
| Installation disk | KVM virtio-blk: | Referenced through rootDeviceHints. |
| Primary NIC | enp0s1 (verify) | The interface used for cluster networking. |
| Primary NIC MAC | 52:54:00:aa:bb:cc | Used by the Agent-Based Installer to identify the host. |
Avoid common network conflicts
Before settling on your network ranges, verify that they do not overlap with networks already in use.
- Podman bridge network:
- If you use Podman on the administration workstation, be aware that it creates a bridge network using 10.88.0.0/16 by default. Red Hat specifically warns against placing the machine network inside this range because it can prevent the cluster from installing correctly.
- Likewise, if another network in your environment already uses 10.88.0.0/16, communication between external systems and the cluster may fail after installation. If your lab currently uses this subnet, choose a different machine network before proceeding.
Existing Enterprise Networks
The default OpenShift networking values work well for most deployments:
- Cluster network:
10.128.0.0/14 - Service network:
172.30.0.0/16
However, these ranges must not overlap with existing routed networks in your environment. The cluster and service networks are defined during installation and cannot be changed later, so verify them before generating the installation ISO.
Validate OpenShift DNS Records
If there is one prerequisite worth getting right, it is DNS. The Agent-Based Installer expects every required DNS record to exist before the node boots. Missing or incorrect records often result in installation failures that appear unrelated to DNS, making them unnecessarily difficult to troubleshoot.
For a Single Node OpenShift cluster, all of the following records resolve to the node’s IP address.
| Purpose | Record | Requirement |
|---|---|---|
| Kubernetes API | api.<cluster>.<base-domain> | A record |
| Internal API | api-int.<cluster>.<base-domain> | A record |
| Application ingress | *.apps.<cluster>.<base-domain> | Wildcard A record |
Forward DNS is only half of the story.
For platform none deployments, Red Hat requires reverse DNS because Red Hat Enterprise Linux CoreOS (RHCOS) uses PTR records to determine node hostnames unless a hostname is supplied through DHCP. Those hostnames are then used when generating the certificate signing requests required during cluster installation.
Without working reverse DNS, systems often boot with unexpected hostnames such as localhost, leading to certificate validation failures and node registration problems that are difficult to trace back to DNS.
To avoid these issues:
- Define the hostname explicitly in
agent-config.yaml. - Create a matching PTR record for the node.
- If using DHCP, configure it to supply the correct hostname.
A PTR record is not required for the wildcard application route.
The exact configuration depends on the DNS server you use. Rather than duplicating BIND, dnsmasq, or other DNS server configurations here, refer to the dedicated DNS setup guides available on Kifarunix.
Once your DNS server is configured, confirm that the required forward and reverse records resolve correctly before generating the installation ISO.
Verify DNS before generating the ISO
Never assume the configuration is correct. Query the DNS server that the cluster will actually use from your bastion host.
dig +short api.sno.kifarunix.comSample output;
10.185.10.250The rest should resolve to the same IP.
dig +short api-int.sno.kifarunix.comdig +short console-openshift-console.apps.sno.kifarunix.comdig +short -x 10.185.10.250Sample output;
sno-01.sno.kifarunix.com.The forward lookups should all resolve to the cluster node IP address, while the reverse lookup should return the node’s fully qualified domain name. If any lookup fails, stop and correct DNS before generating the Agent-Based Installer ISO. Doing so now is far easier than troubleshooting a failed installation later.
What You Do Not Need
- No Bootstrap Node
- SNO does not require a separate bootstrap machine.
- With the agent-based installer:
- The node bootstraps itself.
- The ISO contains the required configuration.
- The node installs RHCOS, reboots, and becomes the OpenShift cluster.
- In a multi-node deployment, a temporary bootstrap node creates the initial control plane. In SNO, the single node performs this role itself.
- Exception: Cloud installer-provisioned deployments on AWS, Azure, and Google Cloud may still create a temporary bootstrap instance.
- No DHCP Server (Unless You Choose It)
- DHCP is optional. SNO supports two network approaches:
- Static IP
- Define the NIC configuration in
agent-config.yamlusingnetworkConfig. - Network settings are embedded into the ISO.
- No DHCP server is required.
- Define the NIC configuration in
- DHCP Reservation
- Leave
networkConfigempty. - Configure DHCP to always assign the same address.
- Set
rendezvousIPto that address.
- Leave
- Static IP
rendezvousIPis embedded into the ISO during generation, so the node address must be known before installation.- Static networking removes an additional dependency.
- DHCP is optional. SNO supports two network approaches:
- No PXE (Unless You Need It)
- PXE boot is supported but usually unnecessary for a single-node deployment.
- The installer can generate PXE assets:
openshift-install agent create pxe-files --dir cluster - Generated assets include:
- Kernel
- Initrd
- Root filesystem
- iPXE script
- PXE is useful for large-scale deployments where many clusters are installed.
- For a single SNO node, ISO boot is simpler:
- No DHCP infrastructure.
- No TFTP infrastructure.
- Easier troubleshooting.
- No Load Balancer
- A load balancer is required in multi-node clusters to distribute traffic across control-plane and worker nodes.
- In SNO, there is only one node, so there is nothing to distribute.
- All endpoints point directly to the node IP:
api.<cluster>.<base_domain>→ node IPapi-int.<cluster>.<base_domain>→ node IP*.apps.<cluster>.<base_domain>→ node IP
- A proxy or load balancer may still be used for operational reasons:
- Providing a stable endpoint during hardware changes.
- Creating a controlled network boundary.
- If used, configure it as layer-4 passthrough. OpenShift should terminate TLS.
- What You Still Need
- DNS:
- Forward records.
- Reverse records.
- NTP access.
- Default gateway.
- Registry access:
quay.ioregistry.redhat.io- Or an internal mirror registry.
- The agent ISO contains the assisted installer components, but not the full OpenShift release payload.
- During installation, the node downloads hundreds of container images. Without registry access or a mirror, installation will fail.
- DNS:
NTP, Firewall, And Connectivity
A Single Node OpenShift (SNO) cluster has much simpler networking requirements than a multi-node deployment. Since all cluster components run on the same host, most internal traffic never leaves the machine. What still matters is accurate time, outbound connectivity, and exposing a small set of ports.
NTP
Clock skew is a common cause of bootstrap failures, often surfacing as TLS or certificate errors. The assisted installer validates the host time during discovery, so the node should be synchronized before installation.
I recommend configuring additionalNTPSources in agent-config.yaml. It is a single line of configuration, works regardless of whether you use static networking or DHCP, and ensures the installer always uses the correct NTP servers.
If your environment already provides NTP servers through DHCP, you can rely on that instead.
Connectivity
The node must be able to reach quay.io and registry.redhat.io, or your mirror registry in disconnected environments. During installation, OpenShift downloads the release payload and hundreds of container images, so installation time depends largely on the available bandwidth.
If your environment uses an HTTP proxy, configure proxy in install-config.yaml and add your CA certificate to additionalTrustBundle.
For disconnected environments, mirror the release images with oc-mirror v2 and configure imageContentSources to use the local registry.
Firewall
Unlike a multi-node cluster, most cluster traffic never leaves the node. In most SNO deployments, only the following inbound ports need to be accessible:
| Port | Purpose | Access |
|---|---|---|
| 6443/TCP | Kubernetes API | Administrators, automation, and CI/CD |
| 443/TCP | OpenShift Console and application ingress | Users |
| 80/TCP | HTTP ingress (optional) | Users |
| 22/TCP | SSH (core) | Administrators only |
The node also requires outbound access to HTTPS (443), DNS, and NTP. If your environment enforces egress filtering, follow Red Hat’s documented firewall allowlist for the complete list of required endpoints.
Preparing the Administration Host (Bastion Host)
Install OpenShift CLI Tools
The administration host, or bastion, is any RHEL, Fedora, Rocky, or Alma machine with network access to the node and to the internet. It runs openshift-install and oc, and nothing about it becomes part of the cluster.
Three tools go on it:
openshift-installbuilds the agent ISO and monitors the installation.ocis the primary OpenShift administration tool. It extendskubectlwith OpenShift-specific commands and includes allkubectlfunctionality, so there is no need to installkubectlseparately.nmstatectlis called by the installer to validate the NMState inagent-config.yaml. Without it, ISO generation fails.
Step 1: Create a directory for the installation files and artifacts, and work from it.
mkdir -p ~/sno-agent-install
cd ~/sno-agent-install
Step 2: Download and install the OpenShift client.
wget https://mirror.openshift.com/pub/openshift-v4/x86_64/clients/ocp/stable/openshift-client-linux.tar.gzsudo tar xzf openshift-client-linux.tar.gz -C /usr/local/bin/ ocVerify it:
oc version --clientClient Version: 4.22.5
Kustomize Version: v5.7.1Step 3: Install the installer.
wget https://mirror.openshift.com/pub/openshift-v4/x86_64/clients/ocp/stable/openshift-install-linux.tar.gzsudo tar xzf openshift-install-linux.tar.gz -C /usr/local/bin/ openshift-installVerify it:
openshift-install versionopenshift-install 4.22.5
built from commit 2e33096a58847329454b34ba11d74d770a688e29
release image quay.io/openshift-release-dev/ocp-release@sha256:e6467b367dd26e4c3d49ef8b949dba403df5bb9274fe045faf651377541f401a
release architecture amd64Note the release image digest. That is the exact payload your cluster will be built from, and it is the thing to quote when you open a support case.
Two notes on the URL above:
stableresolves to the current stable release, which is convenient but means two people running this on different days get different clusters. If you want a rebuild months from now to produce an identical cluster, replacestablewith the exact z-stream, for example4.22.5. Andx86_64in the path is the architecture of the bastion, not of the cluster. They are the same in almost every case, but if you are building an aarch64 cluster from an x86_64 bastion, the binaries you download must still match the bastion.- Whichever you choose, take
ocandopenshift-installfrom the same release. Mixing an older installer with a newer client is a self-inflicted wound.
Step 4: Install nmstatectl. This one is not optional and it is not obvious.
sudo dnf install -y nmstateThe installer shells out to nmstatectl when you run openshift-install agent create image, to validate the networkConfig block for every host before it will build an ISO. It checks interface names and types, whether Ethernet, bond, or VLAN, addressing, DNS resolvers, routes, bond options, and MTU. Without it on the bastion, ISO generation fails with:
failed to validate network yaml for host 0
failed to execute 'nmstatectl gc'
exec: "nmstatectl": executable file not found in $PATH
Every static-IP SNO install uses networkConfig, so this applies to you. On non-RHEL hosts, install the equivalent nmstate package for your distribution.
Preparing Deployment Configuration Files
The agent-based installation process relies on two mandatory YAML configuration files, install-config.yaml and agent-config.yaml. These files define cluster-wide settings and host-level configuration, and must be accurate and complete.
For a single node cluster, both files are considerably shorter than their multi-node equivalents. There is one host, no load balancer, and no bootstrap node to account for.
Step 1: Download OpenShift Deployment Pull Secret
Before creating these files, obtain your Pull Secret from Red Hat, which authenticates your cluster to Red Hat’s container image registries.
To download the pull secret:
- Log in to the Red Hat Customer Portal at https://cloud.redhat.com/openshift/install/pull-secret.
- If you do not have an account, create one or use your existing Red Hat account credentials.
- After logging in, you will see the option to download your Pull Secret as a JSON file or copy it to the clipboard.
- Save this file securely on your bastion host, in the same working directory created above.
The Pull Secret is referenced in install-config.yaml to allow the installer and the cluster node to pull the required OpenShift images during installation and operation.
Step 2: Configure SSH Keys for Agent-Based Installation
The public SSH key you provide is embedded into the node as an authorized key for the core user. It gives you:
- Direct access to the node to inspect the agent and assisted service logs while the installation is running.
- A way into the system if the installation fails before the API is available.
This is your only interactive access to the node if something goes wrong, so do not skip it.
If you do not already have an SSH key pair for the installation, create one on your bastion host:
ssh-keygen -t rsa -b 4096 -C "openshift-agent-install"- When prompted for a file location, accept the default (
~/.ssh/id_rsa) or specify a custom path, for example~/sno-agent-install/id_rsa. - You may optionally set a passphrase, but for automated installations leaving it empty is common.
This generates two files:
- Public key:
id_rsa.pub(Or the name you specified when generating the key). This is added toinstall-config.yaml. - Private key:
id_rsa(Or the name you specified when generating the key). Keep this secure. You will use it to SSH into the node.
Step 3: Prepare the Install Configuration (install-config.yaml)
The install-config.yaml file defines the cluster’s global configuration, including:
- Cluster metadata such as cluster name and base domain
- Pull secret
- SSH public key
- Networking settings: cluster network, service network, and machine network
- Control plane and compute replica counts
Pay particular attention to the networking section, as those values must match your environment.
Below is my sample configuration file:
cat > install-config.yaml << 'EOF'
apiVersion: v1
baseDomain: kifarunix.com
metadata:
  name: sno
compute:
- architecture: amd64
  hyperthreading: Enabled
  name: worker
  replicas: 0
controlPlane:
  architecture: amd64
  hyperthreading: Enabled
  name: master
  replicas: 1
networking:
  networkType: OVNKubernetes
  clusterNetwork:
  - cidr: 10.128.0.0/14
    hostPrefix: 23
  serviceNetwork:
  - 172.30.0.0/16
  machineNetwork:
  - cidr: 10.185.10.0/24
platform:
  none: {}
pullSecret: 'REPLACE_WITH_YOUR_PULL_SECRET'
sshKey: 'REPLACE_WITH_YOUR_SSH_PUBLIC_KEY'
EOF
Before using the file above, update the following fields to match your environment.
baseDomain: Replacekifarunix.comwith a domain you control. This domain forms the cluster’s fully qualified domain names, for exampleapi.sno.<your-domain>and*.apps.sno.<your-domain>. It cannot be changed after installation.metadata.name: Replacesnowith your desired cluster name. This must match the DNS records you created earlier.controlPlane.replicas: 1andcompute.replicas: 0: These two values are what produce a single node cluster. Setting compute replicas to zero is what makes the control plane node schedulable for ordinary workloads. Do not change them.networking.machineNetwork: Ensure the CIDR matches the actual network where the node is deployed. This network must be reachable by the node, must not overlap withclusterNetworkorserviceNetwork, and must not conflict with any existing networks in your environment.networking.networkType: Must beOVNKubernetes. OpenShiftSDN is not supported with single node OpenShift, and the installer validates this before building the ISO.pullSecret: ReplaceREPLACE_WITH_YOUR_PULL_SECRETwith the full contents of the Pull Secret downloaded earlier. Paste it exactly as provided, including all braces and quotation marks, on a single line.sshKey: ReplaceREPLACE_WITH_YOUR_SSH_PUBLIC_KEYwith the contents of your public key, for exampleid_rsa.pub.
The platform: none: {} setting tells OpenShift that there is no infrastructure provider to integrate with, which is what you use for bare metal and virtual machines. It is also the setting that exempts single node clusters from the load balancer requirements.
A note on clusterNetwork and serviceNetwork: the defaults work for most deployments, but they cannot be changed after installation. Confirm they do not overlap with any routed network in your environment before generating the ISO.
Step 4: Create agent-config.yaml
The agent-config.yaml file defines the node’s specific configuration. This is where networking becomes critical.
Here is my sample configuration:
cat > agent-config.yaml << 'EOF'
apiVersion: v1alpha1
kind: AgentConfig
metadata:
  name: sno
rendezvousIP: 10.185.10.250
additionalNTPSources:
  - 10.184.10.51
hosts:
  - hostname: sno-01.sno.kifarunix.com
    role: master
    interfaces:
      - name: enp1s0
        macAddress: 02:AC:10:00:00:10
    rootDeviceHints:
      deviceName: /dev/vda
    networkConfig:
      interfaces:
        - name: enp1s0
          type: ethernet
          state: up
          mac-address: 02:AC:10:00:00:10
          ipv4:
            enabled: true
            address:
              - ip: 10.185.10.250
                prefix-length: 24
            dhcp: false
      dns-resolver:
        config:
          server:
            - 10.184.10.51
      routes:
        config:
          - destination: 0.0.0.0/0
            next-hop-address: 10.185.10.10
            next-hop-interface: enp1s0
EOF
Critical agent-config.yaml settings:
rendezvousIP: 10.185.10.250: The most important line. It tells the installer which node runs the Assisted Service first and acts as the temporary bootstrap. On a multi-node cluster this is the first control plane node. On a single node cluster it is the only node, so this value is simply the node’s own IP address. Because it is embedded into the ISO at generation time, the node’s address must be known before you build the image.hostname: Set this explicitly. RHCOS derives the hostname from reverse DNS or DHCP when it is not supplied, and a node that comes up namedlocalhostproduces certificate and registration failures that are difficult to trace back to DNS. Setting it here removes that risk entirely.role: master: Must bemasterfor the single node. The rendezvous IP must belong to a host with the master role.macAddress: Must match the MAC address you assign to the VM. This is how the installer matches configuration to hardware. This example uses locally administered MAC addresses beginning with02:AC:10:00:00:.rootDeviceHints.deviceName: /dev/vda: For KVM guests using virtio, the disk appears as/dev/vda. If you attach the disk over virtio-scsi it appears as/dev/sda. On bare metal, use a persistent path under/dev/disk/by-path/, since kernel device names are not stable across reboots.ipv4.dhcp: false: This deployment uses a static address. If you use DHCP with a permanent reservation instead, set this totrueand remove theaddresssection.additionalNTPSources: Adds NTP servers to the node in addition to any configured elsewhere. Clock skew is a common cause of bootstrap failures that present as certificate errors, and the assisted service validates host time during discovery.
The interface name (enp1s0 in this example) depends on your virtual machine configuration:
enp1s0: typical for KVM with default virtio networkingens192: common in VMware environmentseth0: older naming convention
The name here does not need to match the guest’s real device name, because the installer matches on MAC address. To confirm the interface name, boot a test VM from a live image and run the command: ip addr show.
Step 5: Generate the Agent ISO
This step reads your configuration files created above and produces a single bootable ISO that installs OpenShift on the node.
Start by creating a clean working directory for the installation artifacts:
mkdir -p ~/sno-agent-install/clusterCopy the configuration files into the installation directory:
cp ~/sno-agent-install/{install-config.yaml,agent-config.yaml} ~/sno-agent-install/cluster/Copy them rather than move them. The installer consumes both files during ISO generation, and they will no longer exist in the cluster directory afterwards. Keeping the originals means a rebuild is a two command exercise rather than an archaeology project.
Next, generate the agent-based installation ISO:
openshift-install agent create image --dir ~/sno-agent-install/cluster --log-level=infoThis step typically takes 3 to 5 minutes.
Watch the output carefully. Most failures at this stage are caused by YAML syntax errors, incorrect configuration values, or a missing nmstatectl binary.
Sample bootable ISO generation output;
INFO Configuration has 1 master replicas, 0 arbiter replicas, and 0 worker replicas
INFO The rendezvous host IP (node0 IP) is 10.185.10.250
INFO Extracting base ISO from release payload
INFO Base ISO obtained from release and cached at [/home/sno/.cache/agent/image_cache/coreos-x86_64.iso]
INFO Consuming Install Config from target directory
INFO Consuming Agent Config from target directory
INFO Generated ISO at /home/sno/sno-agent-install/cluster/agent.x86_64.iso.
The first line is a useful sanity check. It should read 1 master and 0 worker replicas. If it reports anything else, your install-config.yaml replica counts are wrong and you are not building a single node cluster.
The command generates the bootable ISO alongside other important files:
tree clustercluster/
├── agent.x86_64.iso
├── auth
│ ├── kubeadmin-password
│ └── kubeconfig
└── rendezvousIP
1 directory, 4 filesagent.x86_64.iso: the bootable ISO you attach to the VM.auth/kubeadmin-password: the OpenShift web console password for the temporarykubeadminaccount.auth/kubeconfig: CLI access to the cluster.rendezvousIP: the rendezvous host address recorded by the installer.
Guard the auth directory. It contains the cluster’s administrative credentials.
Since the ISO was generated on the bastion host, copy it to the KVM host where the VM will be created:
scp ~/sno-agent-install/cluster/agent.x86_64.iso user@kvm-host:~/Downloads/Create the Single Node OpenShift VM
Now create the virtual machine that becomes the SNO OpenShift cluster on your KVM. Unlike a multi-node deployment, there is only one VM here, no boot ordering to coordinate, and no separate bootstrap machine.
Step 1: Confirm the Machine Network is Created and Running
Libvirtd and virt-manager should already be running on the KVM host. The network used for the cluster in this example is called demo-02.
Get more details about this network from the KVM host:
sudo virsh net-info demo-02Name: demo-02
UUID: 21995a51-88af-4a9c-8f42-d264bea76f99
Active: yes
Persistent: yes
Autostart: yes
Bridge: virbr10The node must be able to reach the DNS server, the gateway, and the internet or a mirror registry through this network.
Step 2: Create the Node Disk
Create a directory to store the VM disk. This step is optional, and the default storage location is used if you do not specify a path.
In this example I use /mnt/vol01/sno-cluster because it has enough free space. Adjust the path based on your environment:
sudo mkdir -p /mnt/vol01/sno-clusterThe disk you create here is the disk etcd will run on. There is no separate etcd device unless you add one later, so its latency directly determines how responsive the cluster feels. If you have not already benchmarked the underlying storage, do it now, before the VM exists (/mnt/vol01 is where I will create my SNO vm image):
sudo mkdir -p /mnt/vol01/etcd-testsudo podman run --rm --volume /mnt/vol01/etcd-test:/var/lib/etcd:Z quay.io/openshift-scale/etcd-perfRed Hat’s guidance is that the 99th percentile of fsync should stay below 10 ms. If the storage cannot meet that, move the VM disk to a faster device before installing rather than troubleshooting a sluggish cluster afterwards.
Sample output from the command above;
...
  "disk_util" : [
    {
      "name" : "sda",
      "read_ios" : 269623,
      "write_ios" : 313353,
      "read_merges" : 0,
      "write_merges" : 6,
      "read_ticks" : 36574,
      "write_ticks" : 15754,
      "in_queue" : 52328,
      "util" : 86.068855
    }
  ]
}
--------------------------------------------------------------------------------------------------------------------------------------------------------
INFO: 99th percentile of fsync is 164864 ns
INFO: 99th percentile of the fsync is within the recommended threshold: - 10 ms, the disk can be used to host etcd
As shown, the 99th percentile fsync latency is well below the recommended 10 ms threshold, indicating the disk is suitable for hosting etcd.
So, let’s create the disk. Single node OpenShift requires a minimum of 120 GB, but because this one node holds RHCOS, etcd, container images, logs, and every workload you deploy, I allocate considerably more:
sudo qemu-img create -f raw -o preallocation=falloc /mnt/vol01/sno-cluster/sno-01.raw 300GI used preallocated raw. Why raw? This is because the raw storage format has a performance advantage over QCOW2 because no formatting is applied, and when a guest writes to a given offset in its virtual disk the I/O is written to the same offset on the backing file.
If storage space on the host is the binding constraint, use qcow2 with preallocation instead:
sudo qemu-img create -f qcow2 -o preallocation=falloc,cluster_size=64k \
  /mnt/vol01/sno-cluster/sno-01.qcow2 300G
You need to know that:
- A preallocated 300 GB raw image consumes 300 GB on the host immediately. If that is a problem, qcow2 is the right answer, and the reason is capacity rather than performance.
Step 3: Create and Start the Node
Before proceeding, confirm the agent ISO is present on the KVM host:
ls -alh ~/Downloads/agent.x86_64.iso-rw-r--r-- 1 kifarunix kifarunix 1.4G Jul 25 23:53 /home/kifarunix/Downloads/agent.x86_64.isoThen execute the command below to create and boot the SNO VM on KVM:
sudo virt-install \
  --name sno-01 \
  --memory 65536 \
  --vcpus 16 \
  --cpu host-passthrough \
  --disk path=/mnt/vol01/sno-cluster/sno-01.raw,device=disk,bus=virtio,cache=none,io=native,discard=unmap \
  --cdrom ~/Downloads/agent.x86_64.iso \
  --os-variant rhel9.0 \
  --network network=demo-02,model=virtio,mac=02:AC:10:00:00:10 \
  --boot hd,cdrom,menu=on \
  --graphics vnc,listen=127.0.0.1 \
  --noautoconsole
Several options here are deliberate:
--memory 65536and--vcpus 16: The documented minimum is 8 vCPUs and 16 GB RAM, but that is the floor for completing an installation, not for running a usable cluster. Since this node runs the control plane and your workloads, allocate more if the host allows it.cache=none,io=native: etcd is sensitive to write latency. Leaving the default writeback cache means the guest receives fsync acknowledgements once data reaches host RAM rather than the device, which produces excellent benchmarks and a cluster that misbehaves under load.--boot hd,cdrom,menu=on: The disk is placed ahead of the CD. The first boot finds an empty disk and falls through to the ISO, and every boot afterwards goes straight to the installed system. This is why there is no separate step to eject the ISO later.--cpu host-passthrough: The guest sees the real CPU features.mac=02:AC:10:00:00:10: Must match the MAC address inagent-config.yaml. If these differ, the installer never applies your configuration to the host.
Monitor the VM. Use virsh list --all to check its status:
sudo virsh list --all | grep sno-01 56 sno-01 runningConnect to the console to watch the boot process, or use virt-manager:
sudo virsh console sno-01What happens on the node:
- The VM boots from the agent ISO
- RHCOS is loaded into memory
- The agent brings up the network from the NMState configuration
- The agent starts the Assisted Service locally
- Pre-flight validations run against the host
- RHCOS is written to the installation disk
- The node reboots into the installed system
On a multi-node cluster the rendezvous host waits for the other nodes to join at this point. On a single node cluster there is nothing to wait for, so the installation proceeds immediately after validations pass.
Monitor the Installation
The agent-based installation runs automatically once the node is booted. Monitor its progress from the bastion host, where you ran the openshift-install commands.
Monitor Bootstrap Completion
Bootstrap is the first phase, where the node sets up the initial control plane and etcd, then pivots into the permanent configuration.
From the bastion host:
cd ~/sno-agent-install/cluster
openshift-install agent wait-for bootstrap-complete \
  --dir . \
  --log-level=info
You will see warning messages during this phase. These do not necessarily indicate a fatal problem. They appear because the installer checks all pre-install requirements, including:
- NTP synchronization (time must be in sync)
- DNS resolution (API, internal API, and apps domains must resolve from the node)
- Sufficient hardware resources
Until all these checks pass, the installer marks the cluster as not ready. Validations that mention connectivity to other hosts are not relevant on a single node cluster, since there are no other hosts.
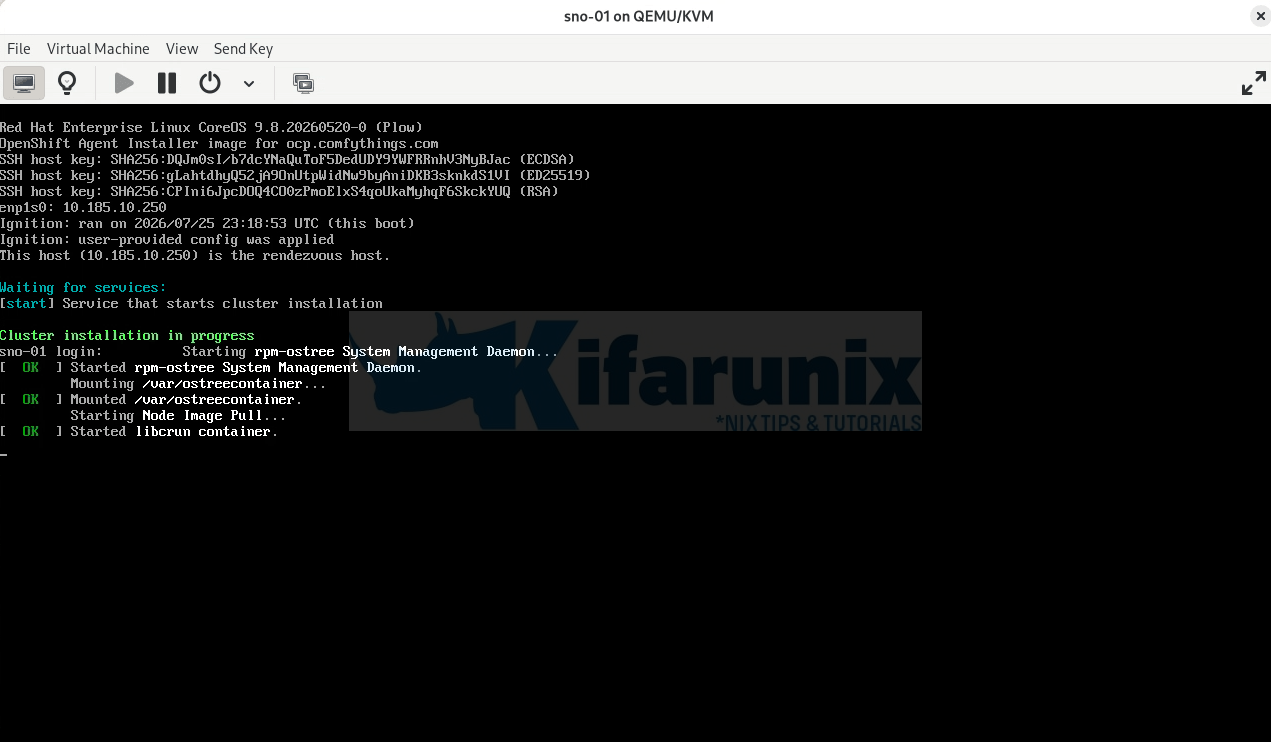
Sample output at the beginning;
INFO Waiting for cluster install to initialize. Sleeping for 30 seconds
INFO Waiting for cluster install to initialize. Sleeping for 30 seconds
INFO Cluster is not ready for install. Check validations
INFO Host 04e4b5ed-f41f-4b47-af47-39aa592dc411: Successfully registered
WARNING Cluster validation: The cluster has hosts that are not ready to install.
WARNING Host sno-01.sno.kifarunix.com validation: Host couldn't synchronize with any NTP server
WARNING Host sno-01.sno.kifarunix.com: updated status from discovering to insufficient (Host cannot be installed due to following failing validation(s): Host couldn't synchronize with any NTP server)
INFO Host sno-01.sno.kifarunix.com validation: Host NTP is synced
INFO Host sno-01.sno.kifarunix.com: updated status from insufficient to known (Host is ready to be installed)
INFO Cluster is ready for install
INFO Cluster validation: All hosts in the cluster are ready to install.
INFO Preparing cluster for installation
INFO Host sno-01.sno.kifarunix.com: updated status from known to preparing-for-installation (Host finished successfully to prepare for installation)
INFO Host sno-01.sno.kifarunix.com: New image status quay.io/openshift-release-dev/ocp-v4.0-art-dev@sha256:36688bcb4c33602d461c7a83303a5fcf33d1c7377c193353afaafeabd74aac52. result: success. time: 3.28 seconds; size: 300.33 Megabytes; download rate: 96.14 MBps
INFO Host sno-01.sno.kifarunix.com: updated status from preparing-for-installation to preparing-successful (Host finished successfully to prepare for installation)
INFO Cluster installation in progress
INFO Host sno-01.sno.kifarunix.com: updated status from preparing-successful to installing (Installation is in progress)
INFO Host: sno-01.sno.kifarunix.com, reached installation stage Installing: bootstrap
INFO Host: sno-01.sno.kifarunix.com, reached installation stage Waiting for bootkube
...
Keep checking the VM state while the bootstrap runs. The node reboots at least once, and on some hosts it fails to power back on by itself. If the installer appears to stall, check virsh list --all and power the VM on if it has stopped.
When bootstrap completes, the monitoring command shows:
...
INFO Bootstrap Kube API Initialized
INFO Host: sno-01.sno.kifarunix.com, reached installation stage Writing image to disk
INFO Host: sno-01.sno.kifarunix.com, reached installation stage Writing image to disk: 10%
INFO Host: sno-01.sno.kifarunix.com, reached installation stage Writing image to disk: 25%
INFO Host: sno-01.sno.kifarunix.com, reached installation stage Writing image to disk: 40%
INFO Host: sno-01.sno.kifarunix.com, reached installation stage Writing image to disk: 52%
INFO Host: sno-01.sno.kifarunix.com, reached installation stage Writing image to disk: 57%
INFO Host: sno-01.sno.kifarunix.com, reached installation stage Writing image to disk: 76%
INFO Host: sno-01.sno.kifarunix.com, reached installation stage Writing image to disk: 89%
INFO Host: sno-01.sno.kifarunix.com, reached installation stage Writing image to disk: 100%
INFO Bootstrap configMap status is complete
INFO Bootstrap is complete
INFO cluster bootstrap is complete
You will not see the Waiting for masters to join bootstrap control plane stage that appears in multi-node installations, because there are no other control plane nodes to wait for.
Monitor Full Cluster Installation
After bootstrap, the installer applies the cluster operators and finalizes the setup. From the bastion host:
openshift-install agent wait-for install-complete \
  --dir ~/sno-agent-install/cluster \
  --log-level=info
This phase is where most of the time is spent, because every operator image is pulled onto the node. Storage speed and link speed both matter here.
When the installation completes, you should see output like:
INFO Bootstrap Kube API Initialized
INFO Bootstrap configMap status is complete

INFO Bootstrap is complete
INFO cluster bootstrap is complete
INFO Waiting up to 40m0s (until 2:53PM CEST) for the cluster at https://api.sno.kifarunix.com:6443 to initialize...
After a while, the cluster should be setup, up and running.
...
INFO Waiting up to 30m0s (until 2:59PM CEST) to ensure each cluster operator has finished progressing...
INFO All cluster operators have completed progressing
INFO Checking to see if there is a route at openshift-console/console...
INFO Install complete!
INFO To access the cluster as the system:admin user when using 'oc', run
INFO     export KUBECONFIG=/home/sno/sno-agent-install/cluster/auth/kubeconfig
INFO Access the OpenShift web-console here: https://console-openshift-console.apps.sno.kifarunix.com
INFO Login to the console with user: "kubeadmin", and password: "tDtvm-xxxxx"
Post-Installation Verification
Once installation completes, verify everything is healthy.
Accessing the Cluster on CLI
Set KUBECONFIG permanently, replacing the path accordingly:
echo "export KUBECONFIG=~/sno-agent-install/cluster/auth/kubeconfig" >> ~/.bashrc
source ~/.bashrc
Verify cluster access:
oc whoamiOutput:
system:adminCheck the cluster version:
oc get clusterversionOutput;
NAME      VERSION   AVAILABLE   PROGRESSING   SINCE   STATUS
version   4.22.5    True        False         3m8s    Cluster version is 4.22.5
Verify the cluster operators. All must be Available, and none should be Progressing or Degraded:
oc get coTo show only the operators that are not yet healthy, which is more useful while the cluster settles:
oc get co | grep -v "True.*False.*False"If any operator is degraded, describe it:
oc describe co <operator-name>Verify the node:
oc get nodesNAME STATUS ROLES AGE VERSION
sno-01.sno.kifarunix.com Ready control-plane,master,worker 20m v1.35.5The combined control-plane,master,worker role string is the confirmation that this is a working single node cluster. If the node shows only control-plane,master, then compute.replicas was not set to 0 and workloads will not schedule.
Confirm etcd is running as a single member:
oc get pods -n openshift-etcd -l app=etcdOne etcd pod is expected. There is no quorum on a single node cluster, so do not be alarmed by the count.
NAME                            READY   STATUS    RESTARTS   AGE
etcd-sno-01.sno.kifarunix.com   5/5     Running   0          14m
Access the Web Console
Get the console URL:
oc whoami --show-consolehttps://console-openshift-console.apps.sno.kifarunix.comGet the kubeadmin password:
cat ~/sno-agent-install/cluster/auth/kubeadmin-passwordOpen your browser, navigate to the console URL, accept the self-signed certificate warning, and log in with:
- Username:
kubeadmin - Password: the value from the kubadmin-password file above
Ensure the machine you are browsing from can resolve the cluster DNS records. Unlike a multi-node cluster, every record points at the node itself rather than at a load balancer.
If you are using a hosts file rather than DNS on your workstation, here is a sample entry:
10.185.10.250 api.sno.kifarunix.com console-openshift-console.apps.sno.kifarunix.com oauth-openshift.apps.sno.kifarunix.com downloads-openshift-console.apps.sno.kifarunix.comA hosts file does not support wildcards, so every application route you create needs its own entry. This is a workaround for a workstation, not a substitute for proper DNS.
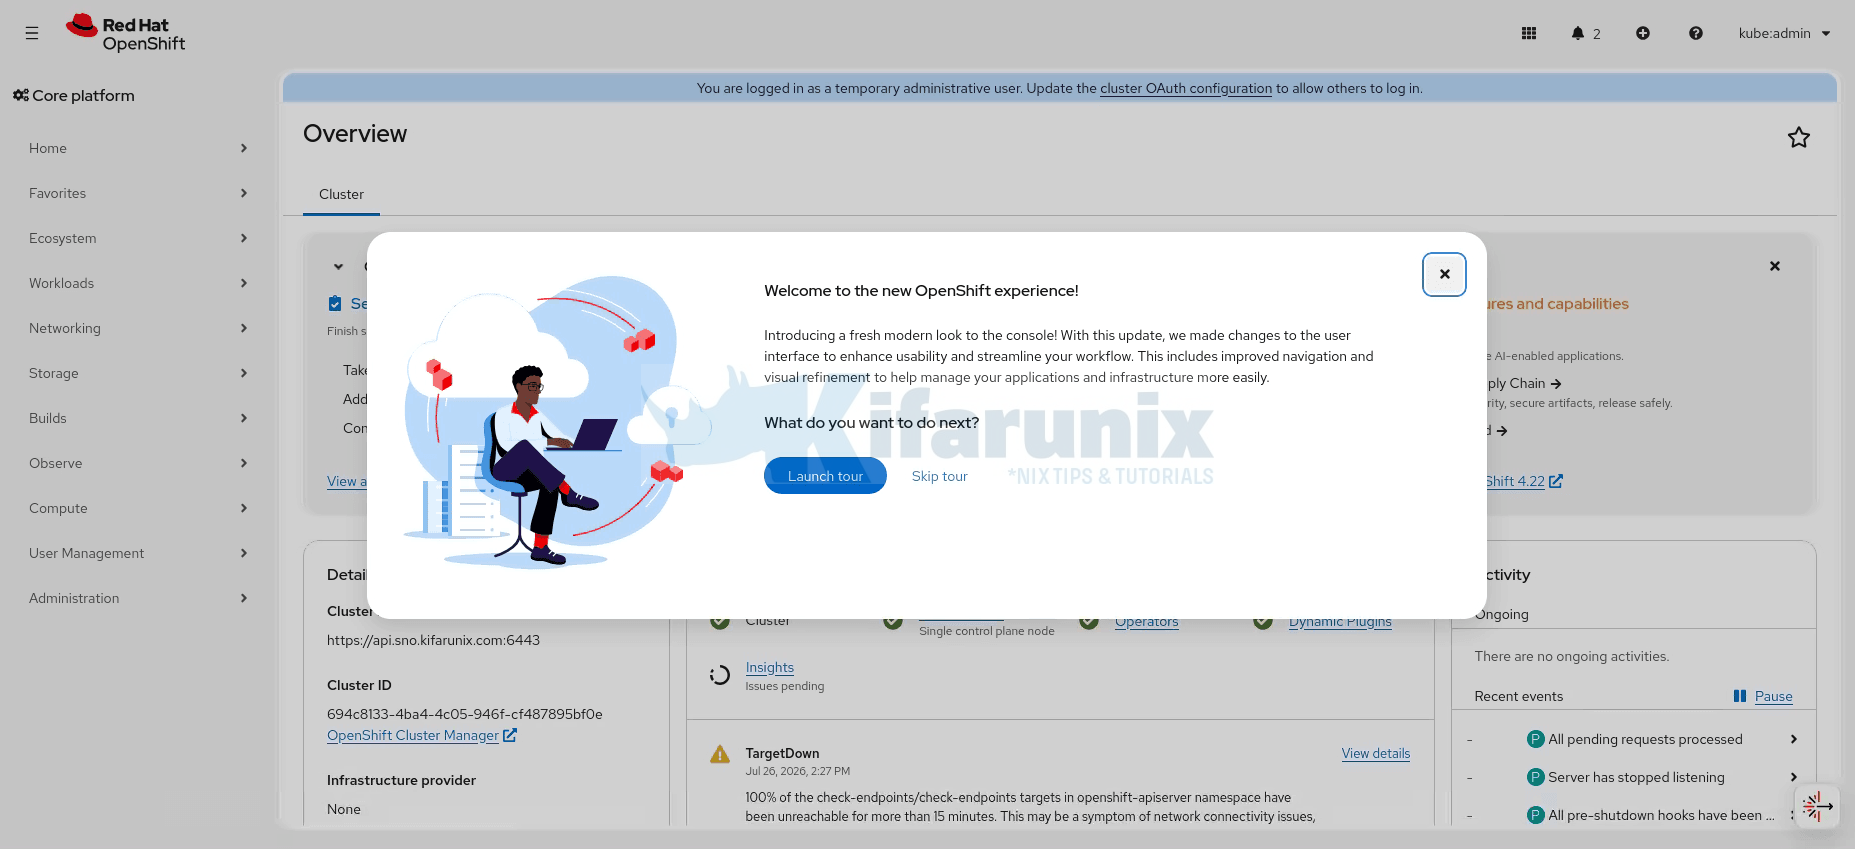
A successful login lands you on the OpenShift web dashbaord.
Test Application Deployment
To confirm the cluster is fully operational, deploy a simple test application and verify it is reachable through the OpenShift router. This validates that scheduling, networking, services, and ingress all work.
On a single node cluster this test carries extra weight, because it also proves the control plane node is genuinely schedulable for ordinary workloads.
Create a new project for testing:
oc new-project test-appDeploy a simple NGINX application:
oc new-app --name=nginx --image=nginxinc/nginx-unprivileged:latestCheck all resources in the namespace:
oc get allExpose the application service externally:
oc expose svc/nginxConfirm the route was created:
oc get routeNAME HOST/PORT PATH SERVICES PORT TERMINATION WILDCARD
nginx nginx-test-app.apps.sno.kifarunix.com nginx 8080-tcp NoneTest access to the application:
NGINX_URL=$(oc get route nginx -o jsonpath='{.spec.host}')
curl -I http://${NGINX_URL}
The expected response:
HTTP/1.1 200 OK
server: nginx/1.29.3
content-type: text/html
If this returns 200, scheduling, networking, and ingress are all working. Clean up when finished:
oc delete project test-appEssential Post-Installation Tasks
An installed cluster is not a finished cluster. These items are not optional on a single node deployment.
Replace the kubeadmin Account
kubeadmin is a temporary credential and the most commonly attacked identity on any OpenShift cluster. Configure a real identity provider, grant a human user cluster-admin, verify you can log in as that user, and only then remove the kubeadmin secret:
oc adm policy add-cluster-role-to-user cluster-admin <your-user>oc delete secrets kubeadmin -n kube-systemVerify the new login works before deleting the secret. Once it is gone, it does not come back.
Read more on how to Configure HTPasswd Identity Provider in OpenShift 4.x.
Configure Persistent Storage with LVM Storage
A fresh single node cluster has no default StorageClass, so any pod requesting a persistent volume stays Pending forever. The internal image registry is the first thing to hit this.
The answer on one node is LVM Storage, known as LVMS. It uses the TopoLVM CSI driver to carve logical volumes out of a local disk and bind them to PersistentVolumeClaims. OpenShift Data Foundation in replicated mode is not appropriate here, because replication needs multiple nodes.
Step 1: Attach a second disk to the VM. Do not point LVMS at the root device, because that is where etcd lives.
On the KVM host:
sudo qemu-img create -f raw -o preallocation=falloc /mnt/vol01/sno-cluster/sno-01-data.raw 200Gsudo virsh attach-disk sno-01 \
/mnt/vol01/sno-cluster/sno-01-data.raw vdb \
--driver qemu --subdriver raw --targetbus virtio --persistentStep 2: Confirm the node sees it and note the exact path.
oc debug node/sno-01.sno.kifarunix.com -- chroot /host lsblk -o NAME,SIZE,TYPE,MOUNTPOINTYou want vdb present with no partitions and no mount point. LVMS filters out devices that are read only, suspended, already LVM partitions, or that have children or bind mounts.
Sample output;
NAME     SIZE TYPE MOUNTPOINT
loop0    6.1M loop
sr0     1024M rom
vda      300G disk
|-vda1     1M part
|-vda2   127M part
|-vda3   384M part /boot
`-vda4 299.5G part /sysroot
vdb      200G disk
Step 3: Create the namespace, operator group, and subscription.
You can install LVM storage operator from the OpenShift:
- Log in to the OpenShift web console as a cluster admin.
- Navigate to Ecosystem > Software Catalog.
- Search for LVM Storage and select it.
- Click Install.
- Leave the default settings:
- Install into the
openshift-storagenamespace (created automatically). - Use Automatic approval.
- Use the update channel that matches your cluster version.
- Install into the
- Click Install.
- Wait until the operator status is Succeeded.
You can also use CLI if you want, you can run as follows.
First, list the channels the operator offers on your cluster. You need this value in the next step:
oc get packagemanifest lvms-operator -n openshift-marketplace \
  -o jsonpath='{.status.channels[*].name}{"\n"}'
stable-4.21 stable-4.22Pick the channel matching your cluster version. On a 4.22 cluster that is stable-4.22.
The channel field is required. If you omit it, the Subscription is created but nothing installs: no InstallPlan is generated and oc get csv -n openshift-storage stays empty indefinitely, with no error to tell you why.
cat << 'YAML' | oc apply -f -
apiVersion: v1
kind: Namespace
metadata:
  name: openshift-storage
  labels:
    openshift.io/cluster-monitoring: "true"
---
apiVersion: operators.coreos.com/v1
kind: OperatorGroup
metadata:
  name: openshift-storage-operatorgroup
  namespace: openshift-storage
spec:
  targetNamespaces:
  - openshift-storage
---
apiVersion: operators.coreos.com/v1alpha1
kind: Subscription
metadata:
  name: lvms
  namespace: openshift-storage
spec:
  channel: stable-4.22
  installPlanApproval: Automatic
  name: lvms-operator
  source: redhat-operators
  sourceNamespace: openshift-marketplace
YAML
If you already created a Subscription without a channel, patch it rather than recreating it:
oc patch subscription lvms -n openshift-storage --type=merge \
  -p '{"spec":{"channel":"stable-4.22"}}'
Step 4: Wait for the operator to become ready.
oc get csv -n openshift-storage -wWait for PHASE=Succeeded, then Ctrl+C.
Step 5: Create the LVMCluster resource pointing at the spare disk.
cat << 'YAML' | oc apply -f -
apiVersion: lvm.topolvm.io/v1alpha1
kind: LVMCluster
metadata:
  name: sno-lvmcluster
  namespace: openshift-storage
spec:
  storage:
    deviceClasses:
    - name: vg1
      default: true
      deviceSelector:
        paths:
        - /dev/vdb
      thinPoolConfig:
        name: thin-pool-1
        sizePercent: 90
        overprovisionRatio: 10
YAML
Two things to know before you apply this:
- Always include
deviceSelector. If you omit it, the operator claims every unused disk on the node, and you cannot add adeviceSelectorsection later. Correcting it means deleting and recreating the LVMCluster. - Only one LVMCluster resource is supported per cluster.
Step 6: Wait for it to become ready.
oc get lvmcluster sno-lvmcluster -n openshift-storage -wWait for STATUS=Ready.
Step 7: Confirm the StorageClass exists. It is named lvms-<device-class-name>, so the vg1 device class above produces lvms-vg1.
oc get scNAME PROVISIONER RECLAIMPOLICY VOLUMEBINDINGMODE ALLOWVOLUMEEXPANSION AGE
lvms-vg1 (default) topolvm.io Delete WaitForFirstConsumer true 63sWaitForFirstConsumer means the volume is not provisioned until a pod actually consumes the claim. A PVC sitting in Pending with no pod attached is expected behaviour, not a fault.
Step 8: Mark it default so workloads do not have to name it.
oc patch storageclass lvms-vg1 -p '{"metadata":{"annotations":{"storageclass.kubernetes.io/is-default-class":"true"}}}'Step 9: Test it end to end.
Two things need proving:
- that a claim gets a volume, and
- that a pod can actually write to it. A
BoundPVC alone does not prove the second.
First, create a claim. Note that no StorageClass is named, which is the point of marking lvms-vg1 default in the previous step:
cat << 'YAML' | oc apply -f -
apiVersion: v1
kind: PersistentVolumeClaim
metadata:
  name: test-pvc
spec:
  accessModes: [ReadWriteOnce]
  resources:
    requests:
      storage: 5Gi
YAML
Check it:
oc get pvc test-pvcNAME STATUS VOLUME CAPACITY ACCESS MODES STORAGECLASS VOLUMEATTRIBUTESCLASS AGE
test-pvc Pending lvms-vg1 <unset> 23sPending is correct here, not a fault. The StorageClass uses WaitForFirstConsumer, so LVMS does not carve the logical volume until a pod actually schedules against the claim. It picked up lvms-vg1 automatically, which confirms the default annotation worked.
Now create a pod that mounts it. The --overrides flag is only there because oc run has no shorthand for attaching a volume, so the pod spec is supplied as JSON:
oc run test-pod --image=registry.access.redhat.com/ubi9/ubi-minimal \
  --overrides='{"spec":{"containers":[{"name":"test","image":"registry.access.redhat.com/ubi9/ubi-minimal","command":["sleep","3600"],"volumeMounts":[{"name":"data","mountPath":"/data"}]}],"volumes":[{"name":"data","persistentVolumeClaim":{"claimName":"test-pvc"}}]}}'
That JSON says three things:
- run a container that sleeps for an hour so it stays alive long enough to inspect
- mount a volume named
dataat/data, and - back that volume with the
test-pvcclaim.
Once the pod is running, the claim should bind:
oc get pvc test-pvc
oc get pod test-pod
Sample output;
NAME       STATUS   VOLUME                                     CAPACITY   ACCESS MODES   STORAGECLASS   VOLUMEATTRIBUTESCLASS   AGE
test-pvc   Bound    pvc-95112085-a99c-47b1-ae0c-d6a8bbbc13fb   5Gi        RWO            lvms-vg1       <unset>                 2m
NAME       READY   STATUS    RESTARTS   AGE
test-pod   1/1     Running   0          50s
Finally, prove the mount is writable:
oc exec test-pod -- sh -c 'echo hello > /data/test.txt && cat /data/test.txt && df -h /data'You should see hello and a 5 GB filesystem mounted on /data. That confirms the operator, the volume group, the CSI driver, and the default StorageClass are all working together.
Clean up:
oc delete pod test-pod
oc delete pvc test-pvc
With a default StorageClass in place, give the internal image registry a home:
oc patch configs.imageregistry.operator.openshift.io cluster --type=merge -p \
  '{"spec":{"managementState":"Managed","storage":{"pvc":{"claim":""}}}}'
An empty claim tells the registry operator to create the PVC itself using the default StorageClass.
Back Up etcd
One node means one copy of etcd. Take backups and store them off the host:
ssh -i ~/.ssh/id_rsa [email protected]
sudo /usr/local/bin/cluster-backup.sh /home/core/etcd-backup
Then copy the snapshot off the node. Three constraints worth knowing before you rely on these backups:
- Do not take an etcd backup within the first 24 hours after installation. The first certificate rotation has not completed, and the backup will contain expired certificates.
- A backup can only be restored onto the same z-stream release it was taken from. This is why you take one before every update.
- The snapshot has a high I/O cost, which on a single node cluster lands on the same disk serving your workloads.
A hypervisor snapshot is not a substitute. It captures a disk image rather than a consistent etcd state.
Review the Monitoring Footprint
The monitoring stack defaults are sized for clusters with dedicated infrastructure nodes. On a single node cluster running your workloads as well, review the Prometheus retention period and resource requests and set them deliberately rather than inheriting defaults that compete with your applications for memory.
Troubleshooting Common Issues in Single Node OpenShift Installations
Agent-based single node installations are generally straightforward, but a few issues recur in virtualized and lab environments. Based on Red Hat guidance and hands-on experience, here are the most common problems and how to address them.
1. Installation Stuck at Bootstrap
The command openshift-install agent wait-for bootstrap-complete hangs, or the node never progresses past validations.
Common causes:
- DNS resolution failures, particularly
api-int.<cluster>.<domain>not resolving from the node itself - Clock skew, where the node cannot reach an NTP server
- The node cannot reach quay.io and registry.redhat.io, or the configured mirror
- The VM powered off after its reboot and did not come back
Suggested checks:
- SSH to the node and test resolution directly:
dig api-int.sno.kifarunix.com - Verify time sync on the node:
chronyc sources - Check the VM is actually running:
sudo virsh list --all - Watch the agent directly on the node:
sudo journalctl -u agent.service -f - Re-run the wait command with debug logging:
--log-level=debug
If you need to collect evidence rather than keep guessing, the installer has two commands for it:
openshift-install gather bootstrap --dir ~/sno-agent-install/cluster
openshift-install analyze --dir ~/sno-agent-install/cluster
On an agent-based deployment it is often faster to pull the logs straight off the node over SSH:
ssh -i ~/.ssh/id_rsa [email protected] 'sudo journalctl -u agent.service --no-pager' > agent.log
ssh -i ~/.ssh/id_rsa [email protected] 'sudo journalctl -u assisted-service.service --no-pager' > assisted.log
2. Node Stuck NotReady After Installation
oc get nodes shows the node as NotReady, often with NetworkPluginNotReady or kubelet errors.
Common causes:
- OVN-Kubernetes failed to initialize due to a network misconfiguration
- Resource exhaustion, which is more likely on a single node cluster than a multi-node one
- Kubelet cannot reach the API server
Suggested checks:
- Inspect node events:
oc describe node <node> - Check network pods:
oc get pods -n openshift-multusandoc get pods -n openshift-ovn-kubernetes - Confirm the node is not out of memory or disk:
oc adm top node
3. Cluster Operators Showing Degraded
oc get co reports Degraded=True for operators such as ingress, console, or image-registry.
Common causes:
- Wildcard DNS not resolving, which breaks the ingress and console health checks
- No default StorageClass, which leaves the image registry unable to claim storage
- Resource pressure causing pod evictions
Suggested checks:
- Describe the operator:
oc describe co <operator> - Inspect the relevant pods:
oc get pods -n openshift-ingress - Approve any pending CSRs:
oc get csr | grep Pending | awk '{print $1}' | xargs oc adm certificate approve
4. Web Console Inaccessible
Browsing to the console URL times out or fails.
Common causes:
- The wildcard record
*.apps.<cluster>.<domain>does not resolve to the node IP - You are browsing from a machine that does not use the cluster’s DNS server
- The ingress controller pods are unhealthy
Suggested checks:
- Confirm the route:
oc get route console -n openshift-console -o jsonpath='{.spec.host}' - Test from the bastion:
curl -kI https://console-openshift-console.apps.sno.kifarunix.com - Verify the wildcard resolves from your workstation, not just from the bastion
Remember that on a single node cluster there is no load balancer in the path. If the record resolves to anything other than the node IP, that is the fault.
5. Pods Stuck in ImagePullBackOff
Pods fail to start with ImagePullBackOff or ErrImagePull.
Common causes:
- The node cannot reach quay.io or registry.redhat.io
- In disconnected environments, images were not mirrored correctly
- An expired or malformed pull secret
Suggested checks:
- Describe the pod for the exact error:
oc describe pod <pod> - Test the pull from the node itself:
sudo podman pull <image> - Verify mirror configuration if disconnected:
oc get imagedigestmirrorset
6. Cluster Feels Slow and Operators Flap
The API is sluggish and operators move between Available and Progressing without an obvious cause.
This is the failure mode specific to single node clusters, and it is almost always storage. etcd shares its disk with every workload on the node.
Suggested checks:
- Check the p99 of
etcd_disk_wal_fsync_duration_seconds_bucketin the monitoring console - Re-run the fio benchmark against the node’s storage
- On a VM, confirm the disk is attached with
cache=noneand check CPU steal time inside the guest withtop
If the disk is the problem, options are to move the VM image to faster storage, or to give etcd its own device. Red Hat documents moving etcd to a separate disk using a MachineConfig that mounts a second device at /var/lib/etcd.
Rebuilding the Cluster
There is no openshift-install destroy for platform: none, because the installer never provisioned any infrastructure. Rebuilding means removing the VM and starting again.
sudo virsh destroy sno-01
sudo virsh undefine sno-01 --nvram --remove-all-storage
Then recreate the disk, regenerate the ISO from your saved configuration files, and boot again:
rm -rf ~/sno-agent-install/cluster
mkdir -p ~/sno-agent-install/cluster
cp ~/sno-agent-install/{install-config.yaml,agent-config.yaml} ~/sno-agent-install/cluster/
openshift-install agent create image --dir ~/sno-agent-install/cluster
This is the payoff for keeping the original configuration files outside the directory the installer consumes. Rebuilding is four commands rather than a reconstruction exercise.
Frequently Asked Questions
Do I need a bootstrap node?
No. The agent-based installer performs an in-place bootstrap with no additional node. The single node bootstraps itself, writes RHCOS to disk, reboots, and pivots into being the cluster. Only cloud installer-provisioned deployments on AWS, Azure, and Google Cloud still create a temporary bootstrap machine.
Do I need a load balancer or HAProxy?
No. Red Hat’s load balancing requirements explicitly do not apply to single node OpenShift clusters using the platform: none option. On a multi-node cluster the DNS records point at a load balancer. On a single node cluster they point directly at the node.
Do I need a DHCP server?
No, provided you use static addressing through networkConfig in agent-config.yaml. DHCP is only required if you choose DHCP addressing or PXE boot. Since rendezvousIP is embedded in the ISO at generation time, the node’s address must be known in advance regardless, which makes static the simpler option.
Do I need PXE boot?
No. Booting from the ISO requires no DHCP or TFTP infrastructure. PXE is supported through openshift-install agent create pxe-files and is worth considering when deploying many clusters, since the rootfs is generic and only the kernel and initrd are cluster-specific.
Can I add worker nodes later?
Yes. Compute nodes can be added to a single node cluster after installation. They add capacity, not availability.
Can I convert this into a three node highly available cluster?
No. The control plane replica count is fixed at installation time. If you need high availability, deploy a compact three node cluster from the start.
Is single node OpenShift supported in production?
It is a supported topology. Whether it suits your production environment depends on whether you can tolerate the cluster being unavailable during reboots and updates, and whether you have a recovery plan for a failed disk.
Does it work in disconnected environments?
Yes. This is one of the stronger arguments for the agent-based installer over the Assisted Installer. Mirror the release with the oc-mirror plugin, set imageContentSources and additionalTrustBundle in install-config.yaml, and the ISO carries everything else it needs.