Welcome to our guide on how to enroll Windows systems into Osquery Fleet Manager. Fleet is the most widely used open source osquery manager. Deploying osquery with Fleet enables programmable live queries, streaming logs, and effective management of osquery across 50,000+ servers, containers, and laptops. It’s especially useful for talking to multiple devices at the same time.“
Enroll Windows Systems into Osquery Fleet Manager
There are different ways in which you can enroll Windows systems on OSquery Fleet manager;
Enroll Windows Systems using Fleet-Osquery Windows Package
Install Fleetctl on Fleet Manager
To enroll Windows systems using Fleet-Osquery Package, ensure that Fleetctl command is installed on the Fleet Manager. Fleetctl will be used to generate Fleet-osquery MSI installer for Windows systems.
If not already installed, you can install Fleetctl on the Fleet Manager as follows;
- Download the Fleetctl binary archive for your specific system from Fleet releases page.
wget https://github.com/fleetdm/fleet/releases/download/fleet-v4.20.1/fleetctl_v4.20.1_linux.zip -P /tmp- Extract and place the
fleetctlbinary under/usr/local/bin;
sudo unzip -j /tmp/fleetctl_v4.20.1_linux.zip "fleetctl_v4.20.1_linux/fleetctl" -d /usr/local/bin/Install Docker on Fleet Manager Host
Install Docker on the Fleet manager host. This is required to generate osquery MSI installer.
docker remove podman buildahdnf install docker-ceOnce installed, start the docker service;
systemctl start dockerConsult your Linux distribution documentation on how to install Docker.
Generate Fleet-osquery Windows Package
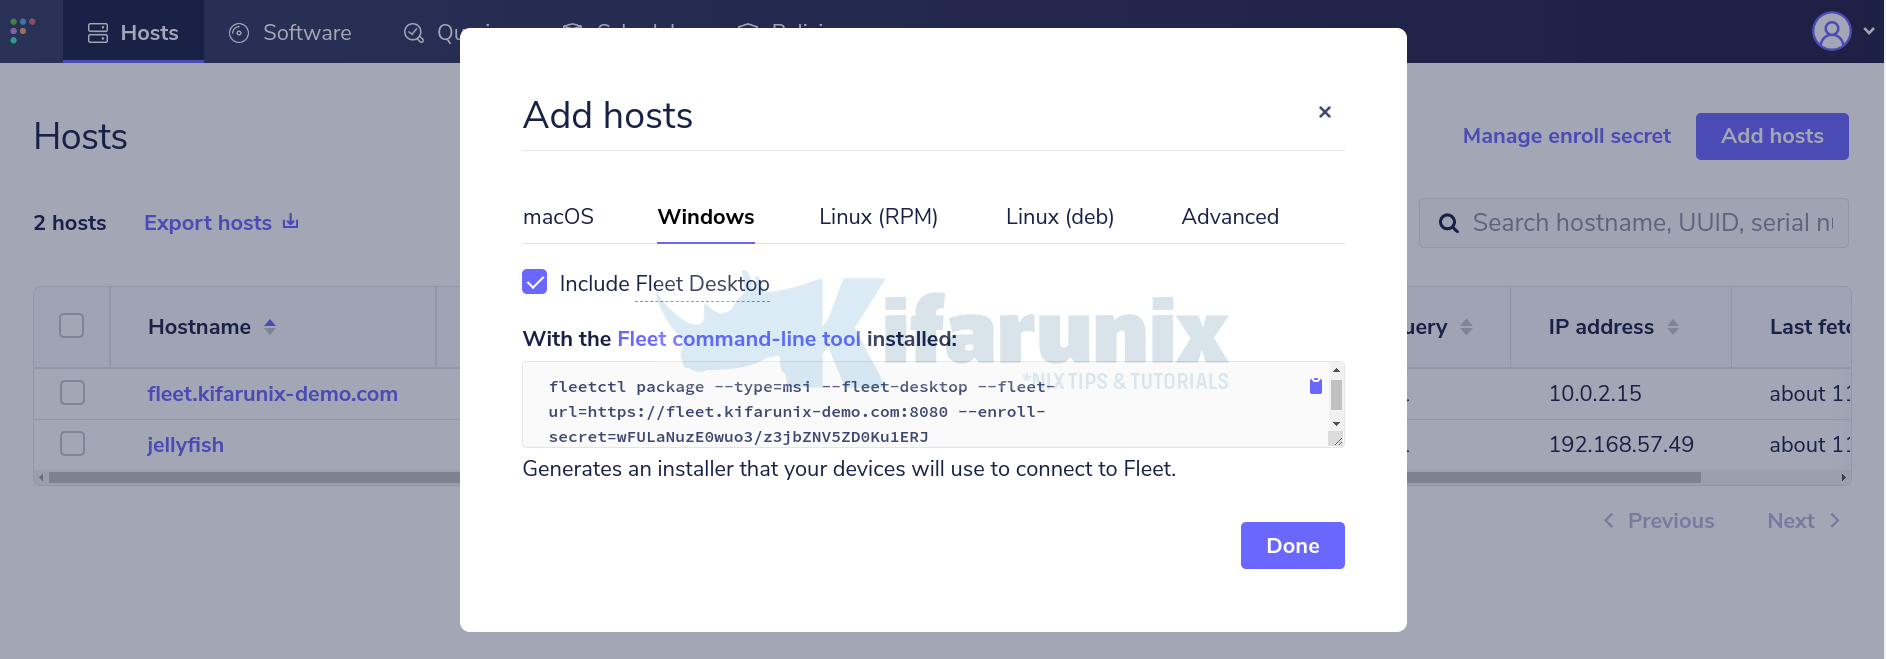
Once you have installed Fleetctl command on the Fleet Manager, navigate to Fleet Manager web UI > Hosts > Add hosts > Windows.
Copy the osquery installer package generating command on the wizard above and execute it on the Fleet Manager. The command will generate MSI installer.
fleetctl package --type=msi --fleet-desktop \
--fleet-url=https://fleet.kifarunix-demo.com:8080 \
--enroll-secret=wFULaNuzE0wuo3/z3jbZNV5ZD0Ku1ERJ
Sample command output;
Generating your osquery installer...
Unable to find image 'fleetdm/wix:latest' locally
latest: Pulling from fleetdm/wix
7d63c13d9b9b: Pull complete
d6b3bca85310: Pull complete
26a41d401cc6: Pull complete
1a28001a7315: Pull complete
86ad66875459: Pull complete
4f4fb700ef54: Pull complete
Digest: sha256:3183e1a702efe74cef600b73c193605bed5aeff53f09cf858b86fe66efdd8e3e
Status: Downloaded newer image for fleetdm/wix:latest
Windows Installer XML Toolset Toolset Harvester version
Copyright (c) .NET Foundation and contributors. All rights reserved.

Windows Installer XML Toolset Compiler version
Copyright (c) .NET Foundation and contributors. All rights reserved.

heat.wxs
main.wxs
Windows Installer XML Toolset Linker version
Copyright (c) .NET Foundation and contributors. All rights reserved.


Success! You generated an osquery installer at /root/fleet-osquery.msi

To add this device to Fleet, double-click to open your installer.

To add other devices to Fleet, distribute this installer using Chef, Ansible, Jamf, or Puppet. Learn how: https://fleetdm.com/docs/using-fleet/adding-hosts
The command generates fleet-osquery.msi installer on the current working directory.
Install Fleet Osquery Package on Windows system
Copy the Fleet Osquery MSI installer to the Windows System and install it by double clicking on the MSI.
You can as well execute the MSI on the powershell.
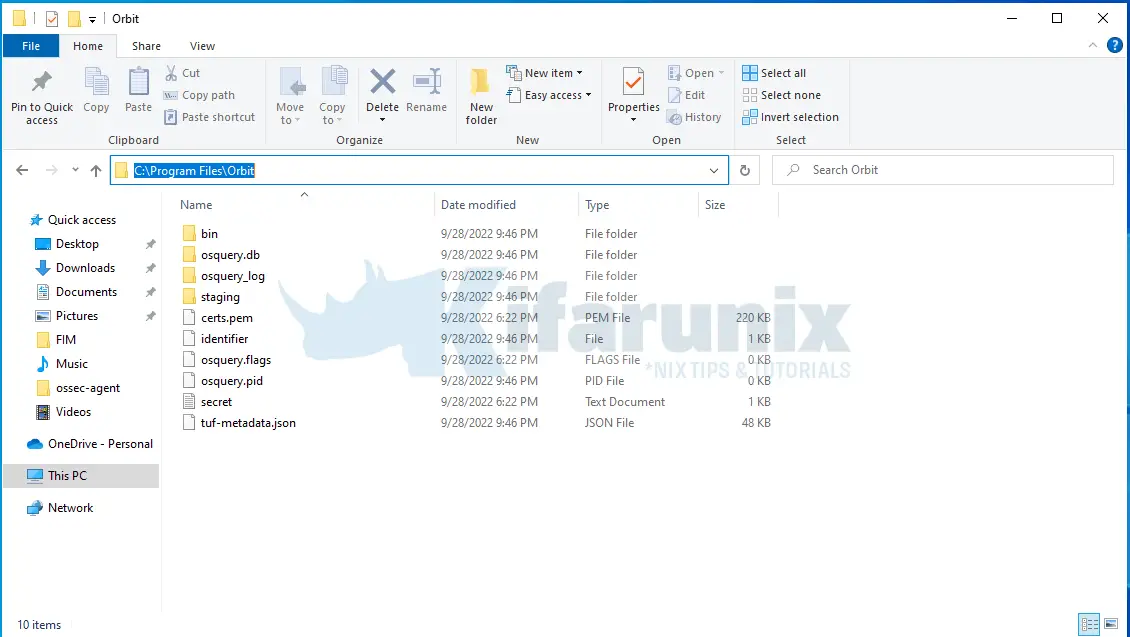
C:\Users\kifarunix\Downloads\fleet-osquery.msiThe Fleet-osquery will be installed as Orbit program, C:\Program Files\Orbit;

The installer will also create Fleet-osquery service;
Get-Service -Name "fleet*"Status Name DisplayName
------ ---- -----------
Running Fleet osquery Fleet osquery
PS C:\Windows\system32>Before you can start the Fleet-osquery service, download the Fleet manager TLS certificate, place it under the C:\ProgramData\fleet.pem
Next, edit the osquery.flags file and add the path to the TLS certificate by adding the line below;
--tls_server_certs=C:\ProgramData\fleet.pemNext, ensure that the Fleet server is reachable via the domain name;
ping fleet.kifarunix-demo.com
Pinging fleet.kifarunix-demo.com [192.168.57.48] with 32 bytes of data:
Reply from 192.168.57.48: bytes=32 time<1ms TTL=64
Reply from 192.168.57.48: bytes=32 time<1ms TTL=64
Reply from 192.168.57.48: bytes=32 time<1ms TTL=64
Reply from 192.168.57.48: bytes=32 time=1ms TTL=64

Ping statistics for 192.168.57.48:
    Packets: Sent = 4, Received = 4, Lost = 0 (0% loss),
Approximate round trip times in milli-seconds:
    Minimum = 0ms, Maximum = 1ms, Average = 0ms
Restart Fleet-osquery service;
Restart-Service 'Fleet osquery'The agent should now show up on Fleet manager hosts page;
Enroll Windows Systems using Plain Osquery Package
Install Osquery Package on Windows Systems
To enroll Windows systems using plain osquery package, you need to install Osquery package on Windows system first.
Follow the guide below;
Install Osquery on Windows system
Download Secret, Flags File and TLS Certificate from the Fleet Manager
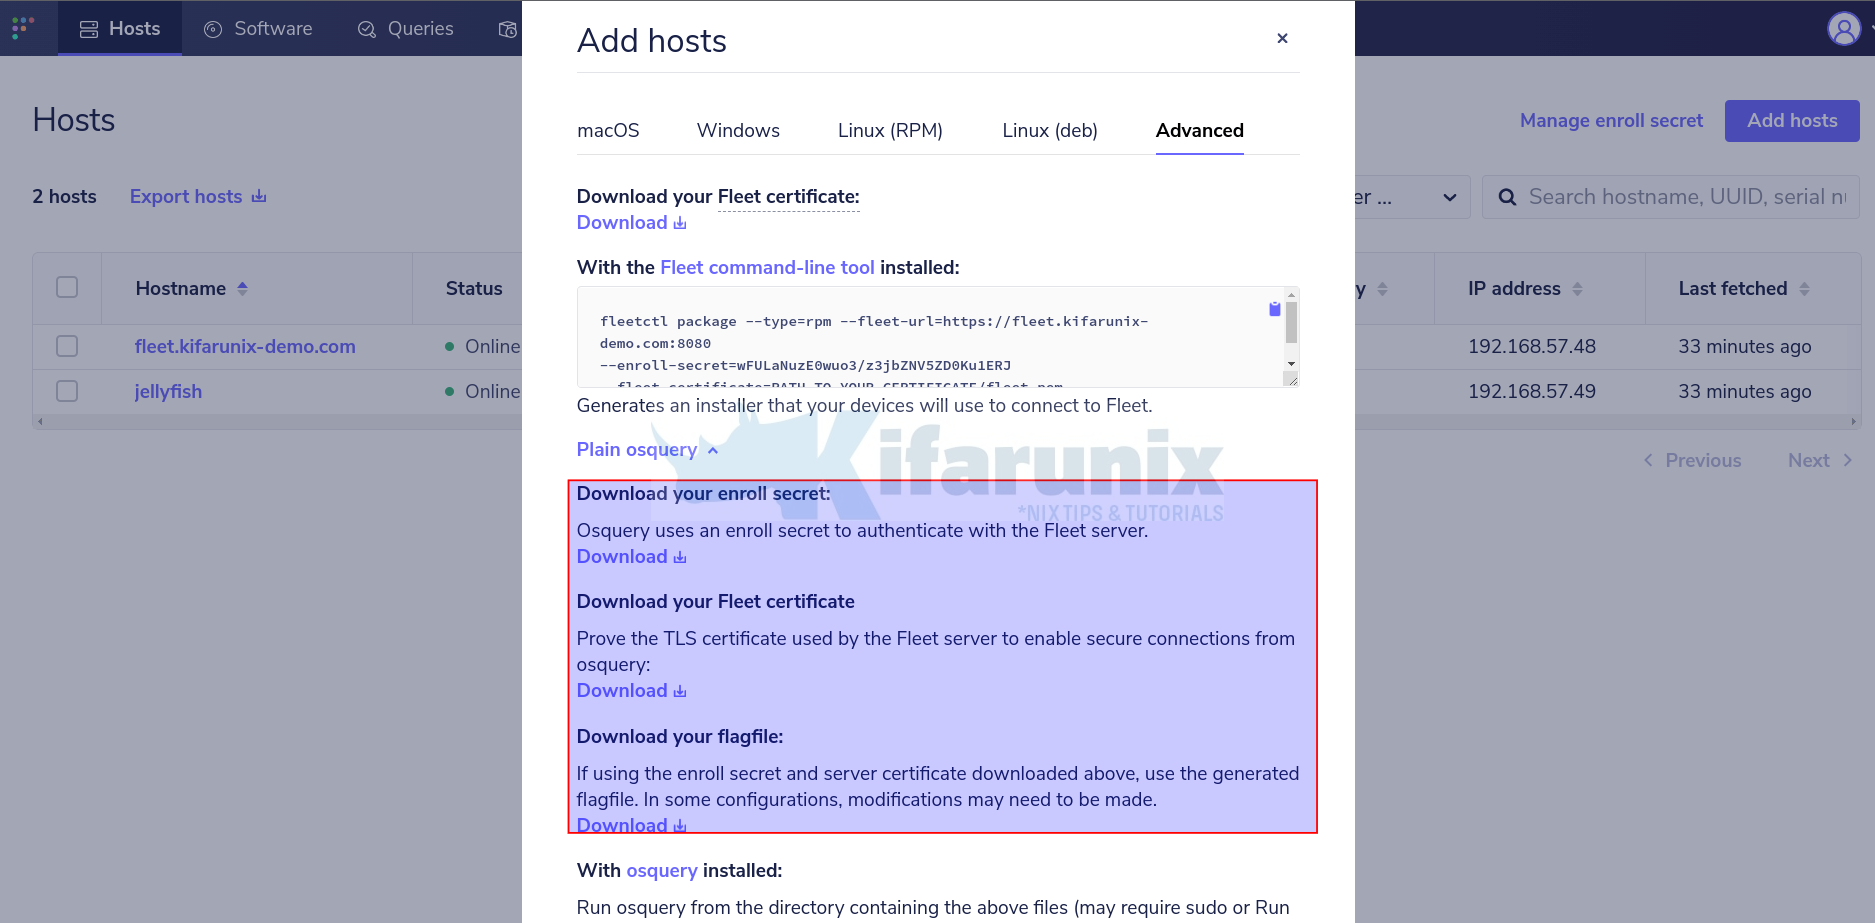
Next, navigate to Fleet manager Hosts page > Add hosts > Advanced. Click Plain osquery drop down menu to expand the page.
Click on the individual download link to download enroll secret, fleet certificate and flagfile.

We have downloaded these files to Windows host Downloads folder.
ls .\Downloads\ Directory: C:\Users\kifarunix\Downloads
Mode LastWriteTime Length Name
---- ------------- ------ ----
-a---- 9/29/2022 11:38 AM 822 flagfile.txt
-a---- 9/29/2022 11:38 AM 1143 fleet.pem
-a---- 9/29/2022 10:49 AM 17453056 osquery-5.5.1.msi
-a---- 9/29/2022 11:38 AM 32 secret.txtMove the secrets file and TLS certificate file to C:\ProgramsData folder or any other suitable folder for you. Ensure you run Powershell as Administrator, if using powershell to move the files.
mv .\Downloads\fleet.pem C:\ProgramData\mv .\Downloads\secret.txt C:\ProgramData\Replace the Osquery flagsfile with the flags file you downloaded from Fleet manager;
rm 'C:\Program Files\osquery\osquery.flags'mv .\Downloads\flagfile.txt 'C:\Program Files\osquery\osquery.flags'Next, open the Flags file and update the path to TLS and Secrets files;
notepad 'C:\Program Files\osquery\osquery.flags'
# Server
--tls_hostname=fleet.kifarunix-demo.com:8080
--tls_server_certs=C:\ProgramData\fleet.pem
# Enrollment
--host_identifier=instance
--enroll_secret_path=C:\ProgramData\secret.txt
--enroll_tls_endpoint=/api/osquery/enroll
# Configuration
--config_plugin=tls
--config_tls_endpoint=/api/v1/osquery/config
--config_refresh=10
# Live query
--disable_distributed=false
--distributed_plugin=tls
--distributed_interval=10
--distributed_tls_max_attempts=3
--distributed_tls_read_endpoint=/api/v1/osquery/distributed/read
--distributed_tls_write_endpoint=/api/v1/osquery/distributed/write
# Logging
--logger_plugin=tls
--logger_tls_endpoint=/api/v1/osquery/log
--logger_tls_period=10
# File carving
--disable_carver=false
--carver_start_endpoint=/api/v1/osquery/carve/begin
--carver_continue_endpoint=/api/v1/osquery/carve/block
--carver_block_size=2000000
Save the changes
Restart Osquery Service to Enroll the Windows Host
Restart Osquery service;
Restart-Service osquerydYou windows host should now be enrolled;

And that is it on how to enroll Windows systems in Osquery Fleet Manager.
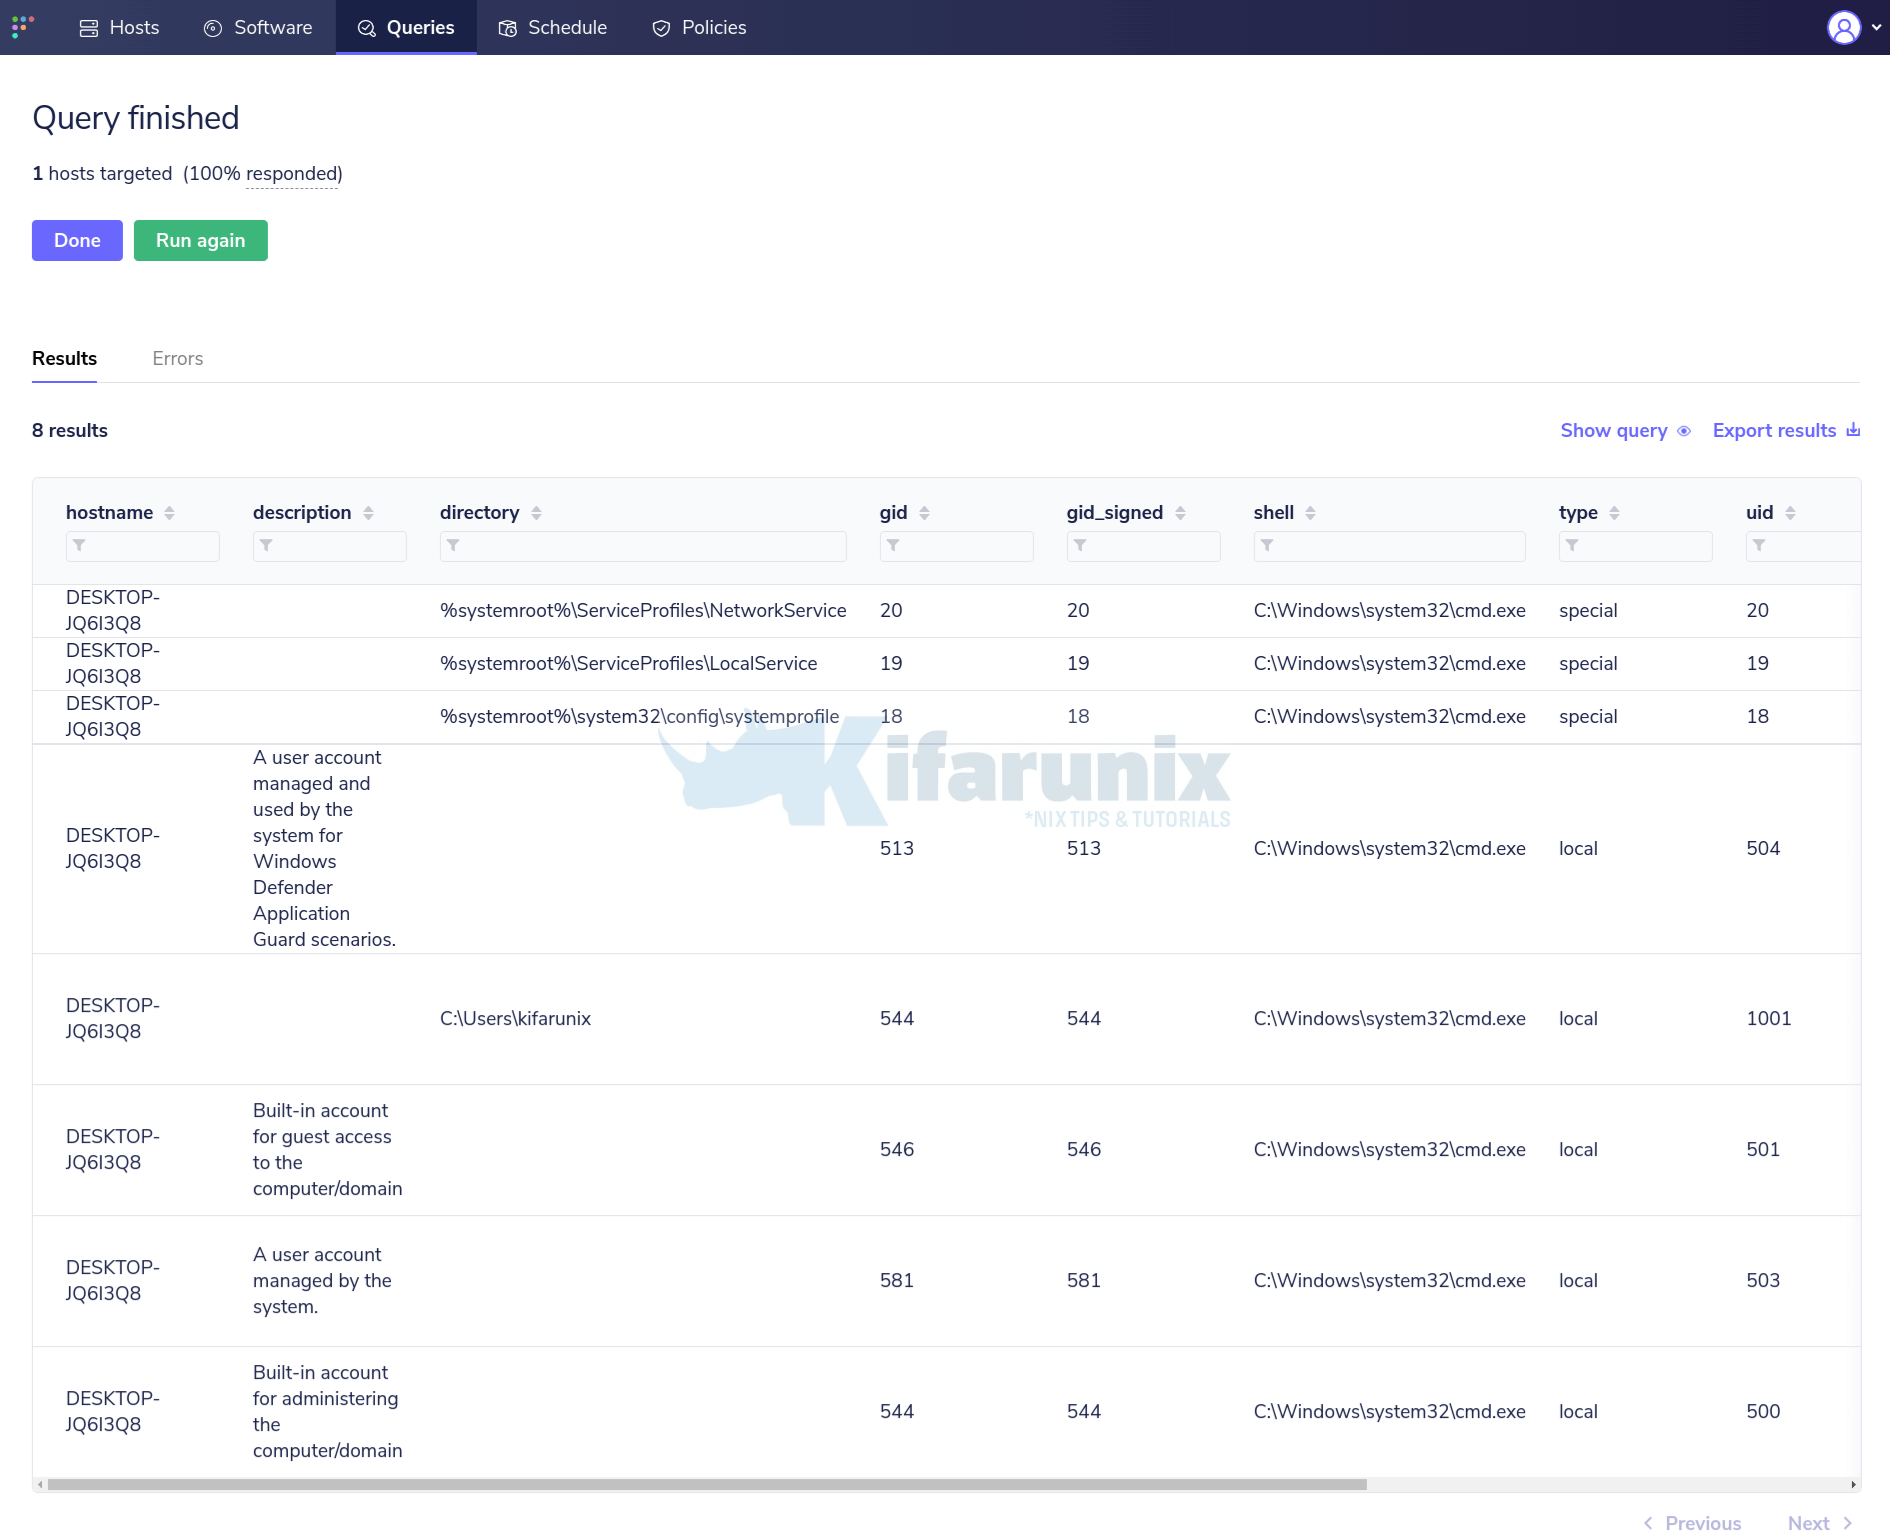
You can now run queries against your windows hosts;
Sample output of the query;
SELECT * from users;
That marks the end of this guide. Explore osquery further.


