Welcome to our tutorial on how to install Zammad ticketing system on Debian 11. According to Zammad documentation page, “Zammad is a web based open source helpdesk/customer support system with many features to manage customer communication via several channels like telephone, facebook, twitter, chat and emails”.
Read about Zammad Ticketing system features on its features page, link provided below.
Zammad Ticketing system features.
Table of Contents
Install Zammad Ticketing System on Debian 11
Prerequisites
There are a number of requirements that your system must meet (as of this writing) before you can install Zammad Ticketing system.
Refer to these links for Software and Hardware Requirements;
Configure Locales in Debian
In this tutorial, we will be installing Zammad with PostgreSQL which is the recommended database and is supported by default.
As such, if you are using PostgreSQL database backend, you need to enable UTF-8 locale.
To check if UTF-8 local is enabled, run the locale command from terminal as shown below.
locale
LANG=en_US.UTF-8
LANGUAGE=
LC_CTYPE="en_US.UTF-8"
LC_NUMERIC="en_US.UTF-8"
LC_TIME="en_US.UTF-8"
LC_COLLATE="en_US.UTF-8"
LC_MONETARY="en_US.UTF-8"
LC_MESSAGES="en_US.UTF-8"
LC_PAPER="en_US.UTF-8"
LC_NAME="en_US.UTF-8"
LC_ADDRESS="en_US.UTF-8"
LC_TELEPHONE="en_US.UTF-8"
LC_MEASUREMENT="en_US.UTF-8"
LC_IDENTIFICATION="en_US.UTF-8"
LC_ALL=
If you do not see such a line from the above output;
LANG=en_US.UTF-8The you need to generate and update the locales.
locale-gen en_US.UTF-8update-locale LANG=en_US.UTF-8This will update the /etc/default/locale file with the set LANG environment variable.
Install Elasticsearch on Debian
Zammad v5.2+ is compatible with Elasticsearch v7.8+. Hence, we install the current Elasticsearch, v8.9.1, which is the latest version as of this writing, on Debian.
Install the Elasticsearch repository signing key;
apt install sudo gnupg2 apt-transport-https curl vim -ywget -qO - https://artifacts.elastic.co/GPG-KEY-elasticsearch --no-check-certificate \
| gpg --dearmor > /etc/apt/trusted.gpg.d/elastic.gpgInstall Elasticsearch repo;
echo "deb https://artifacts.elastic.co/packages/8.x/apt stable main" \
| tee -a /etc/apt/sources.list.d/elastic-8.x.list
Install Elasticsearch on Debian;
apt updateapt install elasticsearch -yElasticsearch v8 enabled authentication and HTTPS connection by default. You will see an output similar to the one below during the installation;
--------------------------- Security autoconfiguration information ------------------------------

Authentication and authorization are enabled.
TLS for the transport and HTTP layers is enabled and configured.

The generated password for the elastic built-in superuser is : ucoAPGk-io-hwnPalUle

If this node should join an existing cluster, you can reconfigure this with
'/usr/share/elasticsearch/bin/elasticsearch-reconfigure-node --enrollment-token '
after creating an enrollment token on your existing cluster.

You can complete the following actions at any time:

Reset the password of the elastic built-in superuser with
'/usr/share/elasticsearch/bin/elasticsearch-reset-password -u elastic'.

Generate an enrollment token for Kibana instances with
 '/usr/share/elasticsearch/bin/elasticsearch-create-enrollment-token -s kibana'.

Generate an enrollment token for Elasticsearch nodes with
'/usr/share/elasticsearch/bin/elasticsearch-create-enrollment-token -s node'.

-------------------------------------------------------------------------------------------------
### NOT starting on installation, please execute the following statements to configure elasticsearch service to start automatically using systemd
 sudo systemctl daemon-reload
 sudo systemctl enable elasticsearch.service
### You can start elasticsearch service by executing
 sudo systemctl start elasticsearch.service
Install Zammad Ticketing System
Install Zammad repo lists on Debian
wget -qO- https://dl.packager.io/srv/zammad/zammad/key \
| gpg --dearmor > /etc/apt/trusted.gpg.d/zammad.gpg
echo "deb https://dl.packager.io/srv/deb/zammad/zammad/stable/debian 11 main" > /etc/apt/sources.list.d/zammad.listUpdate package cache;
apt updateNext, install Zammad and all the other required packages.
apt install zammad -yAs the installation completes, you will see such an output;
# Configuring Elasticsearch...
-- Nevermind, no es_url is set, leaving Elasticsearch untouched ...!
-- The above is all right if you don't want to use Elasticsearch (locally) - if this is not intended, consult https://docs.zammad.org !
I, [2023-09-02T01:24:31.583414 #40090]  INFO -- : ActionCable is using the redis instance at redis://localhost:6379.
I, [2023-09-02T01:24:31.596668#40090-5420]  INFO -- : Using Zammad's file store as Rails cache store.
I, [2023-09-02T01:24:31.597131#40090-5420]  INFO -- : Using the File back end for Zammad's web socket session store.
W, [2023-09-02T01:24:31.701645#40090-5420]  WARN -- : Setting "timezone_default" is empty. Using UTC instead. Please set system timezone.
I, [2023-09-02T01:24:33.439663#40090-5420]  INFO -- : Setting.set('models_searchable', ["Chat::Session", "KnowledgeBase::Answer::Translation", "Organization", "Ticket
", "User"])
I, [2023-09-02T01:24:34.136039#40090-5420]  INFO -- : Setting.set('es_url', "")
# (Re)building Elasticsearch searchindex...
# Enforcing 0600 on database.yml ...
Setting default Logging to file, set via "zammad config:set RAILS_LOG_TO_STDOUT=true" if you want to log to STDOUT!
# Starting Zammad
Enabling module proxy.
To activate the new configuration, you need to run:
  systemctl restart apache2
Considering dependency proxy for proxy_http:
Module proxy already enabled
Enabling module proxy_http.
To activate the new configuration, you need to run:
  systemctl restart apache2
Considering dependency proxy for proxy_wstunnel:
Module proxy already enabled
Enabling module proxy_wstunnel.
To activate the new configuration, you need to run:
  systemctl restart apache2
# Creating webserver bootstart
Synchronizing state of apache2.service with SysV service script with /lib/systemd/systemd-sysv-install.
Executing: /lib/systemd/systemd-sysv-install enable apache2
# Restarting webserver apache2
####################################################################################

Add your fully qualified domain name or public IP to servername directive of
apache2, if this installation is done on a remote server. You have to change:
/etc/apache2/sites-available/zammad.conf and restart apache2 process.
Otherwise just open http://localhost/ in your browser to start using Zammad.

####################################################################################
Processing triggers for libc-bin (2.36-9+deb11u1) ...
Processing triggers for man-db (2.11.2-2) ...
Processing triggers for fontconfig (2.14.1-4) ...
Managing Zammad Services
Zammad
systemctl status zammad
systemctl stop zammad
systemctl start zammad
systemctl restart zammad
systemctl enable zammad
Only web application server
systemctl status zammad-web
systemctl stop zammad-web
systemctl start zammad-web
systemctl restart zammad-web
Only worker process
systemctl status zammad-worker
systemctl stop zammad-worker
systemctl start zammad-worker
systemctl restart zammad-worker
Only websocket server
systemctl status zammad-websocket
systemctl stop zammad-websocket
systemctl start zammad-websocket
systemctl restart zammad-websocket
Configure Elasticsearch for Zammad
Next, configure Elasticsearch search engine for Zammad.
Running Elasticsearch
We have already installed Elasticsearch 8.9.1. Thus, you can start and enable it to run on system boot by running the command below;
systemctl enable --now elasticsearch
Elasticsearch is now running with the default settings. Note that by default, Elasticsearch 8.x enables HTTPS and Authentication.
Initial credentials are printed to standard output during installation. Check Elasticsearch installation above.
You can verify by running the command below;
curl -XGET "https://localhost:9200" \
--cacert /etc/elasticsearch/certs/http_ca.crt \
-u elastic
Enter host password for user 'elastic':
{
  "name" : "debian",
  "cluster_name" : "elasticsearch",
  "cluster_uuid" : "f4ri8w0DTuWRBvITLjl8Rg",
  "version" : {
    "number" : "8.9.1",
    "build_flavor" : "default",
    "build_type" : "deb",
    "build_hash" : "a813d015ef1826148d9d389bd1c0d781c6e349f0",
    "build_date" : "2023-08-10T05:02:32.517455352Z",
    "build_snapshot" : false,
    "lucene_version" : "9.7.0",
    "minimum_wire_compatibility_version" : "7.17.0",
    "minimum_index_compatibility_version" : "7.0.0"
  },
  "tagline" : "You Know, for Search"
}
Define Elasticsearch Server Address on Zammad
To define Elasticsearch server address for Zammad, run the command below;
zammad run rails r "Setting.set('es_url', 'https://localhost:9200')"Note that we set HTTPS on the address.
Define Elasticsearch Authentication Credentials
As already mentioned, ES 8.x enables authentication by default. Note that we are using the default credentials for the super-admin Elasticsearch user
Thus, define the ES connection credentials accordingly.
Disable credentials saving on history;
set +o historyNOTE: Be wary about using the elastic super user here. You can create a user that Zammad can use to manage it’s indices! Refer to other online documentation for the same.
zammad run rails r "Setting.set('es_user', 'elastic')"zammad run rails r "Setting.set('es_password', 'ucoAPGk-io-hwnPalUle')"Enable history;
set -o historyOther Elasticsearch Settings
Run the command below to rebuild index, adjust the index namespacing as well as the file attachment indexing rules.
zammad run rake zammad:searchindex:rebuildSample output;
** Invoke zammad:searchindex:rebuild (first_time)
** Invoke zammad:searchindex:version_supported (first_time)
** Invoke zammad:searchindex:configured (first_time)
** Invoke environment (first_time)
** Execute environment
** Execute zammad:searchindex:configured
** Execute zammad:searchindex:version_supported
** Execute zammad:searchindex:rebuild
** Execute zammad:searchindex:drop
Dropping indexes... done.
** Execute zammad:searchindex:drop_pipeline
Deleting pipeline... done.
** Execute zammad:searchindex:create
Creating indexes... done.
** Execute zammad:searchindex:create_pipeline
Creating pipeline... done.
** Execute zammad:searchindex:reload
Reloading data...
  - Chat::Session...
    done in 0 seconds.
  - Cti::Log...
    done in 0 seconds.
  - Group...
    done in 6 seconds.
  - KnowledgeBase::Answer::Translation...
    done in 0 seconds.
  - KnowledgeBase::Category::Translation...
    done in 0 seconds.
  - KnowledgeBase::Translation...
    done in 0 seconds.
  - Organization...
    done in 19 seconds.
  - StatsStore...
    done in 0 seconds.
  - Ticket::Priority...
    done in 13 seconds.
  - Ticket::State...
    done in 20 seconds.
  - Ticket...
    done in 10 seconds.
  - User...
    done in 8 seconds.
Disable Elasticsearch indexing of some of the attachment extensions to reduce resource consumption;
zammad run rails r "Setting.set('es_attachment_ignore', [ '.png', '.jpg', '.jpeg', '.mpeg', '.mpg', '.mov', '.bin', '.exe', '.box', '.mbox' ] )"zammad run rails r "Setting.set('es_attachment_max_size_in_mb', 50)"[Optional] If you are connection mutiple Zammad instances into Elasticsearch, consider defining index namespacing to able to create indices based on Zammad host hostname.
zammad run rails r "Setting.set('es_index', Socket.gethostname.downcase + '_zammad')"Tune Elasticsearch
Increase the virtual memory map count;
echo vm.max_map_count=262144 >> /etc/sysctl.confsysctl -pIncrease the maximum size of an HTTP request body (default is 100MB).
echo "http.max_content_length: 400mb" >> /etc/elasticsearch/elasticsearch.ymlUpdate Elasticsearch JVM heap size settings. You need to update this value depending on the size of the RAM your system is assigned.
We will set this to 1GB in our demo server.
echo '-Xms1g
-Xmx1g' > /etc/elasticsearch/jvm.options.d/jvm-custom-heap.options
Restart Elasticsearch
systemctl stop elasticsearchsystemctl start elasticsearchConfigure Web Server for Zammad
By default, Zammad installs Nginx web server. You can choose to use Nginx as installed by default or simply install Apache and copy the configurations in place.
To use Nginx, check here;
How to use Nginx Web server with Zammad
I will be using Apache Web server in this guide, so I have to install it as follows;
apt install apache2 apache2-utilsSetup Zammad Apache Site Configuration for HTTP (NOT RECOMMENDED!)
Running Zammad on Apache via HTTP is not recommended security wise. You can only use this for your local environment testing.
If you want to go this route, update the default Zammad Apache configuration for HTTP, /etc/apache2/sites-enabled/zammad.conf, and modify it to suite your needs.
cp /opt/zammad/contrib/apache2/zammad.conf /etc/apache2/sites-enabled/vim /etc/apache2/sites-enabled/zammad.confSample Zammad Apache site configuration file;
#
# this is the apache config for zammad
#

# security - prevent information disclosure about server version
ServerTokens Prod

<VirtualHost *:80>
    # replace 'localhost' with your fqdn if you want to use zammad from remote
    ServerName localhost

    ## don't loose time with IP address lookups
    HostnameLookups Off

    ## needed for named virtual hosts
    UseCanonicalName Off

    ## configures the footer on server-generated documents
    ServerSignature Off

    ProxyRequests Off
    ProxyPreserveHost On

    <Proxy 127.0.0.1:3000>
	Require local
    </Proxy>

    ProxyPass /assets !
    ProxyPass /favicon.ico !
    ProxyPass /apple-touch-icon.png !
    ProxyPass /robots.txt !
    ProxyPass /ws ws://127.0.0.1:6042/
    ProxyPass / http://127.0.0.1:3000/

    # change this line in an SSO setup
    RequestHeader unset X-Forwarded-User

    DocumentRoot "/opt/zammad/public"

    <Directory />
        Options FollowSymLinks
        AllowOverride None
    </Directory>

    <Directory "/opt/zammad/public">
        Options FollowSymLinks
	Require all granted
    </Directory>

</VirtualHost>
Setup Zammad Apache Site Configuration for HTTPS (RECOMMENDED!)
It is recommended to setup Zammad with HTTPS for secured connection.
This is the method that we will use in this guide. Our SSL certificates are Let’s Encrypt SSL certificates. If you have your commercial CA signed certificates, you can use it.
Thus, copy the default Zammad Apache configuration for HTTPs, /opt/zammad/contrib/apache2/zammad_ssl.conf, and modify it to suite your needs.
cp /opt/zammad/contrib/apache2/zammad_ssl.conf /etc/apache2/sites-enabled/This is our modified configuration file;
cat /etc/apache2/sites-enabled/zammad_ssl.conf# security - prevent information disclosure about server version
ServerTokens Prod
<VirtualHost *:80>
ServerName zammad.kifarunix.com
Redirect permanent / https://zammad.kifarunix.com
</VirtualHost>
<VirtualHost *:443>
SSLEngine on
SSLProtocol -all +TLSv1.3 +TLSv1.2
SSLCipherSuite EECDH+AESGCM:EDH+AESGCM:AES256+EECDH:AES256+EDH
SSLCertificateFile /etc/letsencrypt/live/kifarunix.com/fullchain.pem
SSLCertificateKeyFile /etc/letsencrypt/live/kifarunix.com/privkey.pem
SSLOpenSSLConfCmd DHParameters /etc/ssl/dhparam.pem
# replace 'localhost' with your fqdn if you want to use zammad from remote
ServerName zammad.kifarunix.com
## don't loose time with IP address lookups
HostnameLookups Off
## needed for named virtual hosts
UseCanonicalName Off
## configures the footer on server-generated documents
ServerSignature Off
ProxyRequests Off
ProxyPreserveHost On
<Proxy 127.0.0.1:3000>
Require local
</Proxy>
ProxyPass /assets !
ProxyPass /favicon.ico !
ProxyPass /apple-touch-icon.png !
ProxyPass /robots.txt !
# legacy web socket server
ProxyPass /ws ws://127.0.0.1:6042/
# action cable
ProxyPass /cable ws://127.0.0.1:3000/cable
ProxyPass / http://127.0.0.1:3000/
# change this line in an SSO setup
RequestHeader unset X-Forwarded-User
RequestHeader set X_FORWARDED_PROTO 'https'
# Use settings below if proxying does not work and you receive HTTP-Errror 404
# if you use the settings below, make sure to comment out the above two options
# This may not apply to all systems, applies to openSuse
#ProxyPass /ws ws://127.0.0.1:6042/ "retry=1 acque=3000 timeout=600 keepalive=On"
#ProxyPass /cable ws://127.0.0.1:3000/cable "retry=1 acque=3000 timeout=600 keepalive=On"
#ProxyPass / http://127.0.0.1:3000/ "retry=1 acque=3000 timeout=600 keepalive=On"
DocumentRoot "/opt/zammad/public"
<Directory />
Options FollowSymLinks
AllowOverride None
</Directory>
<Directory "/opt/zammad/public">
Options FollowSymLinks
Require all granted
</Directory>
</VirtualHost>
Disable the default Apache site;
a2dissite 000-default.confAlso, generate Deffie-Hellman certificate to ensure a secured key exchange. The -dsaparam option in the command below is added to speed up the generation.
openssl dhparam -dsaparam -out /etc/ssl/dhparam.pem 4096Enable Require Apache Modules
Enable some of the required modules;
a2enmod proxy proxy_html proxy_http proxy_wstunnel headers sslCheck for errors on Apache configurations and restart Apache2;
apachectl -tIf syntax is Ok, restart Apache;
systemctl restart apache2Install Postfix for Zammad Email Notifications
To have Zammad deliver email notifications, you can install postfix and choose Internet Site option if prompted.
apt install postfix -yAccessing Zammad Web Interface
You can now access your Zammad from the browser.
First of all, open the web server ports if you have firewall running;
Using UFW;
ufw allow "WWW Full"You can now access Zammad Web interface by navigating to the URL, http://<server-fqdn> or https://<server-fqdn>.
You will be welcomed by Zammad setup page;
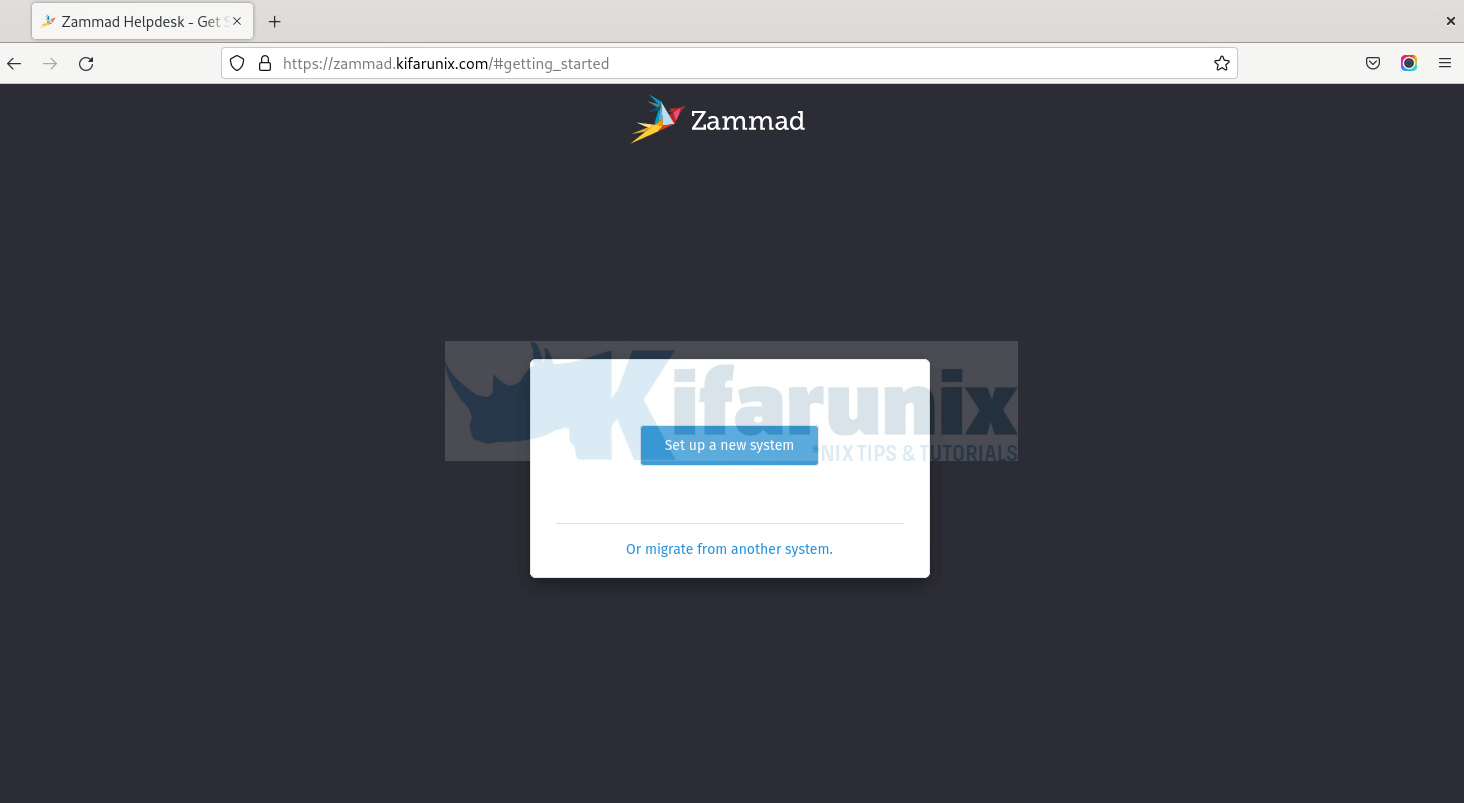
Click on Setup new system to proceed.
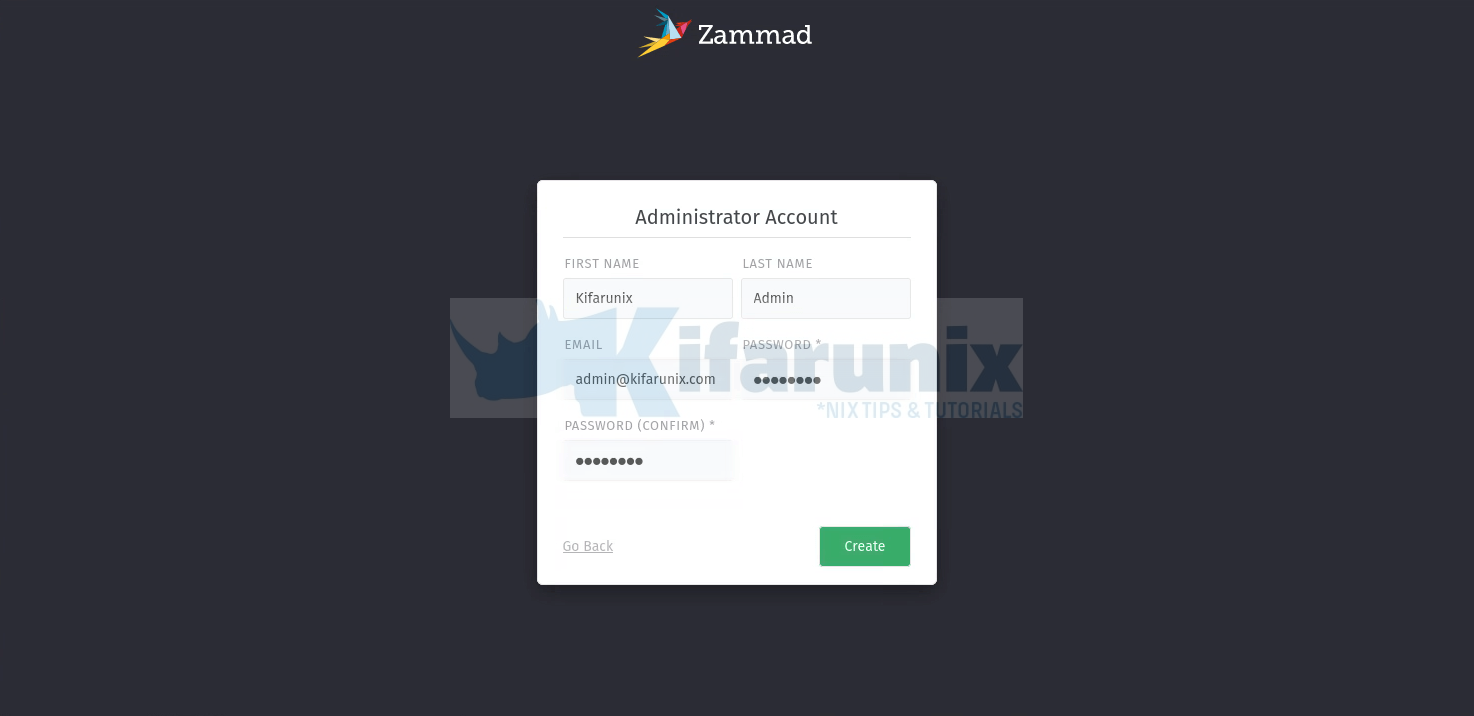
Setup Zammad Administrator account.
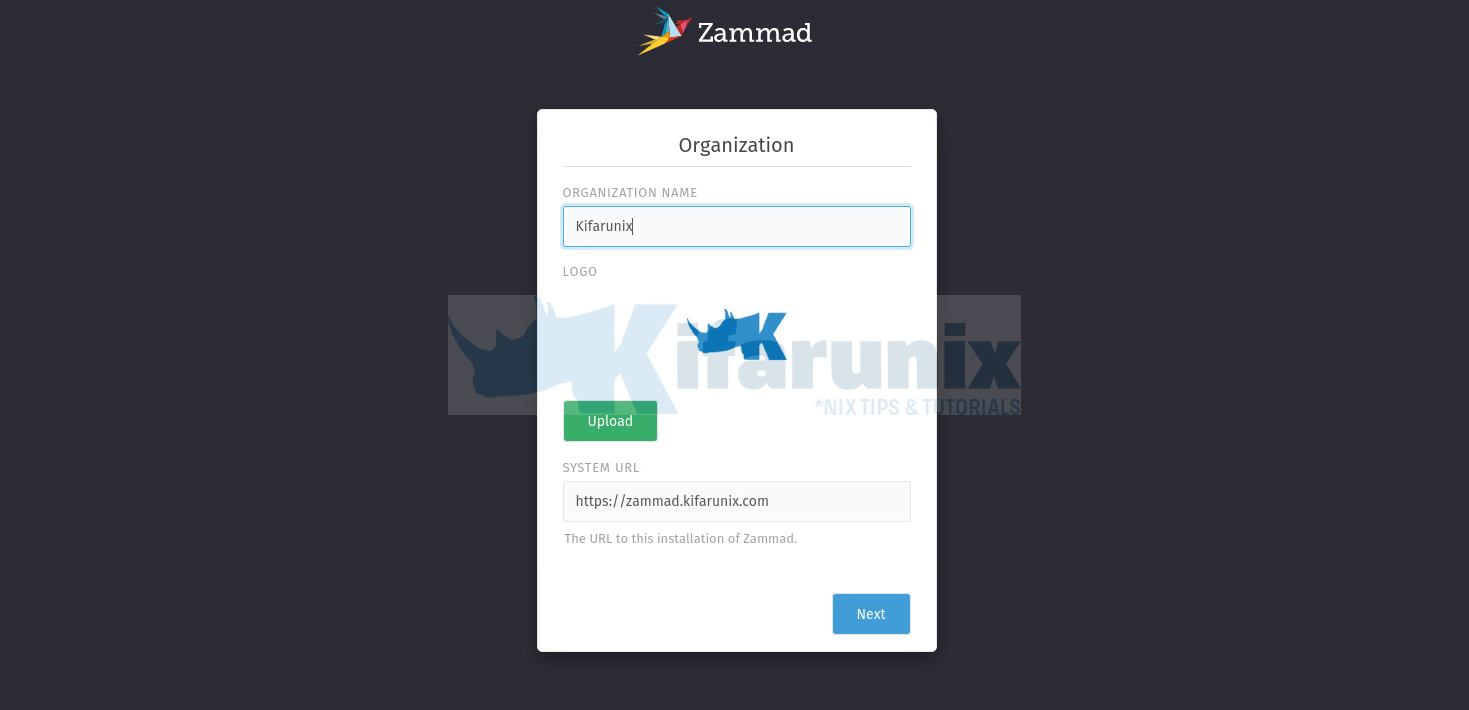
Next, set you organization name, logo and the zammad url;
Configure Email notification settings. We use Gmail relay in our case.
If you are using Gmail relay, then check this guide on how to setup app passwords in the guide Configure Postfix to Use Gmail App Passwords
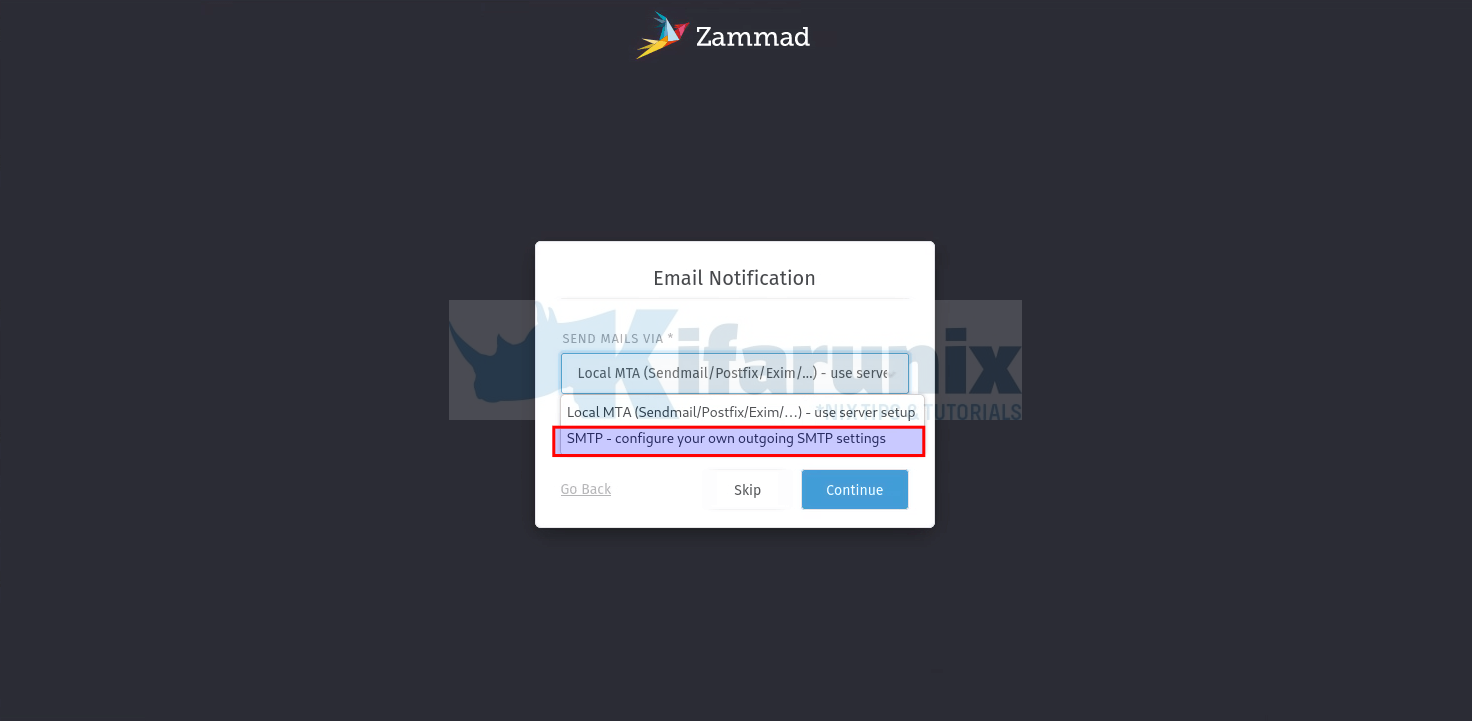
Click Continue to setup your email notifications.
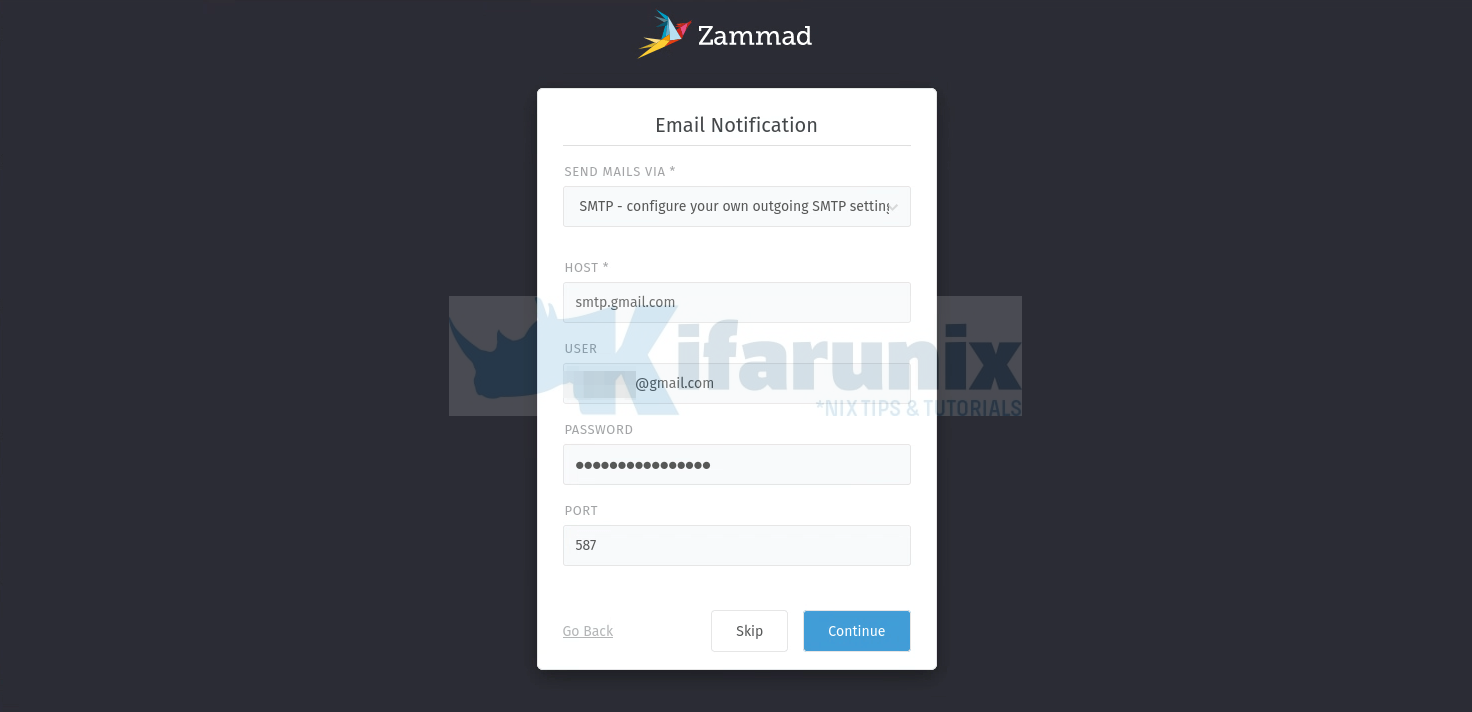
Password required is the app password.
You can setup the Zammad communications channels. Click Email to setup email communication channel.


A verification Email will be sent to your inbox as a confirmation of the function of the communications channel.
Once you have set your Zammad communications channel, you can choose to invite colleagues;

Click Continue to go to the dashboard, stats.
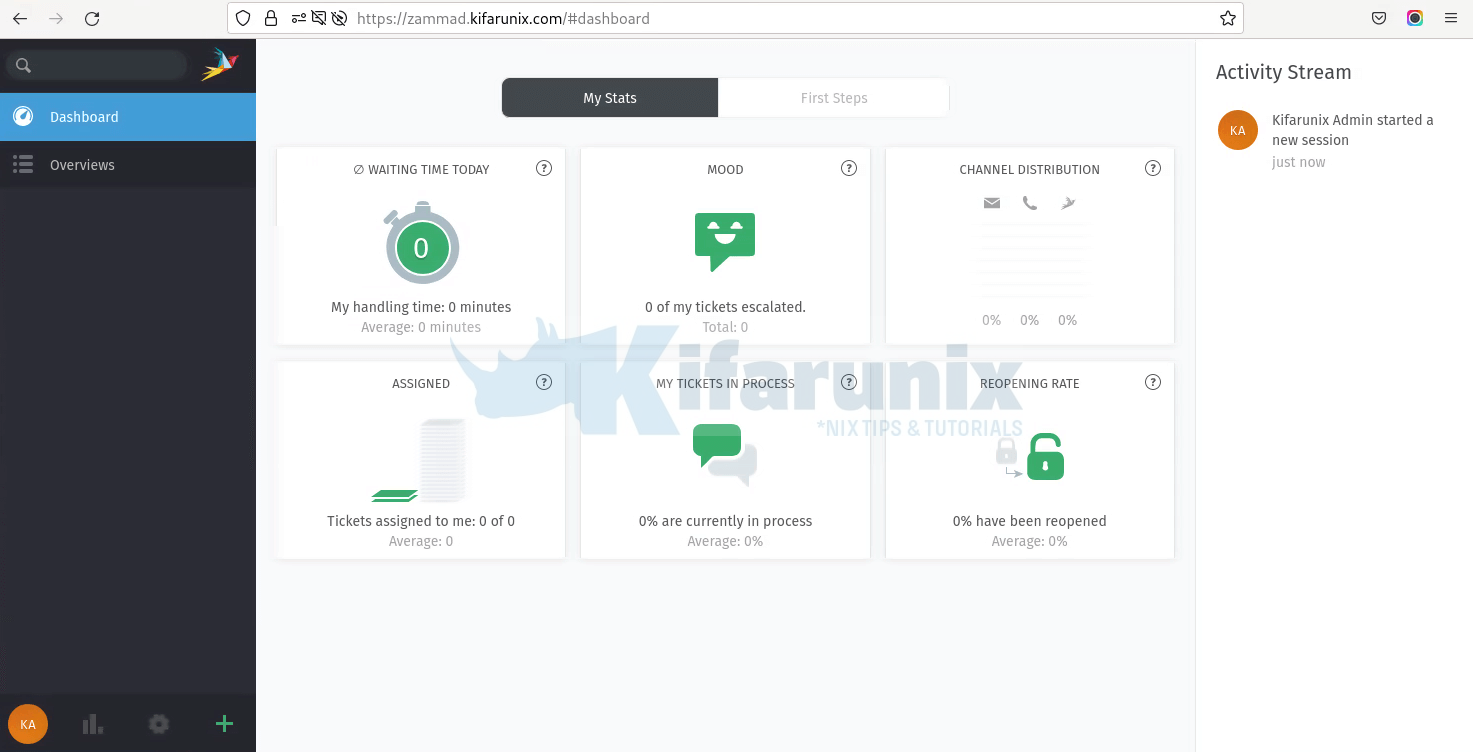
Dashboard, First Steps
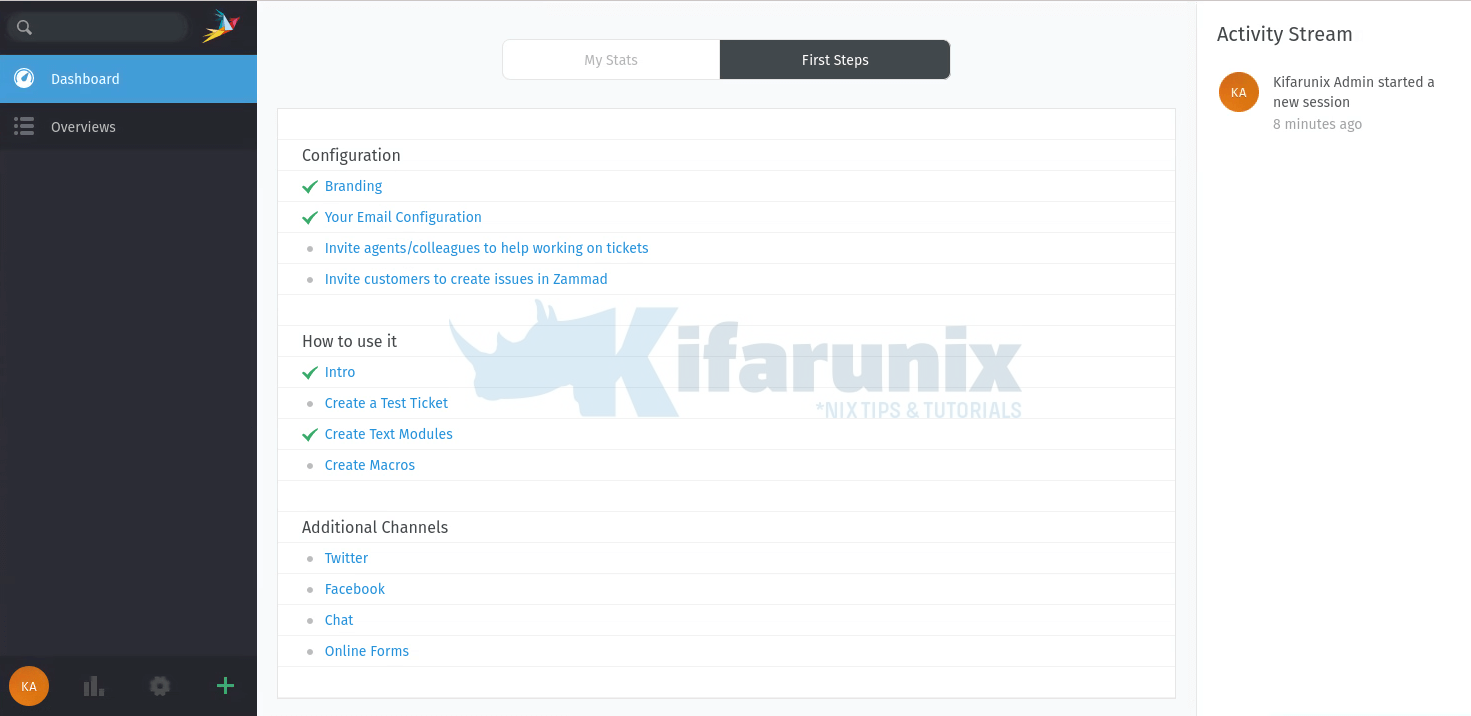
OverView

And that is all on how to install Zammad Ticketing System.
You can continue with the setup in order to fully use the Zammad ticketing system.
Reference
Other Tutorials
Install Zammad Ticketing System on Ubuntu 20.04
Install Request Tracker (RT) with MariaDB on CentOS 8
Configure Request Tracker (RT) to send Mails using MSMTP via Office 365 Relay

