In our previous guide, we learnt how to Install and Setup Pritunl VPN Server on Debian. This tutorial will take you through how to install Pritunl VPN client on Debian/Ubuntu systems so that you can be able to connect to your VPN server and be able to access your other systems in a remote LAN.
Installing Pritunl VPN client on Debian/Ubuntu
Install Pritunl APT Repository on Debian/Ubuntu
In order to install Pritunl VPN client, you need to first install the Pritunl repositories by running the commands below;
Install Pritunl repository on Ubuntu/Debian;
echo "deb https://repo.pritunl.com/stable/apt $(lsb_release -sc) main" > /etc/apt/sources.list.d/pritunl.listInstall Pritunl repository on Ubuntu/Debian;
apt install apt-transport-https dirmngrapt-key adv --keyserver hkp://keyserver.ubuntu.com --recv 7568D9BB55FF9E5287D586017AE645C0CF8E292A Run system update;
apt updateInstall Pritunl VPN client
Once the repos are in place, run the command below to install Pritunl.
On desktop systems, you can install pritunl-client-electron VPN client package;
apt install pritunl-client-electronOn server systems, you can simply use pritunl-client VPN client package;
apt install pritunl-client
Connecting to Pritunl VPN Server
Add Users and Organizations on Pritunl VPN Server
Before you can connect to Pritunl VPN server from the client, you need to have created the users and organizations. Follow the link below to create Pritunl VPN server users and organization.
Add Users and Organizations on Pritunl VPN Server

Connect to Pritunl VPN Server from Servers with no Desktop Environment
If you are running on servers without the GUI interface, you can use pritunl-client to connect to Pritunl VPN server.
The basic command line usage for the pritunl-client is;
pritunl-clientPritunl Client Command Line Tool
Usage:
pritunl-client [flags]
pritunl-client [command]
Available Commands:
add Add profile
completion generate the autocompletion script for the specified shell
help Help about any command
list List profiles
logs Show logs for profile
remove Remove profile
start Start profile
stop Stop profile
version Show version
watch Watch profiles
Flags:
-h, --help help for pritunl-client
Use "pritunl-client [command] --help" for more information about a command.So, for example, in our Pritunl VPN server, we added two demo users as show above.
Let us say you want to connect to Pritunl VPN server as one of the users above, say demo user from your Ubuntu/Debian server, using pritunl-client, then you would simply run the command below;
pritunl-client add [profile_uri]Where [profile_uri] is the uri for the user profile on Pritunl VPN server. You can get the user’s profile URI from Pritunl VPN server, user’s profile. See screenshots below;
So if you are using trusted SSL certificate with your Pritunl VPN server, then you can import the profile directly using the sample command below;
pritunl-client add pritunl://pritunl.kifarunix-demo.com/ku/pw6pDiJZList available profiles by running the command;
pritunl-client listStart the profile using the pritunl-client start command;
pritunl-client start -hStart profile
Usage:
pritunl-client start [profile_id] [flags]
Flags:
-h, --help help for start
-m, --mode string VPN mode (ovpn, wg)
-p, --password string VPN passwordConnect to Pritunl VPN Server from Desktop Systems
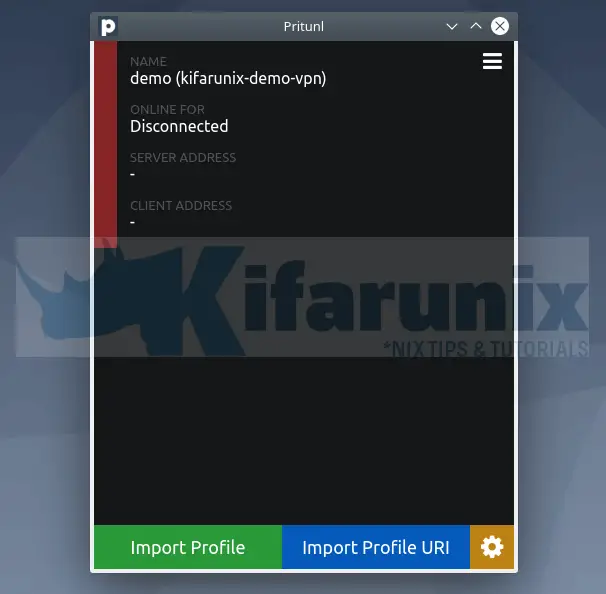
From desktop systems, you can connect to Pritunl VPN server using the Pritunl client. Just launch it from the application menu. It looks like this;

Download the user’s profile from Pritunl server and import on the client.
You can as well get the profile URI and import from URI.
In our demo, we downloaded the profile for demo user and imported as follows.
wget -P ~/Downloads/ https://pritunl.kifarunix-demo.com/key/guxJ2EedzAC8dkodgKoYJTtjGpYpFnp3.tar --no-check-certificatecd ~/Downloadstar xf guxJ2EedzAC8dkodgKoYJTtjGpYpFnp3.tarls -alh ....
-rw-r--r-- 1 koromicha koromicha 20K Mar 17 01:59 guxJ2EedzAC8dkodgKoYJTtjGpYpFnp3.tar
-rw------- 1 koromicha koromicha 9.7K Mar 17 01:59 kifarunix-demo.com_demo_kifarunix-demo-vpn.ovpnSo we have the ovpn profile file.
To import the profile, simply click Import Profile and select your .ovpn file from your specific system location.
The Pritunl client then shows like as shown below once the profile is imported;

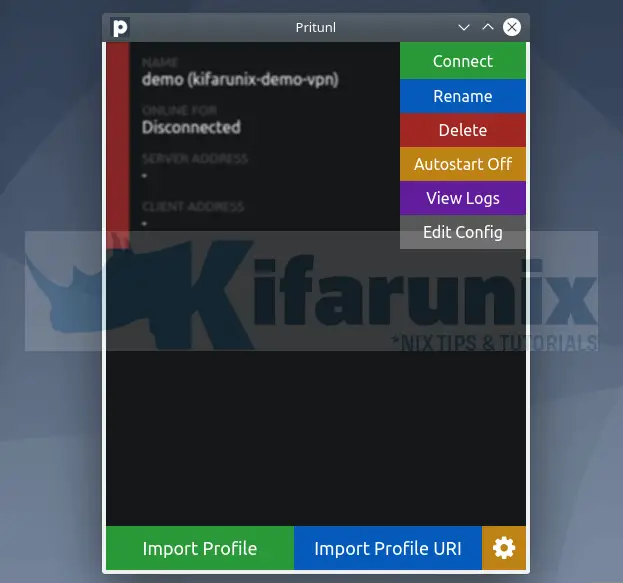
To connect, click on the menu lines at the right top and click connect.

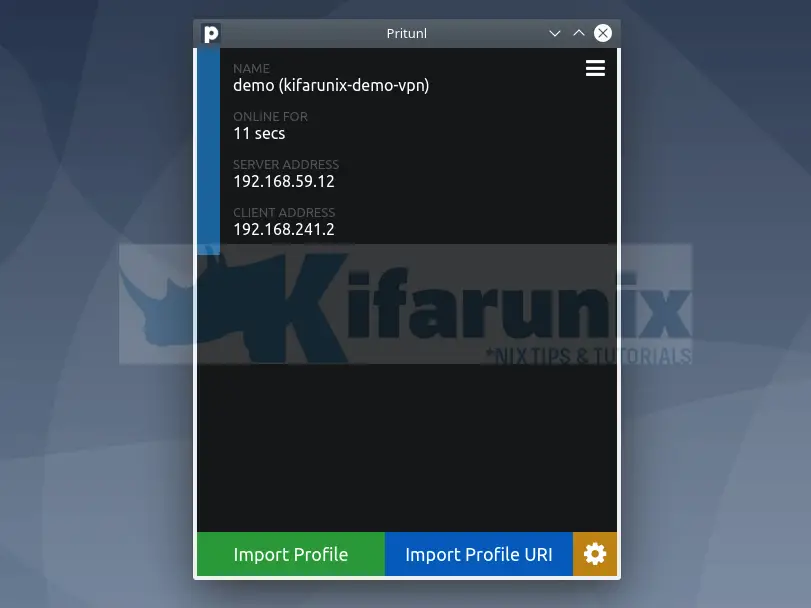
Connection status from the client;

Verify IP address;
ip add4: tun0: <POINTOPOINT,MULTICAST,NOARP,UP,LOWER_UP> mtu 1500 qdisc pfifo_fast state UNKNOWN group default qlen 100
link/none
inet 192.168.241.2/24 brd 192.168.241.255 scope global tun0
valid_lft forever preferred_lft forever
inet6 fe80::8906:20df:b6f4:ef97/64 scope link stable-privacy
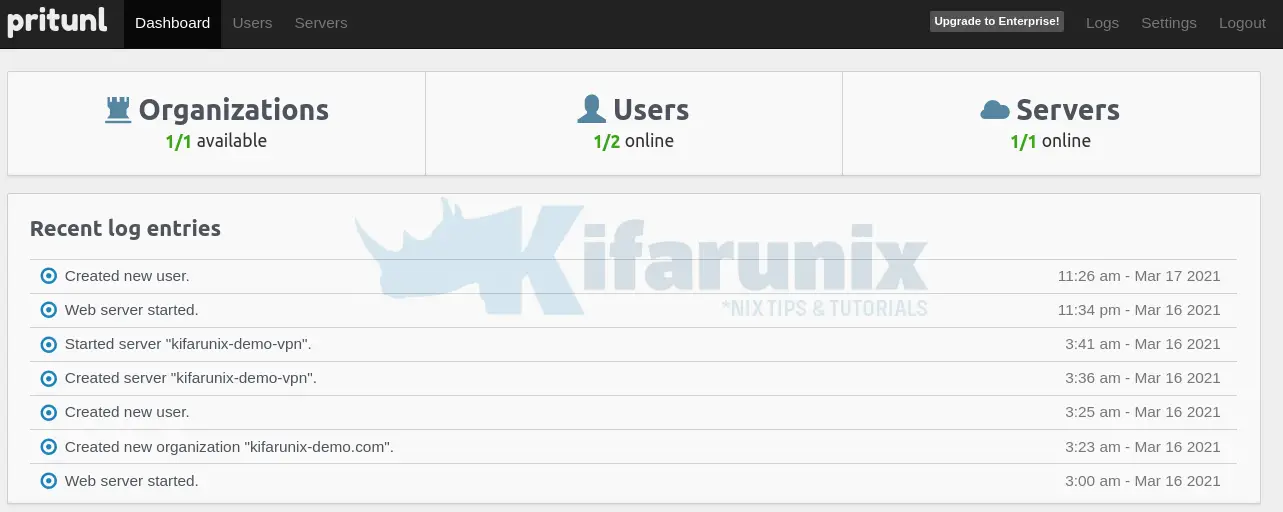
valid_lft forever preferred_lft foreverConnection status from the Pritunl VPN Server;


Connect Using OpenVPN client;
You can connect using openvpn client;
sudo openvpn ~/Downloads/kifarunix-demo.com_demo_kifarunix-demo-vpn.ovpnOther connection methods
Using Network Manager command line tool;
nmcli connection import type openvpn file ~/Downloads/kifarunix-demo.com_demo_kifarunix-demo-vpn.ovpnSimilarly, you can as well import a saved .ovpn configuration from Gnome or KDE network connection settings.
Reference and Further Reading
Related Tutorials
Connect to VPN Automatically on Ubuntu 20.04/18.04
Install FortiClient VPN Client on Ubuntu 20.04/Ubuntu 18.04
Connect to OpenVPN using Network Manager on CentOS 8/Ubuntu 18.04

