In this tutorial, you will learn how to install and setup Pritunl VPN server on Debian 10. Pritunl is an open source enterprise distributed OpenVPN, IPsec and WireGuard Server. It can provide a reliable interconnection between various virtual private cloud (VPC) networks such as AWS, GCP, Oracle Cloud. It is one of the most secure VPN server available and the only VPN server to offer up to five layers of authentication. Including a user certificate, six digit user pin, two-factor authenticator, single sign-on and mobile push authentication.
Installing Pritunl VPN Server on Debian
In this tutorial, we will be installing Pritunl on Debian 10 system.
Install Pritunl Repositories on Debian 10
Pritunl is not available on the default Debian repositories;
apt show pritunlN: Unable to locate package pritunl
N: Unable to locate package pritunl
E: No packages foundTherefore, in order to install and setup Pritunl VPN server, you need to install the Debian repositories by running the command below;
sudo tee /etc/apt/sources.list.d/pritunl.list << EOF
deb https://repo.pritunl.com/stable/apt buster main
EOF
Install Pritunl repository signing key
Run the command below to install the Pritunl repository key.
sudo apt-key adv --keyserver hkp://keyserver.ubuntu.com --recv 7568D9BB55FF9E5287D586017AE645C0CF8E292ARun System Update
Update system package cache;
apt updateInstall Setup Pritunl VPN Server on Debian 10
Now that the Pritunl repositories are installed, the Pritunl package should now be available for installation;
apt-cache policy pritunlpritunl:
Installed: (none)
Candidate: 1.29.2664.67-0debian1~buster
Version table:
1.29.2664.67-0debian1~buster 500
500 https://repo.pritunl.com/stable/apt buster/main amd64 PackagesSo you can simply install Pritunl VPN server on Debian 10 by running the command below;
apt install pritunlRunning Pritunl Service on Debian
Once the installation is done, you can start and enable Pritunl to run on system boot by executing the command below;
systemctl enable --now pritunlTo check the status;
systemctl status pritunl● pritunl.service - Pritunl Daemon
Loaded: loaded (/etc/systemd/system/pritunl.service; enabled; vendor preset: enabled)
Active: active (running) since Mon 2021-03-15 15:44:50 EDT; 55s ago
Main PID: 4660 (pritunl)
Tasks: 20 (limit: 2359)
Memory: 107.9M
CGroup: /system.slice/pritunl.service
├─4660 /usr/lib/pritunl/bin/python /usr/lib/pritunl/bin/pritunl start
└─4680 pritunl-web
Mar 15 15:44:50 debian systemd[1]: Started Pritunl Daemon.
Mar 15 15:44:50 debian pritunl[4660]: /usr/lib/pritunl/local/lib/python2.7/site-packages/OpenSSL/crypto.py:12: CryptographyDeprecationWarning: Python 2 is no longer support
Mar 15 15:44:50 debian pritunl[4660]: from cryptography import x509Install MongoDB on Debian 10
Pritunl uses MongoDB as the database backend. Thus you need to install it.
Follow the link below to install MongoDB on Debian 10;
Setup Pritunl VPN Server on Debian 10
You can now access Pritunl server from your preferred web browser and finalize on the setup. Use the URL https://server-IP-or-resolvable-hostname.
Setup Pritunl Setup Key and Database URL
When you access the URL, you will be prompted to enter the setup key and MongoDB URL.
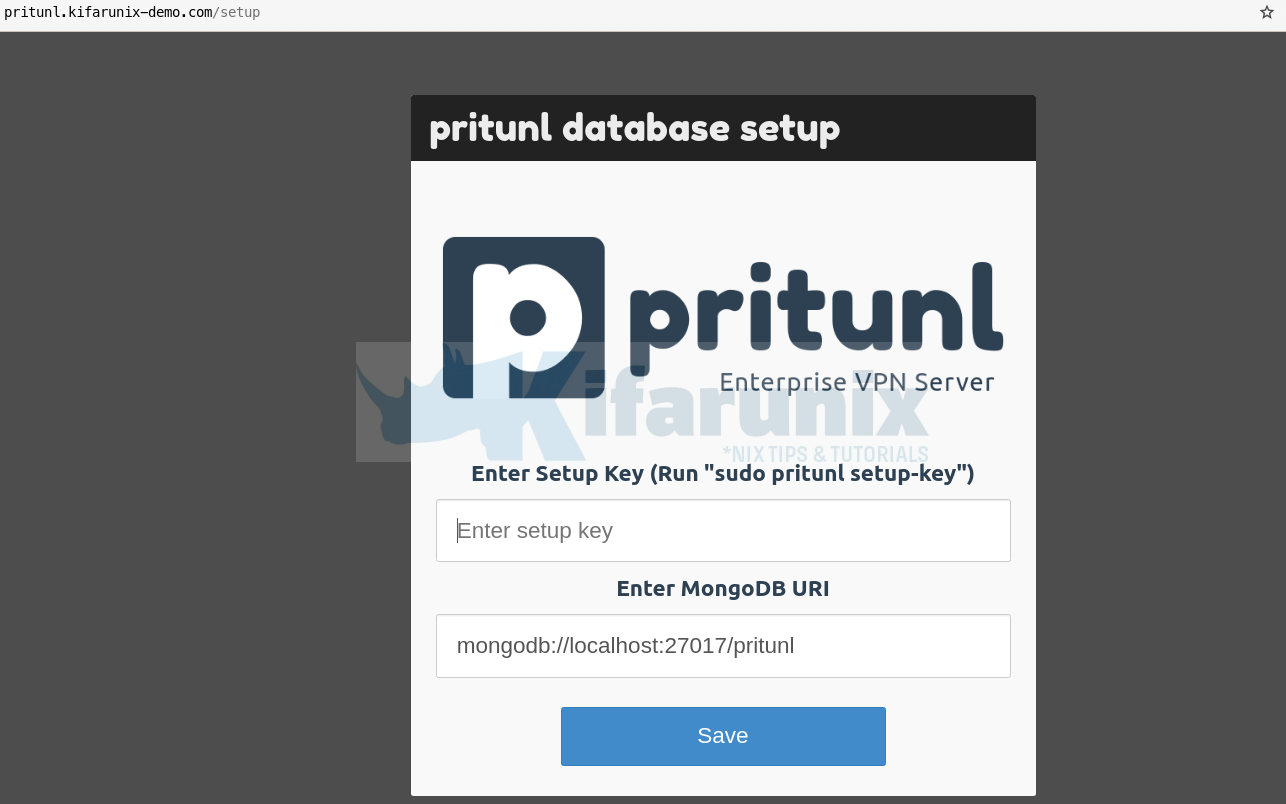
For the setup key, you can obtain it by running the command below;
pritunl setup-keyFor the MongoDB URL, we will it with the default. Be sure to update the URL accordingly.
netstat -altnp | grep 27017tcp 0 0 127.0.0.1:27017 0.0.0.0:* LISTEN 4158/mongodClick Save to proceed.
Login to Pritunl Web Interface
When you click Save button above, you are redirected to Pritunl login in page;
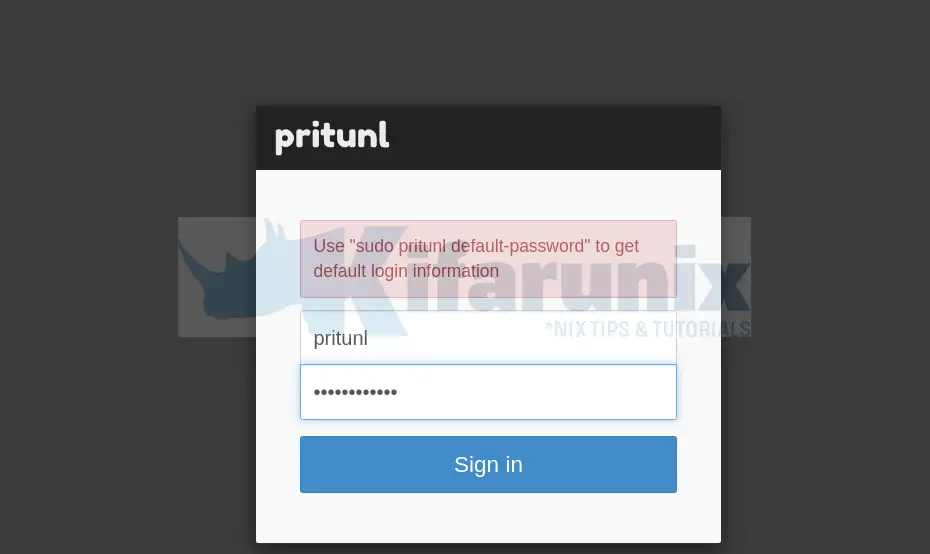
You can obtain the default login credentials running the command below;
pritunl default-password...
[undefined][2021-03-15 16:03:12,676][INFO] Getting default administrator password
Administrator default password:
username: "pritunl"
password: "9stjtiF3PUsy"Enter the credentials and sign in.
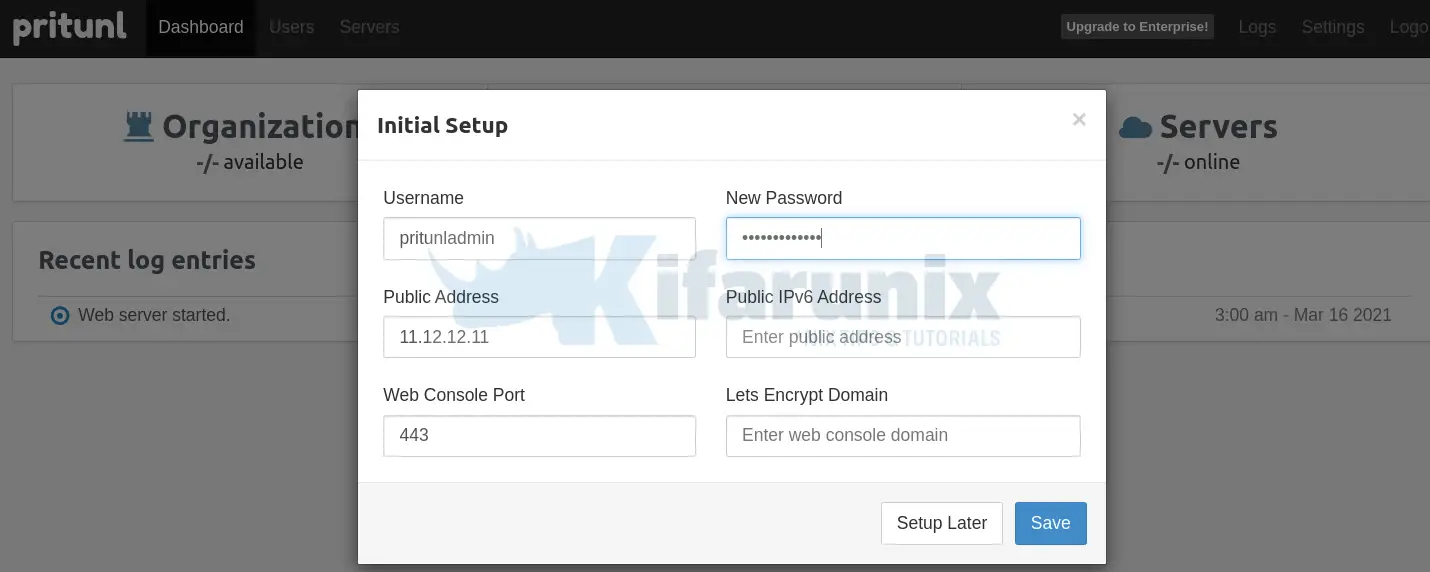
Pritunl Initial Setup
Once you sign in, you are welcomed by initial setup screen. The only things we are going to change here, in this setup, is the username and the password and the VPN server IP. Click Save if you made the changes or simply choose to setup later;
Pritunl Dashboard

Users and Organizations
You need an organization, a user and server added to Pritunl in order for VPN connections to work.
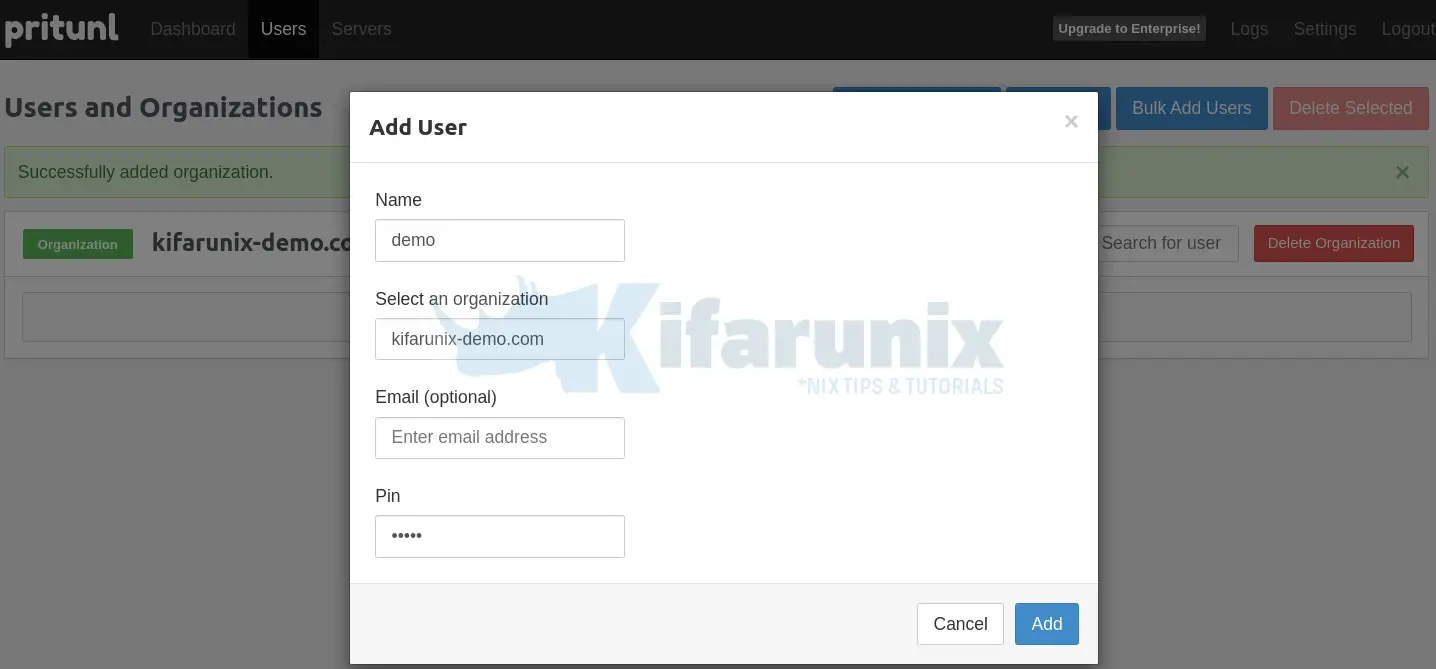
Add Pritunl Organization and Users
Click on Users > Add Organization to create an organization.

Similarly, click Add User to add a user.
Create Pritunl VPN Server
Add Server
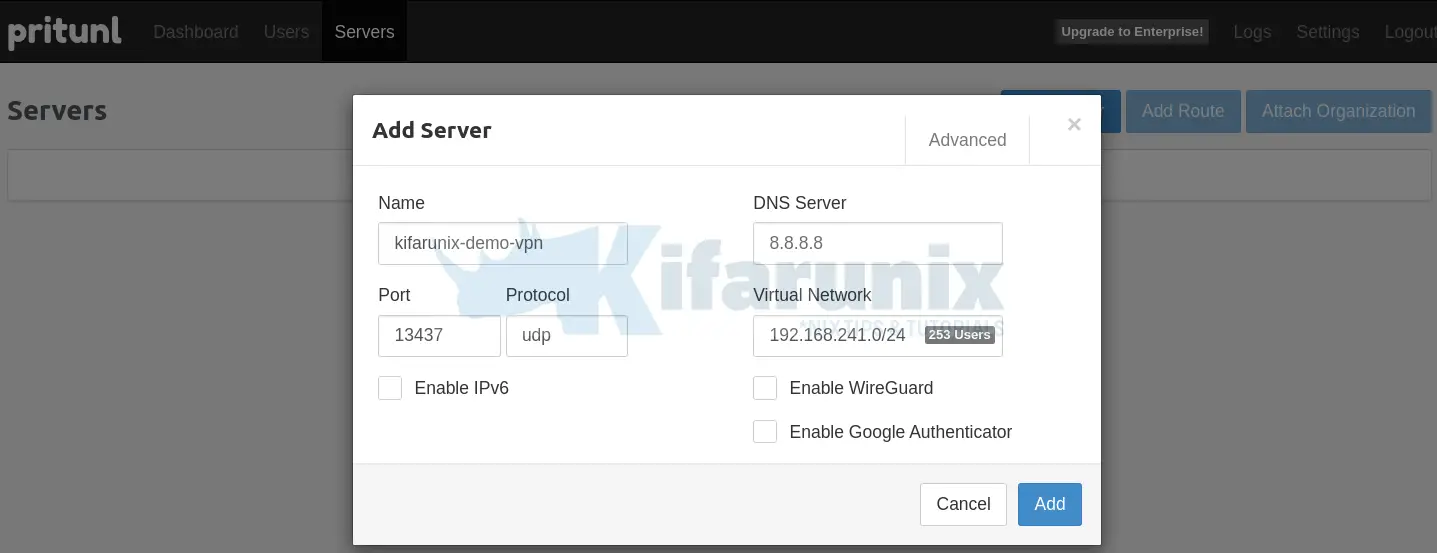
Next, create Pritunl VPN server by clicking on the Servers tab > Add Server. Set your Server name, Port, DNS Server IP, Virtual networks. Click Advanced for advanced VPN settings.
Add Routes
If you have other networks, you can add other routes.
Attach VPN Server to an Organization
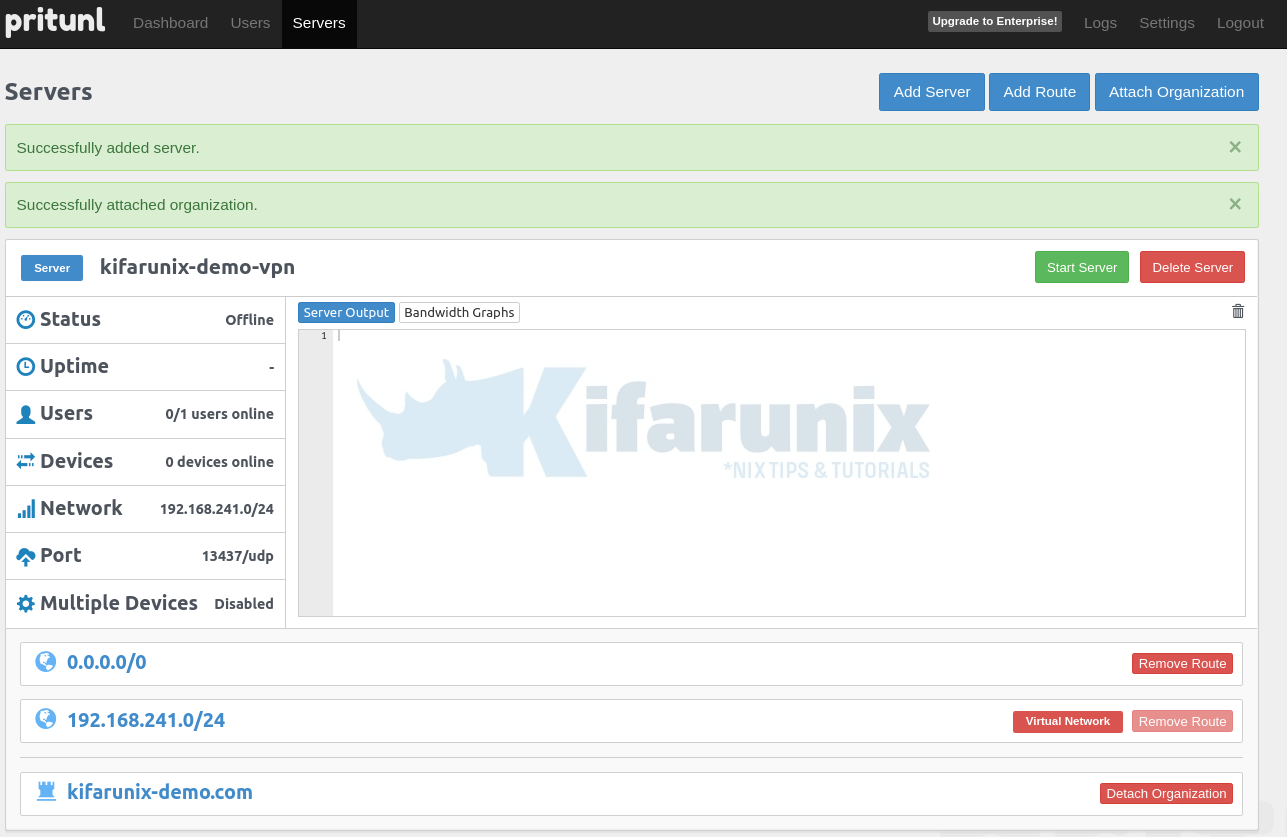
Next, attach VPN Server to an Organization created above.
Once that is done, this is how the servers page should now look like;
Running Pritunl VPN Server
You can now run Pritunl VPN server by clicking Start.
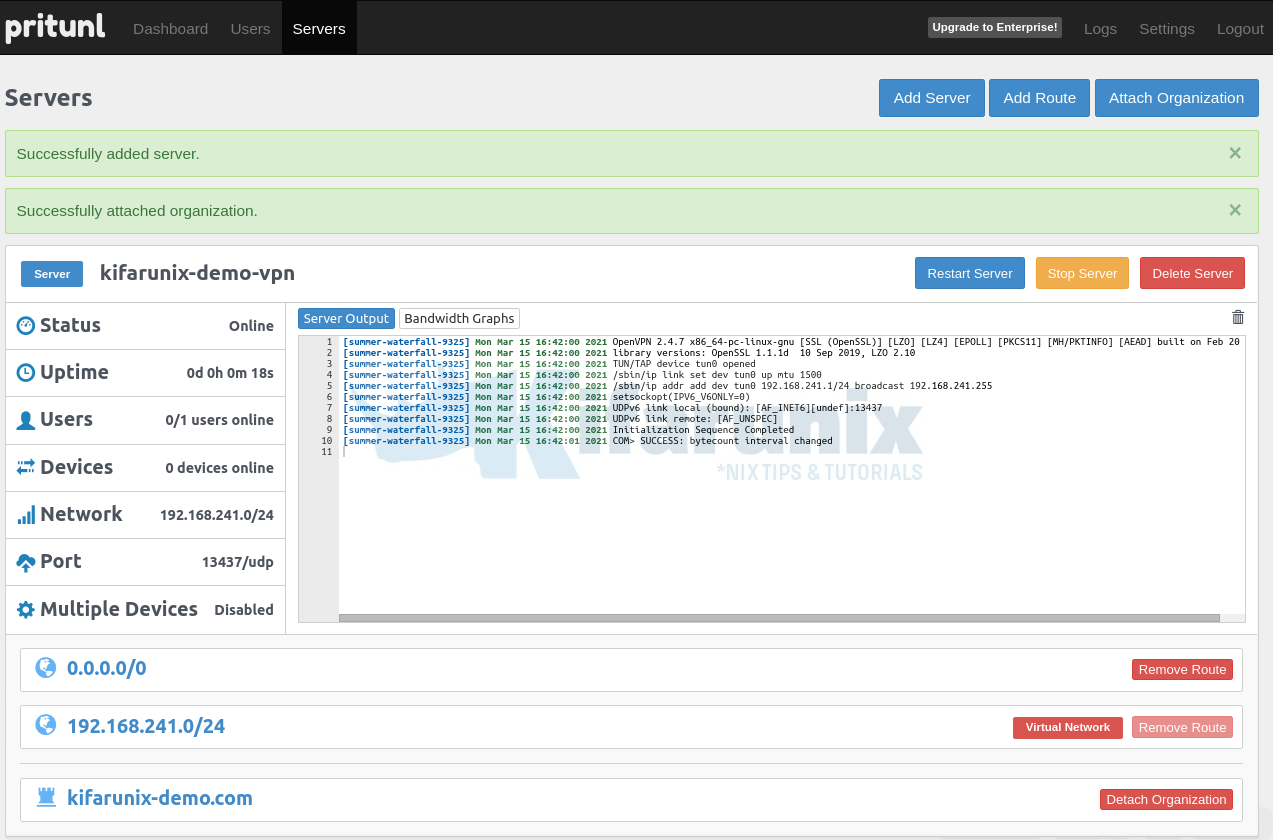
The VPN server is now running.
That marks the end of our tutorial on setting Pritunl VPN server. Follow the link below to learn how to connect to configure Pritunl VPN client system to connect to Pritunl VPN server.
Install Pritunl VPN client on Debian/Ubuntu
Reference
Other Tutorials
Setup IPSec VPN Server with Libreswan on CentOS 8

