In this tutorial, you will learn how to install Wazuh SIEM server on Ubuntu 24.04. The Wazuh platform offers XDR and SIEM functionalities aimed at safeguarding your cloud, container, and server workloads. These capabilities encompass the analysis of log data, detection of intrusions and malware, monitoring file integrity, assessing configurations, identifying vulnerabilities, and ensuring compliance with regulatory standards.
Table of Contents
Installing Wazuh SIEM Server on Ubuntu 24.04
Wazuh SIEM Capabilities
Wazuh can be used to monitor endpoints, cloud services and containers, and to aggregate and analyze data from external sources. Wazuh provides the following capabilities:
- Security Analytics
- Intrusion Detection
- Log Data Analysis
- File Integrity Monitoring
- Vulnerability Detection
- Configuration Assessment
- Incident Response
- Regulatory Compliance
- Cloud Security Monitoring
- Containers Security
Major Wazuh SIEM Server Components
Wazuh SIEM server is made up of various components;
- Wazuh Indexer: This is a highly scalable, full-text search and analytics engine that indexes and stores alerts generated by the Wazuh server and provides near real-time data search and analytics capabilities. Wazuh indexer is a open source fork of OpenSearch.. It can be installed on the same node as Wazuh server and dashboard or on an individual node if you are using a distributed setup.
- Wazuh Server: The Wazuh server analyzes the data received from the Wazuh agents, triggering alerts when threats or anomalies are detected. It is also used to remotely manage the agents’ configuration and monitor their status.
- Wazuh Dashboard: It provides intuitive web interface for mining, analyzing, and visualizing security data. It provides out-of-the-box dashboards, allowing you to seamlessly navigate through the user interface.
- Wazuh agent. These are the agents installed and run on the endpoints that the user wants to monitor. It communicates with the Wazuh server, sending data in near real-time through an encrypted and authenticated channel for processing.
Wazuh SIEM System Hardware Requirements
Each Wazuh SIEM server component requires various system hardware specs to function optimally.
Below are the minimum and recommended hardware requirements for each component.
- Wazuh Indexer:
- Minimum: 4 GB RAM, 2 CPU cores
- Recommended: 16 GB RAM, 8 CPU cores
- Disk: disk space required varies with the number of generated alerts per second (APS).
- Wazuh Server:
- Minimum: 2 GB RAM, 2 CPU cores
- Recommended: 4 GB RAM, 8 CPU cores
- Disk: disk space required varies with the number of generated alerts per second (APS).
- Wazuh Dashboard:
- Minimum: 4 GB RAM, 2 CPU cores
- Recommended: 8 GB RAM, 4 CPU cores
- Disk: disk space required varies with the number of generated alerts per second (APS).
In this tutorial, we will be installing the major components of Wazuh on a single node. Hence, here are our system hardware specs.
RAM: 16G
free -h total used free shared buff/cache available
Mem: 15Gi 3.9Gi 10Gi 1.2Mi 1.2Gi 11Gi
Swap: 2.0Gi 0B 2.0Gi
CPU Cores:
nproc --all8Disk space;
df -hT -P /Filesystem Type Size Used Avail Use% Mounted on
/dev/mapper/ubuntu--vg-ubuntu--lv ext4 98G 7.6G 86G 9% /
Next, proceed to install Wazuh SIEM server. As already mentioned, we will install a single node deployment with Wazuh indexer, Wazuh siem and Wazuh dashboard.
Install Wazuh Indexer on Ubuntu 24.04
Install Wazuh Repository on Ubuntu 24.04
To smoothly run the installation of Wazuh SIEM components on Ubuntu 24.04, you need to install Wazuh repository.
Thus, to begin with, install Wazuh repository GPG signing key on Ubuntu 24.04.
sudo su -apt install gnupg apt-transport-httpscurl -s https://packages.wazuh.com/key/GPG-KEY-WAZUH | \
gpg --dearmor > /etc/apt/trusted.gpg.d/wazuh.gpgInstall the Wazuh 4.x repository;
echo "deb https://packages.wazuh.com/4.x/apt stable main" > /etc/apt/sources.list.d/wazuh.listInstall Wazuh Indexer on Ubuntu 24.04
Update the package cache;
apt updateNext, install Wazuh SIEM server.
apt install wazuh-indexerGenerate Wazuh SSL/TLS Certificates
Generate SSL/TLS certificates that will be used to encrypt communication between the Wazuh SIEM components.
Wazuh provides some tools that can be used to generate the certificates.
Replace the value of the VER below with the current major release version of Wazuh;
VER=4.7Then, download the tools required to generate the certificates;
wget https://packages.wazuh.com/${VER}/wazuh-certs-tool.shDownload a configuration file that helps you to define the IP address and name of each Wazuh node.
wget https://packages.wazuh.com/${VER}/config.ymlBy default, this is how the configuration looks like;
cat config.ymlnodes:
# Wazuh indexer nodes
indexer:
- name: node-1
ip: "<indexer-node-ip>"
#- name: node-2
# ip: "<indexer-node-ip>"
#- name: node-3
# ip: "<indexer-node-ip>"
# Wazuh server nodes
# If there is more than one Wazuh server
# node, each one must have a node_type
server:
- name: wazuh-1
ip: "<wazuh-manager-ip>"
# node_type: master
#- name: wazuh-2
# ip: "<wazuh-manager-ip>"
# node_type: worker
#- name: wazuh-3
# ip: "<wazuh-manager-ip>"
# node_type: worker
# Wazuh dashboard nodes
dashboard:
- name: dashboard
ip: "<dashboard-node-ip>"
You can edit the configuration file and replace the nodes names and IP addresses with your respective names and IP/hostnames based on your architecture.
Since we are running a single node cluster of Wazuh SIEM server, this how our final config.yml looks like
cat config.ymlnodes:
# Wazuh indexer nodes
indexer:
- name: indexer
ip: "192.168.122.149"
# Wazuh server nodes
server:
- name: wazuh
ip: "192.168.122.149"
# Wazuh dashboard nodes
dashboard:
- name: dash
ip: "192.168.122.149"
Save the updated configuration file and generate the SSL/TLS certificates for Wazuh components using the wazuh-certs-tool.sh script.
bash ./wazuh-certs-tool.sh -AOption -A or –all allows generation of all commands.
Sample output;
29/02/2024 17:06:03 INFO: Admin certificates created.
29/02/2024 17:06:03 INFO: Wazuh indexer certificates created.
29/02/2024 17:06:04 INFO: Wazuh server certificates created.
29/02/2024 17:06:04 INFO: Wazuh dashboard certificates created.
You can see other options using;
bash wazuh-certs-tool.sh --helpThe generated certs are placed under wazuh-certificates directory created in the current working directory.
ls -1 wazuh-certificatesadmin-key.pem
admin.pem
dash-key.pem
dash.pem
indexer-key.pem
indexer.pem
root-ca.key
root-ca.pem
wazuh-key.pem
wazuh.pem
Configure Wazuh Indexer on Ubuntu 24.04
Since we are running a single node Wazuh, there are only a few things we will update on the Wazuh indexer configuration.
The default Wazuh indexer configuration is /etc/wazuh-indexer/opensearch.yml.
This is how it looks like by default;
cat /etc/wazuh-indexer/opensearch.ymlnetwork.host: "0.0.0.0"
node.name: "node-1"
cluster.initial_master_nodes:
- "node-1"
#- "node-2"
#- "node-3"
cluster.name: "wazuh-cluster"
#discovery.seed_hosts:
# - "node-1-ip"
# - "node-2-ip"
# - "node-3-ip"
node.max_local_storage_nodes: "3"
path.data: /var/lib/wazuh-indexer
path.logs: /var/log/wazuh-indexer
plugins.security.ssl.http.pemcert_filepath: /etc/wazuh-indexer/certs/indexer.pem
plugins.security.ssl.http.pemkey_filepath: /etc/wazuh-indexer/certs/indexer-key.pem
plugins.security.ssl.http.pemtrustedcas_filepath: /etc/wazuh-indexer/certs/root-ca.pem
plugins.security.ssl.transport.pemcert_filepath: /etc/wazuh-indexer/certs/indexer.pem
plugins.security.ssl.transport.pemkey_filepath: /etc/wazuh-indexer/certs/indexer-key.pem
plugins.security.ssl.transport.pemtrustedcas_filepath: /etc/wazuh-indexer/certs/root-ca.pem
plugins.security.ssl.http.enabled: true
plugins.security.ssl.transport.enforce_hostname_verification: false
plugins.security.ssl.transport.resolve_hostname: false
plugins.security.authcz.admin_dn:
- "CN=admin,OU=Wazuh,O=Wazuh,L=California,C=US"
plugins.security.check_snapshot_restore_write_privileges: true
plugins.security.enable_snapshot_restore_privilege: true
plugins.security.nodes_dn:
- "CN=node-1,OU=Wazuh,O=Wazuh,L=California,C=US"
#- "CN=node-2,OU=Wazuh,O=Wazuh,L=California,C=US"
#- "CN=node-3,OU=Wazuh,O=Wazuh,L=California,C=US"
plugins.security.restapi.roles_enabled:
- "all_access"
- "security_rest_api_access"
plugins.security.system_indices.enabled: true
plugins.security.system_indices.indices: [".plugins-ml-model", ".plugins-ml-task", ".opendistro-alerting-config", ".opendistro-alerting-alert*", ".opendistro-anomaly-results*", ".opendistro-anomaly-detector*", ".opendistro-anomaly-checkpoints", ".opendistro-anomaly-detection-state", ".opendistro-reports-*", ".opensearch-notifications-*", ".opensearch-notebooks", ".opensearch-observability", ".opendistro-asynchronous-search-response*", ".replication-metadata-store"]
### Option to allow Filebeat-oss 7.10.2 to work ###
compatibility.override_main_response_version: true
As already mentioned, for a single node, there are only a changes we will make here:
- network.host: We will leave default setting to allow Wazuh indexer to listen on all interfaces for both HTTP and Transport (if we had a cluster) connections.
- node.name: Set to the name of the indexer as defined config.yml used in generating the SSL/TLS certs.
- cluster.initial_master_nodes: used during the initial setup of a cluster to identify the master-eligible nodes. It is more relevant when running a multi-node cluster. The value of this setting must exactly match the node.name value(s) based on your cluster architecture.
- cluster.name: defines cluster name. You can leave default or define your own.
- plugins.security.nodes_dn: This setting is used to specify the Distinguished Names (DN) of the nodes that are allowed to join the cluster. You can obtain the value using openssl command;
You can get DN using the command below;
openssl x509 -noout -subject -in wazuh-certificates/indexer.pemsubject=C = US, L = California, O = Wazuh, OU = Wazuh, CN = indexerThis is how our updated Wazuh indexer configuration looks like;
cat /etc/wazuh-indexer/opensearch.ymlnetwork.host: "0.0.0.0"
node.name: "indexer"
cluster.initial_master_nodes:
- "indexer"
cluster.name: "wazuh-cluster"
node.max_local_storage_nodes: "3"
path.data: /var/lib/wazuh-indexer
path.logs: /var/log/wazuh-indexer
plugins.security.ssl.http.pemcert_filepath: /etc/wazuh-indexer/certs/indexer.pem
plugins.security.ssl.http.pemkey_filepath: /etc/wazuh-indexer/certs/indexer-key.pem
plugins.security.ssl.http.pemtrustedcas_filepath: /etc/wazuh-indexer/certs/root-ca.pem
plugins.security.ssl.transport.pemcert_filepath: /etc/wazuh-indexer/certs/indexer.pem
plugins.security.ssl.transport.pemkey_filepath: /etc/wazuh-indexer/certs/indexer-key.pem
plugins.security.ssl.transport.pemtrustedcas_filepath: /etc/wazuh-indexer/certs/root-ca.pem
plugins.security.ssl.http.enabled: true
plugins.security.ssl.transport.enforce_hostname_verification: false
plugins.security.ssl.transport.resolve_hostname: false
plugins.security.authcz.admin_dn:
- "CN=admin,OU=Wazuh,O=Wazuh,L=California,C=US"
plugins.security.check_snapshot_restore_write_privileges: true
plugins.security.enable_snapshot_restore_privilege: true
plugins.security.nodes_dn:
- "CN=indexer,OU=Wazuh,O=Wazuh,L=California,C=US"
plugins.security.restapi.roles_enabled:
- "all_access"
- "security_rest_api_access"
plugins.security.system_indices.enabled: true
plugins.security.system_indices.indices: [".plugins-ml-model", ".plugins-ml-task", ".opendistro-alerting-config", ".opendistro-alerting-alert*", ".opendistro-anomaly-results*", ".opendistro-anomaly-detector*", ".opendistro-anomaly-checkpoints", ".opendistro-anomaly-detection-state", ".opendistro-reports-*", ".opensearch-notifications-*", ".opensearch-notebooks", ".opensearch-observability", ".opendistro-asynchronous-search-response*", ".replication-metadata-store"]
compatibility.override_main_response_version: true
Next, copy the generated SSL/TLS certs for Wazuh indexer as well as the Admin certs/key to certs directory as defined in the /etc/wazuh-indexer/opensearch.yml configuration file.
See;
plugins.security.ssl.http.pemcert_filepath: /etc/wazuh-indexer/certs/indexer.pem
plugins.security.ssl.http.pemkey_filepath: /etc/wazuh-indexer/certs/indexer-key.pem
plugins.security.ssl.http.pemtrustedcas_filepath: /etc/wazuh-indexer/certs/root-ca.pem
plugins.security.ssl.transport.pemcert_filepath: /etc/wazuh-indexer/certs/indexer.pem
plugins.security.ssl.transport.pemkey_filepath: /etc/wazuh-indexer/certs/indexer-key.pem
plugins.security.ssl.transport.pemtrustedcas_filepath: /etc/wazuh-indexer/certs/root-ca.pem
Thus, create the directory and copy certs;
mkdir /etc/wazuh-indexer/certs/cp wazuh-certificates/{root-ca.pem,indexer.pem,indexer-key.pem,admin.pem,admin-key.pem} /etc/wazuh-indexer/certs/Should now look like;
ls -1 /etc/wazuh-indexer/certs/*/etc/wazuh-indexer/certs/admin-key.pem
/etc/wazuh-indexer/certs/admin.pem
/etc/wazuh-indexer/certs/indexer-key.pem
/etc/wazuh-indexer/certs/indexer.pem
/etc/wazuh-indexer/certs/root-ca.pem
Update the permissions and set the ownership of the SSL/TLS certs to wazuh-indexer;
chmod 500 /etc/wazuh-indexer/certschmod 400 /etc/wazuh-indexer/certs/*chown -R wazuh-indexer: /etc/wazuh-indexer/certsStart and Initialize Wazuh Indexer Cluster
You can now start and enable Wazuh indexer to run on system boot. Ensure there is no service listening in port 9200/tcp.
systemctl enable --now wazuh-indexersystemctl status wazuh-indexer● wazuh-indexer.service - Wazuh-indexer
Loaded: loaded (/usr/lib/systemd/system/wazuh-indexer.service; enabled; preset: enabled)
Active: active (running) since Thu 2024-02-29 17:45:06 UTC; 25s ago
Docs: https://documentation.wazuh.com
Main PID: 5400 (java)
Tasks: 90 (limit: 18952)
Memory: 1.3G (peak: 1.3G)
CPU: 23.804s
CGroup: /system.slice/wazuh-indexer.service
└─5400 /usr/share/wazuh-indexer/jdk/bin/java -Xshare:auto -Dopensearch.networkaddress.cache.ttl=60 -Dopensearch.networkaddress.cache.negative.ttl=10 -XX:+Alway>
Feb 29 17:44:59 elk.kifarunix-demo.com systemd[1]: Starting wazuh-indexer.service - Wazuh-indexer...
Feb 29 17:45:00 elk.kifarunix-demo.com systemd-entrypoint[5400]: WARNING: A terminally deprecated method in java.lang.System has been called
Feb 29 17:45:00 elk.kifarunix-demo.com systemd-entrypoint[5400]: WARNING: System::setSecurityManager has been called by org.opensearch.bootstrap.OpenSearch (file:/usr/share>
Feb 29 17:45:00 elk.kifarunix-demo.com systemd-entrypoint[5400]: WARNING: Please consider reporting this to the maintainers of org.opensearch.bootstrap.OpenSearch
Feb 29 17:45:00 elk.kifarunix-demo.com systemd-entrypoint[5400]: WARNING: System::setSecurityManager will be removed in a future release
Feb 29 17:45:00 elk.kifarunix-demo.com systemd-entrypoint[5400]: WARNING: A terminally deprecated method in java.lang.System has been called
Feb 29 17:45:00 elk.kifarunix-demo.com systemd-entrypoint[5400]: WARNING: System::setSecurityManager has been called by org.opensearch.bootstrap.Security (file:/usr/share/w>
Feb 29 17:45:00 elk.kifarunix-demo.com systemd-entrypoint[5400]: WARNING: Please consider reporting this to the maintainers of org.opensearch.bootstrap.Security
Feb 29 17:45:00 elk.kifarunix-demo.com systemd-entrypoint[5400]: WARNING: System::setSecurityManager will be removed in a future release
Feb 29 17:45:06 elk.kifarunix-demo.com systemd[1]: Started wazuh-indexer.service - Wazuh-indexer.
Next, execute the “/usr/share/wazuh-indexer/bin/indexer-security-init.sh” script on a Wazuh indexer node to apply the updated certificate information and start the single-node cluster.
/usr/share/wazuh-indexer/bin/indexer-security-init.sh**************************************************************************
** This tool will be deprecated in the next major release of OpenSearch **
** https://github.com/opensearch-project/security/issues/1755 **
**************************************************************************
Security Admin v7
Will connect to 127.0.0.1:9200 ... done
Connected as "CN=admin,OU=Wazuh,O=Wazuh,L=California,C=US"
OpenSearch Version: 2.8.0
Contacting opensearch cluster 'opensearch' and wait for YELLOW clusterstate ...
Clustername: wazuh-cluster
Clusterstate: GREEN
Number of nodes: 1
Number of data nodes: 1
.opendistro_security index does not exists, attempt to create it ... done (0-all replicas)
Populate config from /etc/wazuh-indexer/opensearch-security/
Will update '/config' with /etc/wazuh-indexer/opensearch-security/config.yml
SUCC: Configuration for 'config' created or updated
Will update '/roles' with /etc/wazuh-indexer/opensearch-security/roles.yml
SUCC: Configuration for 'roles' created or updated
Will update '/rolesmapping' with /etc/wazuh-indexer/opensearch-security/roles_mapping.yml
SUCC: Configuration for 'rolesmapping' created or updated
Will update '/internalusers' with /etc/wazuh-indexer/opensearch-security/internal_users.yml
SUCC: Configuration for 'internalusers' created or updated
Will update '/actiongroups' with /etc/wazuh-indexer/opensearch-security/action_groups.yml
SUCC: Configuration for 'actiongroups' created or updated
Will update '/tenants' with /etc/wazuh-indexer/opensearch-security/tenants.yml
SUCC: Configuration for 'tenants' created or updated
Will update '/nodesdn' with /etc/wazuh-indexer/opensearch-security/nodes_dn.yml
SUCC: Configuration for 'nodesdn' created or updated
Will update '/whitelist' with /etc/wazuh-indexer/opensearch-security/whitelist.yml
SUCC: Configuration for 'whitelist' created or updated
Will update '/audit' with /etc/wazuh-indexer/opensearch-security/audit.yml
SUCC: Configuration for 'audit' created or updated
Will update '/allowlist' with /etc/wazuh-indexer/opensearch-security/allowlist.yml
SUCC: Configuration for 'allowlist' created or updated
SUCC: Expected 10 config types for node {"updated_config_types":["allowlist","tenants","rolesmapping","nodesdn","audit","roles","whitelist","internalusers","actiongroups","config"],"updated_config_size":10,"message":null} is 10 (["allowlist","tenants","rolesmapping","nodesdn","audit","roles","whitelist","internalusers","actiongroups","config"]) due to: null
Done with success
The Wazuh indexer (opensearch) should now be running. Confirm the ports;
ss -atlnp | grep -E "92|93"Or;
curl -k -XGET https://localhost:9200 -u adminWhen prompted for password, default is admin.
Enter host password for user 'admin':
{
  "name" : "indexer",
  "cluster_name" : "wazuh-cluster",
  "cluster_uuid" : "m5qZ7M3xRdaJ-t9X5AlL0Q",
  "version" : {
    "number" : "7.10.2",
    "build_type" : "rpm",
    "build_hash" : "db90a415ff2fd428b4f7b3f800a51dc229287cb4",
    "build_date" : "2023-06-03T06:24:25.112415503Z",
    "build_snapshot" : false,
    "lucene_version" : "9.6.0",
    "minimum_wire_compatibility_version" : "7.10.0",
    "minimum_index_compatibility_version" : "7.0.0"
  },
  "tagline" : "The OpenSearch Project: https://opensearch.org/"
}
Install Wazuh Server/Manager on Ubuntu 24.04
Since you already have the Wazuh repository installed, simply execute the command below to install Wazuh server on Ubuntu 24.04.
apt install wazuh-managerOnce the installation is complete, you can start and enable Wazuh-manager to run on system boot;
systemctl enable --now wazuh-managerOpen Wazuh Manager Port on Firewall. Usually, the Wazuh agents is set to communicate with Wazuh manager via TCP port 1514 by default.
ss -alnptu | grep -i wazuhtcp LISTEN 0 128 0.0.0.0:1514 0.0.0.0:* users:(("wazuh-remoted",pid=49410,fd=4))
tcp LISTEN 0 128 0.0.0.0:1515 0.0.0.0:* users:(("wazuh-authd",pid=49236,fd=3))
Thus, open port 1514/tcp on Wazuh manager.
iptables -A INPUT -p tcp --dport 1514 -j ACCEPTOr
ufw allow 1514/tcpAlso, allow port 1515/tcp for agent registration;
iptables -A INPUT -p tcp --dport 1515 -j ACCEPTOr
ufw allow 1515/tcpRead more on required ports.
Install and Configure Filebeat for Wazuh Manager
Install Filebeat
Filebeat is required to ship logs and event data to the Wazuh indexer, where they are indexed and stored for efficient searching and analysis.
As of this writing, Wazuh indexer v4.7.2 is compatible with Filebeat-OSS 7.10.2, which is provided by the Wazuh repository.
apt-cache policy filebeatfilebeat:
Installed: (none)
Candidate: 7.10.2
Version table:
7.10.2 500
500 https://packages.wazuh.com/4.x/apt stable/main amd64 Packages
7.10.0 500
500 https://packages.wazuh.com/4.x/apt stable/main amd64 Packages
7.9.1 500
500 https://packages.wazuh.com/4.x/apt stable/main amd64 Packages
Thus, install Filebeat using the command below;
apt install filebeatConfigure Filebeat
Once the installation is done, make a backup of the default configuration file
mv /etc/filebeat/filebeat.yml{,.stock}Run the command below to create new Filebeat configuration file with the following configs.
cat > /etc/filebeat/filebeat.yml << 'EOL'
output.elasticsearch:
  hosts: ["192.168.122.149:9200"]
  protocol: https
  username: admin
  password: admin
  ssl.certificate_authorities: "/etc/filebeat/certs/root-ca.pem"
  ssl.certificate: "/etc/filebeat/certs/filebeat.pem"
  ssl.key: "/etc/filebeat/certs/filebeat-key.pem"
setup.template.json.enabled: true
setup.template.json.path: '/etc/filebeat/wazuh-template.json'
setup.template.json.name: 'wazuh'
setup.ilm.overwrite: true
setup.ilm.enabled: false

filebeat.modules:
  - module: wazuh
    alerts:
      enabled: true
    archives:
      enabled: false
logging.level: info
logging.to_files: true
logging.files:
  path: /var/log/filebeat
  name: filebeat
  keepfiles: 7
  permissions: 0644
logging.metrics.enabled: false

seccomp:
  default_action: allow
  syscalls:
  - action: allow
    names:
    - rseq
EOL
Note, IP address used on the hosts setting should match the one defined while generating ssl certs.
If you want, you can use Filebeat keystore to store the credentials in variables rather than plain text as in above configuration.
To store credentials in keystore, create the keystore;
filebeat keystore createThe store the username and password in keystore using variables;
Both of the commands will prompt you to type the values of each variable.
filebeat keystore add USERNAMEfilebeat keystore add PASSYou can then update the credentials on filebeat.yml by changing;
  username: admin
  password: admin
to;
  username: ${USERNAME}
  password: ${PASS}
Next, install root CA Wazuh server certificates generated before to be used by Filebeat;
mkdir /etc/filebeat/certs/Copy the Wazuh server node certificates (cert files are named as per the Wazuh node name provided in certs config.yml) and rename them as defined in the filebeat.yml;
cp wazuh-certificates/root-ca.pem /etc/filebeat/certs/root-ca.pemcp wazuh-certificates/wazuh.pem /etc/filebeat/certs/filebeat.pemcp wazuh-certificates/wazuh-key.pem /etc/filebeat/certs/filebeat-key.pemInstall Filebeat Wazuh Module:
wget -qO- https://packages.wazuh.com/4.x/filebeat/wazuh-filebeat-0.3.tar.gz \
| tar -xz -C /usr/share/filebeat/module/
Download and install Wazuh alerts Wazuh indexer template from the Github repo current release branch (v4.7.2 as of this writing):
wget -O /etc/filebeat/wazuh-template.json \
https://raw.githubusercontent.com/wazuh/wazuh/v4.7.2/extensions/elasticsearch/7.x/wazuh-template.json
chmod go+r /etc/filebeat/wazuh-template.jsonTest Filebeat config;
filebeat test configConfig OKTest Filebeat Elasticsearch output;
filebeat test outputelasticsearch: https://192.168.122.149:9200...
parse url... OK
connection...
parse host... OK
dns lookup... OK
addresses: 192.168.122.149
dial up... OK
TLS...
security: server's certificate chain verification is enabled
handshake... OK
TLS version: TLSv1.3
dial up... OK
talk to server... OK
version: 7.10.2
Start and enable Filebeat to run on system boot;
systemctl enable --now filebeatCheck status;
systemctl status filebeatEverything is now set for the single node Wazuh SIEM server cluster.
Install Wazuh Dashboard on Ubuntu 24.04
Since you already have Wazuh repository installed, just execute the command below to install Wazuh dashboard.
apt install wazuh-dashboardConfigure Wazuh dashboard to allow external access and to connect it to Wazuh indexer.
The default configuration file for Wazuh dashboard is /etc/wazuh-dashboard/opensearch_dashboards.yml.
We will only update the Wazuh indexer address;
vim /etc/wazuh-dashboard/opensearch_dashboards.ymlserver.host: 0.0.0.0
server.port: 443
opensearch.hosts: https://192.168.122.149:9200
opensearch.ssl.verificationMode: certificate
#opensearch.username:
#opensearch.password:
opensearch.requestHeadersAllowlist: ["securitytenant","Authorization"]
opensearch_security.multitenancy.enabled: false
opensearch_security.readonly_mode.roles: ["kibana_read_only"]
server.ssl.enabled: true
server.ssl.key: "/etc/wazuh-dashboard/certs/dashboard-key.pem"
server.ssl.certificate: "/etc/wazuh-dashboard/certs/dashboard.pem"
opensearch.ssl.certificateAuthorities: ["/etc/wazuh-dashboard/certs/root-ca.pem"]
uiSettings.overrides.defaultRoute: /app/wazuh
Save and exit the file.
Install the Wazuh dashboard certificates.
mkdir /etc/wazuh-dashboard/certs/cp wazuh-certificates/dash.pem /etc/wazuh-dashboard/certs/dashboard.pemcp wazuh-certificates/dash-key.pem /etc/wazuh-dashboard/certs/dashboard-key.pemcp wazuh-certificates/root-ca.pem /etc/wazuh-dashboard/certs/Update the permissions and set the ownership of the SSL/TLS certs to wazuh-indexer;
chmod 500 /etc/wazuh-dashboard/certschmod 400 /etc/wazuh-dashboard/certs/*chown -R wazuh-dashboard: /etc/wazuh-dashboard/certsStart and enable Wazuh dashboard to run on system boot;
systemctl enable --now wazuh-dashboardChecking the status of each service;
systemctl status wazuh-dashboard● wazuh-dashboard.service - wazuh-dashboard
Loaded: loaded (/etc/systemd/system/wazuh-dashboard.service; enabled; preset: enabled)
Active: active (running) since Thu 2024-02-29 19:48:44 UTC; 3s ago
Main PID: 52149 (node)
Tasks: 11 (limit: 18952)
Memory: 231.0M (peak: 237.4M)
CPU: 3.867s
CGroup: /system.slice/wazuh-dashboard.service
└─52149 /usr/share/wazuh-dashboard/node/bin/node --no-warnings --max-http-header-size=65536 --unhandled-rejections=warn /usr/share/wazuh-dashboard/src/cli/dist>
Feb 29 19:48:46 elk.kifarunix-demo.com opensearch-dashboards[52149]: {"type":"log","@timestamp":"2024-02-29T19:48:46Z","tags":["info","savedobjects-service"],"pid":52149,"m>
Feb 29 19:48:47 elk.kifarunix-demo.com opensearch-dashboards[52149]: {"type":"log","@timestamp":"2024-02-29T19:48:47Z","tags":["info","savedobjects-service"],"pid":52149,"m>
Feb 29 19:48:47 elk.kifarunix-demo.com opensearch-dashboards[52149]: {"type":"log","@timestamp":"2024-02-29T19:48:47Z","tags":["info","savedobjects-service"],"pid":52149,"m>
Feb 29 19:48:47 elk.kifarunix-demo.com opensearch-dashboards[52149]: {"type":"log","@timestamp":"2024-02-29T19:48:47Z","tags":["info","savedobjects-service"],"pid":52149,"m>
Feb 29 19:48:47 elk.kifarunix-demo.com opensearch-dashboards[52149]: {"type":"log","@timestamp":"2024-02-29T19:48:47Z","tags":["info","savedobjects-service"],"pid":52149,"m>
Feb 29 19:48:47 elk.kifarunix-demo.com opensearch-dashboards[52149]: {"type":"log","@timestamp":"2024-02-29T19:48:47Z","tags":["info","plugins-system"],"pid":52149,"message>
Feb 29 19:48:47 elk.kifarunix-demo.com opensearch-dashboards[52149]: {"type":"log","@timestamp":"2024-02-29T19:48:47Z","tags":["listening","info"],"pid":52149,"message":"Se>
Feb 29 19:48:47 elk.kifarunix-demo.com opensearch-dashboards[52149]: {"type":"log","@timestamp":"2024-02-29T19:48:47Z","tags":["info","http","server","OpenSearchDashboards">
Feb 29 19:48:47 elk.kifarunix-demo.com opensearch-dashboards[52149]: {"type":"log","@timestamp":"2024-02-29T19:48:47Z","tags":["error","opensearch","data"],"pid":52149,"mes>
Feb 29 19:48:47 elk.kifarunix-demo.com opensearch-dashboards[52149]: {"type":"log","@timestamp":"2024-02-29T19:48:47Z","tags":["error","opensearch","data"],"pid":52149,...
Accessing Wazuh Dashboard Web Interface
Open the Wazuh dashboard on the Firewall;
ufw allow 443/tcpYou can now access Wazuh dashboard via the url https://<server-IP-or-hostname>.
Accept the self-signed SSL cert warning and proceed to Wazuh dashboard.
The default credentials are admin/admin for user and password.

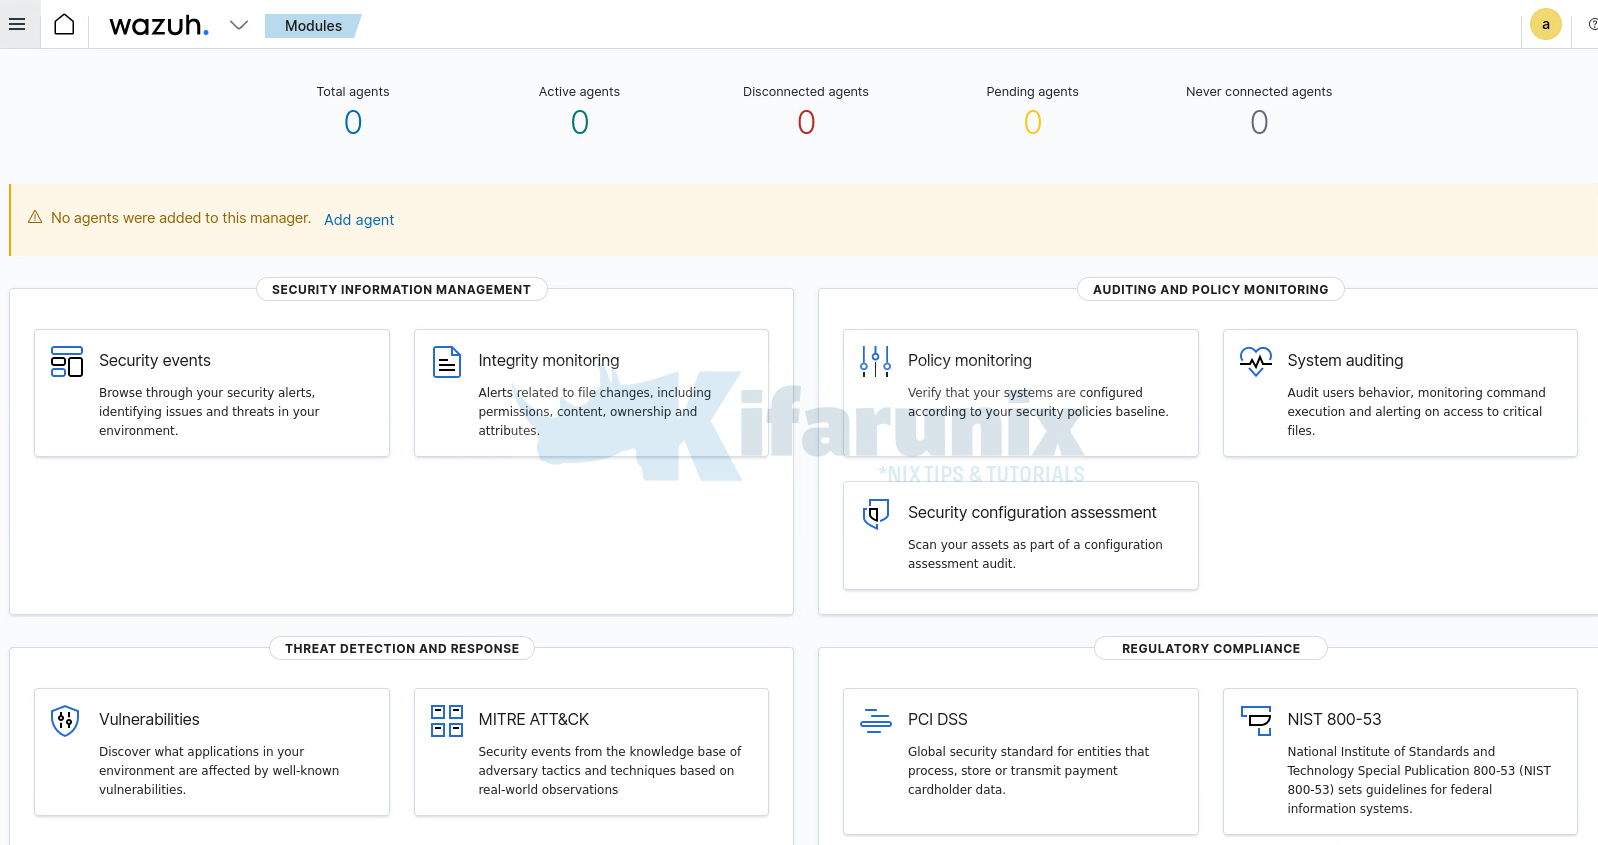
You land on Wazuh agents dashboard.

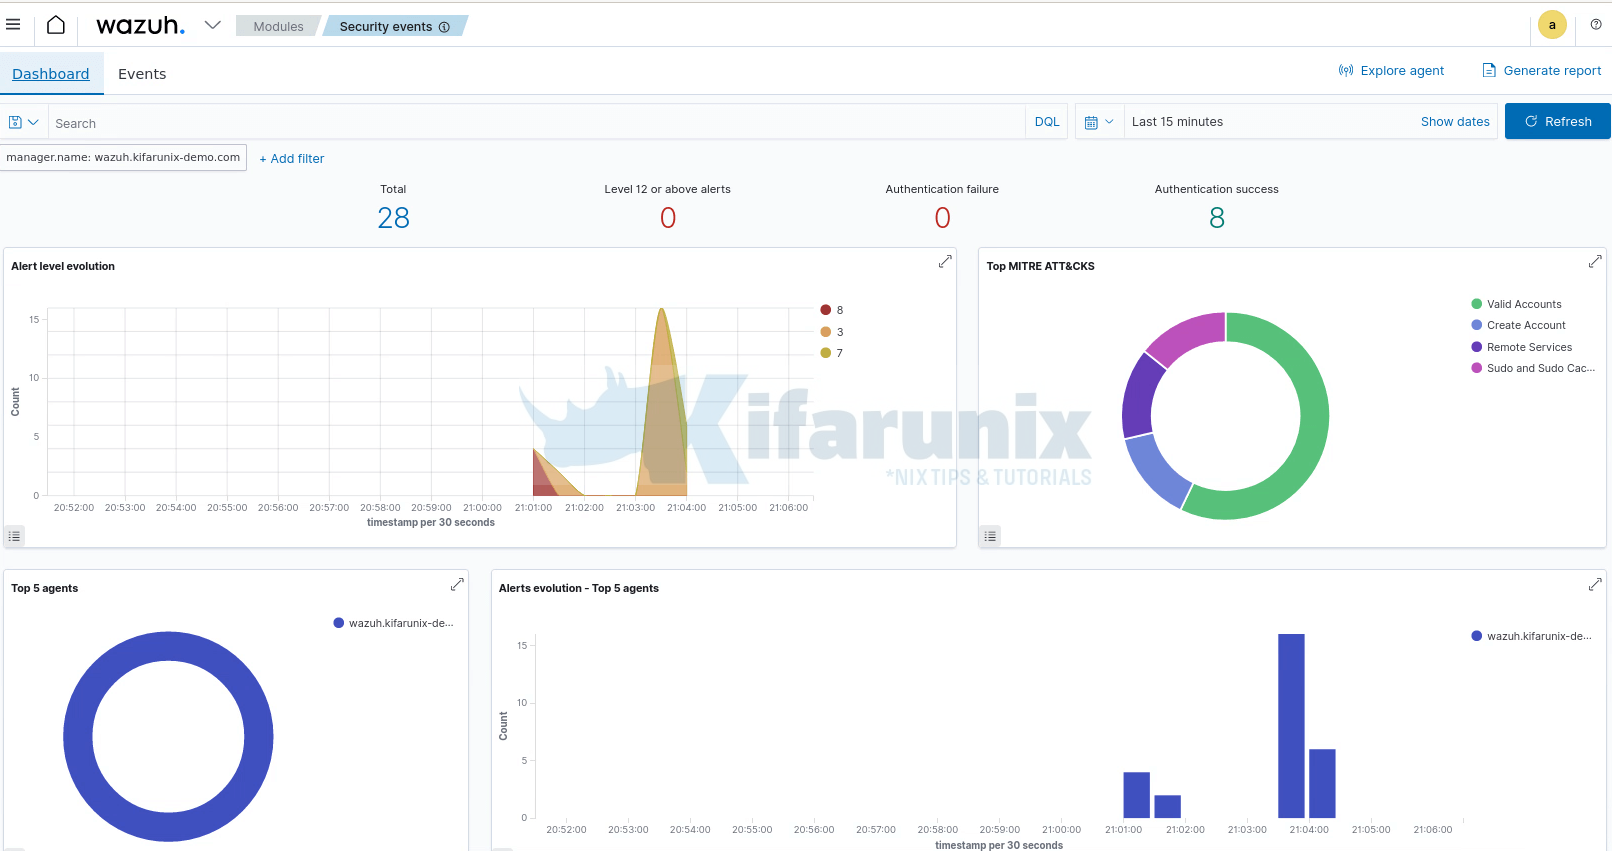
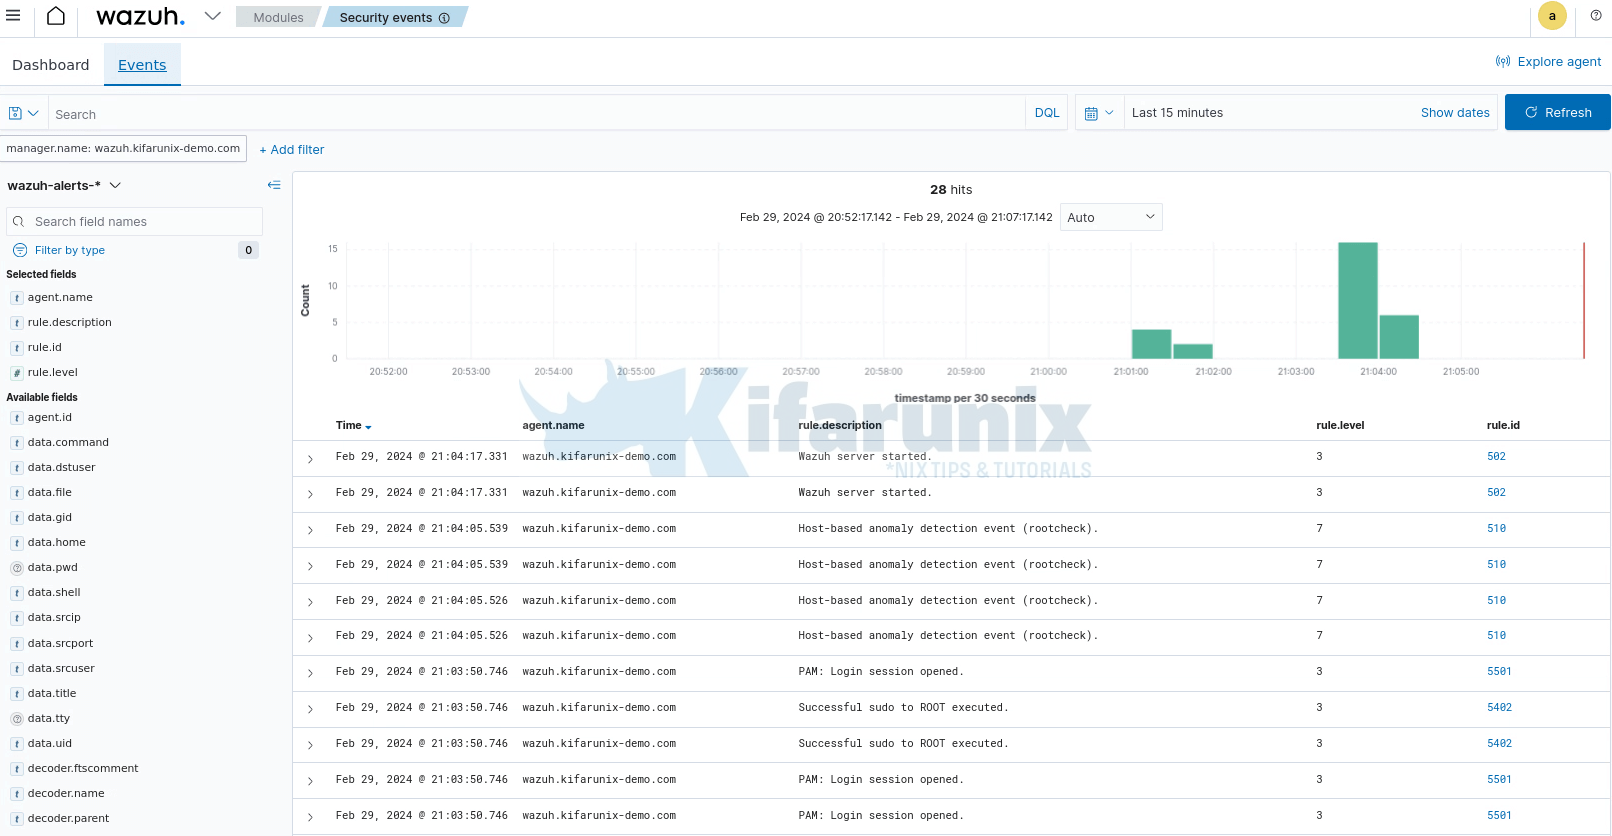
No agents are connected by default. However, there should be some default events already collected from the Wazuh manager.
For example head over to Modules > Security information management >Security Events >Dashboard or Events;


And that is it!! You have successfully setup Wazuh SIEM server, integrated with Wazuh indexer and Wazuh dashboard.
That closes our guide on installing Wazuh SIEM server on Ubuntu 24.04.
You can now go ahead and install Wazuh agents and start log collection from your end points.


Great guide! I tried with the latest version 4.92, but it shows an error in the conf file in filebeat
Hi,
you can use the command,
filebeat config testto check the Filebeat configuration issue. Ensure Filebeat is stopped before you run the command.