Follow through this guide to learn how to install latest phpMyAdmin on CentOS 8. In our previous guide, we learnt how to install WordPress 5 with MySQL 8 on CentOS 8. How about you manage your MySQL database directly from web? phpMyAdmin is what you need.
Installing latest phpMyAdmin on CentOS 8
Prerequisites
Note: In this guide, we are going to install phpMyAdmin v4.9.2, which the current stable release version as of this writing. This version supports PHP 5.5 to 7.3 and MySQL 5.5 and newer. Note this while installing your LAMP/LEMP stack. You can check more requirements including the required PHP modules on PHP requirements page.
Update your system packages.
dnf updateInstall LEMP/LAMP Stack on CentOS 8 by following the links provided below;
Install LAMP Stack on CentOS 8
Install LEMP Stack on CentOS 8
In this guide, PHP 7.2, MySQL 8 and Nginx are used.
Install Required PHP Modules
If not already installed, run the command below to install other required PHP extensions for phpMyAdmin.
dnf install php-{spl,hash,ctype,json,mbstring,zip,gd,curl,xml,common}Install phpMyAdmin on CentOS 8
Once you have setup your LAMP/LEMP stack, databases, your WordPress or whatever your web application is, proceed to install phpMyAdmin.
As of this writing, phpMyAdmin is not available on the default CentOS 8 repos.
dnf whatprovides phpmyadminError: No Matches foundDownload phpMyAdmin
Therefore, we are going to install phpMyAdmin by downloading the source tarball from phpMyAdmin downloads page.
You can download phpMyAdmin kits for English or All languages. This guide is using phpMyAdmin English version only. Make the download easy by using wget command.
To download the latest stable release version, check the versions on the downloads page and simply create a variable to hold the latest version number.
VER=4.9.2wget https://files.phpmyadmin.net/phpMyAdmin/$VER/phpMyAdmin-$VER-english.tar.gzWell, you can as well download phpMyAdmin that supports all the languages to enable you run a version of phpMyAdmin with language of your preference;
https://files.phpmyadmin.net/phpMyAdmin/$VER/phpMyAdmin-$VER-all-languages.tar.gzVerify phpMyAdmin Tarball
To ensure that you are installing a genuine version of phpMyAdmin, you need to verify the integrity of the downloaded archive.
Download and import phpMyAdmin PGP fingerprint key from the key servers.
gpg --keyserver hkp://pgp.mit.edu --recv-keys 3D06A59ECE730EB71B511C17CE752F178259BD92Download the PGP signature for your specific version of phpMyAdmin from phpMyAdmin downloads page. For example, to download the PGP signature for phpMyAdmin v4.9.2 (English version);
wget https://files.phpmyadmin.net/phpMyAdmin/$VER/phpMyAdmin-$VER-english.tar.gz.ascRun the signature verification.
gpg --verify phpMyAdmin-$VER-english.tar.gz.ascKeyword in the output; Good signature.
gpg: assuming signed data in 'phpMyAdmin-4.9.2-english.tar.gz'
gpg: Signature made Fri 22 Nov 2019 03:05:59 AM EST
gpg:                using RSA key 3D06A59ECE730EB71B511C17CE752F178259BD92
gpg: Good signature from "Isaac Bennetch <[email protected]>" [unknown]
gpg:                 aka "Isaac Bennetch <[email protected]>" [unknown]
gpg: WARNING: This key is not certified with a trusted signature!
gpg:          There is no indication that the signature belongs to the owner.
Primary key fingerprint: 3D06 A59E CE73 0EB7 1B51  1C17 CE75 2F17 8259 BD92
You can as well verify the checksum of the downloaded archive. Download the SHA256 hash for phpMyAdmin-4.9.2-english.tar.gz.
wget https://files.phpmyadmin.net/phpMyAdmin/$VER/phpMyAdmin-$VER-english.tar.gz.sha256Calculate the SHA256 hash for downloaded file.
sha256sum phpMyAdmin-$VER-english.tar.gzb1a4edca4e5229fe84a221f4aaa4e98a83bace5776ab3a3127395d8a989dfd3c phpMyAdmin-4.9.2-english.tar.gzCompare the calculated hash with the downloaded hash.
cat phpMyAdmin-$VER-english.tar.gz.sha256b1a4edca4e5229fe84a221f4aaa4e98a83bace5776ab3a3127395d8a989dfd3c phpMyAdmin-4.9.2-english.tar.gzIf all is well, you are good to proceed.
Install phpMyAdmin
Since phpMyAdmin comes as a standalone application ready for installation, simply extract it to your Web root directory. In this guide, we are using Nginx as the web server.
Extract phpMyAdmin Tarball
Create your phpMyAdmin web root directory. You can choose to use a different directory instead of the one created below;
mkdir /usr/share/nginx/phpmyadminNext, extract the phpMyAdmin to the directory created above.
tar xzf phpMyAdmin-$VER-english.tar.gz -C /usr/share/nginx/phpmyadmin --strip-components=1Create phpMyAdmin Nginx Server Block
You can now create a basic Nginx Server block for phpMyAdmin as shown below. Be sure to replace the directories accordingly.
vi /etc/nginx/conf.d/phpmyadmin.confserver {
listen 80;
server_name pma.kifarunix-demo.com;
root /usr/share/nginx/phpmyadmin;
access_log /var/log/nginx/pma.kifarunix-demo.com_access.log;
error_log /var/log/nginx/pma.kifarunix-demo.com_error.log;
index index.php;
location / {
try_files $uri $uri/ /index.php?$args;
}
location ~ \.php$ {
try_files $uri =404;
fastcgi_intercept_errors on;
include fastcgi_params;
fastcgi_param SCRIPT_FILENAME $document_root$fastcgi_script_name;
fastcgi_pass unix:/run/php-fpm/www.sock;
}
}Save the configuration file and run Nginx syntax verification.
nginx -tnginx: the configuration file /etc/nginx/nginx.conf syntax is ok
nginx: configuration file /etc/nginx/nginx.conf test is successfulRestart Nginx
systemctl restart nginxConfigure phpMyAdmin
Rename the sample phpMyAdmin configuration file;
cp /usr/share/nginx/phpmyadmin/config{.sample,}.inc.phpCreate a blowfish secret required for cookie based authentication to encrypt password in cookie. You can generate the blowfish secret online and paste as follows;
vi /usr/share/nginx/phpmyadmin/config.inc.php/** $cfg['blowfish_secret'] = ''; /* YOU MUST FILL IN THIS FOR COOKIE AUTH! */
$cfg['blowfish_secret'] = '{yqiCcF/-1G8WE9LE,dD{3mQDBnv[]bN';Restart Nginx and PHP-FPM for the changes to take effect.
systemctl restart nginx php-fpmAccessing phpMyAdmin
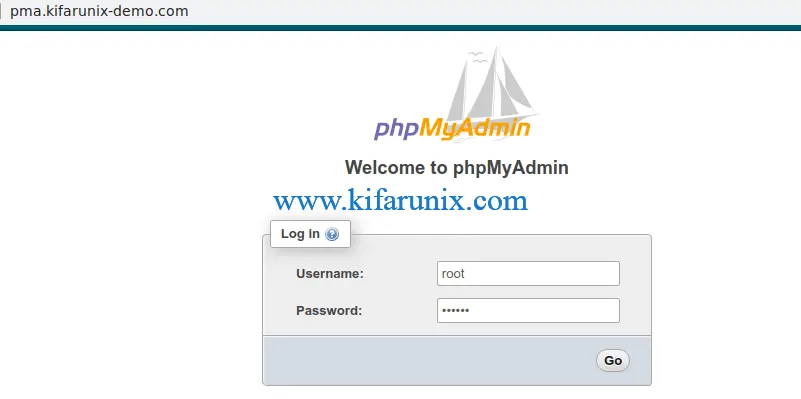
You can now access your phpMyAdmin from the browser by navigating to browser and using the the address, http://server-host-name.

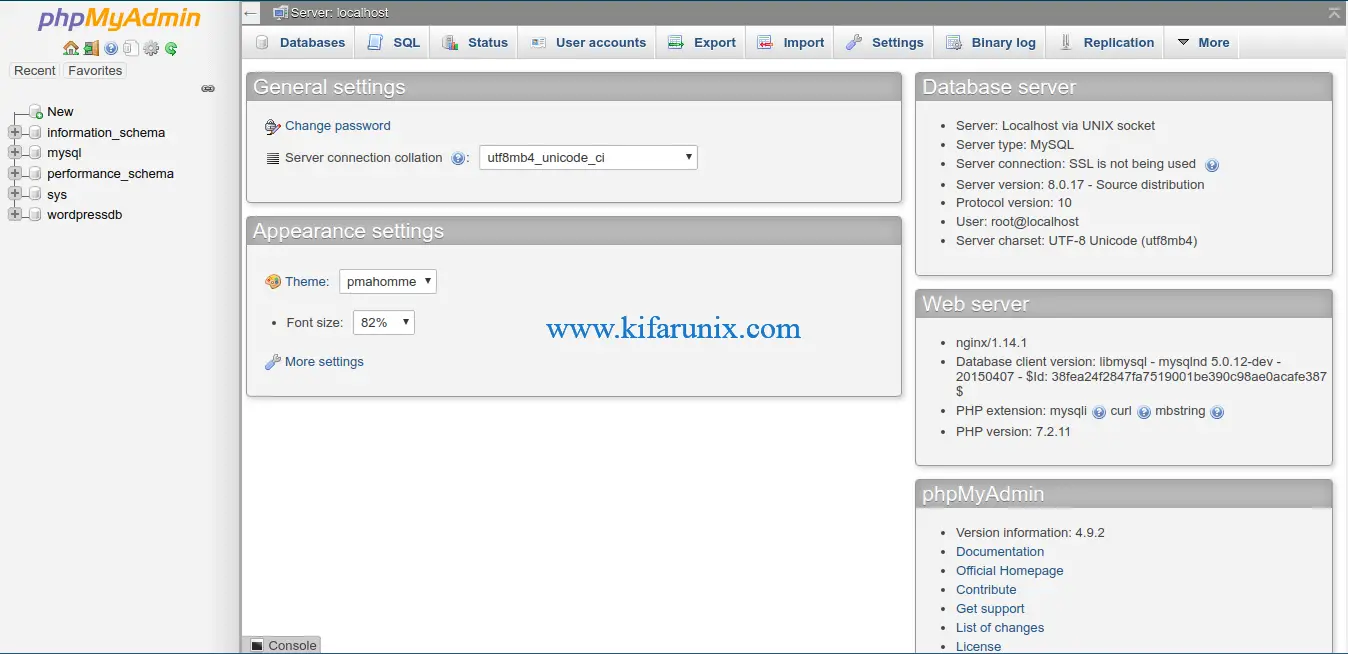
Login as database root user. Upon successful authentication, you will land on the phpMyAdmin dashboard.

There you go. You have successfully setup phpMyAdmin. That marks the end of our guide.
Read more on phpMyAdmin user guide.
Related Tutorials
Install phpMyAdmin with Nginx on Debian 10 Buster
Install phpMyAdmin on Debian 10 Buster
Install phpMyAdmin with Nginx on Fedora 30
Install phpMyAdmin with Apache on Fedora 30
Install phpMyAdmin with Nginx on FreeBSD 12


Hello,
Nice tutorial, but you should reference the all languages version to allow users to have their language.
For example I would like to have French 🙂
William,
phpMyAdmin team
Thanks for that Williams.
Guide updated.