In this tutorial, we are going to learn how to install Icinga 2 and Icinga Web 2 on Ubuntu 20.04. Icinga 2 is a scalable and extensible opensource monitoring solution that checks the availability of various network resources including host metrics such as system uptime, load, memory, disk free space, running processes, network services such as HTTP, SMTP, SNMP, SSH, etc. Icinga supports notifications and can be configured to notify users of system/service outages and generates performance data for reporting.
Installing Icinga 2 and Icinga Web 2 on Ubuntu 20.04
Install Icinga 2 on Ubuntu 20.04
Installing Icinga 2 from the official package repositories is a preferred way of installation. Fortunately, Ubuntu 20.04 repos provides Icinga 2 packages. However, the available package may not be up-to-date.
To ensure you install the latest release version of Icinga, you need to install official Icinga 2 repositories on Ubuntu 20.04 by running the commands below;
Install Icinga Repository signing key;
curl -s https://packages.icinga.com/icinga.key | gpg --dearmor -o /usr/share/keyrings/icinga-archive-keyring.gpgNext, install Icinga Package repository on Ubuntu 20.04;
echo 'deb [signed-by=/usr/share/keyrings/icinga-archive-keyring.gpg] https://packages.icinga.com/ubuntu icinga-focal main
deb-src [signed-by=/usr/share/keyrings/icinga-archive-keyring.gpg] https://packages.icinga.com/ubuntu icinga-focal main' > /etc/apt/sources.list.d/icinga.list
Run system update
Run the command below to update your system packages.
apt updateThus, to install Icinga 2 from Ubuntu 20.04 repos
apt install icinga2Enable Icinga 2 Main Features
During the installation, there are three main features of Icinga 2 that are enabled. These are:
checkerfor executing checksnotificationfor sending notificationsmainlogfor writing theicinga2.logfile
For the enablement to take effect, Icinga 2 service has to be restarted (Icinga 2 is started and enabled during installation);
systemctl restart icinga2To check the status of Icinga 2;
systemctl status icinga2● icinga2.service - Icinga host/service/network monitoring system
Loaded: loaded (/lib/systemd/system/icinga2.service; enabled; vendor preset: enabled)
Drop-In: /etc/systemd/system/icinga2.service.d
└─limits.conf
Active: active (running) since Thu 2022-02-17 10:14:57 UTC; 6s ago
Process: 5461 ExecStartPre=/usr/lib/icinga2/prepare-dirs /etc/default/icinga2 (code=exited, status=0/SUCCESS)
Main PID: 5466 (icinga2)
Status: "Startup finished."
Tasks: 13
Memory: 12.8M
CGroup: /system.slice/icinga2.service
├─5466 /usr/lib/x86_64-linux-gnu/icinga2/sbin/icinga2 --no-stack-rlimit daemon --close-stdio -e /var/log/icinga2/error.log
├─5502 /usr/lib/x86_64-linux-gnu/icinga2/sbin/icinga2 --no-stack-rlimit daemon --close-stdio -e /var/log/icinga2/error.log
└─5507 /usr/lib/x86_64-linux-gnu/icinga2/sbin/icinga2 --no-stack-rlimit daemon --close-stdio -e /var/log/icinga2/error.log
Feb 17 10:14:57 ubuntu20 icinga2[5502]: [2022-02-17 10:14:57 +0000] information/ConfigItem: Instantiated 1 NotificationComponent.
Feb 17 10:14:57 ubuntu20 icinga2[5502]: [2022-02-17 10:14:57 +0000] information/ConfigItem: Instantiated 1 UserGroup.
Feb 17 10:14:57 ubuntu20 icinga2[5502]: [2022-02-17 10:14:57 +0000] information/ConfigItem: Instantiated 1 User.
Feb 17 10:14:57 ubuntu20 icinga2[5502]: [2022-02-17 10:14:57 +0000] information/ConfigItem: Instantiated 3 TimePeriods.
Feb 17 10:14:57 ubuntu20 icinga2[5502]: [2022-02-17 10:14:57 +0000] information/ConfigItem: Instantiated 3 ServiceGroups.
Feb 17 10:14:57 ubuntu20 icinga2[5502]: [2022-02-17 10:14:57 +0000] information/ConfigItem: Instantiated 1 ScheduledDowntime.
Feb 17 10:14:57 ubuntu20 icinga2[5502]: [2022-02-17 10:14:57 +0000] information/ConfigItem: Instantiated 12 Services.
Feb 17 10:14:57 ubuntu20 icinga2[5502]: [2022-02-17 10:14:57 +0000] information/ScriptGlobal: Dumping variables to file '/var/cache/icinga2/icinga2.vars'
Feb 17 10:14:57 ubuntu20 icinga2[5466]: [2022-02-17 10:14:57 +0000] information/cli: Closing console log.
Feb 17 10:14:57 ubuntu20 systemd[1]: Started Icinga host/service/network monitoring system.
Install Icinga 2 Monitoring Plugins on Ubuntu 20.04
Monitoring of external services can only be possible through the use of monitoring plugins. Therefore, run the command below to install Icinga 2 monitoring plugins.
apt install monitoring-pluginsInstall and Configure Icinga 2 Backend Database
Icinga 2 Database Icinga Data Output (DB IDO) exports all configuration and status information into a database which can either by MySQL/MariaDB or PostgreSQL. In this tutorial, we are using MySQL 8 which is the default version available on Ubuntu repos.
Install MySQL Database
apt install mysql-serverOnce the installation is done, run the MySQL initial security script to remove test databases, anonymous users, disallow remote root login…
mysql_secure_installationInstall Icinga Data Output modules for MySQL.
apt install icinga2-ido-mysqlWhen prompted, enable Icinga 2 to use MySQL as the backend database.
If not enabled, this feature can be enabled later by running the command;
icinga2 feature enable ido-mysqlTo list enabled features, run the command;
icinga2 feature listNext, choose whether you want to use the automated setup wizard to configure icinga2-ido-mysql. We chose to go the manual way by selecting No in this tutorial.
Create MySQL Database for Icinga 2
To create the Icinga 2 database, login as root user;
mysql -u root -pThen create the database. Note, names used here are not standard, use any name you like;
create database icinga2db;Create the database user and grant all the privileges on Icinga 2 database created above.
create user icingaadmin@localhost identified with mysql_native_password by 'myP@ssW0rd';grant all on icinga2db.* to icingaadmin@localhost;Reload privileges tables and exit the database.
flush privileges;
quit
Import the Icinga 2 IDO schema
Next, import Icinga 2 IDO schema into Icinga 2 database created above. Replace the database name accordingly.
mysql -u root -p icinga2db < /usr/share/icinga2-ido-mysql/schema/mysql.sqlConfigure Icinga 2 Database Connection Settings
Open the Icinga 2 MySQL IDO configuration file to define the Icinga 2 database connection settings;
vim /etc/icinga2/features-available/ido-mysql.conf/**
* The db_ido_mysql library implements IDO functionality
* for MySQL.
*/
library "db_ido_mysql"
object IdoMysqlConnection "ido-mysql" {
user = "icingaadmin",
password = "myP@ssW0rd",
host = "localhost",
database = "icinga2db"
}
Save and exit the file
Setup the Icinga 2 API for transmitting external commands;
icinga2 api setupinformation/cli: Generating new CA.
information/base: Writing private key to '/var/lib/icinga2/ca//ca.key'.
information/base: Writing X509 certificate to '/var/lib/icinga2/ca//ca.crt'.
information/cli: Generating new CSR in '/var/lib/icinga2/certs//ubuntu20.csr'.
information/base: Writing private key to '/var/lib/icinga2/certs//ubuntu20.key'.
information/base: Writing certificate signing request to '/var/lib/icinga2/certs//ubuntu20.csr'.
information/cli: Signing CSR with CA and writing certificate to '/var/lib/icinga2/certs//ubuntu20.crt'.
information/pki: Writing certificate to file '/var/lib/icinga2/certs//ubuntu20.crt'.
information/cli: Copying CA certificate to '/var/lib/icinga2/certs//ca.crt'.
information/cli: Adding new ApiUser 'root' in '/etc/icinga2/conf.d/api-users.conf'.
information/cli: Reading '/etc/icinga2/icinga2.conf'.
information/cli: Enabling the 'api' feature.
Enabling feature api. Make sure to restart Icinga 2 for these changes to take effect.
information/cli: Updating 'NodeName' constant in '/etc/icinga2/constants.conf'.
information/cli: Created backup file '/etc/icinga2/constants.conf.orig'.
information/cli: Updating 'ZoneName' constant in '/etc/icinga2/constants.conf'.
information/cli: Backup file '/etc/icinga2/constants.conf.orig' already exists. Skipping backup.
Done.
Now restart your Icinga 2 daemon to finish the installation!
Update the API username and password in the file, /etc/icinga2/conf.d/api-users.conf.
Comment the existing lines and the following configs. Be sure to change the password. THIS PASSWORD WILL BE REQUIRED WHEN SETTING THE COMMAND TRANSPORT.
/**
 * The ApiUser objects are used for authentication against the API.
 */
// object ApiUser "root" {
//  password = "8e84357da29fbb32"
//  // client_cn = ""
//
//  permissions = [ "*" ]
//}
object ApiUser "icingaweb2" {
  password = "StroNgP@ssw0rd"
  permissions = [ "status/query", "actions/*", "objects/modify/*", "objects/query/*" ]
}
Save and exit the file.
Restart Icinga 2 daemon
systemctl restart icinga2Install Icinga Web 2 on Ubuntu 20.04
Icinga Web 2 is a powerful PHP framework that provides web management interface for Icinga 2. Install PHP and required modules.
Note, PHP 7.4 is the default version on Ubuntu 20.04.
apt install apache2 php php-{cli,curl,gd,ldap,json,intl,imagick,curl,intl,mbstring,xml,mysql} opensslNext, install Icinga 2 web and CLI management packages.
apt install icingaweb2 icingacliCreate Icinga Web 2 Database
Again, login to MySQL database and create a database and database user for Icinga 2 web.
To create the Icinga 2 database, login as root user;
mysql -u root -pcreate database icinga2webdb;create user icinga2web@localhost identified with mysql_native_password by 'mywebP@ssW0rd';grant all on icinga2webdb.* to icinga2web@localhost;flush privileges;
quitPrepare Icinga 2 Web Setup
Generate Icinga Web 2 authentication tokens;
icingacli setup token createThis will generate such a token as:
The newly generated setup token is: 99b7614f6f1bf89eYou can as well display the token using the command;
icingacli setup token showEnsure that a icingaweb2 system group exists and that the web server user, www-data, is a member of the group.
getent group icingaweb2Sample output
icingaweb2:x:120:www-dataVerify the group membership
groups www-dataSample output
www-data : www-data icingaweb2Restart Apache web server.
systemctl restart apache2Finalize Icinga 2 Web Setup on Browser
To finalize the setup on browser, access Icinga 2 web using the address http://<icinga-server-IP-or-hostname>/icingaweb2/setup.
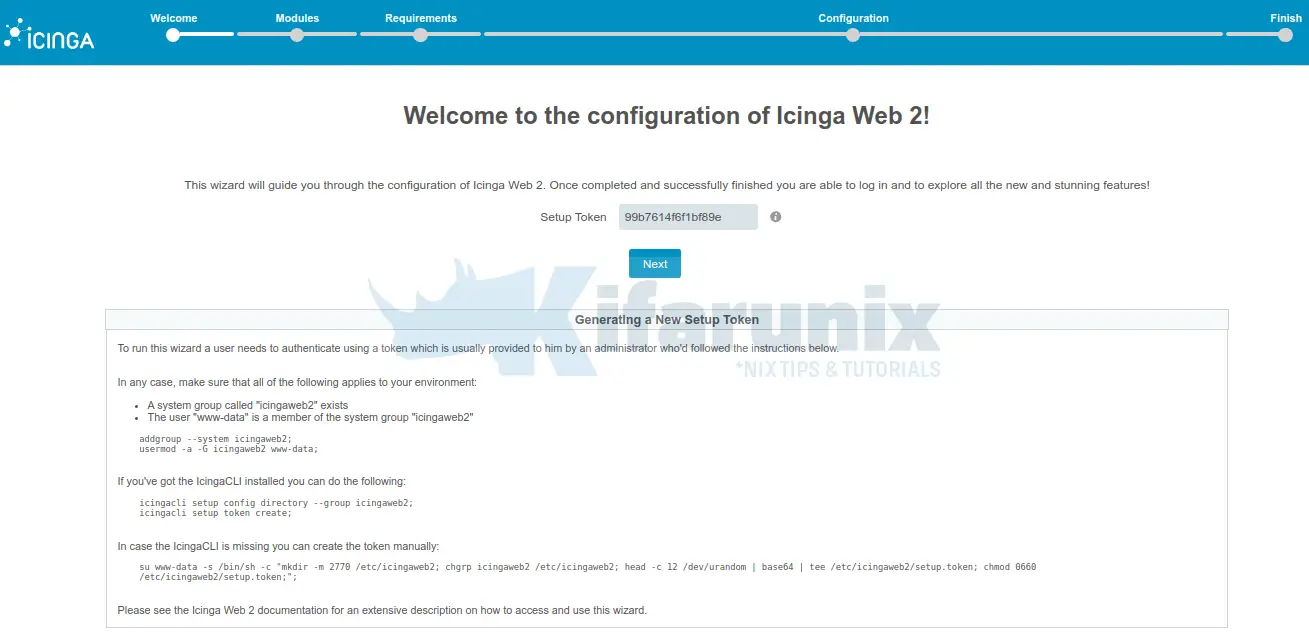
Enter your authentication token generated and click next to proceed.
Choose Icinga 2 modules to enable. In this tutorial, we go with the defaults with monitoring modules only enabled.

On the next page, the setup wizards verifies if all the required PHP modules are in place.
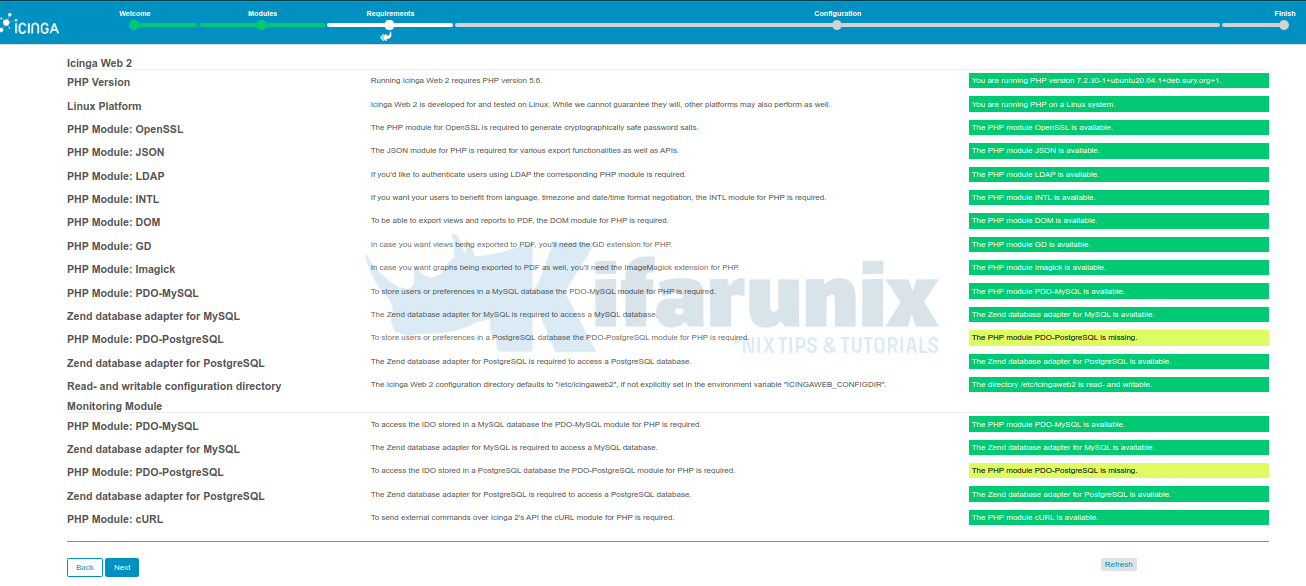
If all is well, click Next to proceed, otherwise install any missing PHP extensions and proceed with setup.
Choose the mode of authentication. We use database authentication in this demo.

Configure Icinga 2 Web database connection settings. Click Validate Configuration to test connection to database.
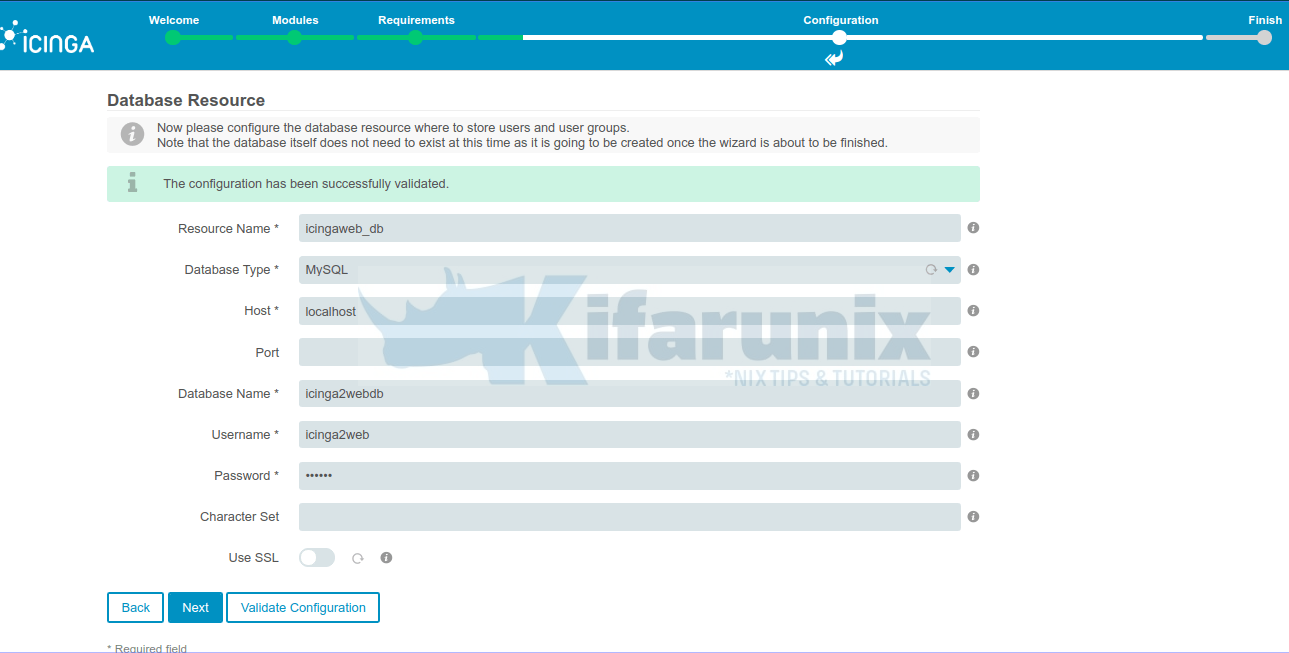
Choose authentication backend database.

Create Icinga Web 2 administrative user.

Choose your application configuration settings.
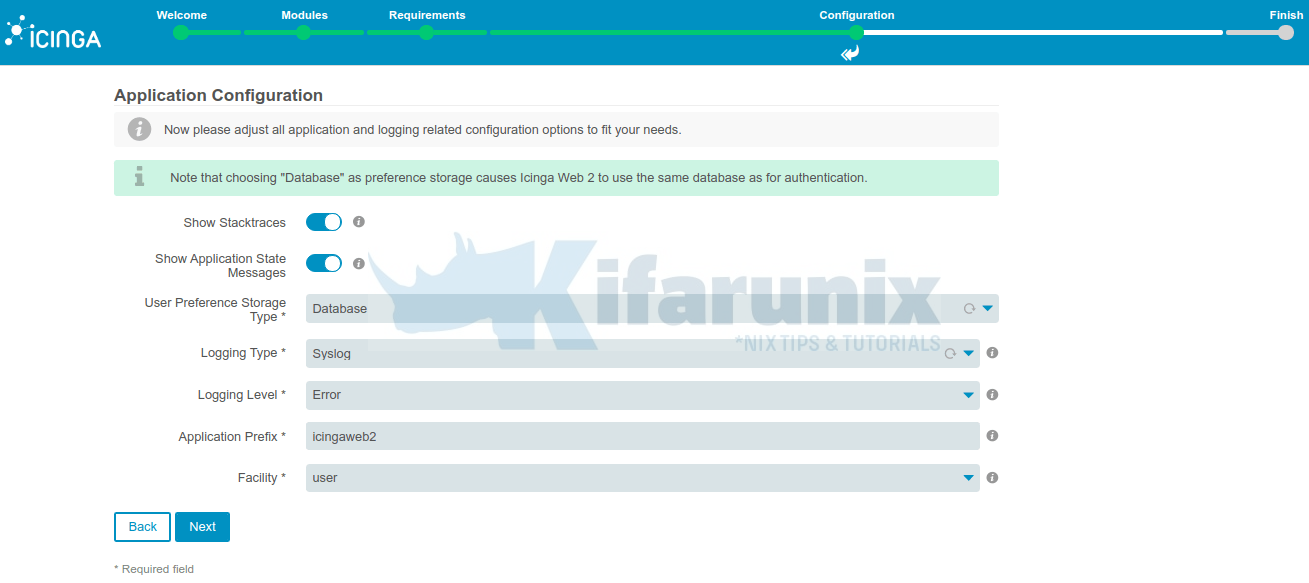
Icinga Web 2 application configuration summary.

Click Next,Next to proceed. Configure Icinga Web 2 monitoring module.

Configure Icinga 2 Database connection settings.
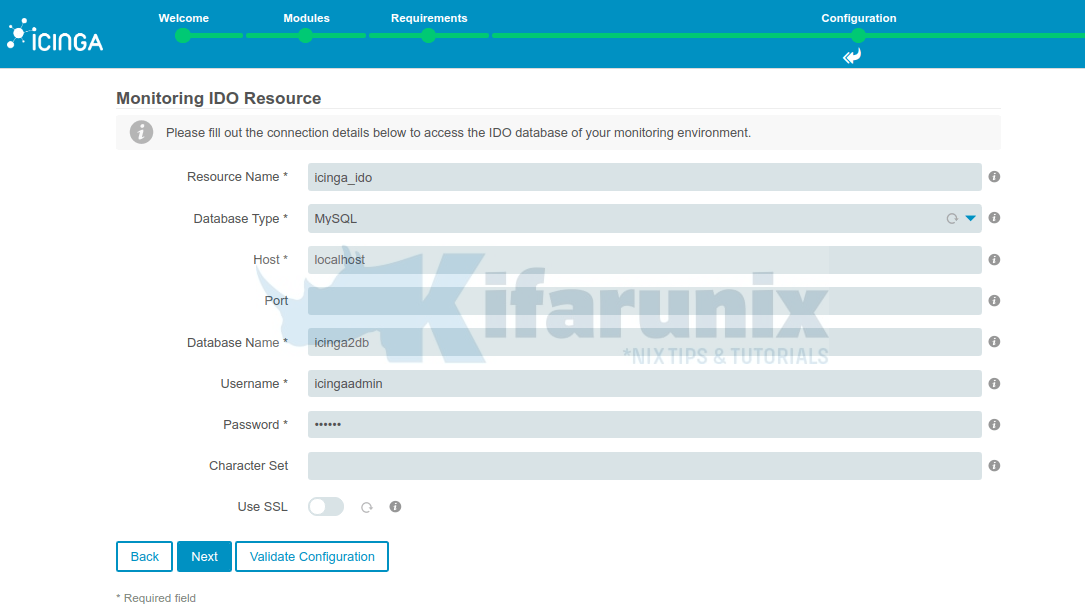
If upon validating the configuration you get the error, There is currently no icinga instance writing to the IDO. Make sure that a icinga instance is configured and able to write to the IDO., it simply means ido-mysql feature is not enabled. Enable it and restart Icinga 2.
Configure Icinga Transport commands. Read more on Icinga web 2 command transport. Provide the API credentials set before.
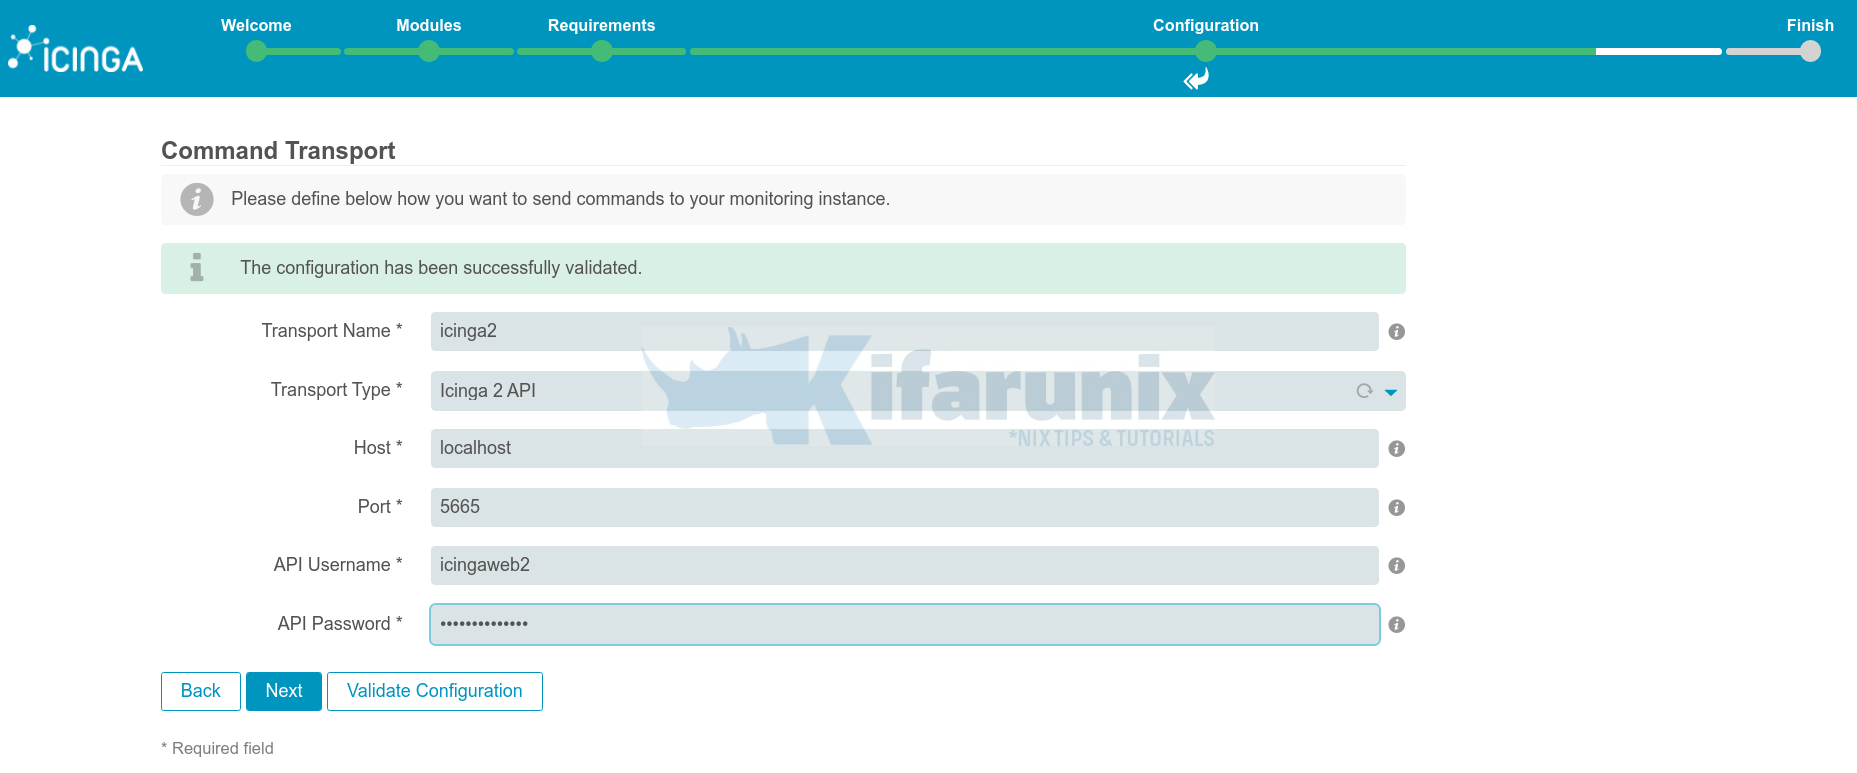
Configure your protected Custom Variables and click next then finish Icinga web 2 setup.

Check the summary and click Finish the setup.
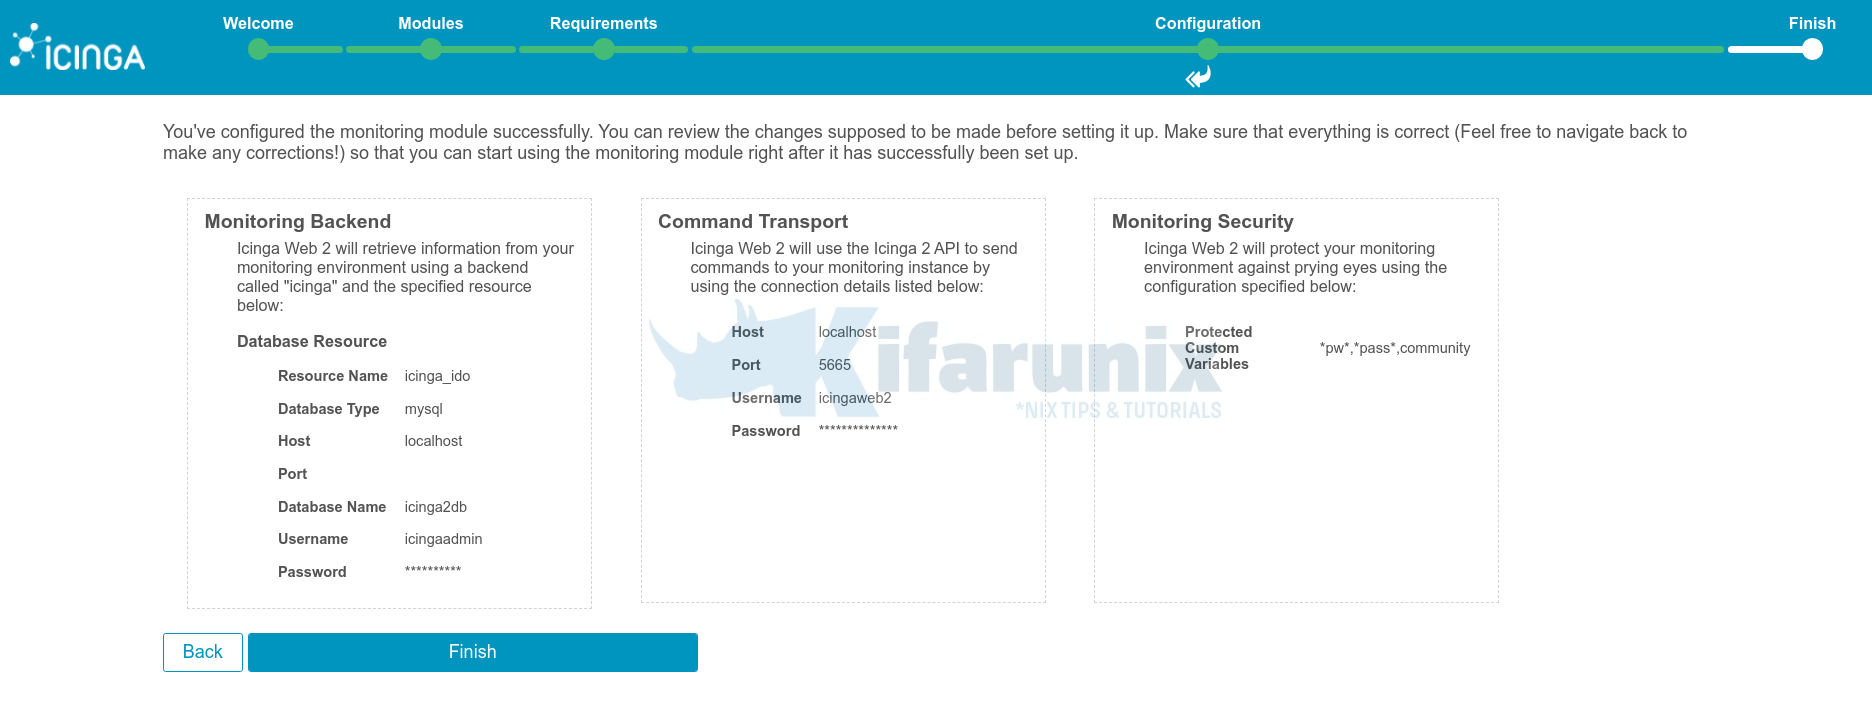
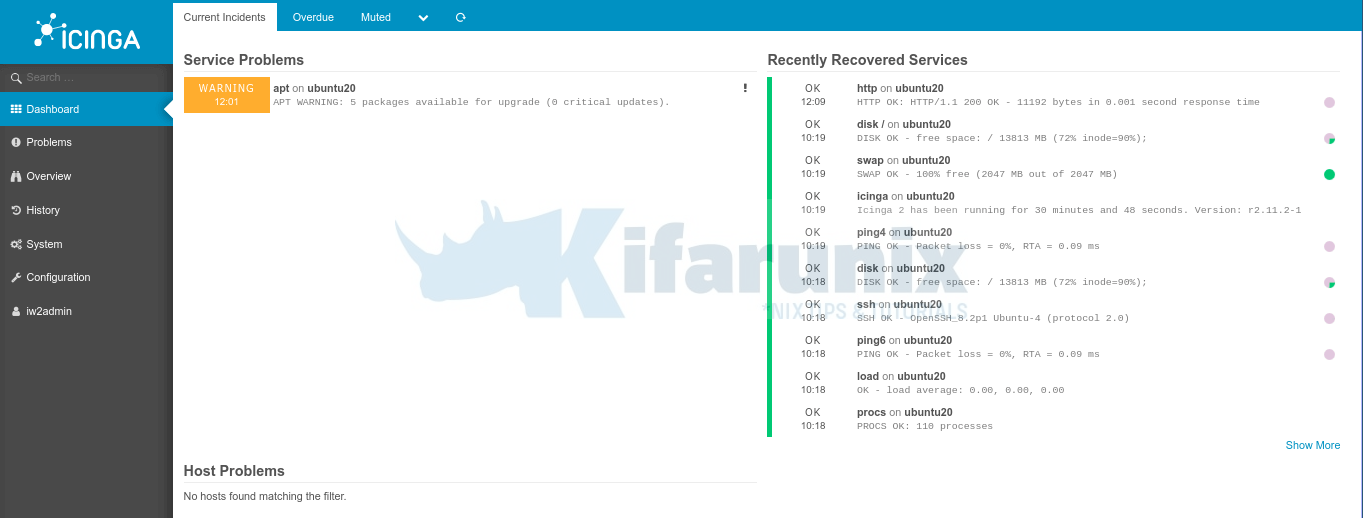
Icinga Web 2 is now setup. Click Login to Icinga Web 2 and login using the admin credentials created during the installation.

Icinga 2 monitoring dashboard.
Magnificent!!
You can now add your hosts for monitoring.
How to Monitor Remote Linux Hosts and Services with Icinga 2
Read more on Icinga 2 documentation page.
Related Tutorials
Install and Setup Nagios Core on Ubuntu 20.04
Install Icinga 2 on Debian 10 Buster
How to Install Icinga 2 and Icinga Web 2 on Ubuntu 18.04 LTS


Doesn’t work. I just get this error
Fatal error: Uncaught Error: Class ‘Locale’ not found in /usr/share/icinga-php/ipl/vendor/ipl/i18n/src/Locale.php:122 Stack trace: #0 /usr/share/icinga-php/ipl/vendor/ipl/i18n/src/Locale.php(87): ipl\I18n\Locale->parseLocale() #1 /usr/share/php/Icinga/Application/Web.php(514): ipl\I18n\Locale->getPreferred() #2 /usr/share/php/Icinga/Application/ApplicationBootstrap.php(730): Icinga\Application\Web->detectLocale() #3 /usr/share/php/Icinga/Application/Web.php(105): Icinga\Application\ApplicationBootstrap->setupInternationalization() #4 /usr/share/php/Icinga/Application/ApplicationBootstrap.php(416): Icinga\Application\Web->bootstrap() #5 /usr/share/php/Icinga/Application/webrouter.php(107): Icinga\Application\ApplicationBootstrap::start() #6 /usr/share/icingaweb2/public/index.php(4): require_once(‘/usr/share/php/…’) #7 {main} thrown in /usr/share/icinga-php/ipl/vendor/ipl/i18n/src/Locale.php on line 122
Hey Matt,
Tutorial has been updated with PHP 7.4. Please rerun the installation again. Everything works fine.