In this tutorial, we are going to learn how install Zoom client on Ubuntu 24.04/Ubuntu 22.04. Zoom is an easy to use and secure communication software that offers video conferencing, online meetings, chat, mobile collaboration and webinars across multiple platforms: mobile devices, desktops, telephones, and room systems. Find out more on features page.
Table of Contents
Installing Zoom on Ubuntu 24.04/Ubuntu 22.04
Installing Zoom Client on Ubuntu 24.04/Ubuntu 22.04 is as easy as downloading the DEB binary installer and executing it in a number of ways as described below;
Run System Update
Update your system package cache;
sudo apt updateDownload Zoom DEB Binary Installer
Grab the Zoom binary installer for Ubuntu from the Zoom download center.
Select Ubuntu as the Linux Type, 64 OS architecture, click download button to grab the binary installer,
Also, you can easily grab the latest Zoom installer by executing the command below;
wget https://zoom.us/client/latest/zoom_amd64.deb -P ~/Downloads/
Installing Zoom Client on Ubuntu 24.04/Ubuntu 22.04
Once you have the binary installer, there are different ways in which you can install Zoom client:
- Install using Graphical installer
- Install using DPKG package manager
- Install using APT package manager
Using a Graphical Installer
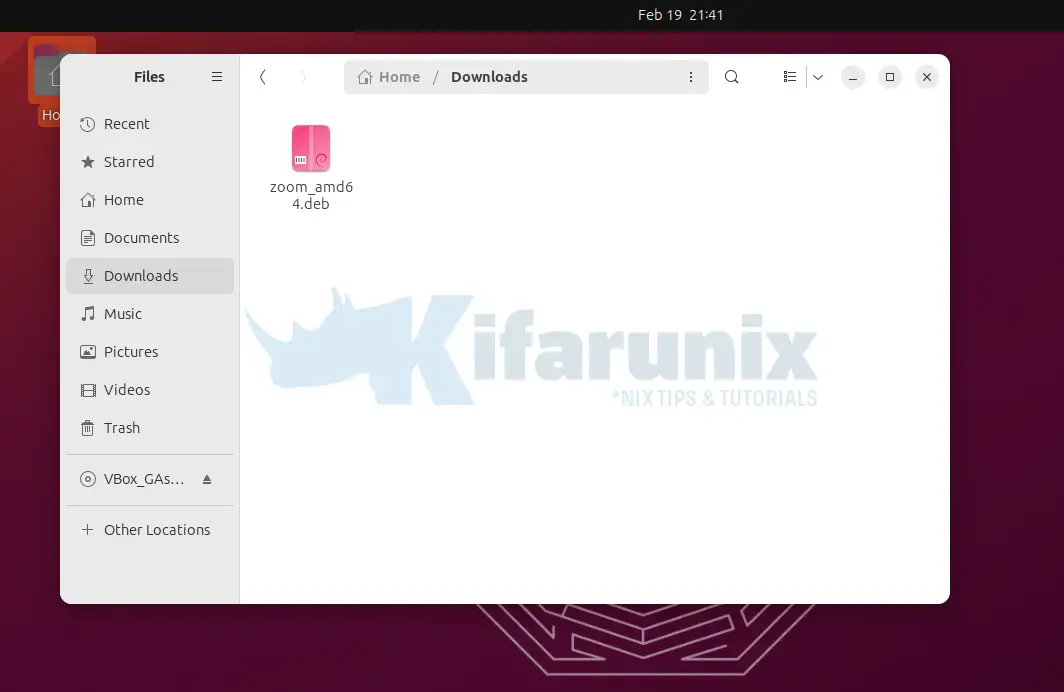
To install Zoom using a graphical installer, open the file manager and navigate to where you saved the zoom installer, in our case, it is the downloads directory.

To run the installer:
- Simply right click on it and choose Open With Other Application
- Choose Software Install or simply choose GDebi Package Installer if you have Gdebi installed (
apt install gdebi). - You can as well double click it to run the installer automatically.
- If Software install is not available, install using the command, sudo apt install gnome-software -y.

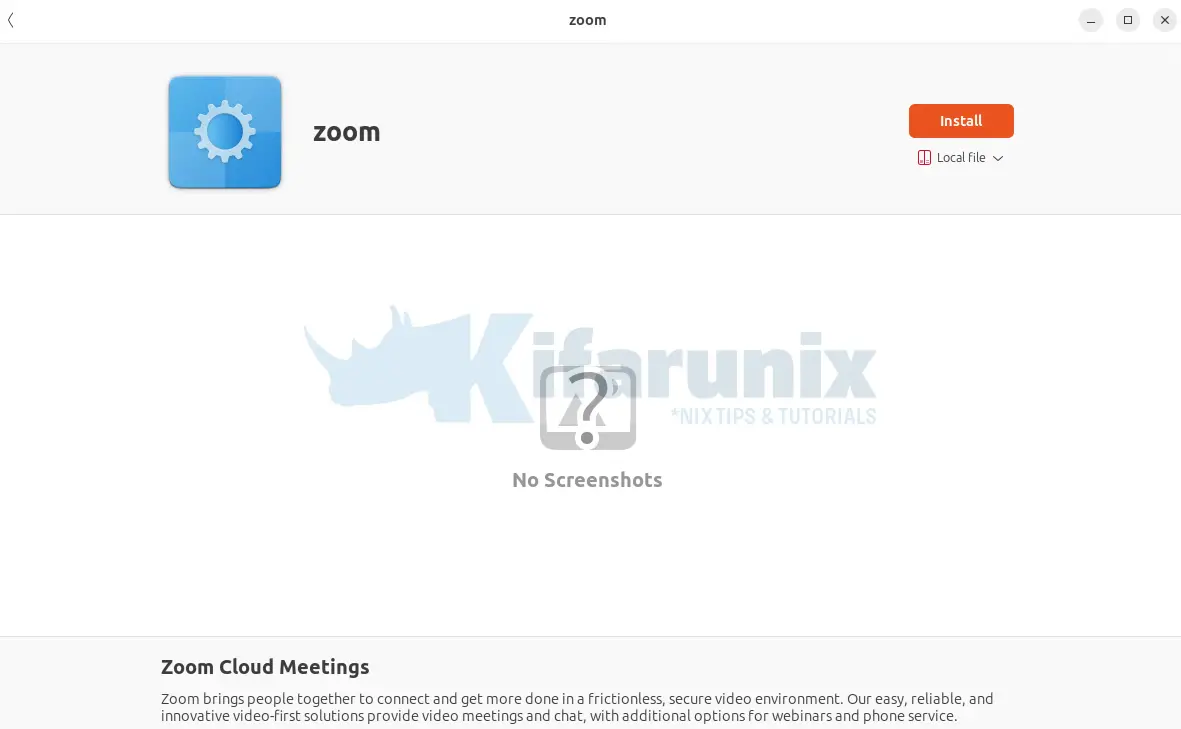
Click install button to install Zoom on Ubuntu 24.04/Ubuntu 22.04
Before the installation can proceed, you are prompted to authenticate. Ensure that the user your installing as has sudo rights.
Authenticate and proceed with installation.
Command Line Installation
If you are command line centric sort of a guy, then this is for you. With command line installation, there are two tools that you can use to install Zoom.
dpkgcommandaptcommand
Both of these commands are Debian package managers and can be used to install, remove and manage debian packages via the command line.
However, the difference comes in how they handle package dependencies issues. While apt package manager automatically downloads and installs all the required package dependencies while installing a package, dpkg command doesn’t and you have to manually install the required dependencies yourself.
Install Zoom Client using dpkg package manager
To use dpkg command for installation, simply navigate to where you saved your DEB binary installer, for example downloads directory in our case;
cd $HOME/Downloads
The run the installation of Zoom client;
sudo dpkg -i zoom_amd64.deb
Any dependency issue can be fixed by running the command;
sudo apt install -f
Install Zoom Client using APT package manager
To install the zoom client using apt package manager and handle any would be dependencies, simply execute the command below. Replace the path, /home/koromicha/Downloads/, accordingly.
sudo apt install $HOME/Downloads/zoom_amd64.deb
Reading package lists... Done
Building dependency tree... Done
Reading state information... Done
Note, selecting 'zoom' instead of '/home/kifarunix/Downloads/zoom_amd64.deb'
The following additional packages will be installed:
  libxcb-xtest0
Recommended packages:
  libegl1-mesa libgl1-mesa-glx
The following NEW packages will be installed:
  libxcb-xtest0 zoom
0 upgraded, 2 newly installed, 0 to remove and 195 not upgraded.
Need to get 4,876 B/185 MB of archives.
After this operation, 684 MB of additional disk space will be used.
Do you want to continue? [Y/n] y
Get:1 http://de.archive.ubuntu.com/ubuntu noble/main amd64 libxcb-xtest0 amd64 1.15-1 [4,876 B]
Get:2 /home/kifarunix/Downloads/zoom_amd64.deb zoom amd64 5.17.5.2543 [185 MB]
Fetched 4,876 B in 1s (4,984 B/s)
Selecting previously unselected package libxcb-xtest0:amd64.
(Reading database ... 172567 files and directories currently installed.)
Preparing to unpack .../libxcb-xtest0_1.15-1_amd64.deb ...
Unpacking libxcb-xtest0:amd64 (1.15-1) ...
Selecting previously unselected package zoom.
Preparing to unpack .../Downloads/zoom_amd64.deb ...
Unpacking zoom (5.17.5.2543) ...
Setting up libxcb-xtest0:amd64 (1.15-1) ...
Setting up zoom (5.17.5.2543) ...
run post install script, action is configure...
Processing triggers for gnome-menus (3.36.0-1.1ubuntu1) ...
Processing triggers for libc-bin (2.38-3ubuntu1) ...
Processing triggers for shared-mime-info (2.4-1) ...
Processing triggers for desktop-file-utils (0.26-1ubuntu5) ...
Launching Zoom on Ubuntu 24.04/Ubuntu 22.04
Once the installation is done, you can launch zoom from the terminal or from activities.

And there you go.

You can now join the zoom meeting if you have the meeting ID already, or sign in to zoom account. That marks the end of our guide on how to install Zoom Client on Ubuntu. Enjoy!
Related Tutorials
How to Install Zoom Video Communications Client on Ubuntu 18.04 LTS
Install Microsoft Teams Client on Ubuntu 24.04/Ubuntu 22.04/18.04

