Follow through this step by step guide to lean how to install VirtualBox Guest Additions on Wubuntu. After you have installed Wubuntu on VirtualBox, you can install Guest additions which provides a set of device drivers that optimizes usability of the virtual machine.
Table of Contents
Installing VirtualBox Guest Additions on Wubuntu
Install Wubuntu on VirtualBox
If you need a guide on how to install Wubuntu on VirtualBox, follow the link below;
Install Wubuntu Linux on VirtualBox
Install Kernel Build tools on Wubuntu Virtual Machine
Run the commands below to install Kernel headers and required build tools required to install VirtualBox Guest Additions. The VirtualBox Guest Additions installer compiles kernel modules specific to the VM OS kernel during the installation process. As such, it requires the build tools installed.
Update and upgrade system packages.
sudo apt updatesudo apt upgradeThe install kernel headers and required build tools;
sudo apt install dkms linux-headers-$(uname -r) build-essentialAfter the installation, reboot the system if needed;
[ -f /var/run/reboot-required ] && sudo systemctl rebootAttach Empty IDE Storage Controller to Wubuntu VM
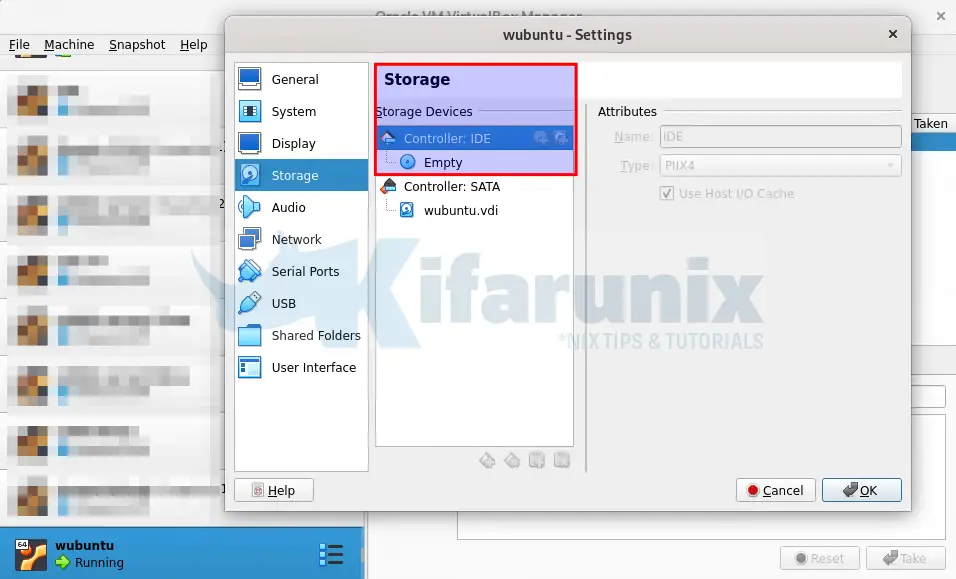
On the VirtualBox manager, edit the Wubuntu virtual machine and attach an empty IDE storage controller. This is is required as you need to attach the VirtualBox Guest Additions ISO into the virtual machine for installation.

Insert Guest Additions ISO to Wubuntu Virtual Machine
You can attach Guest additions ISO file into the VM from the VirtualBox manager or you can also install it directly from the system repositories as long as the available version matches with the version of the VirtualBox manager.
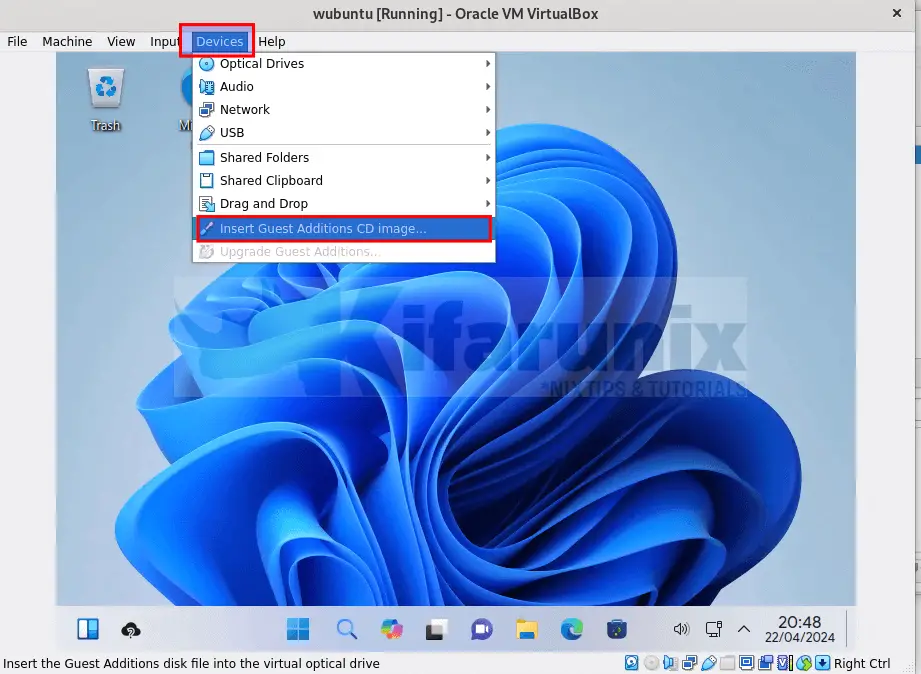
To install the ISO from VirtualBox manager, open the virtual machine and go the menu > Devices > Insert Guest Additions CD image. This ensures that you are using an ISO file that matches the current version of the VirtualBox manager.

You may be prompted to mount and open the ISO. Proceed!
If you want to install the ISO from system repositories, then first ensure that the version of the available ISO package is matching that of the manager;
sudo apt-cache policy virtualbox-guest-additions-isovirtualbox-guest-additions-iso:
Installed: (none)
Candidate: 6.1.50-1~ubuntu1.22.04.1
Version table:
6.1.50-1~ubuntu1.22.04.1 500
500 http://archive.ubuntu.com/ubuntu jammy-updates/multiverse amd64 Packages
500 http://archive.ubuntu.com/ubuntu jammy-updates/multiverse i386 Packages
6.1.34-1 500
500 http://archive.ubuntu.com/ubuntu jammy/multiverse amd64 Packages
500 http://archive.ubuntu.com/ubuntu jammy/multiverse i386 Packages
Confirm the version of the manager on the host;
vboxmanage --version7.0.16r162802As you can see, the versions are not the same. Hence, in such a situation, insert the ISO file via the manager menu.
If it is available on the system repositories is same, then run the command below to install it.
sudo apt install virtualbox-guest-additions-isoInstall VirtualBox Guest Additions
You can now install the guest additions on the virtual machine.
When you insert the Guest additions ISO via the device menu, it will be mounted on the virtual machine /media/$USER directory as VBox_GAs_x.x.xx, whe x.x.xx is the VirtualBox version number.
df -hT -t iso9660Filesystem Type Size Used Avail Use% Mounted on
/dev/sr0 iso9660 51M 51M 0 100% /media/kifarunix/VBox_GAs_7.0.12
Inside this folder, are the guest additions installers. You can execute installer for Linux;
sudo /media/kifarunix/VBox_GAs_7.0.12/VBoxLinuxAdditions.runVerifying archive integrity... 100% MD5 checksums are OK. All good.
Uncompressing VirtualBox 7.0.12 Guest Additions for Linux 100%
VirtualBox Guest Additions installer
Copying additional installer modules ...
Installing additional modules ...
VirtualBox Guest Additions: Starting.
VirtualBox Guest Additions: Setting up modules
VirtualBox Guest Additions: Building the VirtualBox Guest Additions kernel
modules. This may take a while.
VirtualBox Guest Additions: To build modules for other installed kernels, run
VirtualBox Guest Additions: /sbin/rcvboxadd quicksetup
VirtualBox Guest Additions: or
VirtualBox Guest Additions: /sbin/rcvboxadd quicksetup all
VirtualBox Guest Additions: Building the modules for kernel 5.15.0-105-generic.
update-initramfs: Generating /boot/initrd.img-5.15.0-105-generic
VirtualBox Guest Additions: Running kernel modules will not be replaced until
the system is restarted or 'rcvboxadd reload' triggered
VirtualBox Guest Additions: reloading kernel modules and services
VirtualBox Guest Additions: kernel modules and services 7.0.12 r159484 reloaded
VirtualBox Guest Additions: NOTE: you may still consider to re-login if some
user session specific services (Shared Clipboard, Drag and Drop, Seamless or
Guest Screen Resize) were not restarted automatically
If you installed ISO from the system repositories, mount it and run the installation.
sudo mount -o loop /usr/share/virtualbox/VBoxGuestAdditions.iso /media/sudo /media/VBoxLinuxAdditions.runYou should now see some changes on the VM, like automatic screen resize. You should also be able to now enable shared clipboard to copy and paste between the vm and the host machine, Drag and Drop…
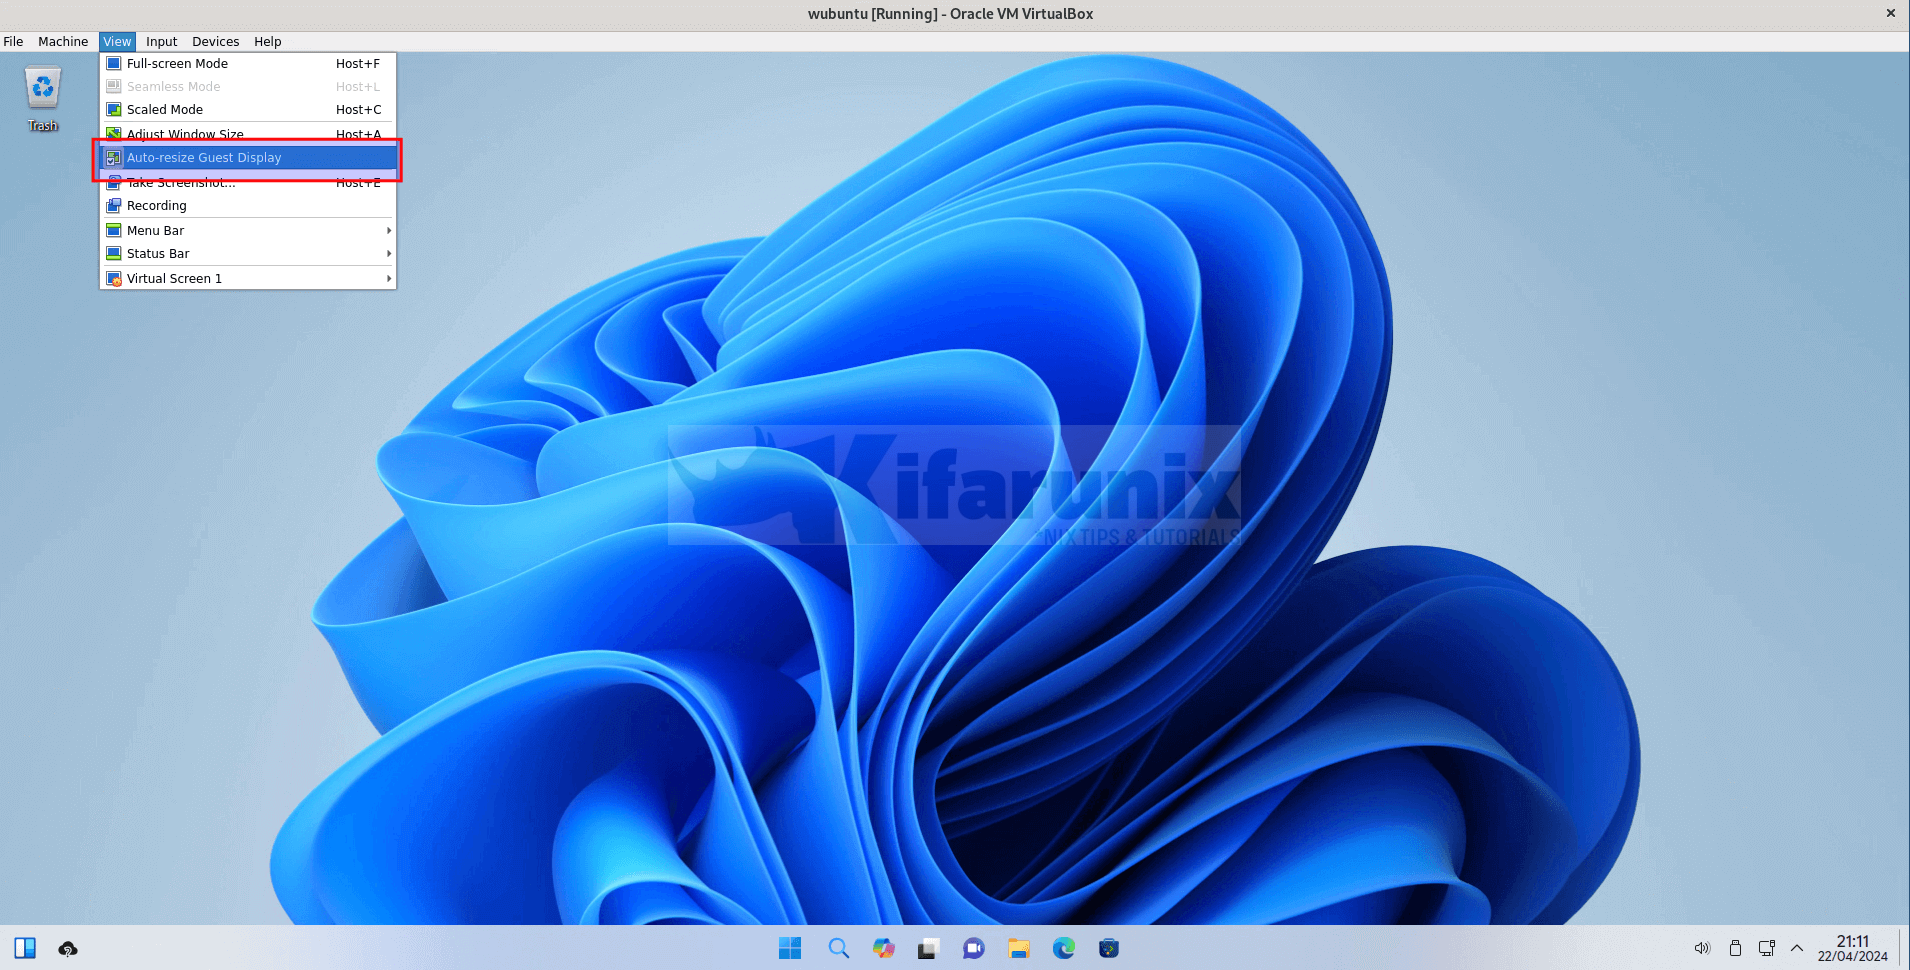
If the screen does not resize automatically, use auto-resize option.

And that is all on installing VirtualBox Guest Additions ISO file on Wubuntu.

