So if you have installed Debian 10 Buster on VirtualBox, you might have realized that it is not in full-screen view by default. If you need to set it to full-screen view, follow though this guide on how to install VirtualBox Guest Additions on Debian 10 Buster. There are so many feature that VirtualBox Guest additions can offer. This include;
The Guest Additions offer the following features:
- Mouse pointer integration
- Shared folders for easy sharing of files between the host and the guest
- Ensures better and accelerated video performance.
- Seamless windows integration
- Generic host/guest communication channels that enables you to control and manage guest execution.
- Provides Host-Guest time synchronization.
- Shared clipboard between host and guest vm.
- Automated logins.
To read more on VirtualBox Guest addition features on the VirtualBox User Manual.
Install Debian 10 Buster on VirtualBox by following the link below;
Install Debian 10 Buster on VirtualBox
Install VirtualBox Guest Additions on Debian 10 Buster
VirtualBox guest additions can be installed through the use VirtualBox guest addition ISO. The Guest additions ISO file can be mounted on a VirtualBox virtual machine via the Virtualbox manager or by installing with the package manager.
To mount the guest additions ISO file using VirtualBox manager, open the virtual machine and click Devices > Insert Guest Additions CD image on the Menu bar.
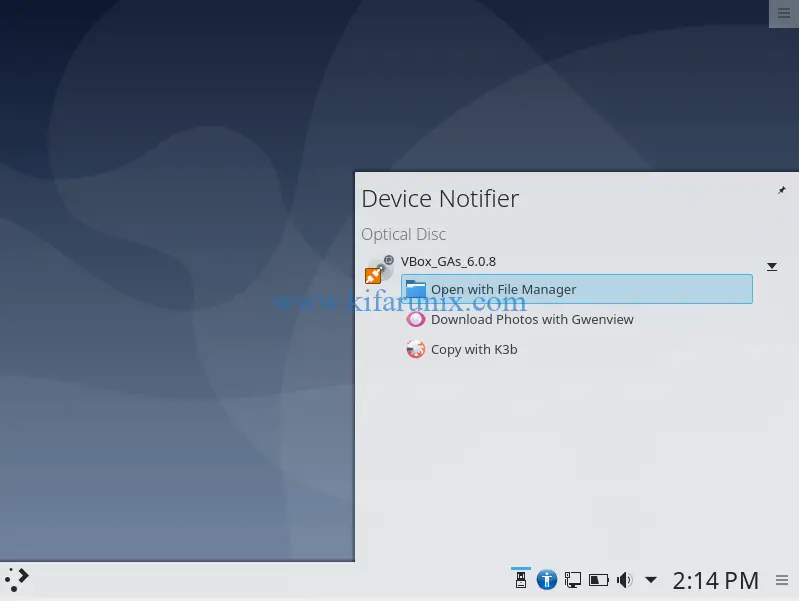
Our Debian 10 Buster uses KDE Plasma as desktop manager. Hence, when VirtualBox guest addition ISO file is inserted, you are prompted on how to open. Select Open with File Manager.

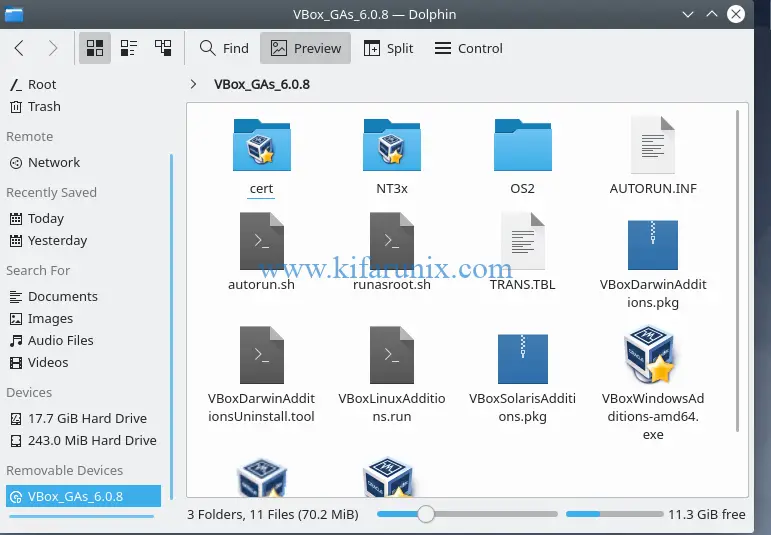
It is also mounted as a removable device. You can open the file manager and click the iso file to mount it. It is mounted under , under /media/cdrom0.

Install VirtualBox Guest Additions
Now, to install VirtualBox guest additions, you need to have the kernel headers, DKMS framework, and build tools installed. To verify whether these tools are installed, you can run the command below;
dpkg -l | grep -E "dkms|linux-headers-$(uname -r)|build-essential"ii build-essential 12.6 amd64 Informational list of build-essential packages
ii dkms 2.6.1-4 all Dynamic Kernel Module Support Framework
ii linux-headers-4.19.0-5-amd64 4.19.37-5 amd64 Header files for Linux 4.19.0-5-amd64If none is installed, run the command below to install them;
sudo apt update -y && apt upgrade
sudo apt install dkms linux-headers-$(uname -r) build-essential
Once the installation is done, you can now install VirtualBox guest additions by executing the command below;
sudo sh /media/cdrom0/VBoxLinuxAdditions.runVerifying archive integrity... All good.
Uncompressing VirtualBox 6.0.8 Guest Additions for Linux........
VirtualBox Guest Additions installer
Removing installed version 6.0.8 of VirtualBox Guest Additions...
update-initramfs: Generating /boot/initrd.img-4.19.0-5-amd64
Copying additional installer modules ...
Installing additional modules ...
VirtualBox Guest Additions: Starting.
VirtualBox Guest Additions: Building the VirtualBox Guest Additions kernel
modules. This may take a while.
VirtualBox Guest Additions: To build modules for other installed kernels, run
VirtualBox Guest Additions: /sbin/rcvboxadd quicksetup <version>
VirtualBox Guest Additions: or
VirtualBox Guest Additions: /sbin/rcvboxadd quicksetup all
VirtualBox Guest Additions: Building the modules for kernel 4.19.0-5-amd64.
update-initramfs: Generating /boot/initrd.img-4.19.0-5-amd64
VirtualBox Guest Additions: Running kernel modules will not be replaced until
the system is restartedOnce the installation is done, restart your virtual machine in order to reload the kernel modules.
Once the system reboots, it should boot to full-screen mode.


Well, that is all on how to install VirtualBox Guest Additions on Debian 10 Buster. Enjoy


thank You, it works great
Followed the instructions and somehow it didn’t work. After the reboot the screen stays black. Started twice from scratch with an default installation of debian buster 10.1. Any ideas?
Try to increase graphics memory in the VM settings. It seems the default 16MB are not sufficient for higher resolutions, I set it to 128MB and now it works.
Thanks for the feedback Daniel. This will save someone.
Perfect! Thanks for this tutorial!
Glad it helped you James!!
Worked like a charm! Thank you.
Thanks a lot!!! It works.
Thank you for this tutorial. Unfortunately, while guest additions is installed (and the version matches the Virtual box installation – both are VirtualBox VM 6.1.6 r137129) and I tried increasing the graphics memory to 128M, it doesn’t seem to work for me…
This is for a Debian 10 guest running on an Ubuntu host.
I’ve tried re-installing multiple times to no avail.
I noticed that under View, Auto-resize Guest Display is grey out.
Does anyone have any suggestions?
Here is some additional info:
$ dpkg -l | grep -E “dkms|linux-headers-$(uname -r)|build-essential”
ii build-essential 12.6 amd64 Informational list of build-essential packages
ii dkms 2.6.1-4 all Dynamic Kernel Module Support Framework
ii linux-headers-4.19.0-8-amd64 4.19.98-1+deb10u1 amd64 Header files for Linux 4.19.0-8-amd64
$ uname -r
4.19.0-8-amd64
Thank you in advance!!
Will
Hello Will, if you have properly installed guest additions, then I would suggest;
1. one more reboot of the vm and recheck the auto-resize if the vm upon boot up, doesn’t auto-resize.
2. Switch the graphics controller to btwn VBoxVGA or VBoxSVGA or VMSVGA
try and see