This guide will take you through how to setup LDAP Self Service Password Tool on CentOS 8. If you got users who are authenticating against an LDAP directory, you might want them to be able to reset their passwords on their own. Self Service Password tool is a PHP application that gives you this capability. It supports a number of LDAPv3 directories including OpenLDAP, OpenDS, ApacheDS, 389 DS, RHDS and even MicroSoft AD.
Setting up LDAP Self Service Password Tool
In this demo, we are using OpenLDAP as our authenticating directory. As such, ensure that you have a running OpenLDAP server before you can proceed. You can refer to the link below to setup OpenLDAP on CentOS 8.
Install and Setup OpenLDAP on CentOS 8
Run System Update
Ensure that your system packages are up-to-date.
dnf updateInstall LDAP Self Service Password Tool on CentOS 8
As of this writing, Self Service Password version 1.3 is the current stable release.
In this demo, we are using PHP 7.3 provided by the Remi repos. Hence proceed as follows;
dnf install https://dl.fedoraproject.org/pub/epel/epel-release-latest-8.noarch.rpmdnf install http://rpms.remirepo.net/enterprise/remi-release-8.rpmReset PHP 7.2 module.
dnf module reset phpEnable PHP 7.3 Remi repos;
dnf module enable php:remi-7.3Next, install Self Service Password tool by executing the command below;
dnf localinstall http://ltb-project.org/archives/self-service-password-1.3-1.el7.noarch.rpmWhen installed, it installs PHP and the required modules including other dependencies such as the Apache web server.
Next, install php-mcrypt required for cryptography functions.
dnf install php-mcrypt vimIf you gonna need to use the mail functionalities while resetting the password, then you need PHP mail and session modules.
Configuring LDAP Self Service Password Tool
After the installation, proceed to configure the Self Service Password tool.
SSP creates a default Apache configuration file, /etc/httpd/conf.d/self-service-password.conf.
Edit this file and make appropriate changes.
cp /etc/httpd/conf.d/self-service-password.conf{,.old}vim /etc/httpd/conf.d/self-service-password.confPaste the following contents into the configuration file making any appropriate changes.
<VirtualHost *>
        ServerName ssp.kifarunix-demo.com

        DocumentRoot /usr/share/self-service-password
        DirectoryIndex index.php

        AddDefaultCharset UTF-8

        Alias /ssp /usr/share/self-service-password

        <Directory /usr/share/self-service-password>
            AllowOverride None
            Require all granted
        </Directory>

        <Directory /usr/share/self-service-password/scripts>
            AllowOverride None
            Require all denied
        </Directory>

        LogLevel warn
        ErrorLog /var/log/httpd/ssp_error_log
        CustomLog /var/log/httpd/ssp_access_log combined
</VirtualHost>
Save and exit the configuration file.
Setup SSP General Parameters
The default configuration file for SSP is, /usr/share/self-service-password/conf/config.inc.php.
To begin with, create a local configuration file, config.inc.local.php, to enable you override the original configurations and avoid any overrides of your settings due to upgrades.
cp /usr/share/self-service-password/conf/config.inc{,.local}.phpOpen the configuration file for editing.
vim /usr/share/self-service-password/conf/config.inc.local.phpIf you check the original configuration file, /usr/share/self-service-password/conf/config.inc.php, you will notice that there are different configuration settings sections, e.g AD, SAMBA, MAIL, SMS etc. In our custom configuration, config.inc.local.php, we have phased out these sections.
Configure LDAP Server connection details. Be sure to replace the values to match your environment settings.
# LDAP
$ldap_url = "ldap://ldapmaster.kifarunix-demo.com";
 $ldap_starttls = false;
 $ldap_binddn = "cn=readonly,ou=system,dc=ldapmaster,dc=kifarunix-demo,dc=com";
 $ldap_bindpw = "P@ssWord";
 $ldap_base = "dc=ldapmaster,dc=kifarunix-demo,dc=com";
 $ldap_login_attribute = "uid";
 $ldap_fullname_attribute = "cn";
 $ldap_filter = "(&(objectClass=posixAccount)($ldap_login_attribute={login}))";
Under the shadow configuration options;
# Shadow options - require shadowAccount objectClass
# Update shadowLastChange
$shadow_options['update_shadowLastChange'] = true;
$shadow_options['update_shadowExpire'] = true;

# Default to -1, never expire. 60 means password expires in 60 days.
$shadow_options['shadow_expire_days'] = 60;
Define password hashing scheme before it is sent to LDAP server.
# auto scheme gets the current password value and find the hash. It also requires read access to the password.
$hash = "auto";
Configure Password Policies
$pwd_min_length = 12;
$pwd_max_length = 15;
$pwd_min_lower = 1;
$pwd_min_upper = 1;
$pwd_min_digit = 1;
$pwd_min_special = 1;
$pwd_special_chars = "^a-zA-Z0-9";
$pwd_no_reuse = true;
$pwd_diff_login = true;
$pwd_complexity = 1;
$use_pwnedpasswords = false;
...
$pwd_show_policy = "always";
$pwd_show_policy_pos = "above";
$who_change_password = "user";
$use_change = true;Change the value of the Keyphrase to anything random and long;
$keyphrase = "7rRy0}96#4E7#kzb%:,25X}c&66rU";Our configuration looks like in below without comments;
less /usr/share/self-service-password/conf/config.inc.local.php<?php
$debug = false;
$ldap_url = "ldap://ldapmaster.kifarunix-demo.com";
$ldap_starttls = false;
$ldap_binddn = "cn=readonly,ou=system,dc=ldapmaster,dc=kifarunix-demo,dc=com";
$ldap_bindpw = "P@ssWord";
$ldap_base = "dc=ldapmaster,dc=kifarunix-demo,dc=com";
$ldap_login_attribute = "uid";
$ldap_fullname_attribute = "cn";
$ldap_filter = "(&(objectClass=posixAccount)($ldap_login_attribute={login}))";
$shadow_options['update_shadowLastChange'] = true;
$shadow_options['update_shadowExpire'] = true;
$shadow_options['shadow_expire_days'] = 60;
$hash = "auto";
$hash_options['crypt_salt_prefix'] = "$6$";
$hash_options['crypt_salt_length'] = "6";
$pwd_min_length = 12;
$pwd_max_length = 15;
$pwd_min_lower = 1;
$pwd_min_upper = 1;
$pwd_min_digit = 1;
$pwd_min_special = 1;
$pwd_special_chars = "^a-zA-Z0-9";
$pwd_no_reuse = true;
$pwd_diff_login = true;
$pwd_complexity = 1;
$use_pwnedpasswords = false;
$pwd_show_policy = "always";
$pwd_show_policy_pos = "above";
$who_change_password = "user";
$use_change = true;
$change_sshkey = false;
$change_sshkey_attribute = "sshPublicKey";
$who_change_sshkey = "user";
$notify_on_sshkey_change = false;
$use_questions = true;
$answer_objectClass = "extensibleObject";
$answer_attribute = "info";
$crypt_answers = true;
$use_tokens = true;
$crypt_tokens = true;
$token_lifetime = "3600";
$keyphrase = "7rRy0}96#4E7#kzb%:,25X}c&66rU";
$show_help = true;
$lang = "en";
$allowed_lang = array();
$show_menu = true;
$logo = "images/kifarunix-logo.png";
$background_image = "images/unsplash-space.jpeg";
$login_forbidden_chars = "*()&|";
$default_action = "change";
?>Go through the whole configuration file with reference to Documentation and make appropriate changes to suit your environment.
Once done with the setup, save and exit the configuration file.
Ensure that the user has permissions to update their passwords on OpenLDAP server. For example, this is the sample Access Control List in our openLDAP server database.
ldapsearch -Q -LLL -Y EXTERNAL -H ldapi:/// -b cn=config '(olcDatabase=mdb)' olcAccessdn: olcDatabase={1}mdb,cn=config
olcAccess: {0}to attrs=userPassword by self write by anonymous auth by dn.subt
ree="gidNumber=0+uidNumber=0,cn=peercred,cn=external,cn=auth" manage by dn.su
btree="ou=system,dc=ldapmaster,dc=kifarunix-demo,dc=com" read by * none
olcAccess: {1}to attrs=shadowLastChange,shadowExpire by self write by dn.subtr
ee="gidNumber=0+uidNumber=0,cn=peercred,cn=external,cn=auth" manage by dn.sub
tree="ou=system,dc=ldapmaster,dc=kifarunix-demo,dc=com" read by * none
...Install SSL/TLS Cerificate
In this demo, we are using LDAP over SSL. Hence, we need to install CA certificate to validate connection to LDAP server. To download the CA certificate from the server, run the command below;
openssl s_client -connect ldapmaster.kifarunix-demo.com:636 -showcerts < /dev/null | openssl x509 -text | sed -ne '/-BEGIN CERTIFICATE-/,/-END CERTIFICATE-/p'Copy the certificate…
-----BEGIN CERTIFICATE-----
MIIDzzCCAregAwIBAgIUMJkYu/S+fQbyGjUOLsMoar6owfowDQYJKoZIhvcNAQEL
BQAwdzELMAkGA1UEBhMCS0UxDDAKBgNVBAgMA05haTEMMAoGA1UEBwwDTmFpMRcw
...
...
kqkfQw96SLItvsAXpeosfYkH6uEG36svqAJ6rzxZcJzl3OTrUZnFX3OOsmFeHupC
Qxv7gjfE5jqdD6iQR0cohGLpaA==
-----END CERTIFICATE-----
… and paste on a specific file, e.g /etc/ssl/certs/cacert.pem.
After, update the /etc/openldap/ldap.conf file to define the path to the CA certificate file downloaded above.
vim /etc/openldap/ldap.conf...
#TLS_CACERT /etc/pki/tls/cert.pem
TLS_CACERT /etc/ssl/certs/cacert.pem
...Save and quit the file.
Change the ownership of the /usr/share/self-service-password directory to apache.
chown -R apache:apache /usr/share/self-service-passwordVerify Apache configuration syntax.
httpd -tRestart and enable Apache to run on system boot.
systemctl restart httpdsystemctl enable httpdOpen port 80 on firewalld.
firewall-cmd --add-port=80/tcp --permanentfirewall-cmd --reloadConfigure SELinux Policies
If SELinux is running, run the commands below to allow Self Service Password tool to change users passwords.
Allow httpd to connect to network.
setsebool -P httpd_can_network_connect 1Allow httpd to connect to ldap
setsebool -P httpd_can_connect_ldap 1Resolve user passwd entries directly from ldap
setsebool -P authlogin_nsswitch_use_ldap 1To allow system to run with NIS.
setsebool -P nis_enabled 1Accessing SSP from Browser
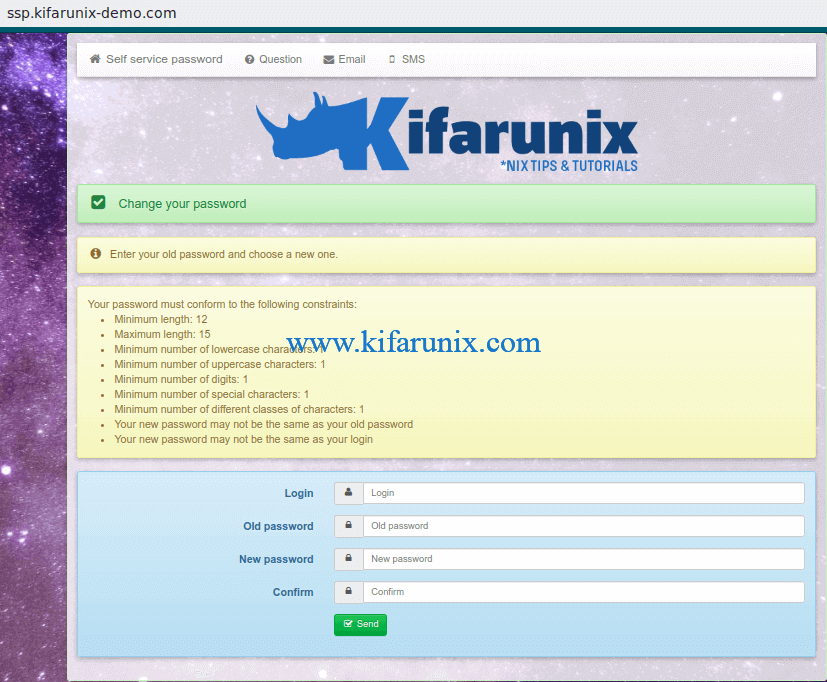
You can now access your Self Service password tool from browser using the url, http://<server-hostname-OR-IP.

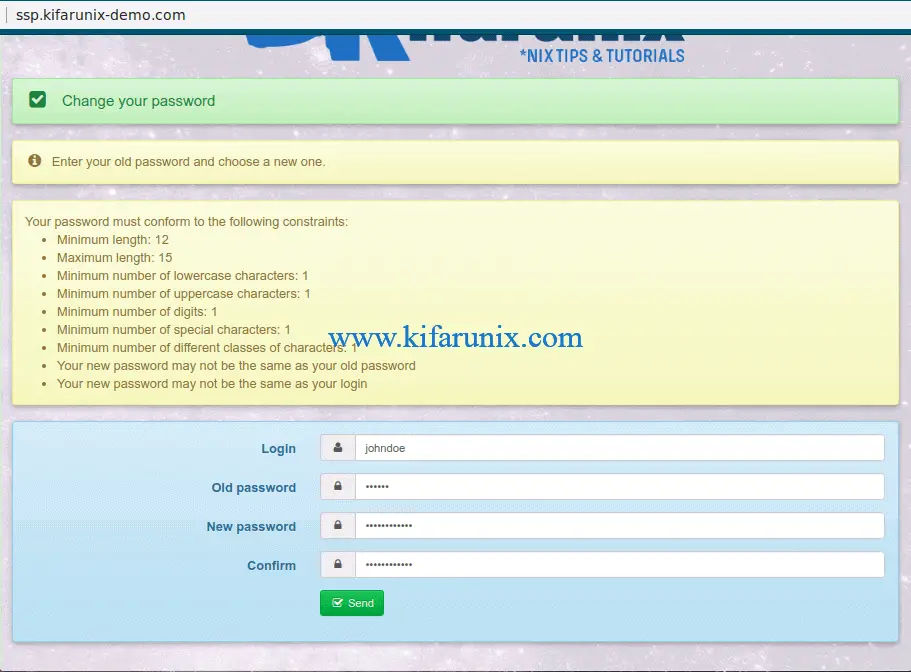
To demonstrate how to reset the password, we will be using a demo user in our OpenLDAP database;
ldapsearch -Y EXTERNAL -H ldapi:/// -b "ou=people,dc=ldapmaster,dc=kifarunix-demo,dc=com" "(objectClass=posixAccount)" "(uid=*)"-Q -LLLdn: uid=johndoe,ou=people,dc=ldapmaster,dc=kifarunix-demo,dc=com
...To meet the defined password policies, this is the sample password used, N#rAvImVosh3. Note if you also have defined password policies in your OpenLDAP backend database, ensure that the policies defined on SSP matches the backend policies.

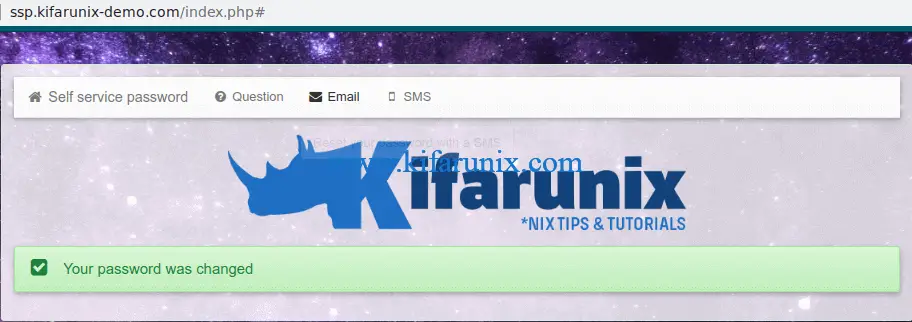
If the password is accept, you should see the output, Your password was Changed.

You can as well verify the same password on your OpenLDAP;
ldapwhoami -x -H ldapi:/// -D "uid=johndoe,ou=people,dc=ldapmaster,dc=kifarunix-demo,dc=com" -WEnter LDAP Password: N#rAvImVosh3
dn:uid=johndoe,ou=people,dc=ldapmaster,dc=kifarunix-demo,dc=comIf the passwords do not match, you will get the output;
ldap_bind: Invalid credentials (49)If you have implemented password policies in OpenLDAP backend with the attribute pwdCheckQuality set the value 2, then the password might still fail the quality checks. In that case, set the value of this attribute to 1.
There you go. Your users can now comfortably reset their passwords.
Reference
Self Service Password LDAP Tool Box Documentation
Other Related Guides
Setup OpenLDAP Server with SSL/TLS on Debian 10
Configure SSSD for OpenLDAP Client Authentication on Debian 10/9


Hi! I’ve follow your guide but I’m getting 500 internal server error. Can’t access SSP web
me too, did you get a solution?
I found the solution. DO NOT Copy from config.inc.php for local , just create a blank file, and fill with the parameter you want to override. save it and voilla it work
*create a blank file start with <?php
Comments the 3 last line of the config local file. It create a loop.