In this tutorial, we are going to learn how to install FEMP Stack on FreeBSD 12. Just like FAMP Stack, FEMB Stack is an acronym for FreeBSD, the Operating System, Engine-X (Nginx) the web server, MySQL the database server and PHP the server side scripting language.
Table of Contents
Installing FEMP Stack on FreeBSD 12
Update Package Repository
Ensure your system is up-to-date by running the commands below;
freebsd-update fetch
freebsd-update install
Install Nginx on FreeBSD 12
Nginx Web server is available on the default FreeBSD repositories and can be installed using the pkg package manager command.
pkg install nginx
Start and Enable Nginx
To enable Nginx web server to run on system boot, run the commands below;
sysrc nginx_enable=yesThis will add the line nginx_enable="yes" at the end of the /etc/rc.conf configuration file.
Start Nginx
service nginx start
You can check the status of Apache as shown below;
service nginx status
nginx is running as pid 2959.
Similarly, start and enable PHP-FPM to run on system boot;
sysrc php_fpm_enable="YES"service php-fpm startTo verify that you can actually access you web server from the browser, navigate to the browser and type the IP address of your web server. If everything is working fine, you should be able to see the default FreeBSD Nginx welcome page headed, "Welcome to nginx!".
Configure Nginx
The default configuration file for Nginx resides under /usr/local/etc/nginx as nginx.conf.
Open the configuration file for editing and proceed as follows;
vi /usr/local/etc/nginx/nginx.conf
Set the user that Nginx uses for normal operations to www by uncommenting the line #user nobody and making appropriate substitution.
user www;
Set the value of the worker_processes directive to the number same as the number of CPU cores of your server. By default, it is set to 1.
worker_processes 2;
Uncomment the error log file directive and set the logging level to information.
error_log /var/log/nginx/error.log info;
Uncomment the access log file directive under http block and set the value as follows;
access_log /var/log/nginx/access.log;
Set the value of the server_name directive under server block to the hostname or IP address of your server.
sever_name kifarunix-demo.com;
Configure Nginx to server PHP content by adding index.php as the first value of index directive.
Remove the document root and index directives under the location block and define them under the server block context.
    server {
        listen       80;
        server_name  kifarunix-demo.com;
        ...
        root   /usr/local/www/nginx-dist;
        index  index.php index.html index.htm;

        location / {
		try_files $uri $uri/ =404;
        }
Save and exit the file.
Restart Nginx;
nginx -tnginx: the configuration file /usr/local/etc/nginx/nginx.conf syntax is ok
nginx: configuration file /usr/local/etc/nginx/nginx.conf test is successfulRestart if there is no error;
service nginx restartInstall MySQL on FreeBSD 12
Just like Nginx, MySQL can be installed directly from default FreeBSD 12 default repositories using the package manager. To install MySQL 8.0, run the command below;
pkg install mysql80-server
Start and Enable MySQL Service
Enable MySQL as a service so it can start on system boot.
sysrc mysql_enable=yes
Start MySQL
service mysql-server start
Run MySQL Initial Secure Script
Run the normal MySQL security script to remove some default configurations.
mysql_secure_installation
The script may prompt you whether to enforce strong password creation. If you need to enforce secure password creation, then press y to accept and choose the level of password validation policy.
VALIDATE PASSWORD COMPONENT can be used to test passwords
and improve security. It checks the strength of password
and allows the users to set only those passwords which are
secure enough. Would you like to setup VALIDATE PASSWORD component?

Press y|Y for Yes, any other key for No: y

There are three levels of password validation policy:

LOW    Length >= 8
MEDIUM Length >= 8, numeric, mixed case, and special characters
STRONG Length >= 8, numeric, mixed case, special characters and dictionary file

Please enter 0 = LOW, 1 = MEDIUM and 2 = STRONG: 1
Please set the password for root here.

New password: STRONG PASS

Re-enter new password: STRONG PASS

Estimated strength of the password: 100
Do you wish to continue with the password provided?(Press y|Y for Yes, any other key for No) : y
Next;
- remove anonymous users,
- disallow remote root login,
- remove test databases
- reload privilege tables to effect the changes.
By default, a MySQL installation has an anonymous user,
allowing anyone to log into MySQL without having to have
a user account created for them. This is intended only for
testing, and to make the installation go a bit smoother.
You should remove them before moving into a production
environment.

Remove anonymous users? (Press y|Y for Yes, any other key for No) : y
Success.


Normally, root should only be allowed to connect from
'localhost'. This ensures that someone cannot guess at
the root password from the network.

Disallow root login remotely? (Press y|Y for Yes, any other key for No) : y
Success.

By default, MySQL comes with a database named 'test' that
anyone can access. This is also intended only for testing,
and should be removed before moving into a production
environment.


Remove test database and access to it? (Press y|Y for Yes, any other key for No) : y
 - Dropping test database...
Success.

 - Removing privileges on test database...
Success.

Reloading the privilege tables will ensure that all changes
made so far will take effect immediately.

Reload privilege tables now? (Press y|Y for Yes, any other key for No) : y
Success.

All done!
You can now login to your MySQL server and create your databases!
Install PHP on FreeBSD 12
PHP works with HTML to generate dynamic web content. In order for PHP to connect to MySQL database to retrieve information for serving to the web server, you need to install PHP Apache and MySQL extensions. The following command installs the most common PHP modules.
pkg install php82 php82-mysqli php82-mbstring php82-zlib php82-curl php82-gd
If you require other PHP extensions, you can simply search and install them as shown above.
Configure PHP
Copy the sample PHP configuration file into place.
cp /usr/local/etc/php.ini{-production,}
Open the file /usr/local/etc/php.ini for editing the uncomment the line ;cgi.fix_pathinfo=1 and set its value to 0 so that PHP intepreter cannot processing files not found.
vi /usr/local/etc/php.ini;cgi.fix_pathinfo=1 cgi.fix_pathinfo=0
Save and exit the file.
Configure PHP-FPM
Configure PHP-FPM to listen on a Unix socket. By default, it listens on TCP port 9000 on localhost.
vi /usr/local/etc/php-fpm.d/www.conf;listen = 127.0.0.1:9000
listen = /var/run/php-fpm/php-fpm.sockSave and exit the file.
Create PHP-FPM unix socket directory and set proper ownership;
mkdir /var/run/php-fpmchown -R www:www /var/run/php-fpmRestart PHP-FPM;
service php-fpm restartConfigure Nginx to work with PHP processor
Configure Nginx to work with PHP processor by uncommenting the lines under the location block with PHP configurations as shown below. Replace the TCP socket, 127.0.0.1:9000; with unix socket unix:/var/run/php-fpm.sock;
vi /usr/local/etc/nginx/nginx.conf
        location ~ \.php$ {
            try_files $uri =404;
            fastcgi_split_path_info ^(.+\.php)(/.+)$;
            fastcgi_pass   unix:/var/run/php-fpm/php-fpm.sock;
            fastcgi_index  index.php;
            fastcgi_param  SCRIPT_FILENAME $request_filename;
            include        fastcgi_params;
        }
Save and exit the file.
Restart Nginx;
nginx -tnginx: the configuration file /usr/local/etc/nginx/nginx.conf syntax is ok
nginx: configuration file /usr/local/etc/nginx/nginx.conf test is successfulRestart if there is no error;
service nginx restartCreate PHP test configuration file under the Nginx default document root directory to verify whether PHP is working well with Nginx web server. The default document root directory is /usr/local/www/nginx-dist.
vi /usr/local/www/nginx-dist/test.php
<?php phpinfo(); ?>Verify that Nginx has not syntactical error and restart it.
nginx -tnginx: the configuration file /usr/local/etc/nginx/nginx.conf syntax is ok nginx: configuration file /usr/local/etc/nginx/nginx.conf test is successful
service nginx restart
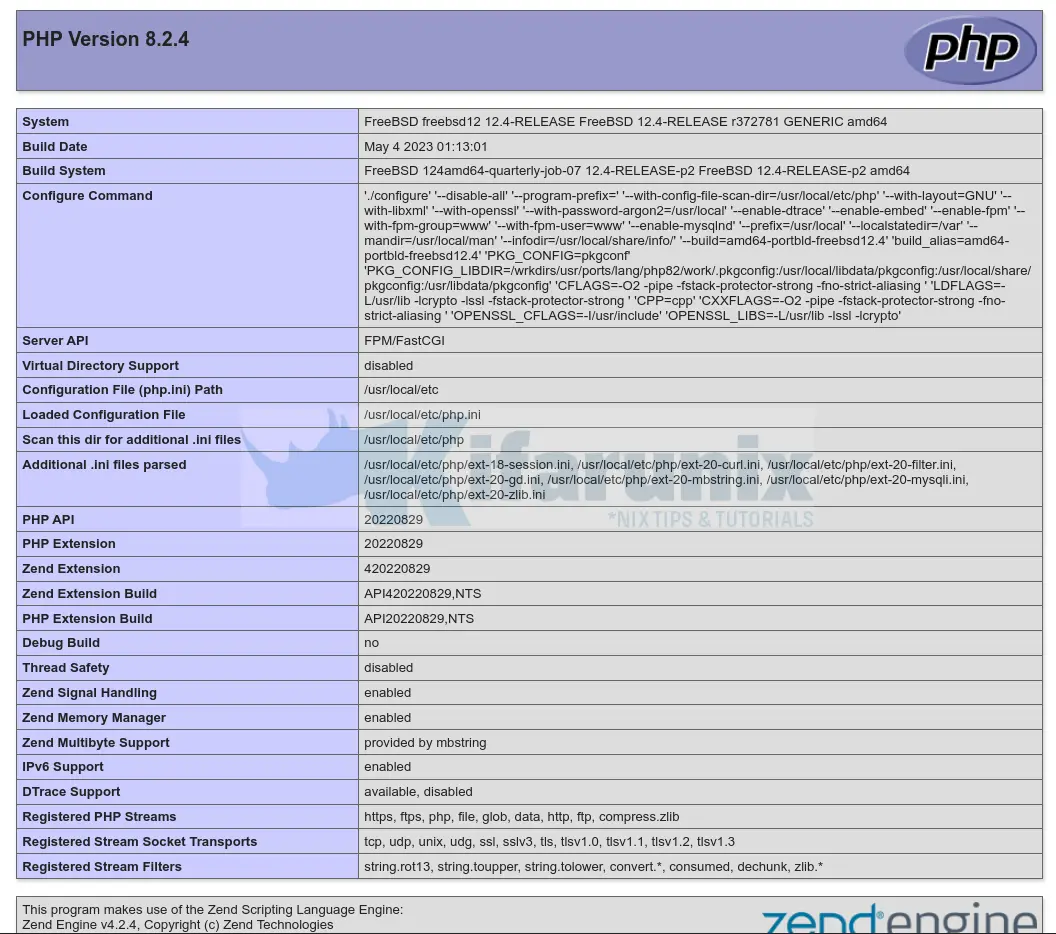
Navigate to the browser and the address in the format, http://server_IP_address/test.php.

Beautiful. Now remove the test file from your server to avoid exposing the information about server to the public.
rm -rf /usr/local/www/nginx-dist/test.php


Superb tutorial! Thank you for that article, it was very useful on my FreeBSD. Great website!
We are glad the tutorial helped you Hakan. Enjoy!
Wonderful! It worked perfectly. I appreciate your hard work in figuring this out.
FFS keep getting 404 on all last step, no error log, access log shows test.php being accessed but still 404