Hello there. Today we are going to learn how to install Apache with Self-signed Certificate on FreeBSD 12. The use of TLS/SSL certificates ensure a secured connection to and from the web server by encrypting traffic. The traffic is encrypted with public key that can only be decrypted with a private key that is stored in the web server.
The use of Self-signed TLS/SSL certificates is strictly not recommended for use in a public site where private information is involved. It can only be used locally for Apache testing purposes, on an intranet or on personal sites that doesn’t involve the transfer of critical data.
Install Apache with Self-Signed Certificate on FreeBDS 12
Install Apache on FreeBSD 12
To begin with, update your system packages.
pkg update
pkg upgrade
Once the update is done, install Apache HTTP server.
pkg install apache24Updating FreeBSD repository catalogue...
FreeBSD repository is up to date.
All repositories are up to date.
The following 12 package(s) will be affected (of 0 checked):
New packages to be INSTALLED:
apache24: 2.4.39
libnghttp2: 1.37.0
libxml2: 2.9.8
expat: 2.2.6_1
perl5: 5.28.1_1
pcre: 8.43
apr: 1.6.5.1.6.1_1
gdbm: 1.18.1
indexinfo: 0.3.1
readline: 7.0.5
gettext-runtime: 0.19.8.1_2
db5: 5.3.28_7
Number of packages to be installed: 12
The process will require 153 MiB more space.
34 MiB to be downloaded.
Proceed with this action? [y/N]: yStart and Enable Apache
Once the installation is done, you can enable and start Apache by running the commands below;
sysrc apache24_enable=yes
service apache24 start
Generate Apache Self Signed Certificate
Now that Apache is installed and running on FreeBSD 12, proceed to generate your self signed SSL/TLS certificate. This can be done using the openssl command. Hence, fire up your terminal and execute the command below;
openssl req -x509 -nodes -days 365 -newkey rsa:2048 -keyout /etc/ssl/private/selfsigned.key -out /etc/ssl/certs/selfsigned.crtWhen the command runs, you will be prompted to provide some information that will be incorporated into your certificate request. You can leave the defaults for most fields. The most important field however is the server hostname or IP address.
-----
Country Name (2 letter code) [AU]:KE
State or Province Name (full name) [Some-State]:Nairobi
Locality Name (eg, city) []:Nairobi
Organization Name (eg, company) [Internet Widgits Pty Ltd]:Example Ltd
Organizational Unit Name (eg, section) []:ITSec
Common Name (e.g. server FQDN or YOUR name) []:freebsd12.example.com
Email Address []: ENTER
This generates a new self signed certificate with a private key stored under /etc/ssl/certs/selfsigned.crt and /etc/ssl/private/selfsigned.key respectively with a validity period of 365 days.
Configure Apache to Use Self Signed Certificates
Next, you need to configure Apache to use the generated self signed certificate.
Enable Apache SSL module
To configure Apache to load the SSL modules, edit the main configuration file and uncomment the line, LoadModule ssl_module libexec/apache24/mod_ssl.so.
vim /usr/local/etc/apache24/httpd.conf...
#LoadModule slotmem_shm_module libexec/apache24/mod_slotmem_shm.so
#LoadModule slotmem_plain_module libexec/apache24/mod_slotmem_plain.so
LoadModule ssl_module libexec/apache24/mod_ssl.so
#LoadModule dialup_module libexec/apache24/mod_dialup.so
...Next, edit the default Apache SSL virtual host file configuration and set the proper values for the ServerAdmin, SSLCertificateFile, and SSLCertificateKeyFile at the least. Before that, make a backup of the original configuration file.
cp /usr/local/etc/apache24/extra/httpd-ssl.conf /usr/local/etc/apache24/extra/httpd-ssl.conf.bakvim /usr/local/etc/apache24/extra/httpd-ssl.confYou default server block should look like below.
...
<VirtualHost _default_:443>
DocumentRoot "/usr/local/www/apache24/data"
ServerName freebsd12.example.com:443
ServerAdmin [email protected]
ErrorLog "/var/log/httpd-error.log"
TransferLog "/var/log/httpd-access.log"
SSLEngine on
SSLCertificateFile "/etc/ssl/certs/selfsigned.crt"
SSLCertificateKeyFile "/etc/ssl/private/selfsigned.key"
<FilesMatch "\.(cgi|shtml|phtml|php)$">
    SSLOptions +StdEnvVars
</FilesMatch>
<Directory "/usr/local/www/apache24/cgi-bin">
    SSLOptions +StdEnvVars
</Directory>
BrowserMatch "MSIE [2-5]" \
         nokeepalive ssl-unclean-shutdown \
         downgrade-1.0 force-response-1.0
CustomLog "/var/log/httpd-ssl_request.log" \
          "%t %h %{SSL_PROTOCOL}x %{SSL_CIPHER}x \"%r\" %b"
</VirtualHost>
Once you are done with configuration, verify the Apache configuration file to ensure that there are no syntax errors.
apachectl -tIf you get such an error;
AH00526: Syntax error on line 92 of /usr/local/etc/apache24/extra/httpd-ssl.conf:
 SSLSessionCache: 'shmcb' session cache not supported (known names: ). Maybe you need to load the appropriate socache module (mod_socache_shmcb?).
Edit the main configuration file,/usr/local/etc/apache24/httpd.conf, and enable the socache_shmcb_module by uncommenting the line below;
LoadModule socache_shmcb_module libexec/apache24/mod_socache_shmcb.soRun the syntax verification again.
apachectl -t
Syntax OK
Restart Apache if there is no more errors.
service apache24 restart
Performing sanity check on apache24 configuration:
Syntax OK
Stopping apache24.
Waiting for PIDS: 6873.
Performing sanity check on apache24 configuration:
Syntax OK
Starting apache24.
Test HTTPS connection
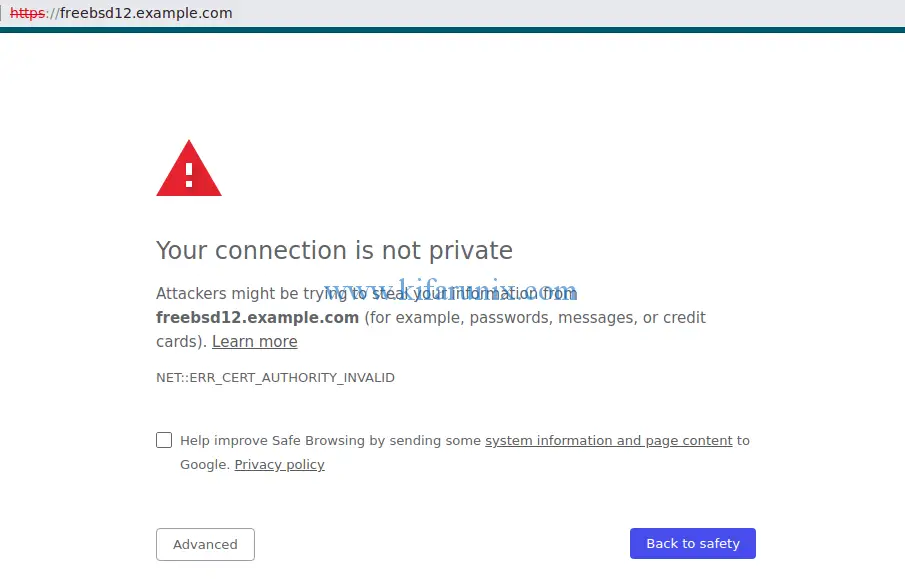
You can now test HTTPS connection to your Apache Web server using the address, https://<server-hostname>. If all is well, you should see a “Your connection is not private” message since we are using a self-signed certificate.

To proceed to the server, click Advanced and Proceed to <server> unsafe.
If you need to create a separate virtual host configuration, create your configuration under the /usr/local/etc/apache24/extra/httpd-vhosts.conf.
Well, that is it on how to install Apache with Self-signed Certificate on FreeBSD 12. Feel free to drop your comments on the same.
Want to see other FreeBSD 12 configurations, check the links below;
Install phpMyAdmin with Nginx on FreeBSD 12

