In this tutorial, you will learn how to easily install and setup Cacti on Ubuntu 20.04. Cacti is a complete frontend to RRDTool. RRDTool is a time-series data storage and display system. It stores and display time-series data (e.g. network bandwidth, machine-room temperature, server load average) in a database. It stores the data in Round Robin Databases (RRDs), a very compact way that will not expand over time. RRDtool processes the extracted data to enforce a certain data density, allowing for useful graphical representation of data values. The Cacti frontend is completely PHP driven. Along with being able to maintain Graphs, Data Sources, and Round Robin Archives in a database, cacti handles the data gathering. There is also SNMP support for those used to creating traffic graphs with MRTG.
Cacti Feature Highlights
- Remote data collectors (Pollers)
- Network discovery and automation
- Device management automation
- Expanded color sets
- Enhanced user, group and domain management
- User interface enhancements
- Additional RRDtool graph option support
- Multiple poller intervals
- Merged almost 20 plugins into core
Installing Cacti on Ubuntu 20.04
Prerequisites
Below are the requirements for setting up Cacti;
- RRDTool 1.0.49 or greater, 1.4+ recommended
- MySQL 5.x or greater
- PHP 5.1 or greater
- Web Server that supports PHP e.g. Apache, Nginx
Run System Update
To begin with, ensure your system package cache is up-to-date;
apt updateInstall RRDTool on Ubuntu 20.04
As stated in the requirements section above, RRDTool 1.4+ is recommended for use with Cacti. In the default Ubuntu 20.04 repos, RRDTool 1.7.2 is available.
apt-cache policy rrdtool
rrdtool:
  Installed: (none)
  Candidate: 1.7.2-3build2
  Version table:
     1.7.2-3build2 500
        500 http://ke.archive.ubuntu.com/ubuntu focal/main amd64 Packages
Therefore, you can install RRDTool on Ubuntu 20.04 by running the command below;
apt install rrdtool -yYou also need to install SNMP by running the command below;
apt install snmpd snmp snmp-mibs-downloader libsnmp-devInstall and Setup MySQL/MariaDB Database on Ubuntu 20.04
Install MariaDB 10.5 on Ubuntu 20.04
In this setup, we will use MariaDB 10.5 as our database backend. Thus, run the commands below to install and setup MariaDB 10.5 on Ubuntu 20.04;
apt-key adv --fetch-keys 'https://mariadb.org/mariadb_release_signing_key.asc'add-apt-repository 'deb [arch=amd64] http://mariadb.mirror.globo.tech/repo/10.5/ubuntu focal main'apt updateapt install mariadb-server mariadb-clientSecuring MariaDB
MariaDB ships with initial security script which can be run to remove test databases, disallow remote root login, remove anonymous users.
mysql_secure_installationCreate Cacti Database and Database User
Login to MariaDB and create the Cacti database and database user. Be sure to replace the database name and the username and password accordingly.
mysqlcreate database rrdtooldb CHARACTER SET utf8mb4 COLLATE utf8mb4_unicode_ci;grant all on rrdtooldb.* to rrdtooladmin@localhost identified by 'RRDTOOLDB_pass';Reload privileges table and exit the database;
flush privileges;
quit
Fine-tune MariaDB Database for Cacti
Open the /etc/mysql/mariadb.conf.d/50-server.cnf file and add the following lines under the [mysqld] section to optimize the database for Cacti.
vim /etc/mysql/mariadb.conf.d/50-server.cnf
...
# utf8 4-byte character set. See also client.cnf
character-set-server  = utf8mb4
character_set_client  = utf8mb4
collation-server      = utf8mb4_unicode_ci
...
...
max_heap_table_size=128M
tmp_table_size=128M
join_buffer_size=256M
innodb_file_format=Barracuda
innodb_large_prefix=1
innodb_buffer_pool_size=2048M
innodb_flush_log_at_timeout=3
innodb_read_io_threads=32
innodb_write_io_threads=16
innodb_buffer_pool_instances=17
innodb_io_capacity=5000
innodb_io_capacity_max=10000
...
Save and exit the file and restart MariaDB;
systemctl restart mariadbInstall PHP and Other Required Modules
Run the command below to install PHP and other required modules;
apt install php php-mysql php-curl php-net-socket php-gd php-intl php-pear php-imap php-memcache libapache2-mod-php php-pspell php-tidy php-xmlrpc php-snmp php-mbstring gettext php-gmp php-json php-xml php-ldapSet the PHP timezone;
vim /etc/php/7.4/apache2/php.ini[Date]
; Defines the default timezone used by the date functions
; http://php.net/date.timezone
date.timezone = Asia/QatarMaximum execution time;
...
; Maximum execution time of each script, in seconds
; http://php.net/max-execution-time
; Note: This directive is hardcoded to 0 for the CLI SAPI
max_execution_time = 60
...
Set the Memory limit;
...
; Maximum amount of memory a script may consume (128MB)
; http://php.net/memory-limit
memory_limit = 400M
...
Similarly, set the timezone on PHP INI CLI configuration.
vim /etc/php/7.4/cli/php.ini[Date]
; Defines the default timezone used by the date functions
; http://php.net/date.timezone
date.timezone = "Asia/Qatar"Install Apache Web Server on Ubuntu 20.04
In this setup, we are using Apache HTTP Server with Cacti. Note that when you install PHP, Apache gets installed along with it. If not already installed, then you can install it as follows;
apt install apache2Install Cacti
Next, install Cacti. As much as the package is available on the default Ubuntu Universe repos, it is the latest stable release.
apt-cache policy cacticacti:
Installed: (none)
Candidate: 1.2.10+ds1-1ubuntu1
Version table:
1.2.10+ds1-1ubuntu1 500
500 http://ke.archive.ubuntu.com/ubuntu focal/universe amd64 PackagesAs of this writing, the latest stable version is 1.2.14, released 08/02/20.
Hence, download and extract Cacti tarball archive to your default Web root directory.
wget https://www.cacti.net/downloads/cacti-latest.tar.gzIn this setup, am gonna use /var/www/html/cacti as the web root directory for Cacti;
mkdir /var/www/html/cactitar xzf cacti-latest.tar.gz -C /var/www/html/cacti --strip-components=1Set the ownership of the Cacti web root directory to Apache HTTP server user;
chown -R www-data: /var/www/html/cacti/Import the default Cacti database
Import the default Cacti database from the extracted web root directory to the new database created above for Cacti;
mysql -u rrdtooladmin -p -D rrdtooldb < /var/www/html/cacti/cacti.sqlImport timezone data into MariaDB database
Import the timezone data into MariaDB database and grant Cacti database user SELECT right access to mysql.time_zone_name table;
mysql -u root -p mysql < /usr/share/mysql/mysql_test_data_timezone.sqlmysql -u rootgrant select on mysql.time_zone_name to rrdtooladmin@localhost;quitConfigure Cacti Database Connection details
Once the import is done, open the Cacti configuration file, /var/www/html/cacti/include/config.php, and define the database connection details.
vim /var/www/html/cacti/include/config.php
...
/*
 * Make sure these values reflect your actual database/host/user/password
 */

$database_type     = 'mysql';
$database_default  = 'rrdtooldb';
$database_hostname = 'localhost';
$database_username = 'rrdtooladmin';
$database_password = 'RRDTOOLDB_pass';
$database_port     = '3306';
Create Cacti Apache Configuration
Next, create an Apache configuration for Cacti;
vim /etc/apache2/conf-available/cacti.conf
Alias /cacti    /var/www/html/cacti

<Directory /var/www/html/cacti/>
        <IfModule mod_authz_core.c>
                Require all granted
        </IfModule>
</Directory>
Save and exit the file.
Check Apache configuration syntax;
apachectl configtestIf you get, Syntax OK, output, restart Apache. Otherwise fix any would be errors.
systemctl restart apache2Open Apache on UFW, if at all UFW is running;
ufw allow "Apache Full"Finalize installation and Setup of Cacti on Ubuntu 20.04
Accessing Cacti Web Interface
You can now access Cacti Web interface via the URL, http://server-IP/cacti as per our setup.
Login using the default credentials, admin:admin for both username and password.
Upon login, you are prompted to reset your password. Please reset and proceed.
Accept End User License Agreement;
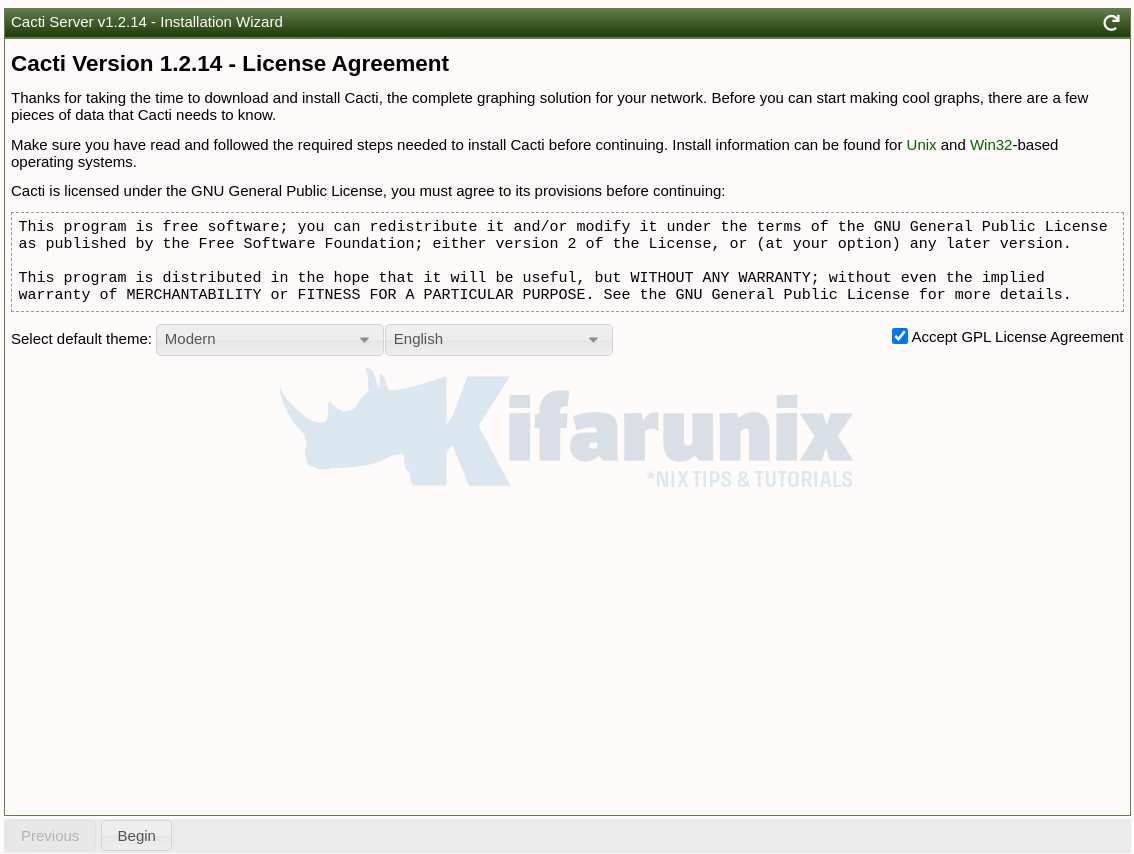
Click Begin to perform Pre-installation checks. If any error, please fix before you can proceed.

Installation type
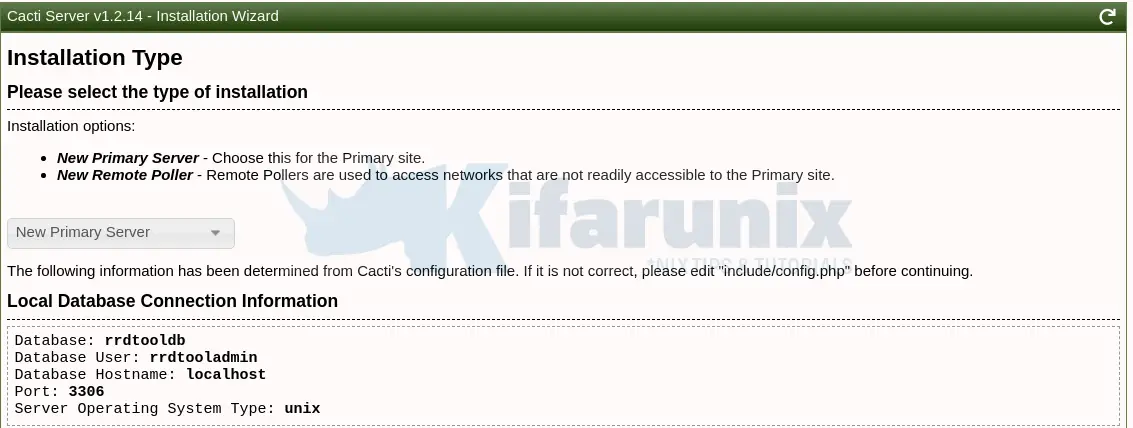
Directory Permission Checks

Critical Binary Locations and Versions.
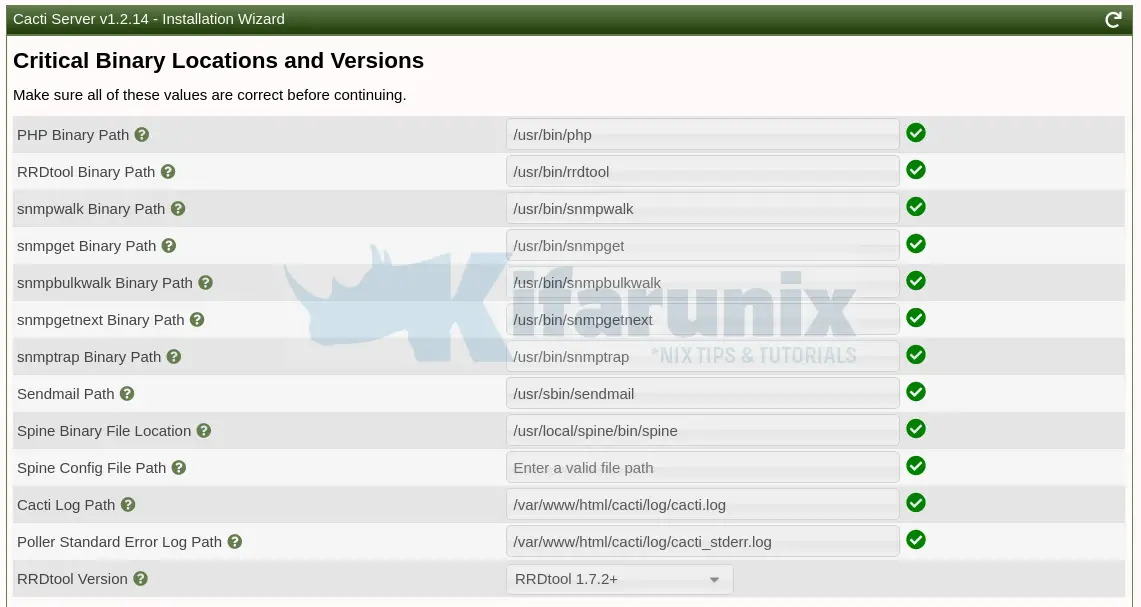
Input Validation Whitelist Protection
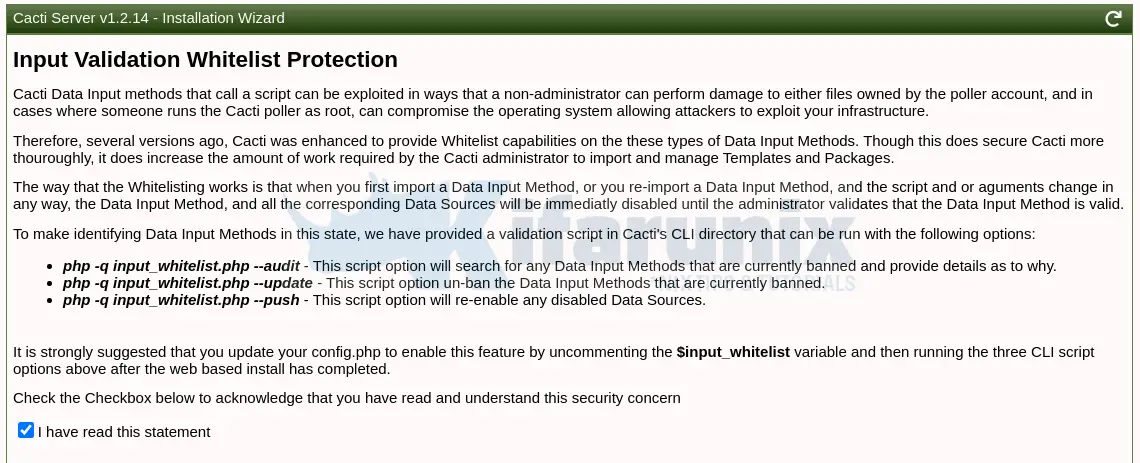
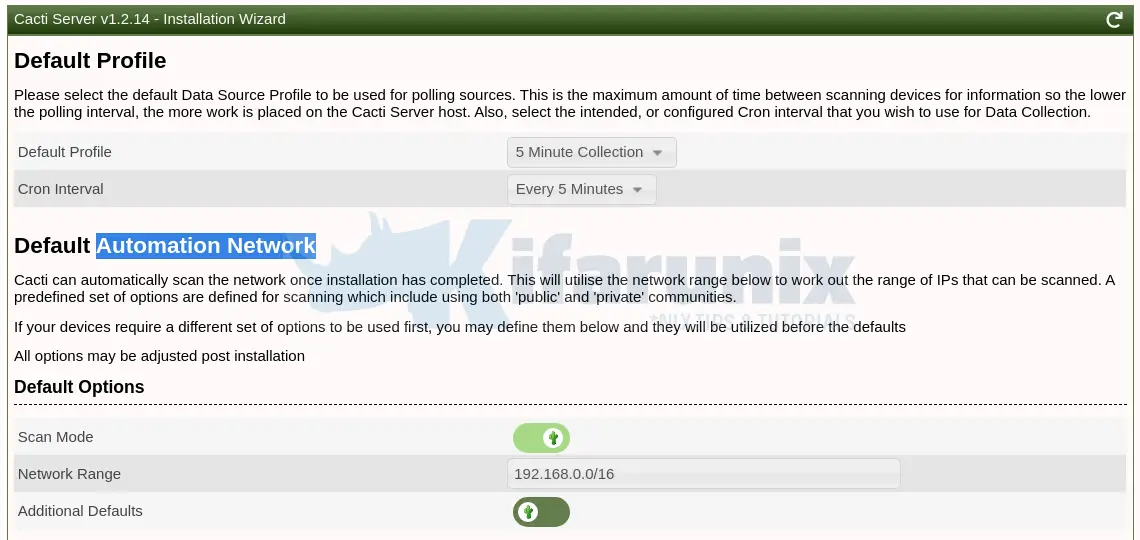
Default Profile and Automation Network
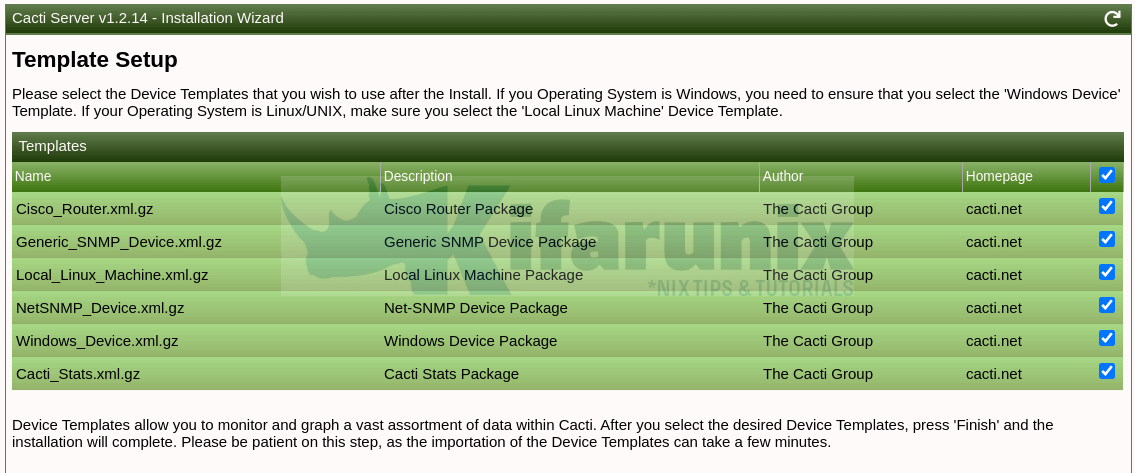
Template Setup
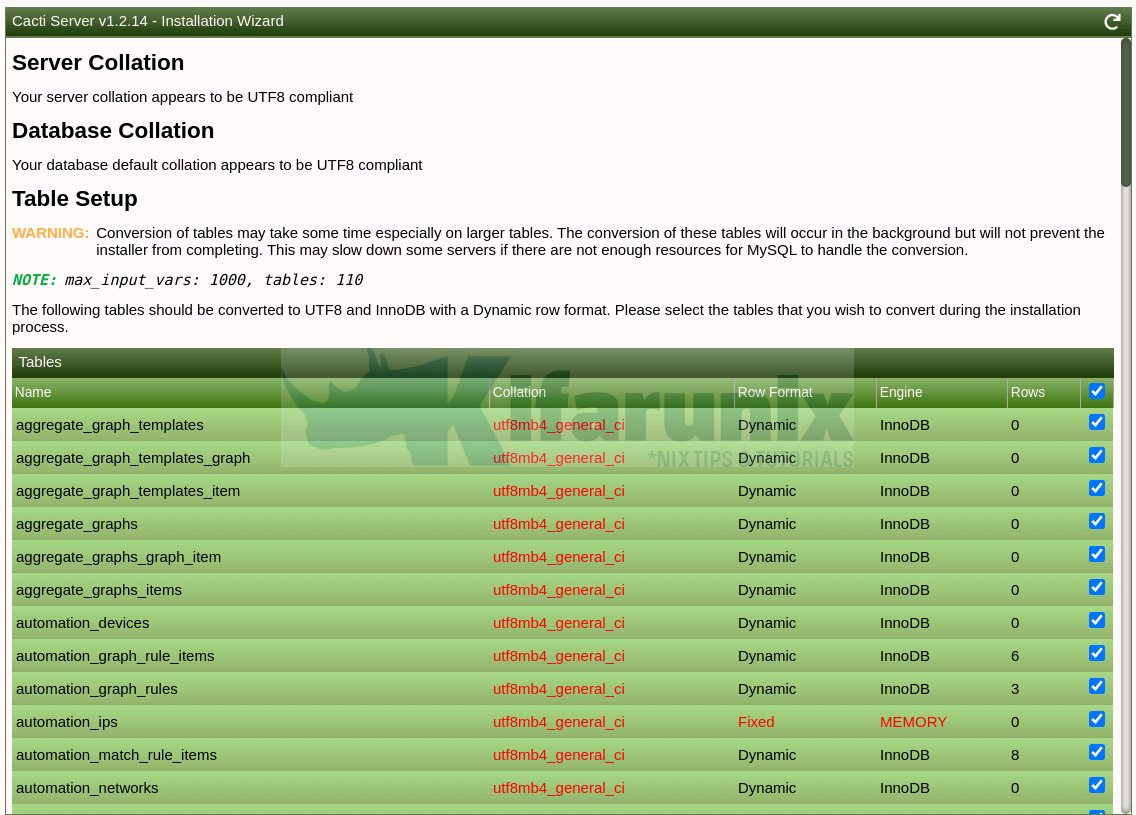
Server, Database collation and Table Setup.
Cacti Installation: Select Confirm Installation and click install to install Cacti on Ubuntu 20.04.

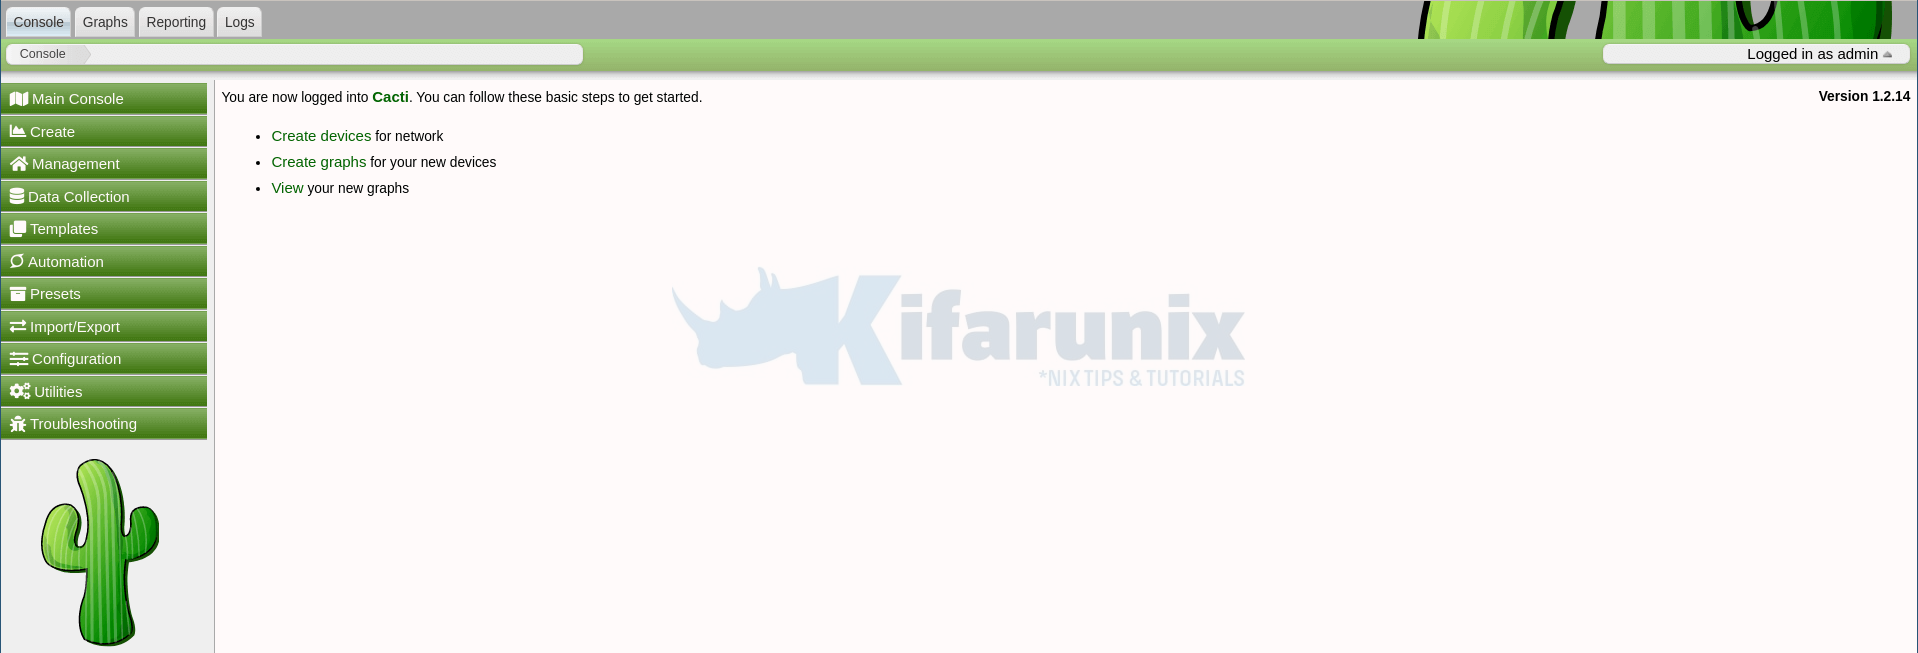
Once the installation completes, click Get started to access Cacti web interface.

Cacti Web Console;
Reference
Other Related Tutorials
Install Zabbix 4.x from Sources on Debian 10 Buster
Install ELK Stack on Ubuntu 20.04


Hi, can you please give me the crontab config based on this tutorial so my graphs will run automatically. Thank you in advance.