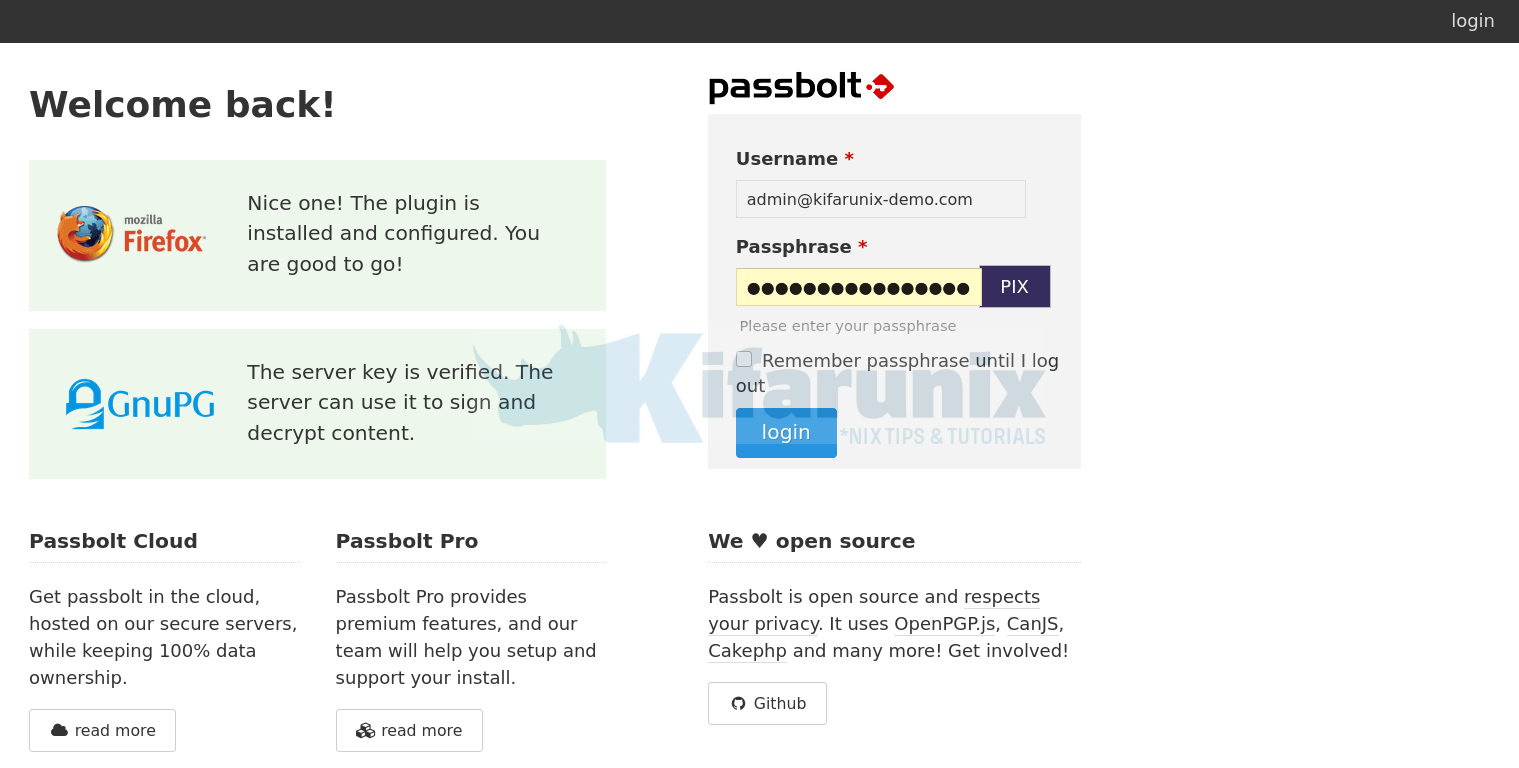
In this tutorial, you will learn how to install and setup Passbolt password manager on Ubuntu 20.04. Passbolt is is a free, open source, self-hosted, extensible, OpenPGP based password manager that enables teams to securely store their personal as well as share their common credentials. It is available both a subscription based and community edition. This tutorial focuses on the setup of community edition.
As of this writing, there is no official guide release for setting up Passbolt on Ubuntu 20.04. As such, we are going to install Passbolt from the source code.
Installing Passbolt Password Manager on Ubuntu 20.04
Prerequisites
- Install and setup a fresh Vanilla Ubuntu 20.04 server.
- Allocate the server at least 2 GB RAM and 2 vCPUs
- A resolvable hostname or IP address of your server.
- Install and setup LEMP/LAMP stack on Ubuntu 20.04
Install LAMP/LEMP Stack on Ubuntu 20.04
Assuming that the first three prerequisites mentioned above have been met, proceed to install LEMP/LAMP stack on Ubuntu 20.04 server. Note that Password is written in PHP and hence, it requires either a LEMP or a LAMP stack to run.
Install PHP 7.3 on Ubuntu 20.04
NOTE: By default, Ubuntu 20.04 ships with PHP 7.4 in its repos. Passbolt doesn’t fully support PHP 7.4 yet. As such, ensure that you install PHP 7.3. The LAMP/LEMP guides below uses PHP 7.4. Be sure to install PHP 7.3 and its modules.
To install PHP 7.3, insatll the Ondrej PPAs and install PHP 7.3;
apt install software-properties-commonadd-apt-repository ppa:ondrej/php --yesapt updateYou can then install PHP 7.3;
apt install php7.3 php7.3-mysqlFollow either of the links below to set up LAMP or LEMP stack on Ubuntu 20.04.
Install LAMP Stack on Ubuntu 20.04
Install and Setup LEMP Stack on Ubuntu 20.04
In this tutorial, we are using LAMP stack to run Passbolt.
Create Passbolt Database and Database User
Login to MariaDB/MySQL database server;
mysqlThe above assumes that your MySQL/MariaDB database is using unix_socket for authentication and that you are executing the command as a root user. If you are not root and have sudo rights, simply use; sudo mysql -u root. Otherwise, you can just use mysql -u root -p command.
Replace the name of the database, the database user username and password as you see fit.
Create Passbolt database that supports non latin characters and emojis.
CREATE DATABASE passbolt CHARACTER SET utf8mb4 COLLATE utf8mb4_unicode_ci;Create a Passbolt database user and grant all privileges on the Passbolt database.
grant all on passbolt.* to passman@localhost identified by 'p@SSw0rd123';Reload privileges tables and quit database;
flush privileges;
quit
Clone Passbolt Github Repository to Apache Web Root Directory
Since we are going to install Passbolt from the source, you need to clone its Gtihub repository to your web root directory.
In this tutorial, we are using /var/www/passbolt as the web root directory.
mkdir /var/www/passboltgit clone https://github.com/passbolt/passbolt_api.git /var/www/passboltSince we are using Apache as the web server, you need to set the ownership (user and group) of the Passbolt web root directory to Apache user and group;
chown -R www-data: /var/www/Install Other Required dependencies and PHP modules/extensions
To successfully install and run Passbolt, there are other tools and PHP extensions that are required. Run the command below to install them.
apt install composer gnupg2 git php7.3-{gnupg,intl,mbstring,gd,imagick,xml,common,curl,json,ldap} zlib1gNavigate to Passbolt web root directory and install other required dependencies using composer.
cd /var/www/passboltRun composer as the non privileged user. In this case, we use the owner of the Passbolt directory
sudo -u www-data composer install --no-devDuring the installation, you are prompted on whether to adjust directories permissions. Accept and continue.
> App\Console\Installer::postInstall
Created `config/app.php` file
Created `/var/www/passbolt/logs` directory
Created `/var/www/passbolt/tmp/cache/models` directory
Created `/var/www/passbolt/tmp/cache/persistent` directory
Created `/var/www/passbolt/tmp/cache/views` directory
Created `/var/www/passbolt/tmp/sessions` directory
Created `/var/www/passbolt/tmp/tests` directory
Set Folder Permissions ? (Default to Y) [Y,n]? y
Generate OpenPGP Key for Authenticating JSON Requests
In order to authenticate and sign outgoing JSON requests, Passbolt API uses PGP keys. Therefore, run the command below to generate the keys;
gpg --full-generate-keyWhen prompted for the passphrase, DO NOT set it. Just press ENTER and confirm that you don’t want to set it. Also, do not set the expiration date.
Replace YOUR_NAME and YOUR_EMAIL_ID with your name and email id.
Please select what kind of key you want:
   (1) RSA and RSA (default)
   (2) DSA and Elgamal
   (3) DSA (sign only)
   (4) RSA (sign only)
  (14) Existing key from card
Your selection? 1
RSA keys may be between 1024 and 4096 bits long.
What keysize do you want? (3072) 4096
Requested keysize is 4096 bits
Please specify how long the key should be valid.
         0 = key does not expire
      <n>  = key expires in n days
      <n>w = key expires in n weeks
      <n>m = key expires in n months
      <n>y = key expires in n years
Key is valid for? (0) 0
Key does not expire at all
Is this correct? (y/N) y

GnuPG needs to construct a user ID to identify your key.

Real name: YOUR_NAME
Email address: ENTER_YOUR_EMAIL_ID
Comment:
You selected this USER-ID:
    "YOUR_NAME <YOUR_EMAIL_ID>"

Change (N)ame, (C)omment, (E)mail or (O)kay/(Q)uit? O
...
gpg: key 85EB40BA1D5DE890 marked as ultimately trusted
gpg: revocation certificate stored as '/root/.gnupg/openpgp-revocs.d/C503E615618B34331BA1D26D85EB40BA1D5DE890.rev'
public and secret key created and signed.

pub   rsa4096 2020-07-15 [SC]
      C503E615618B34331BA1D26D85EB40BA1D5DE890
uid                      YOUR_NAME <YOUR_EMAIL_ID>
sub   rsa4096 2020-07-15 [E]
Note the Key fingerprint and save it somewhere as it will be needed later in the setup.
Export and store both public and private keys on Passbolt configuration directory.
gpg --armor --export-secret-keys YOUR_EMAIL_ID > /var/www/passbolt/config/gpg/serverkey_private.ascgpg --armor --export YOUR_EMAIL_ID > /var/www/passbolt/config/gpg/serverkey.ascNext, initialize the gpg keyring for the Apache web server user so that Passbolt authentication can work.
sudo su -s /bin/bash -c "gpg --list-keys" www-dataConfiguring Passbolt on Ubuntu 20.04
Copy the sample Passbolt configuration file renaming it as follows;
cp /var/www/passbolt/config/passbolt{.default,}.phpNext, open the configuration file for modification;
vim /var/www/passbolt/config/passbolt.phpSet the Application URL
Set the application url to the web address for your Passbolt app by replacing the value of the fullBaseUrl parameter appropriately.
        // 'fullBaseUrl' => 'https://www.passbolt.test',
        'fullBaseUrl' => 'https://passbolt.kifarunix-demo.com',
Define Database Connection settings
Configure Passbolt database connection settings;
    // Database configuration.
    'Datasources' => [
        'default' => [
            'host' => 'localhost',
            //'port' => 'non_standard_port_number',
            'username' => 'passman',
            'password' => 'p@SSw0rd123',
            'database' => 'passbolt',
        ],
    ],
Configure Passbolt Email Settings
Configure Passbolt Email Server settings. We are using Gmail SMTP as our relay server.
    // Email configuration.
    'EmailTransport' => [
        'default' => [
            'host' => 'smtp.gmail.com',
            'port' => 587,
            'username' => '[email protected]',
            'password' => 'secretpassword',
            // Is this a secure connection? true if yes, null if no.
            'tls' => true,
            //'timeout' => 30,
            //'client' => null,
            //'url' => null,
        ],
    ],
    'Email' => [
        'default' => [
            // Defines the default name and email of the sender of the emails.
            'from' => ['[email protected]' => 'Kifarunix-demo Passbolt'],
            //'charset' => 'utf-8',
            //'headerCharset' => 'utf-8',
        ],
    ],
Specify the GPG key fingerprint
Extract the GPG key fingerprint and set it as the value of the fingerprint parameter.
gpg --list-keys --fingerprint | grep -i -B 2 YOUR_EMAIL_ID pub rsa4096 2020-07-15 [SC]
C503 E615 618B 3433 1BA1 D26D 85EB 40BA 1D5D E890
uid [ultimate] <YOUR_NAME> <YOUR_EMAIL_ID>
sub rsa4096 2020-07-15 [E]Copy the highlighted string and remove spaces and paste it as the value of the fingerprint parameter. Also, uncomment the public and private lines below the fingerprint by removing the two forward slashes at the beginning of those lines;
...
            'serverKey' => [
                // Server private key fingerprint.
                'fingerprint' => 'C503E615618B34331BA1D26D85EB40BA1D5DE890',
                'public' => CONFIG . 'gpg' . DS . 'serverkey.asc',
                'private' => CONFIG . 'gpg' . DS . 'serverkey_private.asc',
            ],
Save and exit the configuration file.
Create Apache VirtualHost Configuration for Passbolt and Enable HTTPS
Next, create a dedicated Apache virtual host configuration file for Passbolt.
vim /etc/apache2/sites-available/passbolt.conf <VirtualHost *:80>
ServerAdmin passbolt.kifarunix-demo.com
DocumentRoot /var/www/passbolt
Redirect / https://passbolt.kifarunix-demo.com
</VirtualHost>
#SSLStaplingCache "shmcb:logs/stapling-cache(150000)"
ServerSignature Off
ServerTokens Prod
<VirtualHost _default_:443>
ServerAdmin passbolt.kifarunix-demo.com
DocumentRoot /var/www/passbolt
ErrorLog ${APACHE_LOG_DIR}/passbolt_error.log
CustomLog ${APACHE_LOG_DIR}/passbolt_access.log combined
SSLEngine on
SSLCertificateFile /etc/ssl/certs/ssl-cert-passbolt.pem
SSLCertificateKeyFile /etc/ssl/private/ssl-cert-passbolt.key
SSLCACertificateFile /etc/ssl/private/ssl-cacert-passbolt.pem
SSLCipherSuite EECDH+AESGCM:EDH+AESGCM
SSLProtocol -all +TLSv1.3 +TLSv1.2
SSLOpenSSLConfCmd Curves X25519:secp521r1:secp384r1:prime256v1
SSLHonorCipherOrder On
Header always set Strict-Transport-Security "max-age=63072000; includeSubDomains; preload"
Header always set X-Frame-Options DENY
Header always set X-Content-Type-Options nosniff
SSLCompression off
#SSLUseStapling on
SSLSessionTickets Off
<Directory /var/www/passbolt/>
Options FollowSymLinks MultiViews
AllowOverride All
Require all granted
</Directory>
<FilesMatch "\.(cgi|shtml|phtml|php)$">
SSLOptions +StdEnvVars
</FilesMatch>
<Directory /usr/lib/cgi-bin>
SSLOptions +StdEnvVars
</Directory>
</VirtualHost>Save and exit the configuration file.
Generate TLS certificates
If you noticed, we enabled HTTP > HTTPS redirection in our configuration.
Obtain your commercially trusted CA certificates and install them on the directories specified on the Apache configuration.
Disable Apache default site;
a2dissite 000-default.confEnable Passbolt site;
a2ensite passbolt.confEnable Apache rewrite, ssl, headers module;
a2enmod rewrite ssl headersRun Apache configuration syntax check.
apachectl -tSyntax OKIf there is no issue, proceed to restart Apache;
systemctl restart apache2Run the Passbolt Install Script
Next, execute the Passbolt install script.
cd /var/www/passboltsudo su -s /bin/bash -c "./bin/cake passbolt install --no-admin" www-dataBy default, when script is run, it prompts you to create an administrative user. We disabled that by adding the --no-admin option. We will create the admin account later.
All Done. Took 111.3186s

Import the server private key in the keyring
---------------------------------------------------------------
Importing /var/www/passbolt/config/gpg/serverkey_private.asc
Keyring init OK

Passbolt installation success! Enjoy! ☮
Run health check to verify that all is Okay.
cd /var/www/passbolt
sudo su -s /bin/bash -c "./bin/cake passbolt healthcheck" www-data
...
Application configuration
[PASS] Using latest passbolt version (2.13.1).
[PASS] Passbolt is configured to force SSL use.
[PASS] App.fullBaseUrl is set to HTTPS.
[PASS] Selenium API endpoints are disabled.
[PASS] Search engine robots are told not to index content.
[PASS] Registration is closed, only administrators can add users.
[PASS] Serving the compiled version of the javascript app
[PASS] All email notifications will be sent.
No error found. Nice one sparky!Finalize Passbolt Setup from Browser
You can now finalize the Passbolt setup from browser by following the address https://<passbolt-server-hostname>.
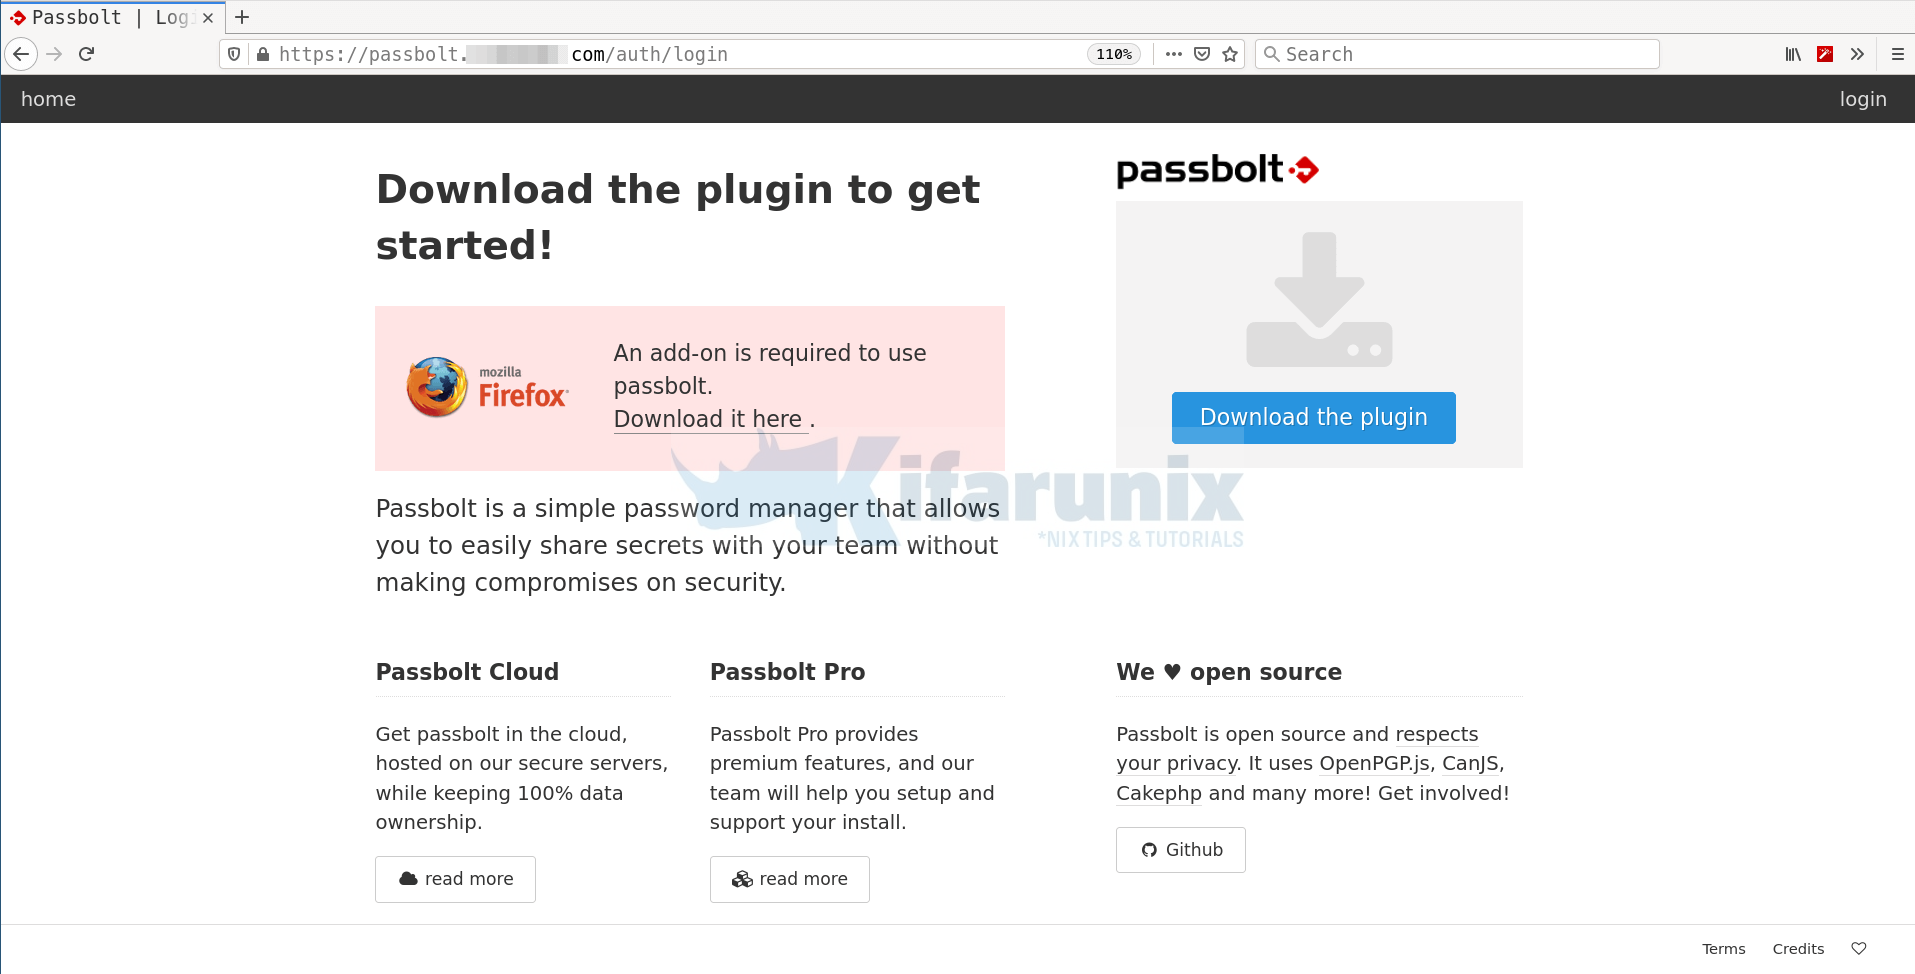
Download and install plugin for your specific browser, in this demo, we using Firefox. Therefore, click on Download the plugin to download and install Passbolt Firefox add-on extension.
Create Passbolt Administrative User
You can now create Passbolt admin user using the ./bin/cake passbolt register_user command. Below is the command line options for this command;
cd /var/www/passbolt./bin/cake passbolt register_user --help ____ __ ____
/ __ \____ _____ ____/ /_ ____ / / /_
/ /_/ / __ `/ ___/ ___/ __ \/ __ \/ / __/
/ ____/ /_/ (__ |__ ) /_/ / /_/ / / /
/_/ \__,_/____/____/_.___/\____/_/\__/
Open source password manager for teams
---------------------------------------------------------------
Register a new user.
Usage:
cake passbolt register_user [options]
Options:
--first-name, -f The user first name
--help, -h Display this help.
--interactive, -i Enable interactive mode
--interactive-loop Enable interactive mode (default:
3)
--last-name, -l The user last name
--quiet, -q Enable quiet output.
--role, -r The User role, such as "admin" or "user"
--username, -u The user email aka username
--verbose, -v Enable verbose output.So let us create an admin user;
cd /var/www/passboltsudo su -s /bin/bash -c "./bin/cake passbolt register_user -u [email protected] -f Kifarunix -l Demo -r admin" www-data ____ __ ____
/ __ \____ _____ ____/ /_ ____ / / /_
/ /_/ / __ `/ ___/ ___/ __ \/ __ \/ / __/
/ ____/ /_/ (__ |__ ) /_/ / /_/ / / /
/_/ \__,_/____/____/_.___/\____/_/\__/
Open source password manager for teams
---------------------------------------------------------------
User saved successfully.
To start registration follow the link provided in your mailbox or here:
https://passbolt.kifarunix-demo.com/setup/install/d4273b45-2728-4538-863a-ff7e58260a0f/42221ac3-0205-415a-85b2-c8271f8742f7Copy the link provided upon user registration and use it to finalize the setup of Passbolt on browser.
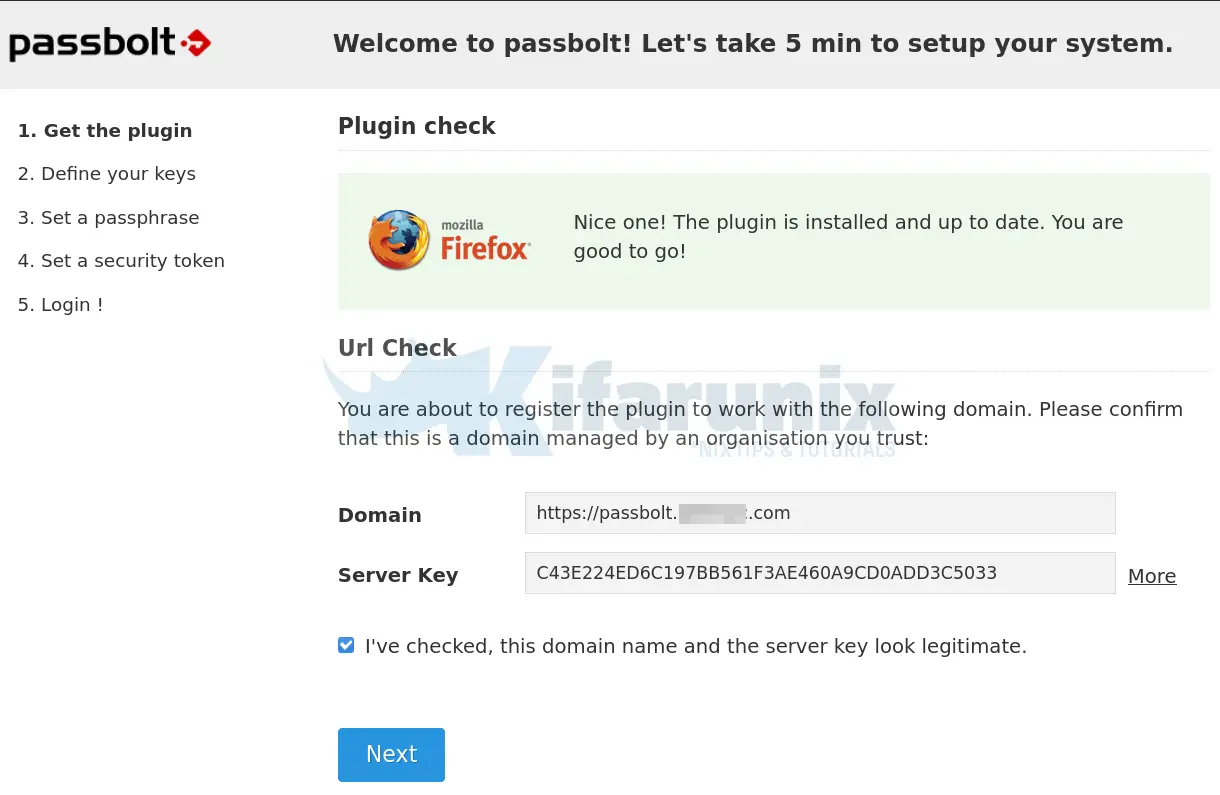
The link takes you to Welcome page to finalize on the Passbolt setup. If you get a blank page after loading Passbolt URL, then it means you have not installed the Passbolt browser extension.
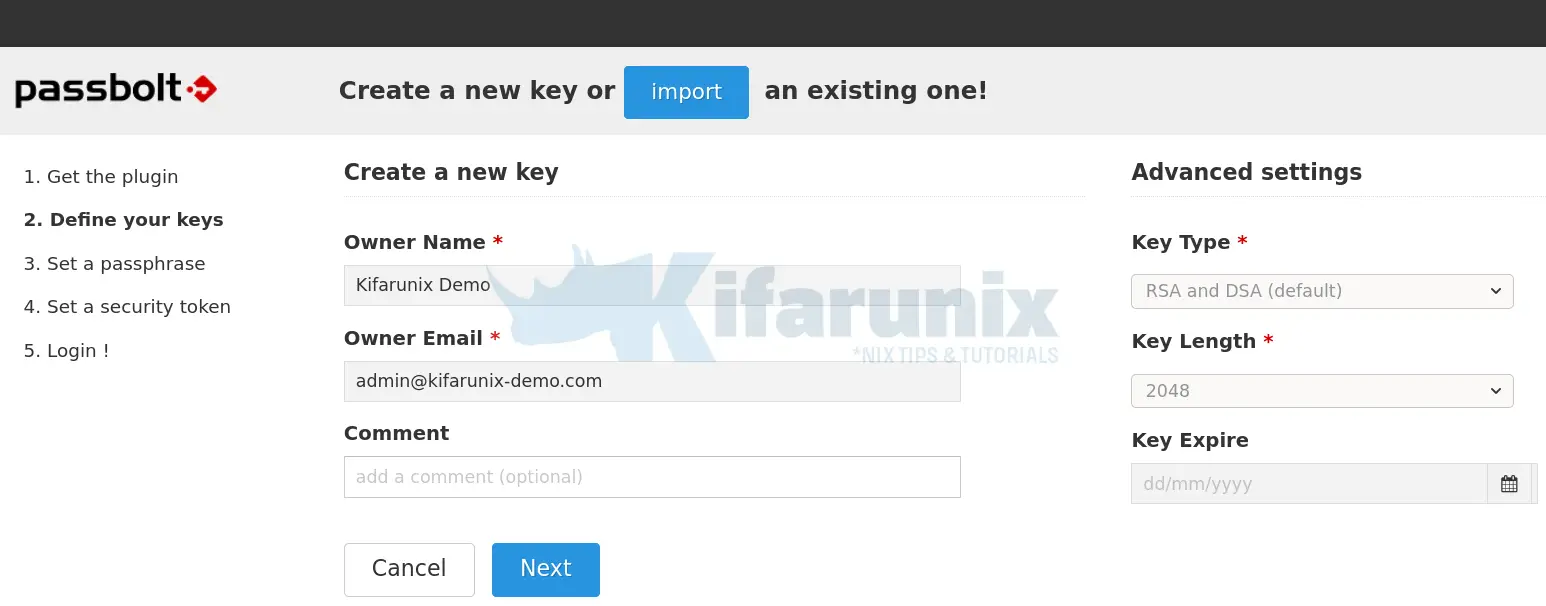
Confirm that the URL and GPG key fingerprint are okay and click Next to proceed with setup. In the next step, you are required to generate the key. However, simply click import to import the existing keys.
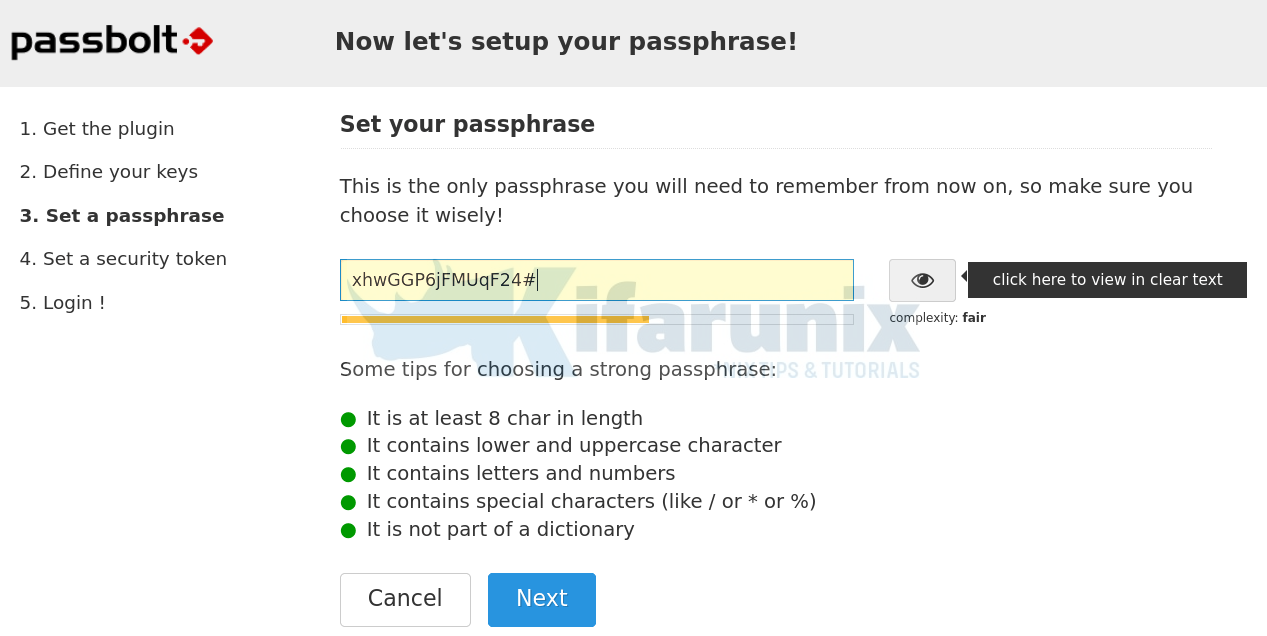
Set a complex passphrase that you can easily remember for protecting you secret key.
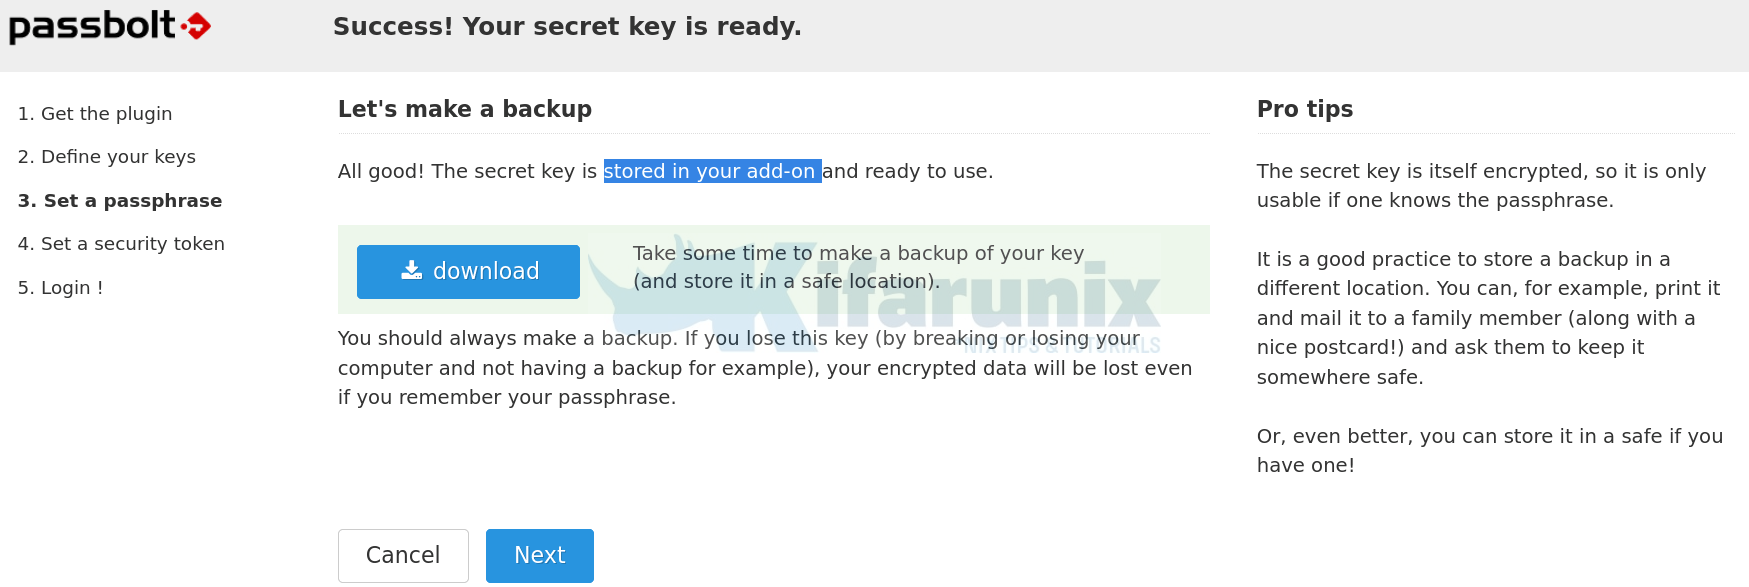
Your secret key is now generated and encrypted with your passphrase and it is stored in your Passbolt add-on. Ensure that you make a copy of this key by downloading it and storing it in a different location.
Generate your security token.
You have now successfully set up your Passbolt. Click Next to get to the Login page.
And there you go.
You can now start using Passbolt to store passwords/share them as you wish.
Configure Passbolt to Sent Emails
Last but not least, you can now configure Passbolt to be able to sent email notifications on new password creation, sharing, modification etc.
Before this, ensure that you have configured Passbolt email settings.
cd /var/www/passbolt./bin/cake EmailQueue.senderWhen you run the above, you should be able to receive emails on activating your account as well as welcoming you to Passbolt.
Create a cron job to execute this script to have the emails sent automatically.
Install the cron jobs as Apache Web server user, www-data.
crontab -u www-data -eCreate a cron job that runs all the time.
* * * * * /var/www/passbolt/bin/cake EmailQueue.sender >> /var/log/passbolt-mails.logSave and exit the cron jobs file.
You can list installed cronjobs;
crontab -u www-data -lYour Passbolt password manager is now ready.
Reference
Related Tutorials
Install sysPass Password Manager on Ubuntu 18.04
Install TeamPass Password Manager on Ubuntu 18.04

