Follow through this post to learn how to install and setup Ceph Storage cluster on Ubuntu 20.04. Ceph is a scalable distributed storage system designed for cloud infrastructure and web-scale object storage. It can also be used to provide Ceph Block Storage as well as Ceph File System storage.
As of this writing, CEPH Pacific is the current stable release.
See our updated guide on Ubuntu 22.04.
Table of Contents
Install and Setup Ceph Storage Cluster on Ubuntu 20.04
Ceph Storage Cluster setup requires at least one Ceph Monitor, Ceph Manager, and Ceph OSD (Object Storage Daemon) and may be Ceph Metadata Server for providing Ceph File System Storage.
All these components perform various roles;
- Ceph Admin node (
cephadm)- It is the node on which Ceph deployment script (cephadm) is installed on.
- Ceph Object Storage Daemon (OSD,
ceph-osd)- It provides ceph object data store.
- It also performs data replication , data recovery, rebalancing and provides storage information to Ceph Monitor.
- Ceph Monitor (
ceph-mon)- It maintains maps of the entire ceph cluster state including monitor map, manager map, the OSD map, and the CRUSH map.
- manages authentication between daemons and clients.
- A minimum of three monitors is required but it is recommended to deploy five monitors if there are five or more nodes in your cluster.
- Ceph Manager (
ceph-mgr)- keeps track of runtime metrics and the current state of the Ceph cluster, including storage utilization, current performance metrics, and system load.
- manages and exposes Ceph cluster web dashboard and API.
- At least two managers are required for HA.
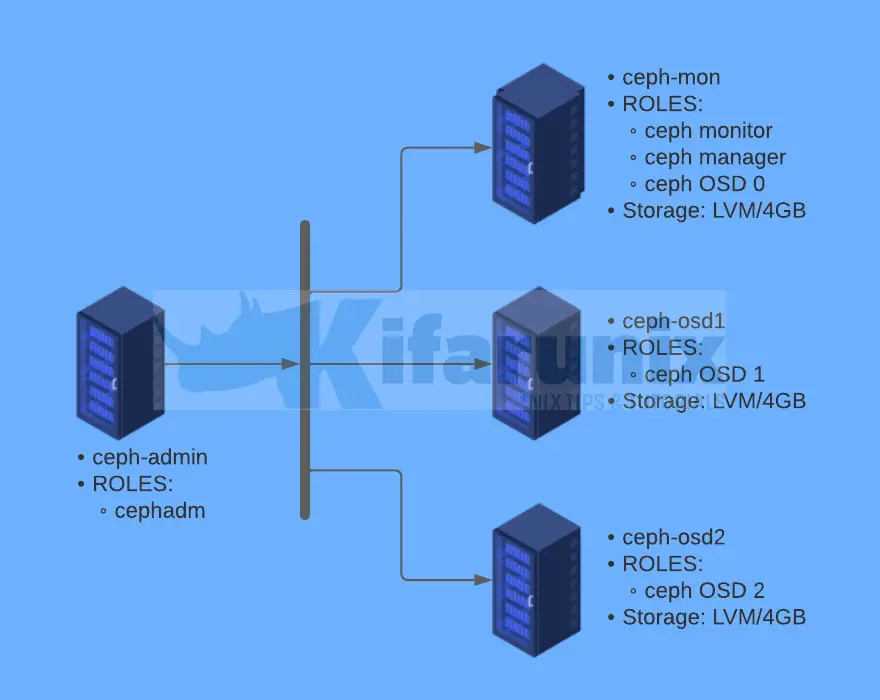
Architecture of our deployment

If your cluster nodes are in the same network subnet, cephadm will automatically add up to five monitors to the subnet, as new hosts are added to the cluster.
Ceph Pacific Depolyment Requirements
Below are the requirements for deploying Ceph Pacific storage cluster;
- Python 3
- Systemd
- Podman or Docker for running containers (we use docker in this setup)
- Time synchronization (such as chrony or NTP)
- LVM2 for provisioning storage devices.
Prepare Ceph Nodes for Ceph Storage Cluster Deployment on Ubuntu 20.04
Attach Storage Disks to Ceph OSD Nodes
Each Ceph OSD node in our architecture above has unallocated LVM logical volumes of 4 GB each.
lvsSample output;
  LV   VG    Attr       LSize   Pool Origin Data%  Meta%  Move Log Cpy%Sync Convert
  lv01 vol01 -wi-a----- <10.00g
Run System Update
On all the nodes, update your system packages.
apt updateSet hostnames and Update Hosts File
To begin with, setup up your nodes hostnames;
hostnamectl set-hostname ceph-adminDo the same on the other nodes.
Next, if you are not using DNS for name resolution, then update the hosts file accordingly.
For example, in our setup, each node hosts file should contain the lines below;
less /etc/hosts...
192.168.59.31 ceph-admin
192.168.59.30 ceph-mon
192.168.59.29 ceph-osd1
192.168.59.28 ceph-osd2Set Time Synchronization
Ensure that the time on all the nodes is synchronized. Thus install Chrony on each and set it up such that all nodes uses the same NTP server.
apt install chrony -yEdit the Chrony configuration and set your NTP server by replacing the NTP server pools with your NTP server address.
vim /etc/chrony/chrony.confDefine your NTP Server. Replace ntp.kifarunix-demo.com with your respective NTP server address.
...
# pool ntp.ubuntu.com        iburst maxsources 4
# pool 0.ubuntu.pool.ntp.org iburst maxsources 1
# pool 1.ubuntu.pool.ntp.org iburst maxsources 1
# pool 2.ubuntu.pool.ntp.org iburst maxsources 2
pool ntp.kifarunix-demo.com iburst
...
Restart Chronyd
systemctl restart chronydInstall SSH Server on Each Node
Ceph deployment through cephadm utility requires that an SSH server is installed on all the nodes.
Ubuntu 20.04 comes with SSH server already installed. If not, install and start it as follows;
apt install openssh-serversystemctl enable --now sshdInstall Python3
Python is required to deploy Ceph on Ubuntu 20.04. Python 3 is installed by default on Ubuntu 20.04
Create Ceph Deployment User
On the ceph admin node, create a ceph user with sudo right required for installing ceph packages and configurations as shown below. Do not use the username ceph as it is reserved.
Replace cephadmin username accordingly.
useradd -m -s /bin/bash cephadminpasswd cephadminecho "cephadmin ALL=(ALL:ALL) NOPASSWD:ALL" >> /etc/sudoers.d/cephadminchmod 0440 /etc/sudoers.d/cephadminInstall Docker on Each Node
The cephadm utility is used to bootstrap a Ceph cluster and to manage ceph daemons deployed with systemd and containers.
Thus, on each Node, run the command below to install Docker CE;
sudo apt install apt-transport-https ca-certificates curl gnupg-agent software-properties-common -ycurl -fsSL https://download.docker.com/linux/ubuntu/gpg | sudo apt-key add -echo "deb [arch=amd64] https://download.docker.com/linux/ubuntu $(lsb_release -sc) stable" | sudo tee /etc/apt/sources.list.d/docker-ce.listsudo apt updatesudo apt install docker-ce docker-ce-cli containerd.io -ysudo systemctl enable --now dockerEnable Root Login on Other Nodes
In order to add other nodes to the Ceph cluster using Ceph Admin Node, you will have to use the root user account.
Thus, on the Ceph Monitor, Ceph OSD nodes, enable root login from the Ceph Admin node;
vim /etc/ssh/sshd_configAdd the configs below, replacing the IP address for Ceph Admin accordingly.
Match Address 192.168.59.31
        PermitRootLogin yes
Reload ssh;
systemctl reload sshdSetup Ceph Storage Cluster on Ubuntu 20.04
Install cephadm Utility on Ceph Admin Node
On the Ceph admin node, you need to install the cephadm utility.
Cephadm installs and manages a Ceph cluster using containers and systemd, with tight integration with the CLI and dashboard GUI.
- cephadm only supports Octopus and newer releases.
- cephadm is fully integrated with the new orchestration API and fully supports the new CLI and dashboard features to manage cluster deployment.
- cephadm requires container support (podman or docker) and Python 3.
You can check other recommended methods of deploying Ceph.
To install cephadm on Ubuntu 20.04;
sudo wget -q https://github.com/ceph/ceph/raw/pacific/src/cephadm/cephadm -P /usr/bin/sudo chmod +x /usr/bin/cephadmSetup Ceph Cluster Monitor
Your nodes are now ready to deploy a Ceph storage cluster. To begin with, switch to cephadmin user;
su - cephadminwhoamiOutput;
cephadminInitialize Ceph Cluster monitor
It is now time to bootstrap the Ceph cluster in order to create the first monitor daemon, the Ceph Admin node.
sudo cephadm bootstrap --mon-ip 192.168.59.31
Verifying podman|docker is present...
Verifying lvm2 is present...
Verifying time synchronization is in place...
Unit systemd-timesyncd.service is enabled and running
Repeating the final host check...
docker (/usr/bin/docker) is present
systemctl is present
lvcreate is present
Unit systemd-timesyncd.service is enabled and running
Host looks OK
Cluster fsid: f959b65e-91c2-11ec-9776-abbffb8a52a1
Verifying IP 192.168.59.31 port 3300 ...
Verifying IP 192.168.59.31 port 6789 ...
Mon IP `192.168.59.31` is in CIDR network `192.168.59.0/24`
- internal network (--cluster-network) has not been provided, OSD replication will default to the public_network
Pulling container image quay.io/ceph/ceph:v16...
Ceph version: ceph version 16.2.7 (dd0603118f56ab514f133c8d2e3adfc983942503) pacific (stable)
Extracting ceph user uid/gid from container image...
Creating initial keys...
Creating initial monmap...
Creating mon...
Waiting for mon to start...
Waiting for mon...
mon is available
Assimilating anything we can from ceph.conf...
Generating new minimal ceph.conf...
Restarting the monitor...
Setting mon public_network to 192.168.59.0/24
Wrote config to /etc/ceph/ceph.conf
Wrote keyring to /etc/ceph/ceph.client.admin.keyring
Creating mgr...
Verifying port 9283 ...
Waiting for mgr to start...
Waiting for mgr...
mgr not available, waiting (1/15)...
mgr not available, waiting (2/15)...
mgr not available, waiting (3/15)...
mgr is available
Enabling cephadm module...
Waiting for the mgr to restart...
Waiting for mgr epoch 4...
mgr epoch 4 is available
Setting orchestrator backend to cephadm...
Generating ssh key...
Wrote public SSH key to /etc/ceph/ceph.pub
Adding key to root@localhost authorized_keys...
Adding host ceph-admin...
Deploying mon service with default placement...
Deploying mgr service with default placement...
Deploying crash service with default placement...
Deploying prometheus service with default placement...
Deploying grafana service with default placement...
Deploying node-exporter service with default placement...
Deploying alertmanager service with default placement...
Enabling the dashboard module...
Waiting for the mgr to restart...
Waiting for mgr epoch 8...
mgr epoch 8 is available
Generating a dashboard self-signed certificate...
Creating initial admin user...
Fetching dashboard port number...
Ceph Dashboard is now available at:

	     URL: https://ceph-admin:8443/
	    User: admin
	Password: 7164vdghsy

Enabling client.admin keyring and conf on hosts with "admin" label
Enabling autotune for osd_memory_target
You can access the Ceph CLI with:

	sudo /usr/bin/cephadm shell --fsid f959b65e-91c2-11ec-9776-abbffb8a52a1 -c /etc/ceph/ceph.conf -k /etc/ceph/ceph.client.admin.keyring

Please consider enabling telemetry to help improve Ceph:

	ceph telemetry on

For more information see:

	https://docs.ceph.com/docs/pacific/mgr/telemetry/

Bootstrap complete.
According to the documentation, the bootstrap command;
- Create a monitor and manager daemon for the new cluster on the local host.
- Generate a new SSH key for the Ceph cluster and add it to the root user’s
/root/.ssh/authorized_keysfile. - Write a copy of the public key to
/etc/ceph/ceph.pub. - Write a minimal configuration file to
/etc/ceph/ceph.conf. This file is needed to communicate with the new cluster. - Write a copy of the
client.adminadministrative (privileged!) secret key to/etc/ceph/ceph.client.admin.keyring. - Add the
_adminlabel to the bootstrap host. By default, any host with this label will (also) get a copy of/etc/ceph/ceph.confand/etc/ceph/ceph.client.admin.keyring.
Ceph admin containers are installed;
docker ps
CONTAINER ID   IMAGE                                      COMMAND                  CREATED          STATUS          PORTS     NAMES
fa8b37976c6f   quay.io/prometheus/alertmanager:v0.20.0    "/bin/alertmanager -…"   21 minutes ago   Up 21 minutes             ceph-f959b65e-91c2-11ec-9776-abbffb8a52a1-alertmanager-ceph-admin
a3345c3df15e   quay.io/ceph/ceph-grafana:6.7.4            "/bin/sh -c 'grafana…"   21 minutes ago   Up 21 minutes             ceph-f959b65e-91c2-11ec-9776-abbffb8a52a1-grafana-ceph-admin
562cb5595aa7   quay.io/prometheus/prometheus:v2.18.1      "/bin/prometheus --c…"   21 minutes ago   Up 21 minutes             ceph-f959b65e-91c2-11ec-9776-abbffb8a52a1-prometheus-ceph-admin
81aa6bff037a   quay.io/prometheus/node-exporter:v0.18.1   "/bin/node_exporter …"   22 minutes ago   Up 22 minutes             ceph-f959b65e-91c2-11ec-9776-abbffb8a52a1-node-exporter-ceph-admin
cba3508f638b   quay.io/ceph/ceph                          "/usr/bin/ceph-crash…"   24 minutes ago   Up 24 minutes             ceph-f959b65e-91c2-11ec-9776-abbffb8a52a1-crash-ceph-admin
6ce79ae859b2   quay.io/ceph/ceph:v16                      "/usr/bin/ceph-mgr -…"   25 minutes ago   Up 25 minutes             ceph-f959b65e-91c2-11ec-9776-abbffb8a52a1-mgr-ceph-admin-yxxusl
3e901accdfb6   quay.io/ceph/ceph:v16                      "/usr/bin/ceph-mon -…"   25 minutes ago   Up 25 minutes             ceph-f959b65e-91c2-11ec-9776-abbffb8a52a1-mon-ceph-admin
Enable Ceph CLI
When bootstrap command completes, a command for accessing Ceph CLI is provided. Execute that command to access Ceph CLI;
sudo /usr/bin/cephadm shell --fsid f959b65e-91c2-11ec-9776-abbffb8a52a1 -c /etc/ceph/ceph.conf -k /etc/ceph/ceph.client.admin.keyringThis drops you onto Ceph Docker CLI;
You can run the ceph commands eg to check the Ceph status;
sudo ceph -s
  cluster:
    id:     f959b65e-91c2-11ec-9776-abbffb8a52a1
    health: HEALTH_WARN
            OSD count 0 < osd_pool_default_size 3

  services:
    mon: 1 daemons, quorum ceph-admin (age 23m)
    mgr: ceph-admin.yxxusl(active, since 20m)
    osd: 0 osds: 0 up, 0 in

  data:
    pools:   0 pools, 0 pgs
    objects: 0 objects, 0 B
    usage:   0 B used, 0 B / 0 B avail
    pgs:
You can exit the docker CLI by pressing Ctrl+D or enter exit.
There are other ways in which you can access the Ceph CLI. For example, you can run Ceph CLI commands using cephadm command.
sudo cephadm shell -- ceph -sOr Install Ceph CLI tools on the host;
sudo cephadm add-repo --release pacific
sudo cephadm install ceph-common
With this method, then you can just ran the Ceph commands easily;
sudo ceph -sAdd Ceph Monitor Node to Ceph Cluster
At this point, we have just provisioned Ceph Admin node only;
sudo ceph orch host lsSample output;
HOST        ADDR           LABELS  STATUS
ceph-admin  192.168.59.31  _admin
So next, add the Ceph Monitor node to the cluster;
Copy the SSH key generated by the bootstrap command to Ceph Monitor's root user account. Ensure Root Login is permitted on the Ceph monitor node.
sudo ssh-copy-id -f -i /etc/ceph/ceph.pub root@ceph-monOnce you have copied the Ceph SSH public key, execute the command below to add the Ceph Monitor to the cluster;
sudo ceph orch host add ceph-monSample command output;
Added host 'ceph-mon' with addr '192.168.59.30'Next, label the host with its role (remember our ceph-monitor also doubles up as an OSD);
sudo ceph orch host label add ceph-mon mon/osdAdd Ceph OSD Nodes to Ceph Cluster
Similarly, copy the SSH keys to the OSD Nodes;
for i in ceph-osd1 ceph-osd2; do sudo ssh-copy-id -f -i /etc/ceph/ceph.pub root@$i; doneAdd them to the cluster.
sudo ceph orch host add ceph-osd1sudo ceph orch host add ceph-osd2Define their respective labels;
for i in ceph-osd1 ceph-osd2; do sudo ceph orch host label add $i osd; doneList Ceph Cluster Nodes;
You can list the Ceph cluster nodes;
sudo ceph orch host lsSample output;
HOST        ADDR           LABELS  STATUS
ceph-admin  192.168.59.31  _admin
ceph-mon    192.168.59.30  mon
ceph-osd1   192.168.59.29  osd
ceph-osd2   192.168.59.28  osd
Attach Logical Storage Volumes to Ceph OSD Nodes
In our setup, we have unallocated logical volume of 4 GB on each OSD node to be used as a backstore for OSD daemons.
To attach the logical volumes to the OSD node, run the command below. Replace vg01/lv01 with Volume group and logical volume accordingly.
sudo ceph orch daemon add osd ceph-mon:vg01/lv01Sample output;
sudo ceph orch daemon add osd ceph-mon:vol01/lv01Repeat the same for the other OSD nodes.
sudo ceph orch daemon add osd ceph-osd1:vol01/lv01sudo ceph orch daemon add osd ceph-osd2:vol01/lv01The Ceph Nodes are now ready for OSD use.
Check Ceph Cluster Health
To verify the health status of the ceph cluster, simply execute the command ceph s on each OSD node.
To check Ceph cluster health status from the admin node;
sudo ceph -sSample output;
  cluster:
    id:     f959b65e-91c2-11ec-9776-abbffb8a52a1
    health: HEALTH_OK

  services:
    mon: 4 daemons, quorum ceph-admin,ceph-mon,ceph-osd1,ceph-osd2 (age 12m)
    mgr: ceph-admin.yxxusl(active, since 93m), standbys: ceph-mon.rivvvs
    osd: 3 osds: 3 up (since 4m), 3 in (since 4m)

  data:
    pools:   1 pools, 1 pgs
    objects: 0 objects, 0 B
    usage:   15 MiB used, 12 GiB / 12 GiB avail
    pgs:     1 active+clean
Accessing Ceph Admin Web User Interface
The bootstrap commands give a url and credentials to use to access the Ceph admin web user interface;
Ceph Dashboard is now available at:

	     URL: https://ceph-admin:8443/
	    User: admin
	Password: 7164vdghsy
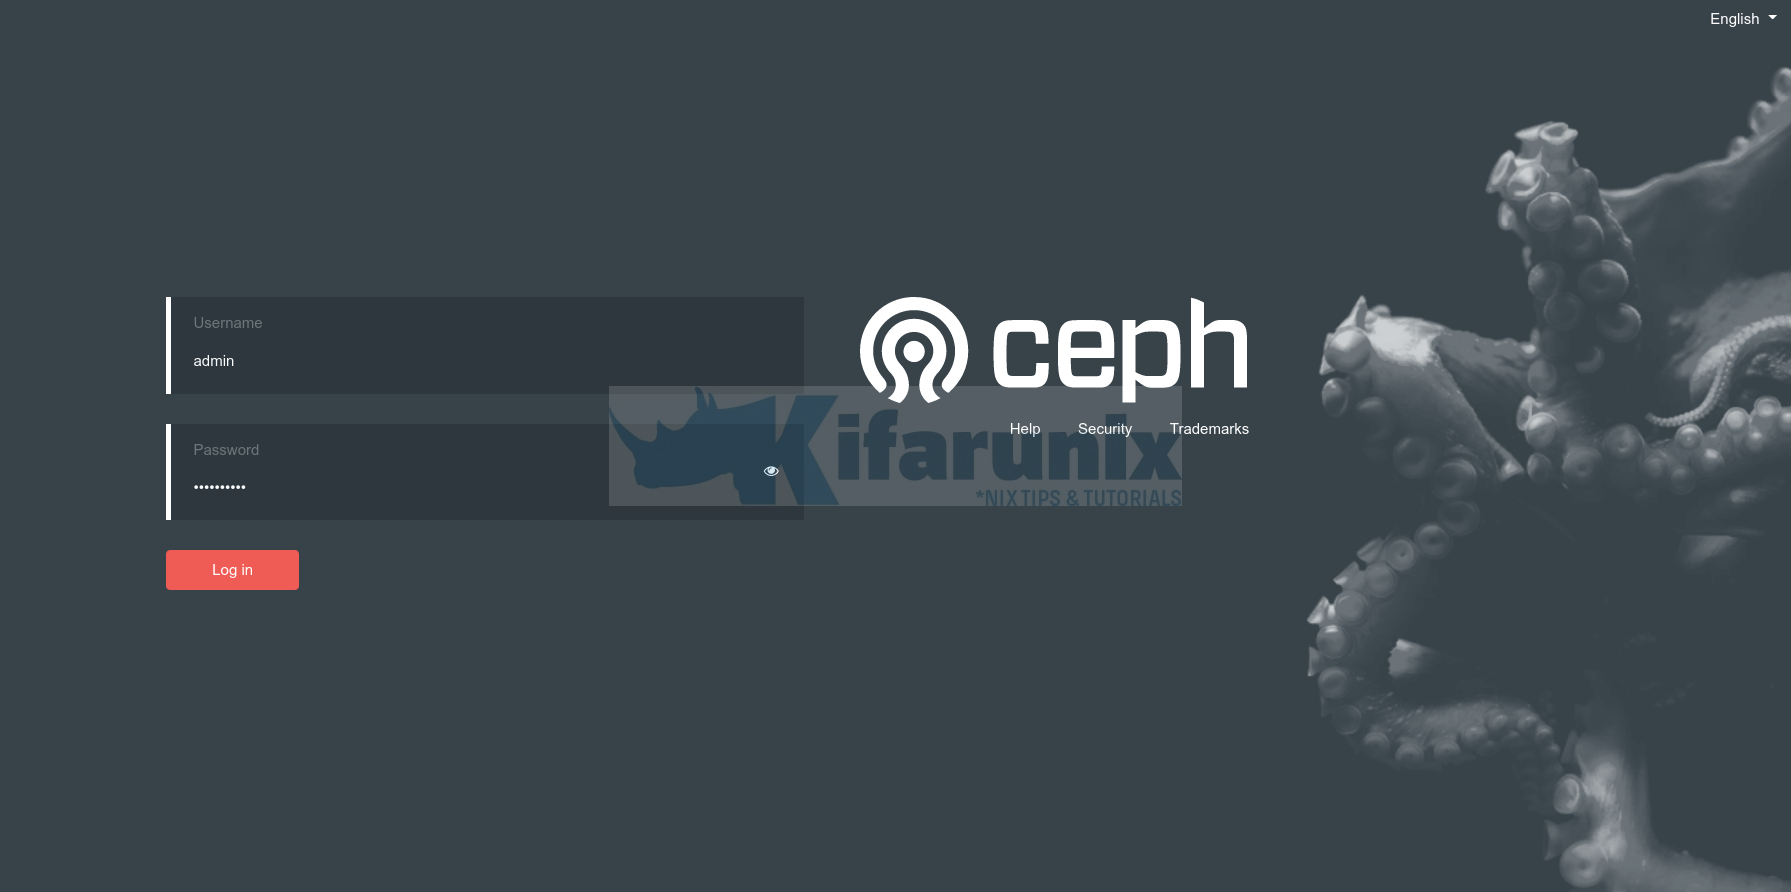
Thus, open the browser and navigate to the URL.
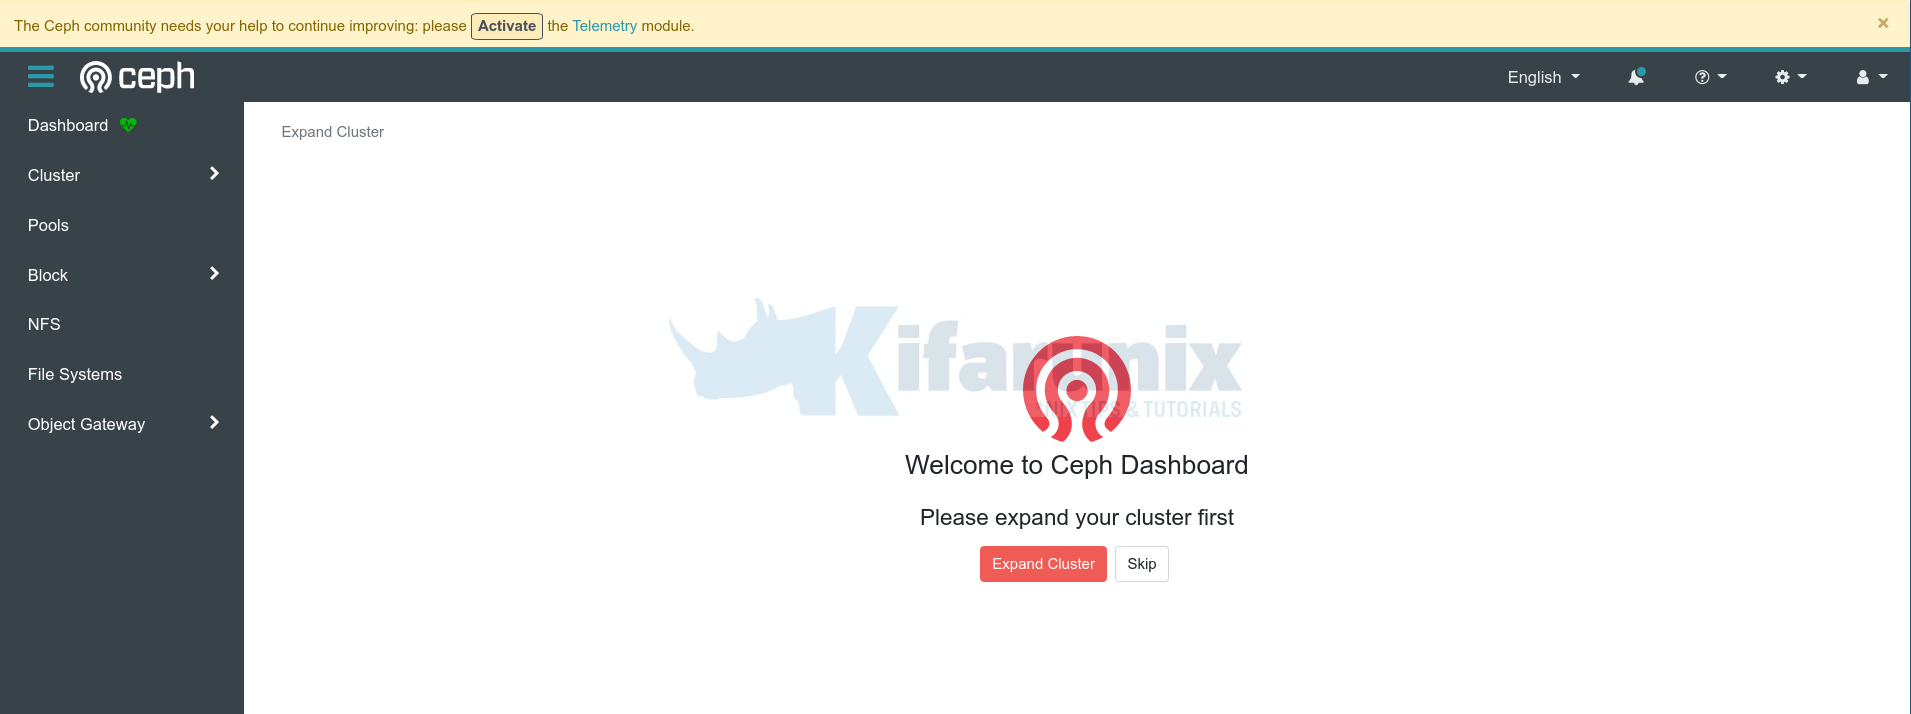
Reset your admin password and proceed to login to Ceph Admin UI.
If you want, you can activate the telemetry module.
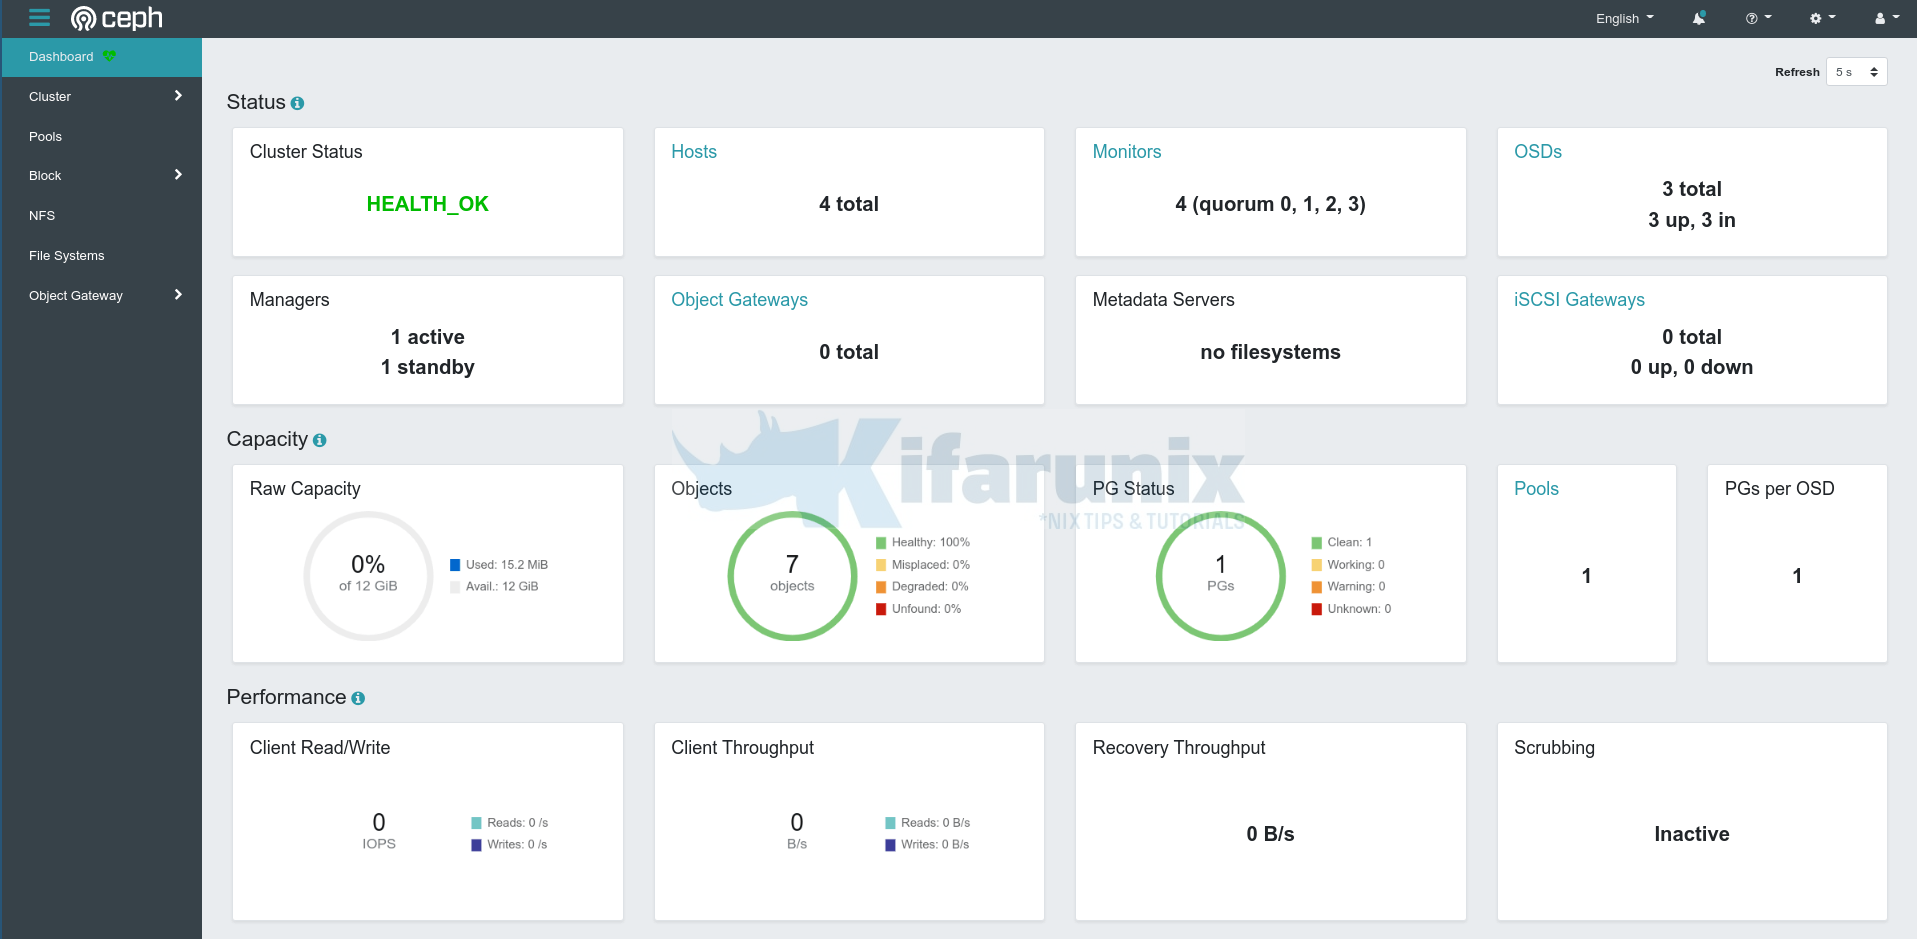
Go through other Ceph menu to see more about Ceph.
Ceph Dashboard;
There you go. That marks the end of our tutorial on how to install and setup Ceph storage cluster on Ubuntu.
Reference
Other Tutorials
Install ownCloud Server on Ubuntu 22.04


Hello,
I am trying to build ceph cluster as per your document seeing below error while bootstraping monitor node
can you please help me here
cephadmin@ceph-admin:~$ sudo cephadm bootstrap –mon-ip 172.31.20.189
Verifying podman|docker is present…
Verifying lvm2 is present…
Verifying time synchronization is in place…
Unit chrony.service is enabled and running
Repeating the final host check…
docker (/usr/bin/docker) is present
systemctl is present
lvcreate is present
Unit chrony.service is enabled and running
Host looks OK
Cluster fsid: de54427c-2f36-11ed-a4d4-f50177d551b1
Verifying IP 172.31.20.189 port 3300 …
ERROR: [Errno 99] Cannot assign requested address
cephadmin@ceph-admin:~$
cephadmin@ceph-admin:~$
cephadmin@ceph-admin:~$
Did you confirm that the system has the IP assigned?
Had the same error. However, i used the ceph-monitor IP instead of the ceph-admin IP.
You need to use the same IP as the local host; you can run that command from the same server you want to be the monitor server…
thank you so much, worked great