Welcome to our tutorial on how to configure Squid Proxy OpenLDAP authentication on pfSense. Squid Proxy supports different types of authentication method, one of them being the lightweight directory access protocol (LDAP). Squid proxy authentication ensures that only authenticated users can access the Internet as a way of filtering Internet access for individuals.
In our previous guide, we provided a step-by-step tutorial on how to install and setup Squid Proxy on pfSense. Below is the link;
Install and Setup Squid Proxy on pfSense
Configuring Squid Proxy OpenLDAP Authentication on pfSense
We assume that you already installed and setup Squid on pfSense, if not, follow the link above to set it up.
We also assume that have an OpenLDAP server up and running. In our case, we are using an OpenLDAP server running on a CentOS 8 system;
Install and Setup OpenLDAP on CentOS 8
Configure Squid OpenLDAP Authentication Settings
To begin with, login to pfSense web interface and navigate to Services > Squid Proxy Server.
Click Authentication tab. This is where you define your Squid Proxy authentication mechanisms and settings.
Define Squid Authentication General Settings
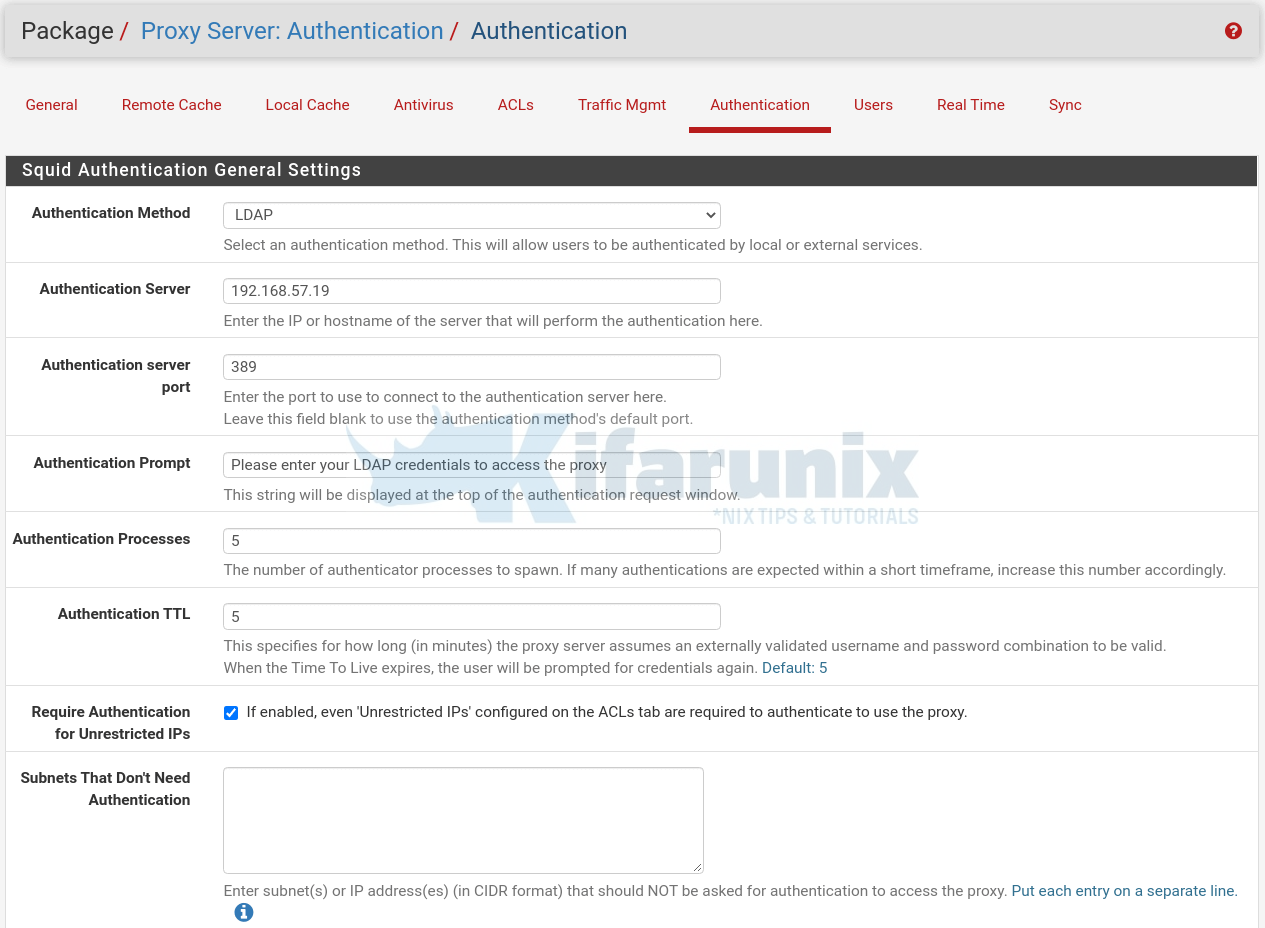
On the Squid Authentication General Settings section;
- Select an authentication method, choose LDAP in this case.
- Enter the IP or hostname of your OpenLDAP server server
- Enter the port to use to connect to your LDAP server. We choose port 389 for our server.
- Set your preferred string that will be displayed at the top of the proxy authentication request window.
- For authentication processes and TTL, we go with the defaults
- Enable Squid proxy Authentication for Unrestricted IPs
- If you have any subnets to exclude from Squid authentication, specify them.

Define Squid Authentication LDAP Settings
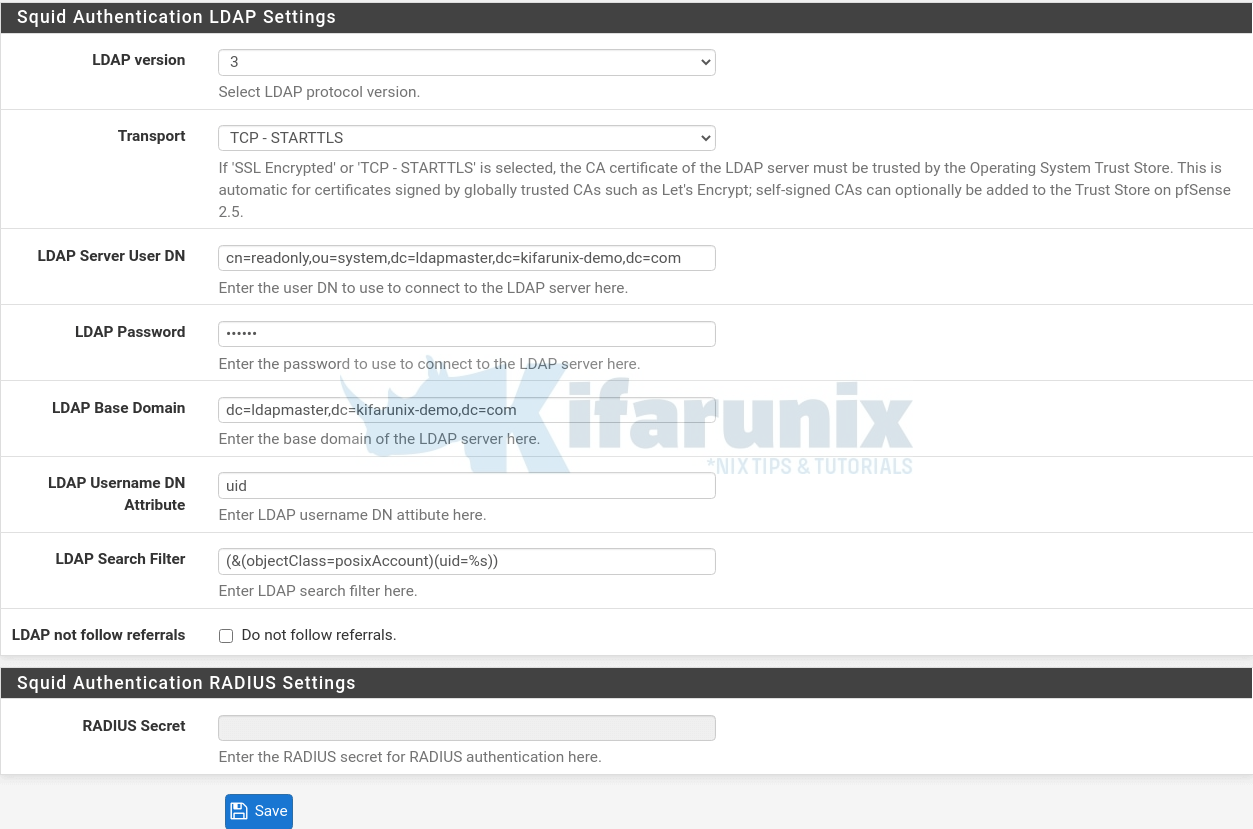
In this section, you need to define your OpenLDAP authentication details.
- Set the LDAP version, which in our case is version 3.
- Choose the mode of communication. In our setup, OpenLDAP is configure with TLS support, hence STARTTLS.
- Set your LDAP bind/user DN and the password for searching the LDAP directory within the defined search base.
- Set your OpenLDAP base domain.
- Enter LDAP username DN attribute. We use UID in our setup.
- Set your LDAP Search Filter.

Click Save once your are done with configurations.
Import OpenLDAP CA Certificate on pfSense
Note that we chose STARTTLS as our transport method. As such, we need to install the CA certificate of the LDAP server for trusted connections.
Therefore, login into pfSense console via SSH. Replace pfsense-IP with the IP address of your pfSense server
ssh root@pfsense-IPDownload the LDAP CA certificate using OpenSSL command. Replace the IP address accordingly.
openssl s_client -connect 192.168.57.19:636 -showcerts < /dev/null | openssl x509 -text | sed -ne '/-BEGIN CERTIFICATE-/,/-END CERTIFICATE-/p'Copy the certificate part;
-----BEGIN CERTIFICATE-----
MIIDvzCCAqegAwIBAgIUc8imlOVhEej453dXtvacn7krg1MwDQYJKoZIhvcNAQEL
...
...
Igf9K1e9M0Q+j2XEsTeCYVU/v0Jt0kER0+V/NM0IrDOX+6kRz6DNsZrwcMEf5Yvp
ARWZ
-----END CERTIFICATE-----
Put the certificate in a file and store it in a convenient location, eg, /usr/local/etc/ssl/.
vi /usr/local/etc/ssl/cacert.pemPaste the certificate above into the file;
-----BEGIN CERTIFICATE-----
MIIDvzCCAqegAwIBAgIUc8imlOVhEej453dXtvacn7krg1MwDQYJKoZIhvcNAQEL
...
...
Igf9K1e9M0Q+j2XEsTeCYVU/v0Jt0kER0+V/NM0IrDOX+6kRz6DNsZrwcMEf5Yvp
ARWZ
-----END CERTIFICATE-----
Next, open the /usr/local/etc/openldap/ldap.conf file and insert the lines below.
vi /usr/local/etc/openldap/ldap.confTLS_CACERT /usr/local/etc/ssl/cacert.pem
TLS_REQCERT allowSave and exit the file.
Testing Squid Proxy OpenLDAP Authentication on Browser
To test our Squid Proxy OpenLDAP authentication on browser, we will use Firefox. Learn how to configure proxy on firefox by checking the link below.
How to Configure Proxy Settings on Firefox Browser
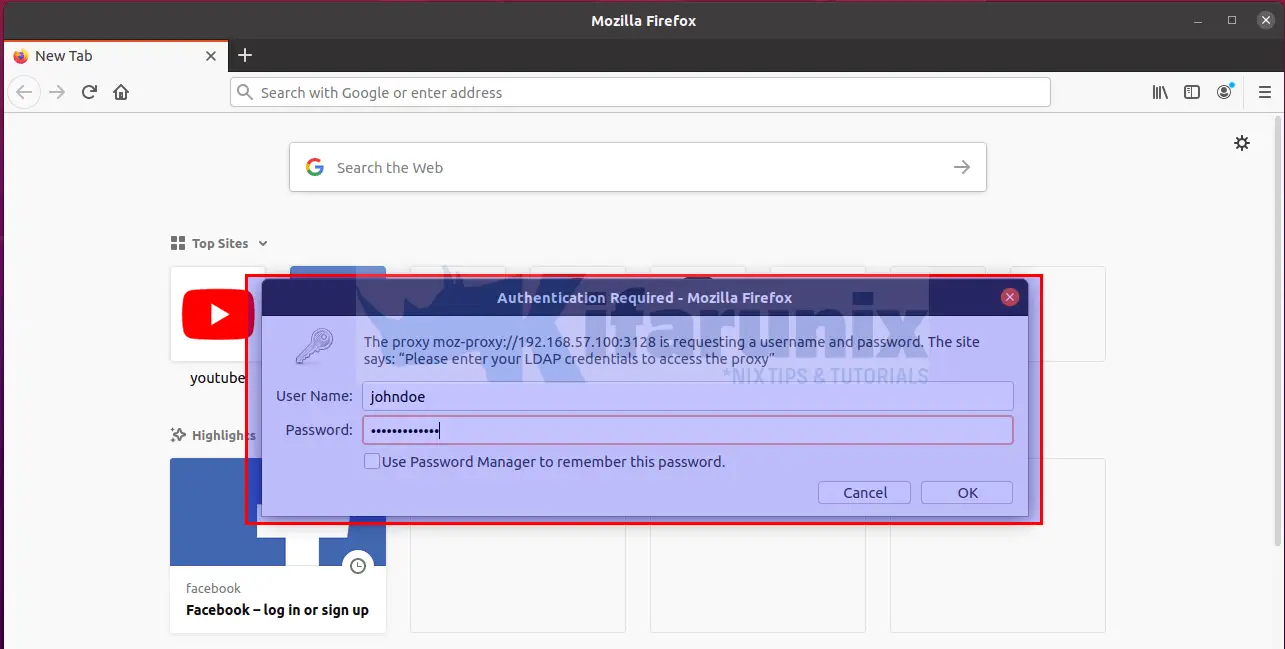
Once you setup the proxy and try to browser Internet, you will be prompted to authenticate.

Enter your LDAP credentials and proceed to surf Internet.
You can tail Squid logs as well as LDAP logs to check what is going on.
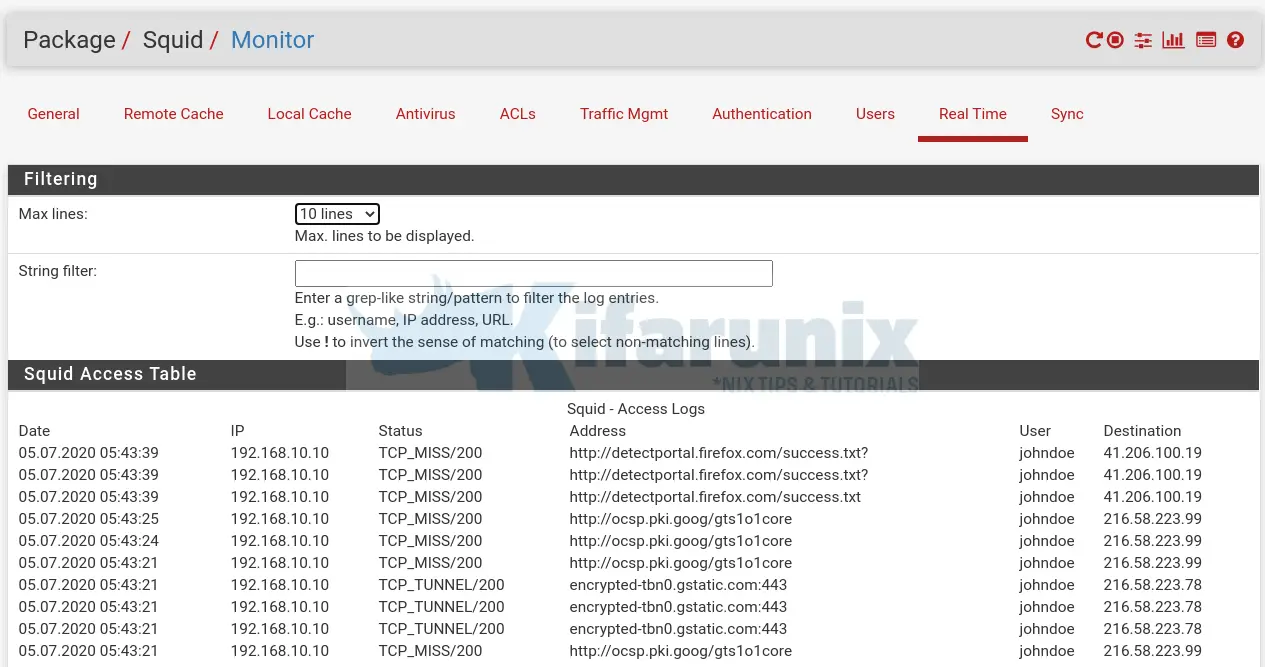
tail -f /var/squid/logs/access.logYou can as well check Squid logs from pfSense web interface in real time by navigating to Services > Squid Proxy Server > Real Time.

Similarly, check you LDAP logs;
tail -f /var/log/slapd.logThat is it on how to configure Squid Proxy OpenLDAP authentication of pfSense.
Related Tutorials
Monitor Squid logs with Grafana and Graylog
Create Squid Logs Extractors on Graylog Server
Monitor Squid Access Logs with Graylog Server
Setup Squid Proxy Authentication on Ubuntu 18.04/Fedora 29/28/CentOS 7

