How to upgrade Elasticsearch 7 to 8? In this guide, you will learn how to upgrade ELK Stack 7.x to ELK Stack 8.x. ELK/Elastic 8 is an improvement version over Elastic 7 that brings about a number of performance improvements, security enhancements, and new features.
Table of Contents
Upgrading ELK Stack 7.x to ELK Stack 8.x
So, you might be running an Elastic stack that is a bit dated. for example, in my environment, i am running ELK/Elastic stacj v7.17.0. In order to enjoy the a new era of speed, scale, relevance, and simplicity brought about by Elastic 8, you definitely have to upgrade!
Backup your Elastic Data
Before you even think of upgrading your ELK Stack 7.x to ELK Stack 8.x, ensure that you have your data backed up. Just in case things go south, you should be able to restore and access your data.
You can either take snapshots of your ELK stack 7.x servers from the hypervisor or
check how to backup using Elasticsearch snapshots.
Prepare ELK Stack 7.x for Upgrade to 8.x
In this tutorial, we will be upgrading Elastic stack 7.17.0 to Elastic 8.7.0. If you are on a version lower than 7.17.0, you MUST first upgrade to 7.17.0 before upgrading to 8.x.
The major components that we will start upgrade to upgrade are Elasticsearch and Kibana. Beats and Logstash 7.n are compatible with Elasticsearch 8.7.0 to give you flexibility in scheduling the upgrade.
Let’s confirm our current versions of Kibana and Elasticsearch;

Or just do;
curl http://ES-NODE-IP:9200
{
  "name" : "debian11",
  "cluster_name" : "elasticsearch",
  "cluster_uuid" : "pE3v-1oSTfaiF3Dp2VbOjg",
  "version" : {
    "number" : "7.17.0",
    "build_flavor" : "default",
    "build_type" : "deb",
    "build_hash" : "bee86328705acaa9a6daede7140defd4d9ec56bd",
    "build_date" : "2022-01-28T08:36:04.875279988Z",
    "build_snapshot" : false,
    "lucene_version" : "8.11.1",
    "minimum_wire_compatibility_version" : "6.8.0",
    "minimum_index_compatibility_version" : "6.0.0-beta1"
  },
  "tagline" : "You Know, for Search"
}
You can use Kibana Upgrade Assistant in preparation for upgrading ELK Stack 7.x to ELK Stack 8.x. The assistant identifies deprecated settings in your configuration and guides you through the process of resolving issues if any deprecated features are enabled.
Thus, after you have CONFIRMED your Elastic Data backup, and as an administrative user, of course, login to Kibana and navigate to Management > Stack Management > Stack > Upgrade Assistant.

So, before you upgrade;
- As you can see, even the upgrade assistant starts with “Backup your data”. Very important! In our setup, we have already backed up our data and thus we are good to go.
- Migrate system indices to prepare them for upgrade. From the assistant, this is done already!
- Review deprecated settings and resolve issues.
As you can see, we have some critical issue on Elasticsearch and some warning issues on Kibana. Let’s try to find out about them and fix them;
Thus, click on Elasticsearch to view the issues;

As you can see, the issue is about enabling security features on our cluster. Note the in my current setup, there is no any security features enabled in our cluster.
Thus, click on the issue to view more details and probably get more information and suggestions on how to fix it.
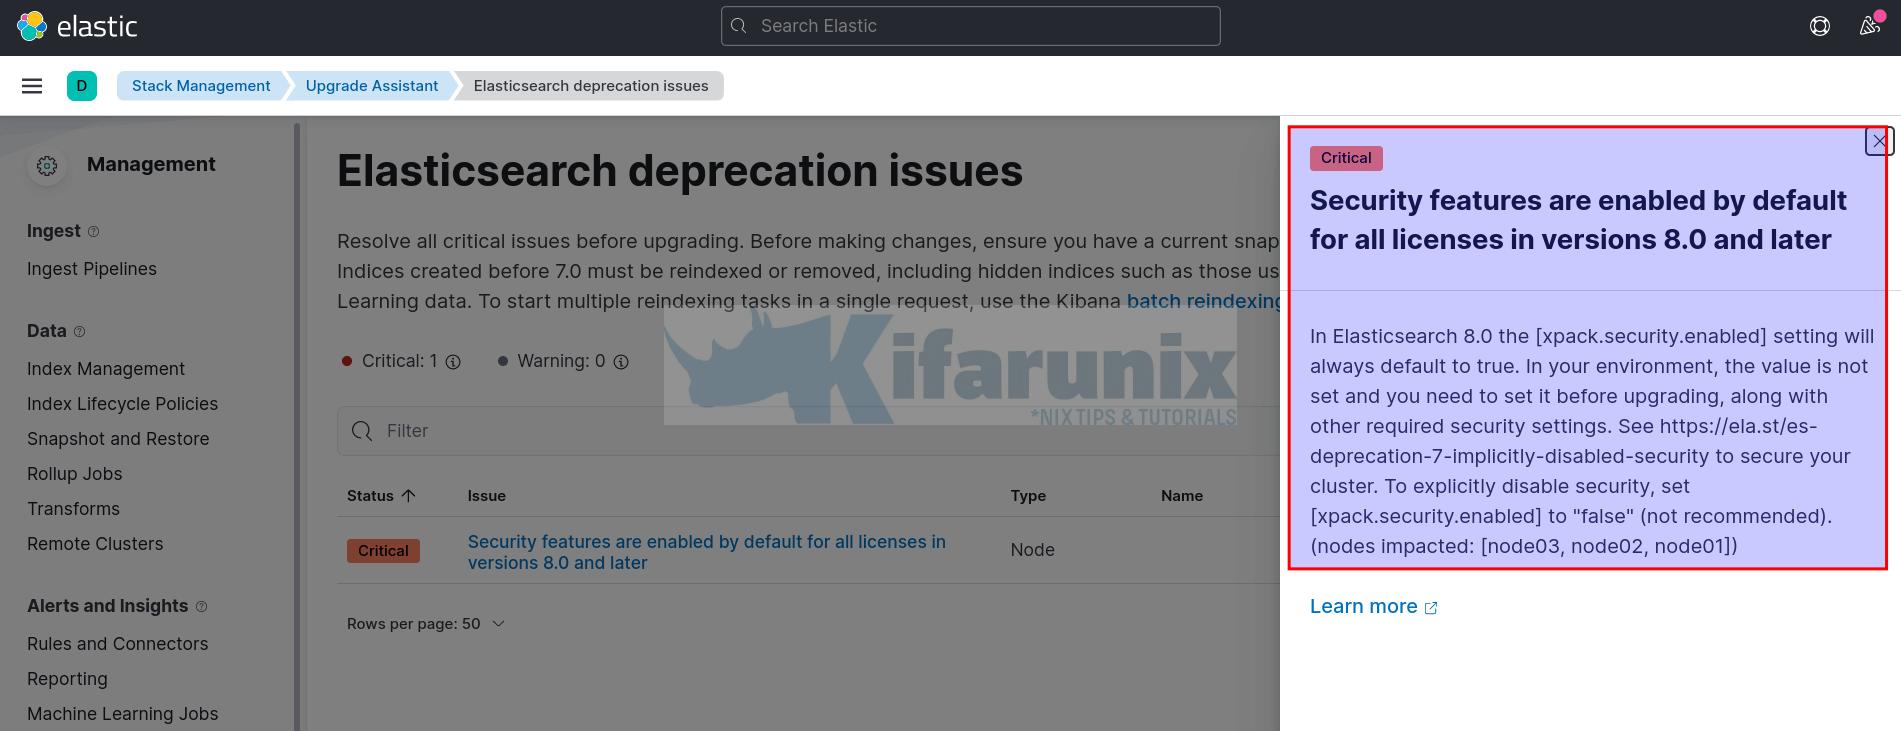
So, enable security features if you didn’t do that already.
Usually, when you deploy new Elasticsearch 8.x, it will automatically enable authentication and authorization, setup TLS for transport and HTTP layers.
So, you need to setup the same on Elastic 7.17.0 before upgrade.
Stop both Kibana and Elasticsearch on ALL nodes in the cluster;
systemctl stop kibanasystemctl stop elasticsearchEnable authentication and Configure Transport Layer Security (TLS) between the cluster nodes by following the guides below;
Enable HTTPS Connection Between Elasticsearch Nodes
When the cluster is up, login back to Kibana and check the Upgrade assistant, and refresh the page! Elasticsearch issue should be fixed now!
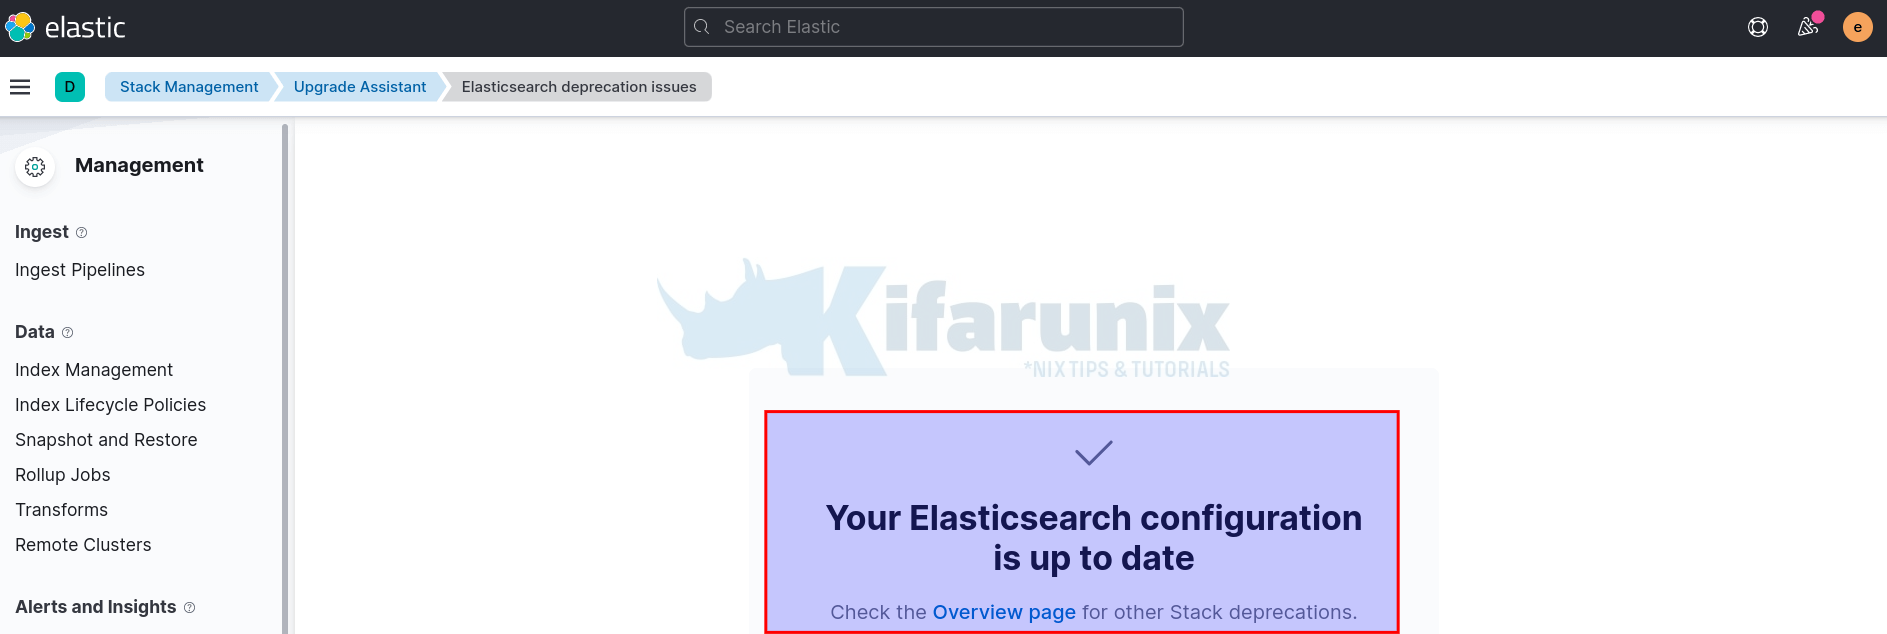
The Warning should be gone as well.
Now, again, let’s find out what is deprecated about Kibana, by clicking on the warnings. See below what is deprecated in our Kibana.
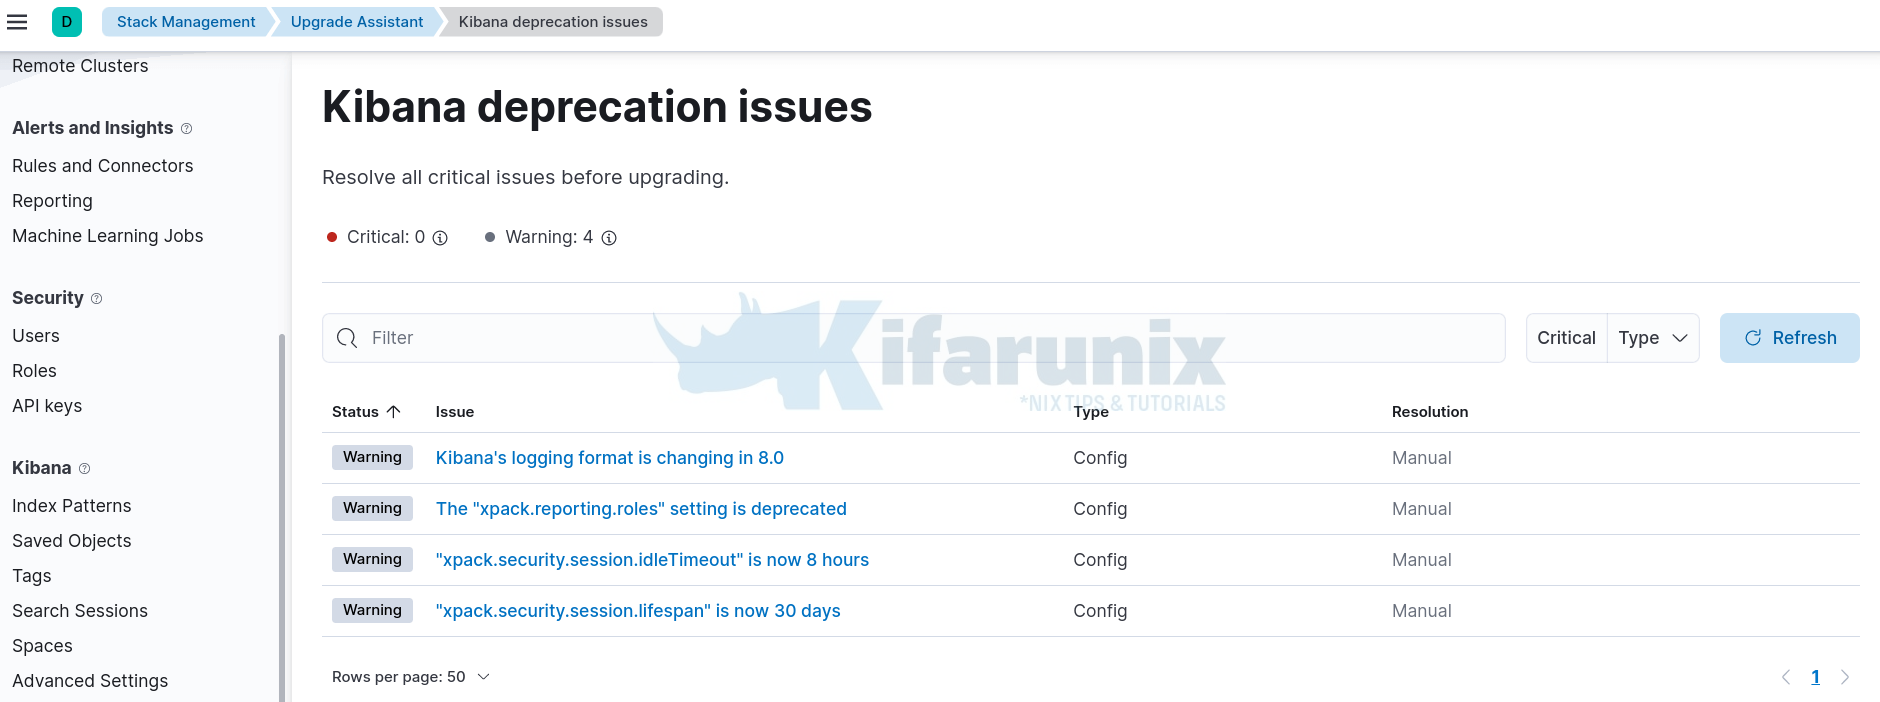
Click on each issue to see suggestions on how to fix them;
- For the first identified issue on Kibana logging format, we have no special handling of current Kibana logs. So I am okay with new logging format. If this is different for you, then check their guide on how to fix that.
Thus, remove the logging.dest configuration on kibana.yml;
sed -i.bak-log '/^logging.dest/s/^/#/' /etc/kibana/kibana.ymlAlso, remove the same setting on Kibana systemd unit file.
sed -i.bak 's|--logging.dest="/var/log/kibana/kibana.log"||' /etc/systemd/system/kibana.serviceReload systemd unit files and restart Kibana;
systemctl daemon-reload;systemctl restart kibana- For the The “xpack.reporting.roles” setting issue, we have taken suggested steps to fix;
- Set “
xpack.reporting.roles.enabled” to “false” in kibana.yml;echo "xpack.reporting.roles.enabled: false" >> /etc/kibana/kibana.yml - Remove “
xpack.reporting.roles.allow” in kibana.yml, if present.sed -i.bak '/xpack.reporting.roles.allow/d' /etc/kibana/kibana.yml - Go to Management > Security > Roles to create one or more roles that grant the Kibana application privilege for Reporting.
- Grant Reporting privileges to users by assigning one of the new roles.
- Check the Kibana reporting configuration guide.
- Set “
- “xpack.security.session.idleTimeout” is now 8 hours”: I will leave this setting for my setup. To configure a custom timeout, set “
xpack.security.session.idleTimeout“. Use the format<count>[ms|s|m|h|d|w|M|Y], for example, 20m, 24h, 7d, 1w. A value of 0 disables the timeout. - “xpack.security.session.lifespan” is now 30 days”: Similarly, I will leave this as is. To configure a custom timeout, set “
xpack.security.session.lifespan“. Use the format<count>[ms|s|m|h|d|w|M|Y], for example, 20m, 24h, 7d, 1w. A value of 0 disables the timeout. - If you made any changes to Kibana, restart it to apply the changes.
systemctl stop kibana && systemctl start kibanaUpgrading ELK Stack 7.x to ELK Stack 8.x
Once you have fixed all the issues identified by the upgrade assistant, proceed to upgrade Elastic stack 7.x to Elastic stack 8.x.
The upgrade process will now involve upgrading each Elastic components individually.
As usual, upgrade Elastic components in the following order;
Elasticsearch > Kibana > Logstash > Beats > Elastic Agents (if you are using them)Upgrade Elasticsearch7.x to Elasticsearch 8.x
Before you can begin the Elasticsearch 7.x upgrade process;
- Temporarily disable shard/replica allocation since Elasticsearch will need to be restarted when upgraded. You can disable shard/replica allocation via Elasticsearch API from command line or simply from Kibana Dev Tools console. We use command line as follows (if no authentication is enabled, omit
-u elasticoption);
Replace the addresses of the nodes accordingly.
curl -X PUT "node01:9200/_cluster/settings?pretty" -u elastic -H 'Content-Type: application/json' -d'
{
  "persistent": {
    "cluster.routing.allocation.enable": "primaries"
  }
}
'
Sample output;
{
  "acknowledged" : true,
  "persistent" : {
    "cluster" : {
      "routing" : {
        "allocation" : {
          "enable" : "primaries"
        }
      }
    }
  },
  "transient" : { }
}
- (Optional) Stop indexing and perform a flush to ensure a quicker shard recovery.
curl -X POST "node01:9200/_flush?pretty" -u elastic
Enter host password for user 'elastic':
{
  "_shards" : {
    "total" : 16,
    "successful" : 14,
    "failed" : 0
  }
}
- (Optional) Temporarily stop machine learning jobs and datafeeds and prevent new jobs from opening by enabling upgrade mode.
curl -X POST "node01:9200/_ml/set_upgrade_mode?enabled=true&pretty" -u elasticEnter host password for user 'elastic':
{
"acknowledged" : true
}It is now time to upgrade Elasticsearch!
If you are running an Elasticsearch cluster, you need to upgrade one node at a time to avoid service interruption. This is called rolling upgrade.
Follow this order to upgrade Elasticsearch nodes;
- Upgrade non-master-eligible nodes first. These are node with the setting,
node.master: false. - Upgrade nodes tier-by-tier, in the order:
frozen tier > the cold tier > the warm tier > the hot tierlast. - Upgrade the master-eligible nodes last. These are nodes with the setting,
node.master: true.
We are running a three node cluster in this guide. All nodes are master legible.
curl node03:9200/_cat/nodes?v -u elastic
ip             heap.percent ram.percent cpu load_1m load_5m load_15m node.role master name
192.168.56.154            9          97   9    0.23    0.42     0.35 dim       -      node03
192.168.58.22            39          74  16    0.26    0.65     0.60 dim       -      node01
192.168.56.10            61          97  15    0.18    0.62     0.50 dim       *      node02
Install Elasticsearch 8.x
Note that it’s always a good idea to carefully review any changes that are made during a package update and to make sure your configuration files are backed up before updating, so you can restore them if necessary.
Note that you have to upgrade on one node at a time, and start the upgraded one when done. Go next etc…
On Ubuntu;
apt updateapt install apt-transport-https gnupg2 -ywget -qO - https://artifacts.elastic.co/GPG-KEY-elasticsearch | \
gpg --dearmor > /etc/apt/trusted.gpg.d/elk.gpgecho "deb https://artifacts.elastic.co/packages/8.x/apt stable main" \
> /etc/apt/sources.list.d/elastic-8.x.listStop Elasticsearch service, backup config and upgrade Elasticsearch 7.x to 8.x;
systemctl stop elasticsearch.servicecp -r /etc/elasticsearch{,-7.17.0}apt updateapt install --only-upgrade elasticsearchWhen prompted, DO NOT override the configurations!
On RHEL derivatives;
rpm --import https://packages.elastic.co/GPG-KEY-elasticsearch
cat > /etc/yum.repos.d/elastic.repo << 'EOL'
[elastic-8.x]
name=Elastic repository for 8.x packages
baseurl=https://artifacts.elastic.co/packages/8.x/yum
gpgcheck=1
gpgkey=https://artifacts.elastic.co/GPG-KEY-elasticsearch
enabled=1
autorefresh=1
type=rpm-md
Stop Elasticsearch service and upgrade Elasticsearch 7.x to 8.x;
sudo systemctl stop elasticsearch.servicecp -r /etc/elasticsearch{,-7.17.0}yum update elasticsearchIf you have any plugins installed, then simply re-run the install command (/usr/share/elasticsearch/bin/elasticsearch-plugin) to upgrade them.
Start an Upgraded Elasticsearch
On the node that you have upgraded Elasticsearch, start the service;
systemctl start elasticsearchRepeat the upgrade for other nodes on the cluster and bring them back online when upgrade is done.
When all is done, the upgrade assistant will tell you all about it!
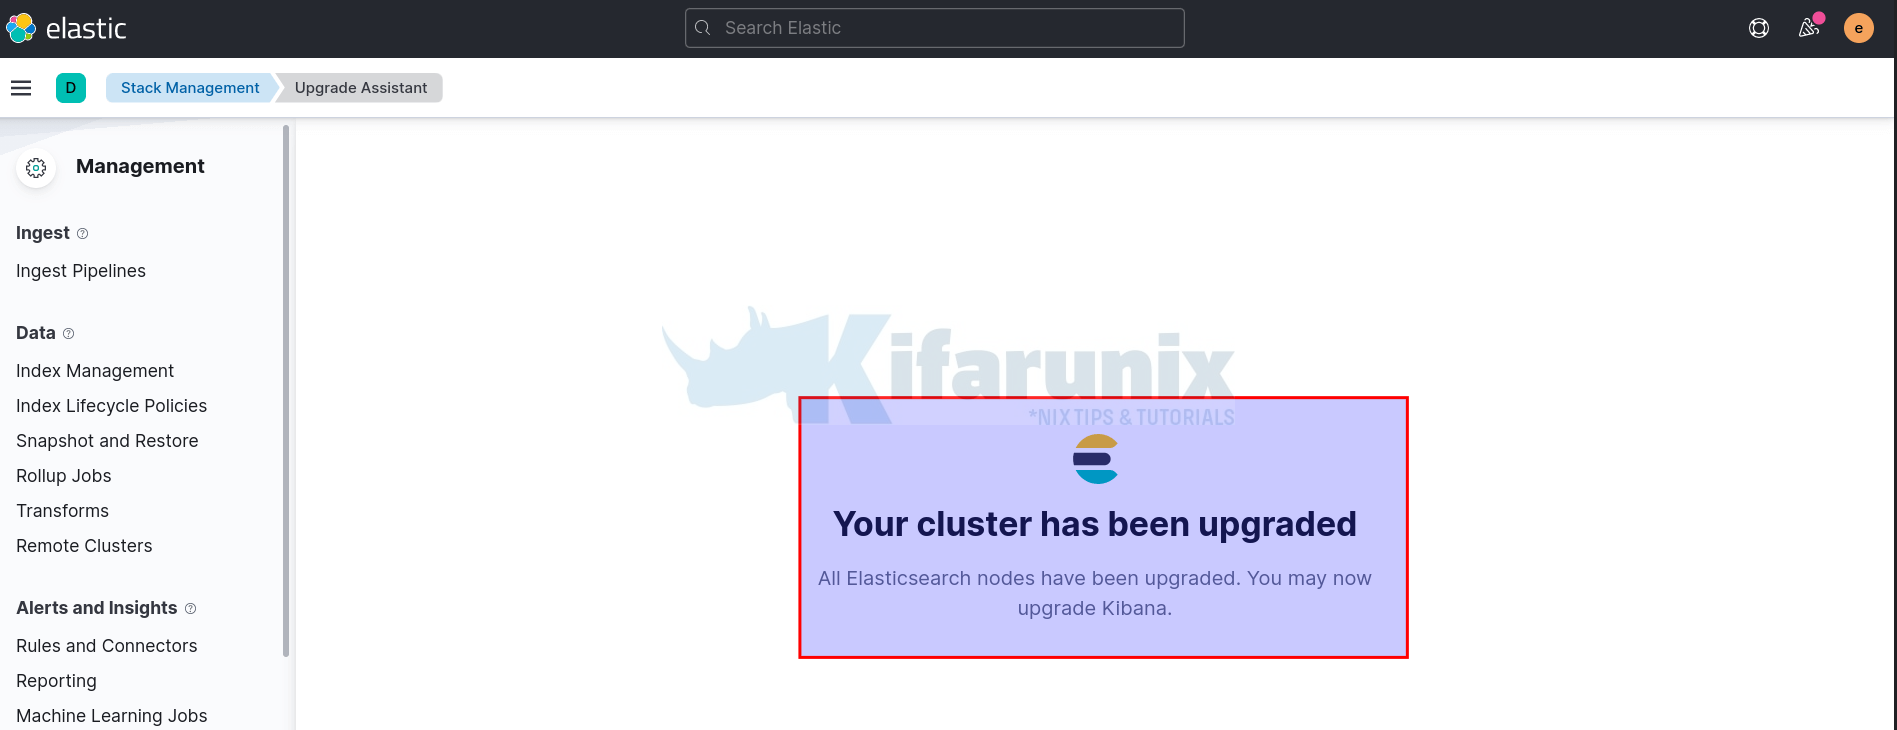
Check the cluster version;
curl https://node03:9200 -u elastic
Enter host password for user 'elastic':
{
  "name" : "node03",
  "cluster_name" : "elasticsearch",
  "cluster_uuid" : "pE3v-1oSTfaiF3Dp2VbOjg",
  "version" : {
    "number" : "8.7.0",
    "build_flavor" : "default",
    "build_type" : "deb",
    "build_hash" : "09520b59b6bc1057340b55750186466ea715e30e",
    "build_date" : "2023-03-27T16:31:09.816451435Z",
    "build_snapshot" : false,
    "lucene_version" : "9.5.0",
    "minimum_wire_compatibility_version" : "7.17.0",
    "minimum_index_compatibility_version" : "7.0.0"
  },
  "tagline" : "You Know, for Search"
}
We also have all nodes in the cluster;
curl node03:9200/_cat/nodes?v -u elastic
ip             heap.percent ram.percent cpu load_1m load_5m load_15m node.role   master name
192.168.58.22            74          97   3    0.58    0.35     0.34 cdfhilmrstw *      node01
192.168.56.10            48          96  12    0.53    0.75     0.44 dim         -      node02
192.168.56.154           30          97   1    0.05    0.11     0.15 dim         -      node03
Next, re-enable shard allocation on the cluster;
curl -X PUT "node01:9200/_cluster/settings?pretty" -u elastic -H 'Content-Type: application/json' -d'
{
  "persistent": {
    "cluster.routing.allocation.enable": null
  }
}'
Disable upgrade mode;
curl -X POST "node01:9200/_ml/set_upgrade_mode?enabled=false&pretty" -u elasticUpgrade Other Elastic Components
At this point, tough task is done and you can now proceed to upgrade other Elastic components.
In my stack, let's begin by upgrading Kibana.
So, stop all instances of Kibana and upgrade them one by one. Kibana does not support rolling upgrades.
systemctl stop kibanaDepending on your previous method of installation, upgrade Kibana.
In our setup, Kibana was installed via Elastic APT repos. Thus, since we have Elastic 8.x repos in place, we will just upgrade it as follows;
apt install --only-upgrade kibanaAgain, DO NOT override the configs when prompted!
Upgrade all your plugins using the kibana-plugin script as well.
Also, disable any plugins that are not compatible with Kibana. For example, I had Wazuh manager integrated with ELK. But, as of this writing, current versions of Wazuh is not compatible with ELK 8.x.;
/usr/share/kibana/bin/kibana-plugin list[email protected]To remove a plugin, use the command;
/usr/share/kibana/bin/kibana-plugin remove <plugin>e.g;
/usr/share/kibana/bin/kibana-plugin remove wazuhWhen all is done, restart Kibana;
systemctl restart kibanaConfirm Upgrades from UI;
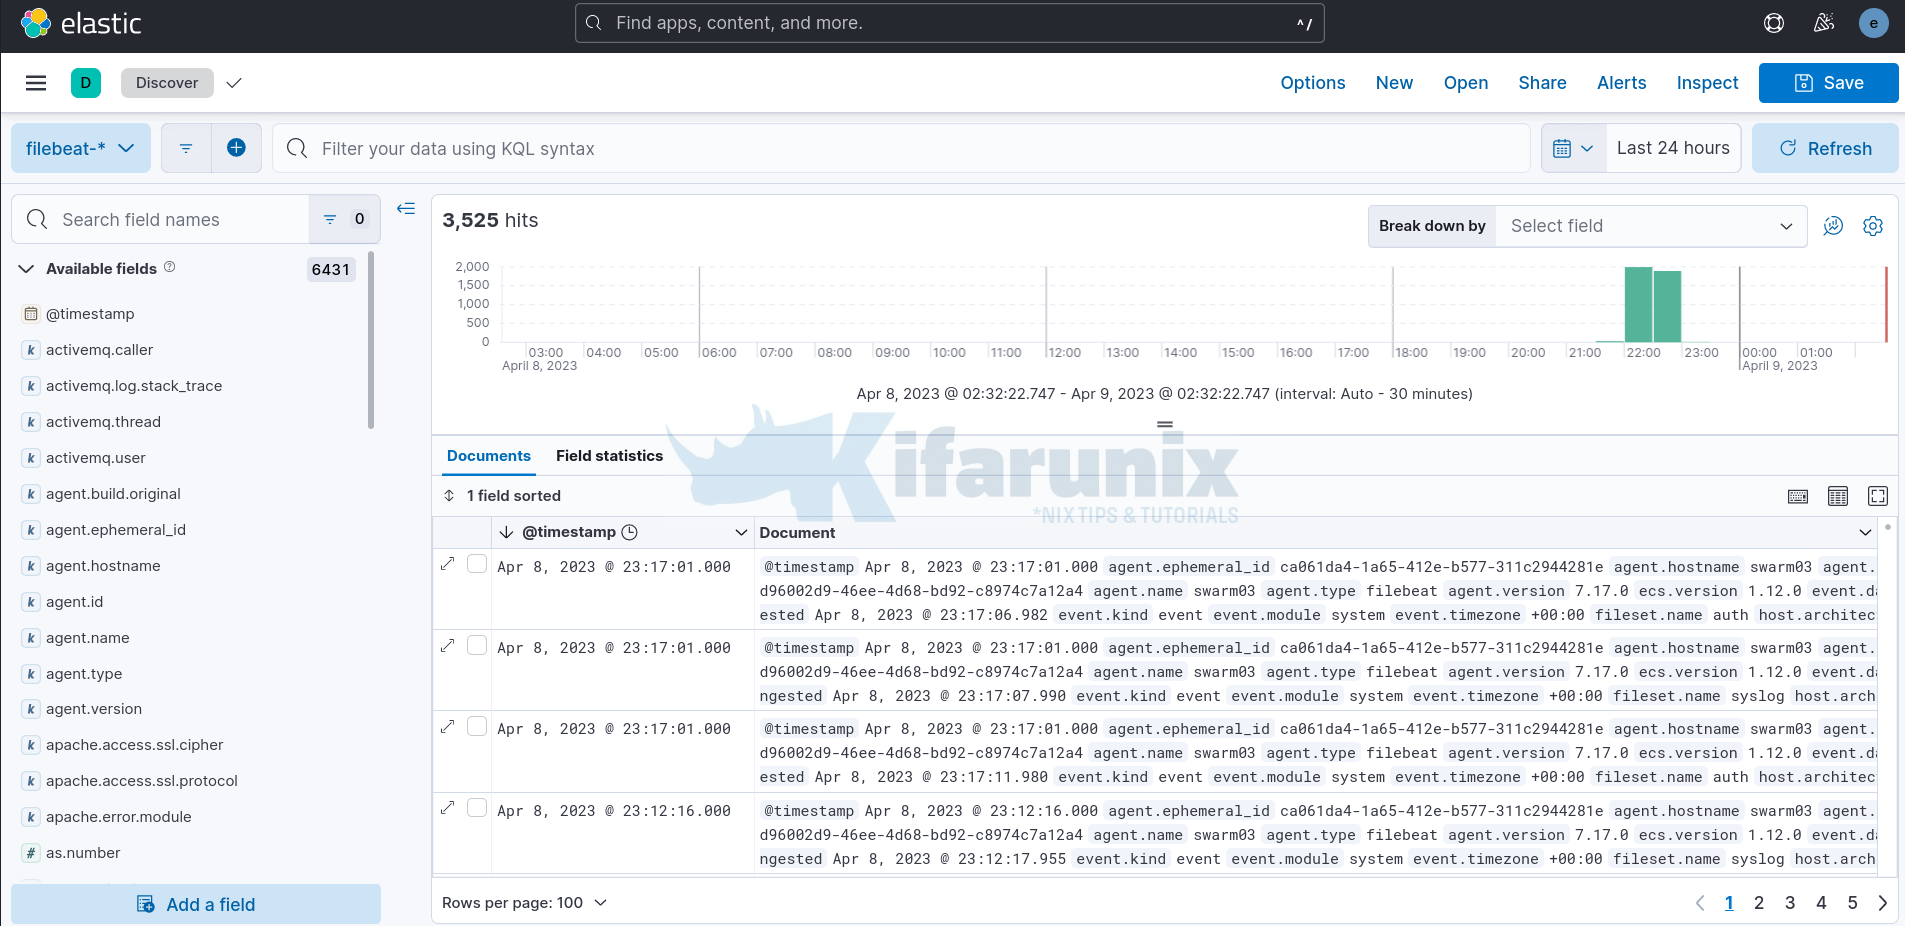
Kibana 8 discovr tab;
Navigate to upgrade assistant to see if there are any issues with previous indices and sort them if any.
That brings up to the end of our guide on upgrading ELK Stack 7.x to ELK Stack 8.x.
You can upgrade other components such as Logstash, or beats if you have them running older versions.
Reference
Other Tutorials


