In this blog post, we’ll provide a step by step tutorial on how to create and delete OpenStack projects. A project, also known as accounts, in OpenStack is essentially a way to organize and isolate cloud resources. Think of it like a labeled folder where you can neatly arrange your virtual machines, storage, and networks. Whether you prefer the hands-on approach of the command-line interface (CLI) or the user-friendly Horizon dashboard, understanding how to create, modify, and delete projects is crucial for effective resource management. Let’s explore the basics and demystify OpenStack project management.
Table of Contents
How to Create or Delete OpenStack Project
In this tutorial, we are using a single-node openstack that was deployed using DevStack.
If you want to learn how to deploy OpenStack with ease, check these tutorials;
Deploy OpenStack using DevStack on Ubuntu 22.04/Ubuntu 20.04
Deploy All-In-One OpenStack with Kolla-Ansible on Ubuntu 18.04
If you are using Kolla Ansible, see the guides on our site.
There are some projects that are created by default when you deploy OpenStack.
You can check the available projects by checking them on the Horizon > Identity > Projects.
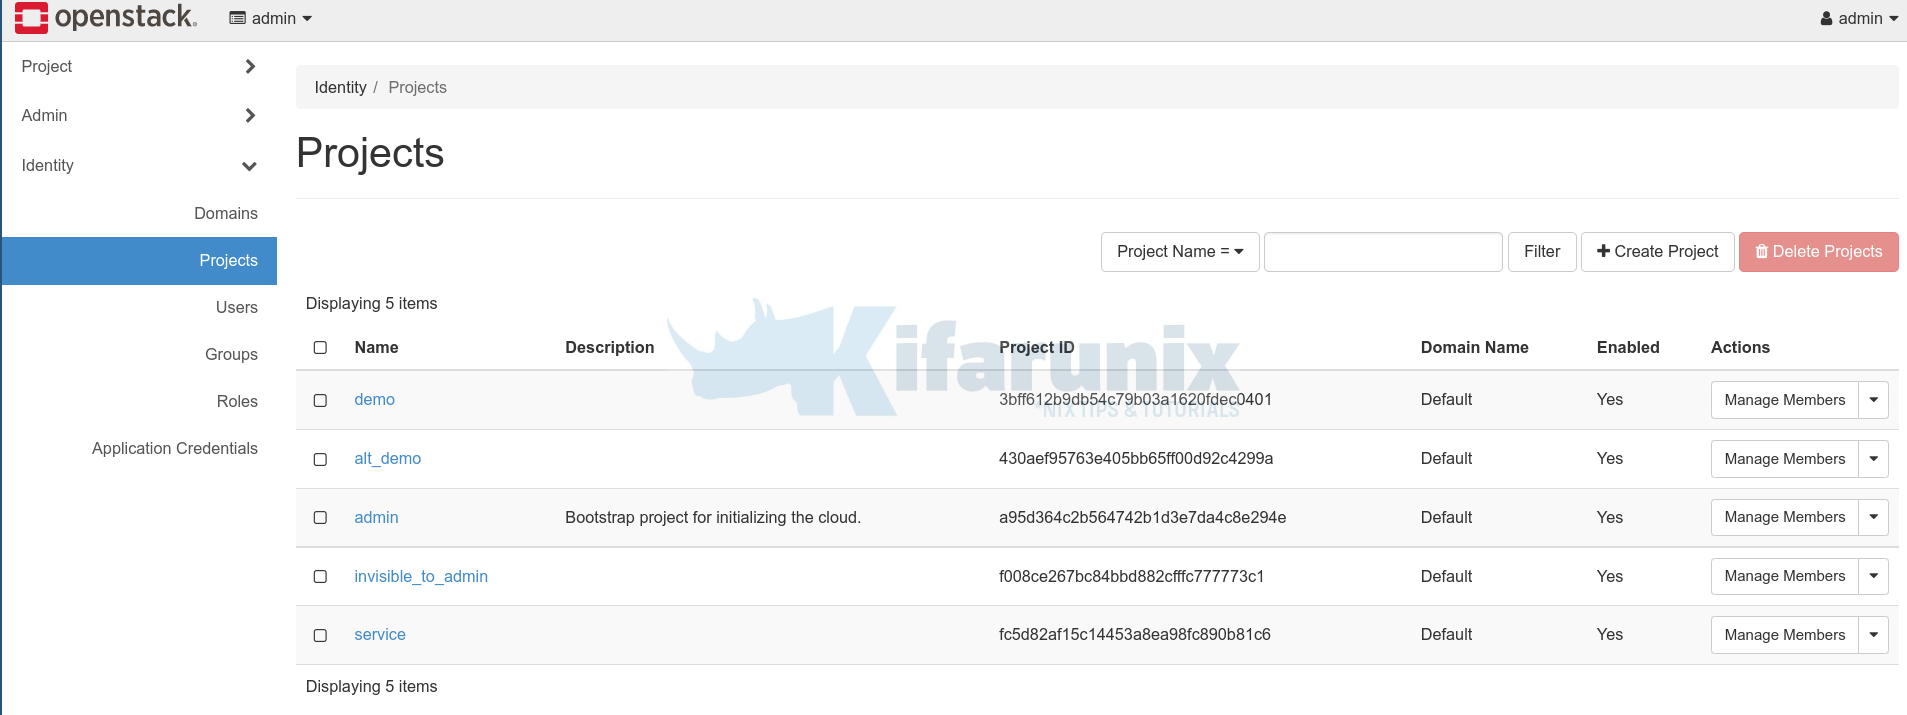
or listing them using OpenStack command line tool.
Before you can use OpenStack command line tools, you need to authenticate against the Identity service, keystone, which returns a Token and Service Catalog. The catalog contains the endpoints for all services the user/tenant has access to – such as Compute, Image Service, Identity, Object Storage, Block Storage, and Networking (code-named nova, glance, keystone, swift, cinder, and neutron).
To authenticate against the Identity service that enables you to access OpenStack specific/or all project details, you need to download the OpenStack RC file from the horizon or create and then source the file before running any commands. The OpenStack RC file contains the credentials that all OpenStack services use.
To download OpenStack RC file for the administrative user, login to OpenStack horizon and download the RC file under the admin user settings.
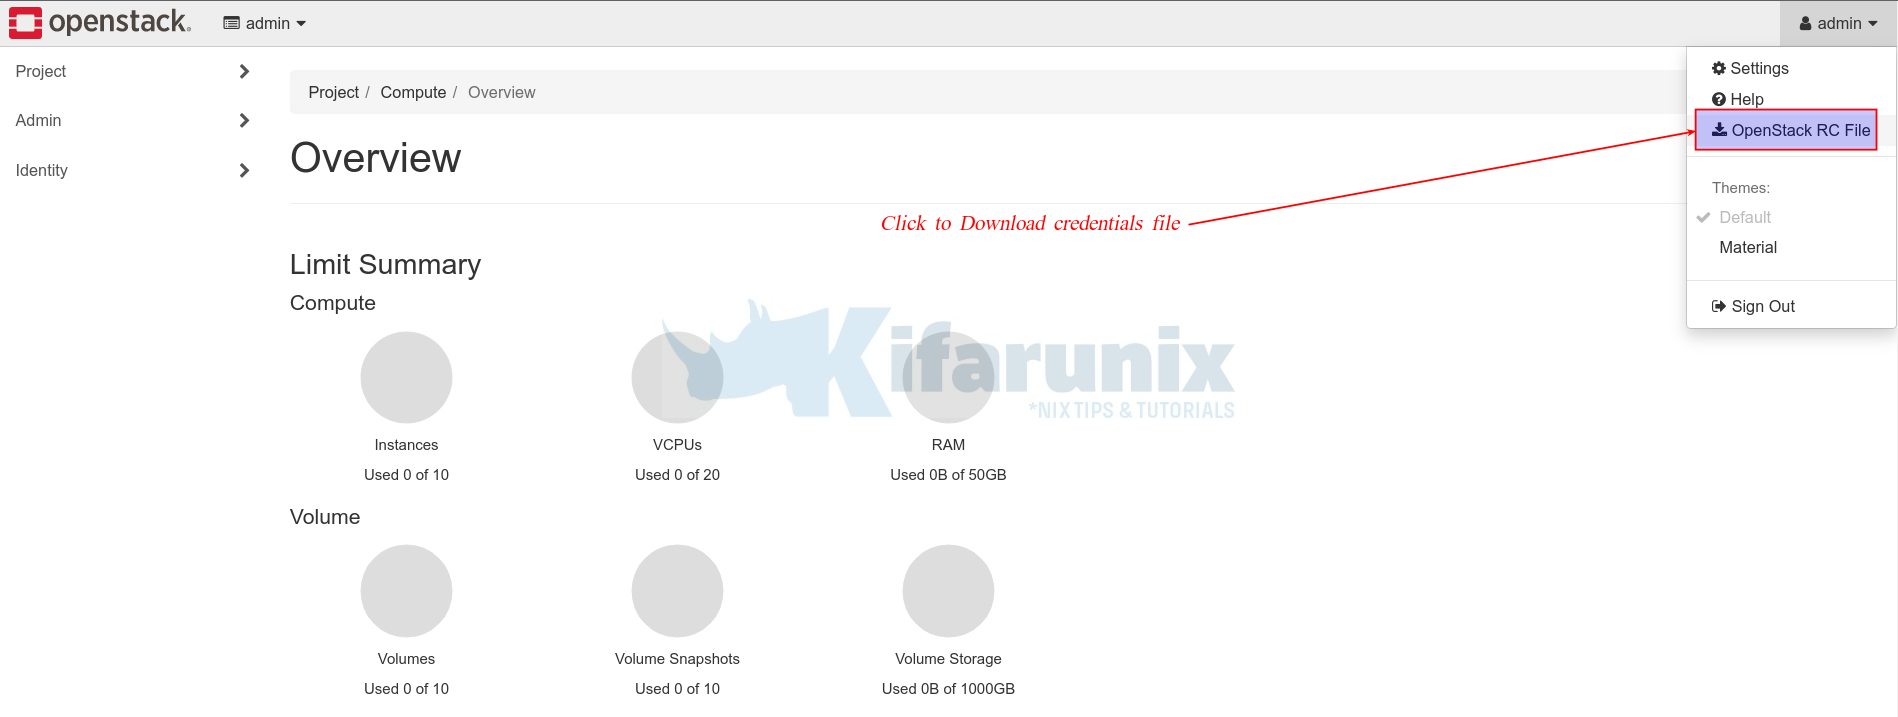
Similarly, you can download the OpenStack RC file from Horizon > Projects > API Access > Download OpenStack RC File > OpenStack RC File.
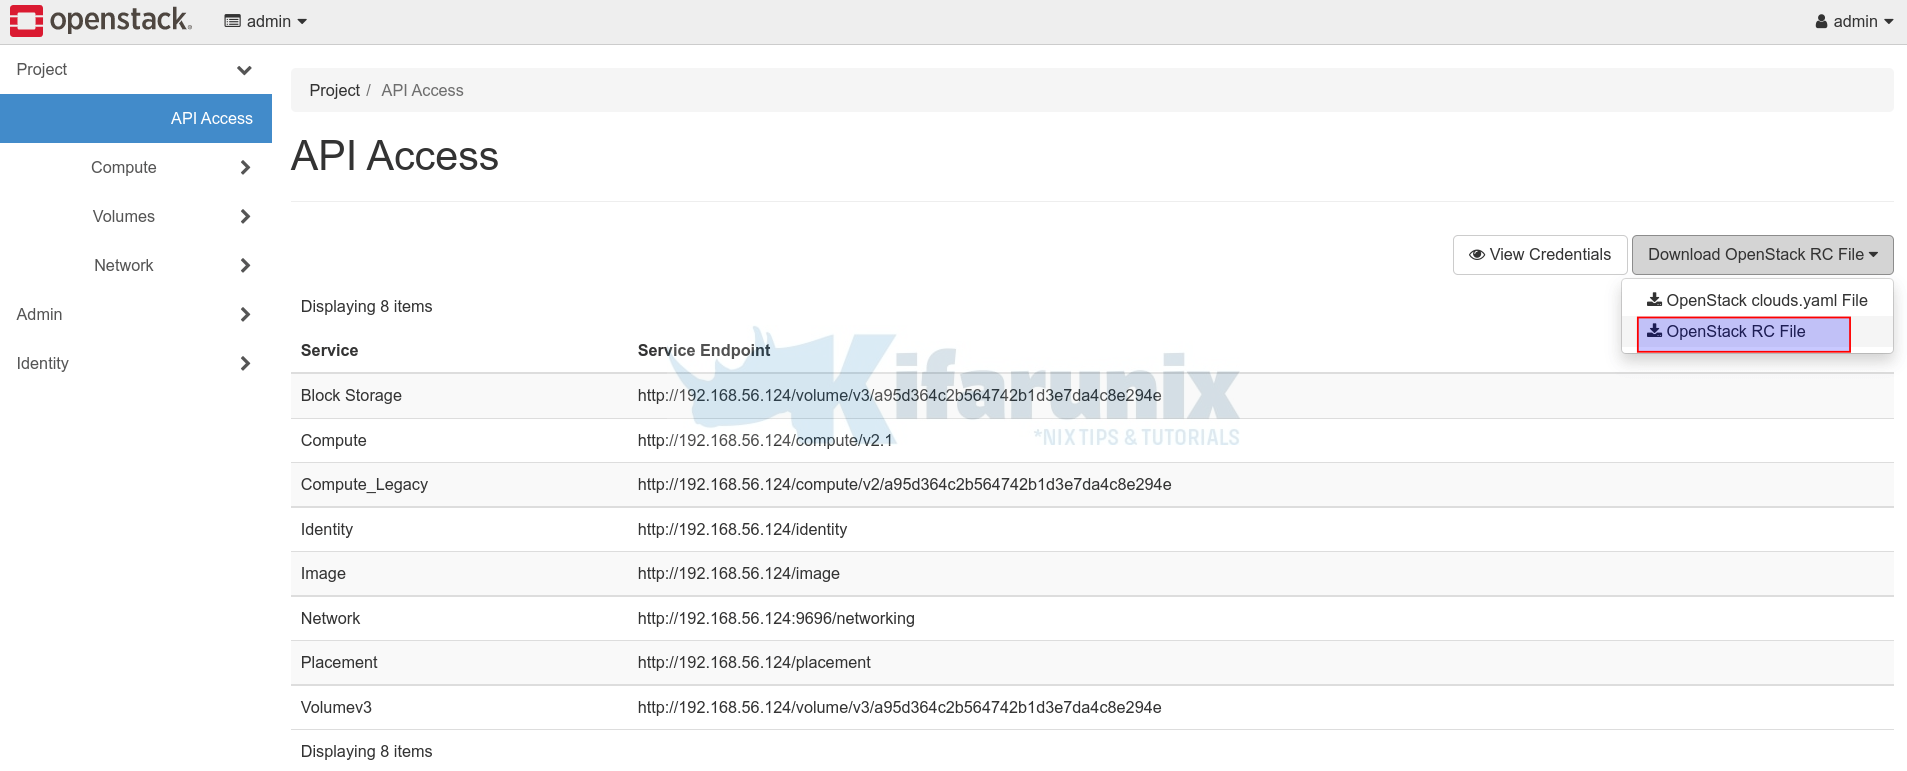
You should now have a file like admin-openrc.sh.
cat admin-openrc.sh#!/usr/bin/env bash
export OS_AUTH_URL=http://192.168.56.124/identity
export OS_PROJECT_ID=a95d364c2b564742b1d3e7da4c8e294e
export OS_PROJECT_NAME="admin"
export OS_USER_DOMAIN_NAME="Default"
if [ -z "$OS_USER_DOMAIN_NAME" ]; then unset OS_USER_DOMAIN_NAME; fi
export OS_PROJECT_DOMAIN_ID="default"
if [ -z "$OS_PROJECT_DOMAIN_ID" ]; then unset OS_PROJECT_DOMAIN_ID; fi
unset OS_TENANT_ID
unset OS_TENANT_NAME
export OS_USERNAME="admin"
echo "Please enter your OpenStack Password for project $OS_PROJECT_NAME as user $OS_USERNAME: "
read -sr OS_PASSWORD_INPUT
export OS_PASSWORD=$OS_PASSWORD_INPUT
export OS_REGION_NAME="RegionOne"
if [ -z "$OS_REGION_NAME" ]; then unset OS_REGION_NAME; fi
export OS_INTERFACE=public
export OS_IDENTITY_API_VERSION=3
You can as well create your own RC file.
Once you have downloaded the OpenStack RC file, you then use it to access OpenStack services from the command line;
Source the file to load the RC file environment variables;
source admin-openrc.shOr;
. admin-openrc.shIf you didn’t set the password in the file, you might be prompted to enter the user password when you source the credentials file.
Once you load the OpenStack credentials, you can then proceed to use OpenStack CLI tools.
openstack project list+----------------------------------+--------------------+
| ID | Name |
+----------------------------------+--------------------+
| 3bff612b9db54c79b03a1620fdec0401 | demo |
| 430aef95763e405bb65ff00d92c4299a | alt_demo |
| a95d364c2b564742b1d3e7da4c8e294e | admin |
| f008ce267bc84bbd882cfffc777773c1 | invisible_to_admin |
| fc5d82af15c14453a8ea98fc890b81c6 | service |
+----------------------------------+--------------------+
So next, let’s see:
How to Create OpenStack Project
There are two ways in which you can create Openstack project;.
Create OpenStack project on the Horizon
Login to OpenStack Horizon as admin and;
- navigate to Identity > Projects.
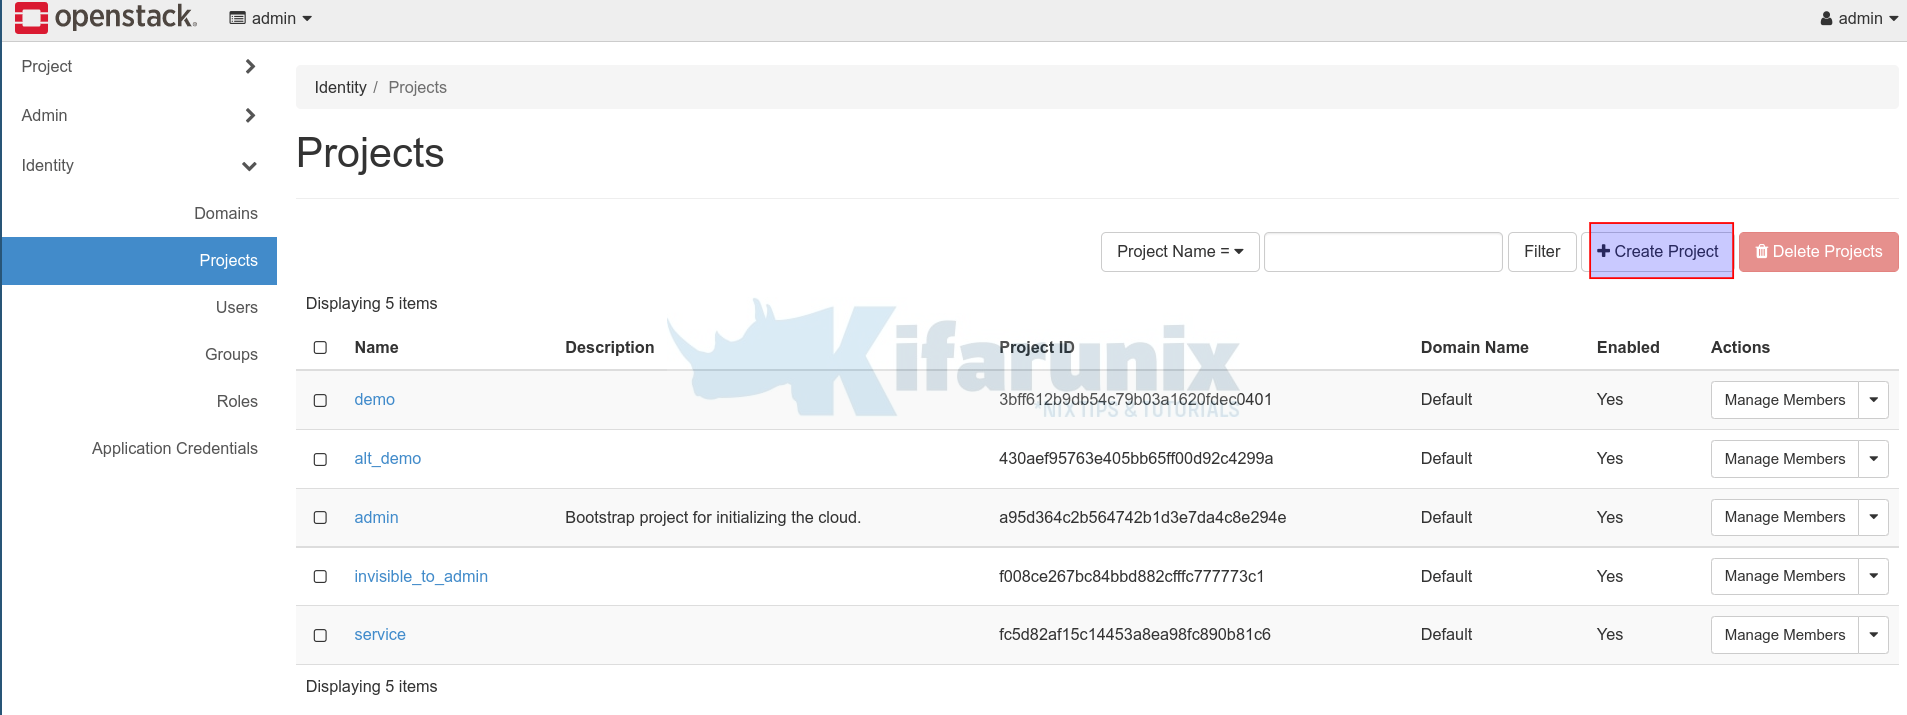
- Click Create Project.
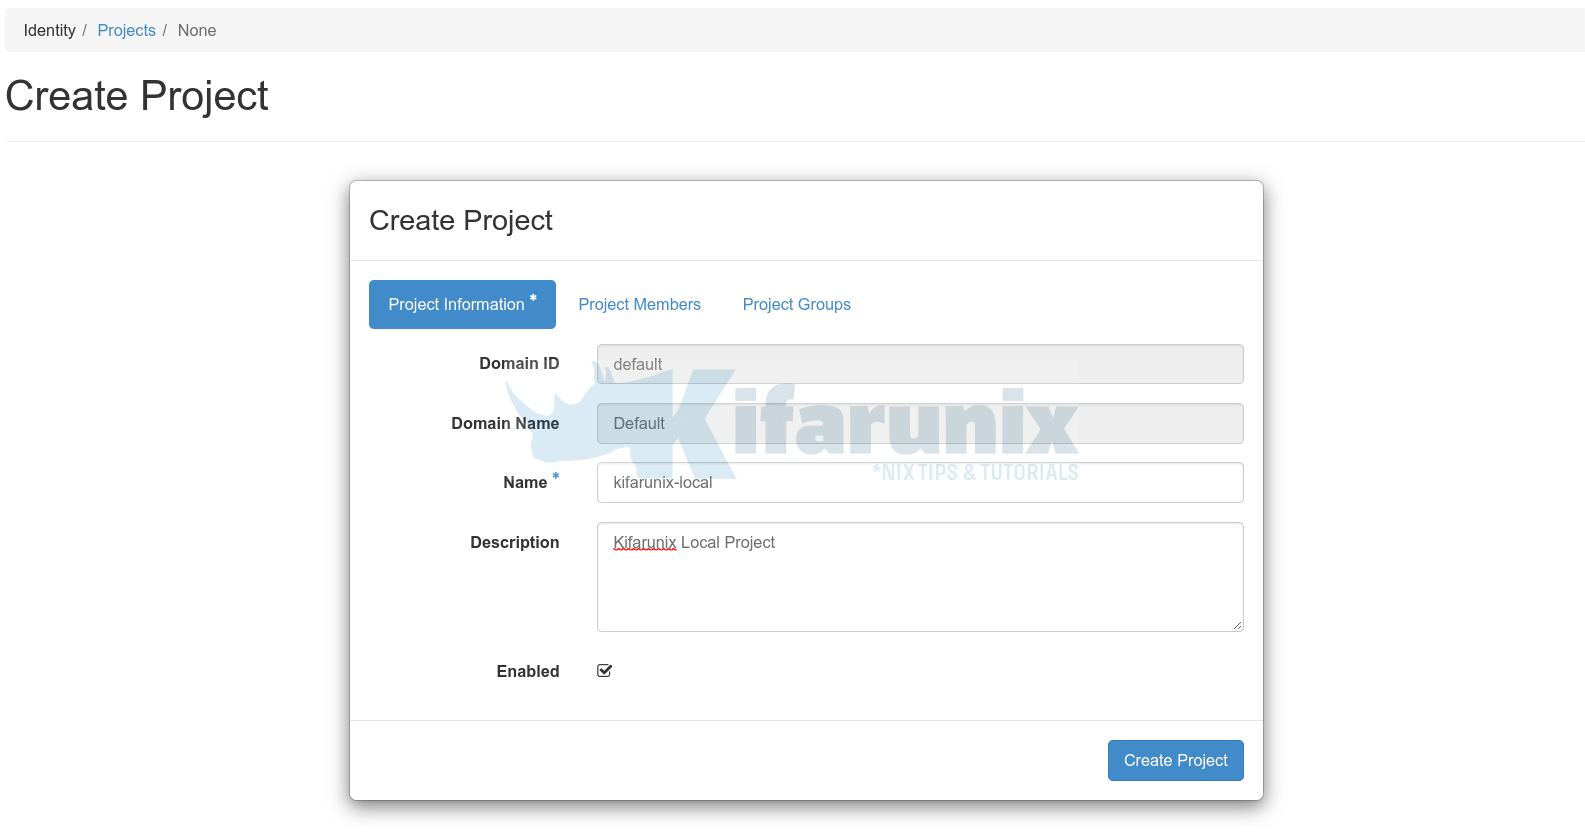
- Under Project information, enter the name of the project, description and ensure it is enabled.
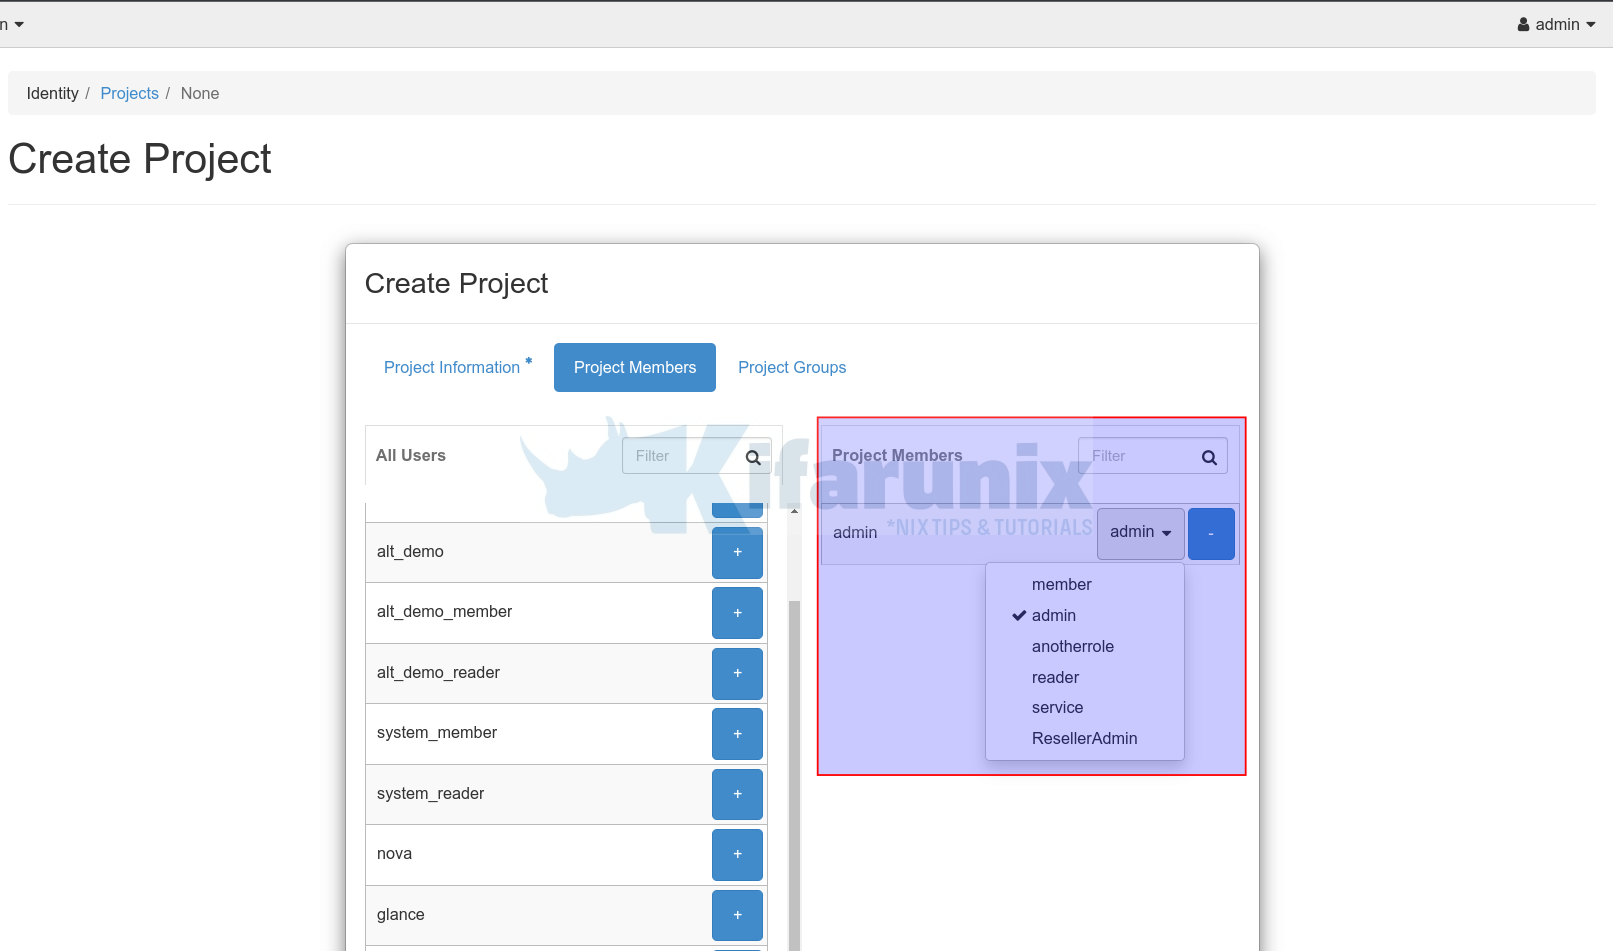
- Under Project Members, you can select which user from the list will have access to the project. Click the + plus button besides the username to give that specific user access to the Project.
- Next, click on the drop down button against selected user to choose what access privileges are granted to the user. For example, in our example project, we have given admin user admin rights on the project.
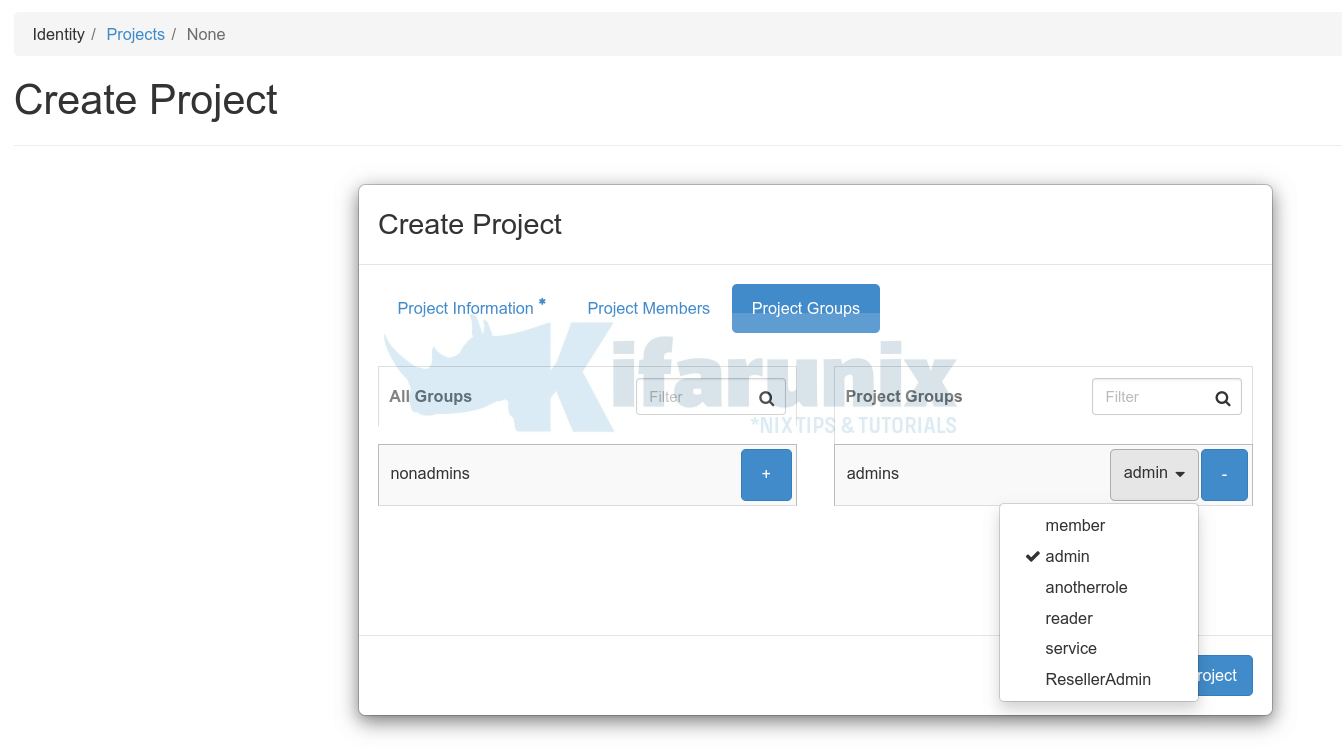
- Similarly, under Project Groups, select groups to grant access and specific rights for that group on the project.
- Click Create Project to create OpenStack project on Horizon.
- Your project should now be listed under Identity > Projects.
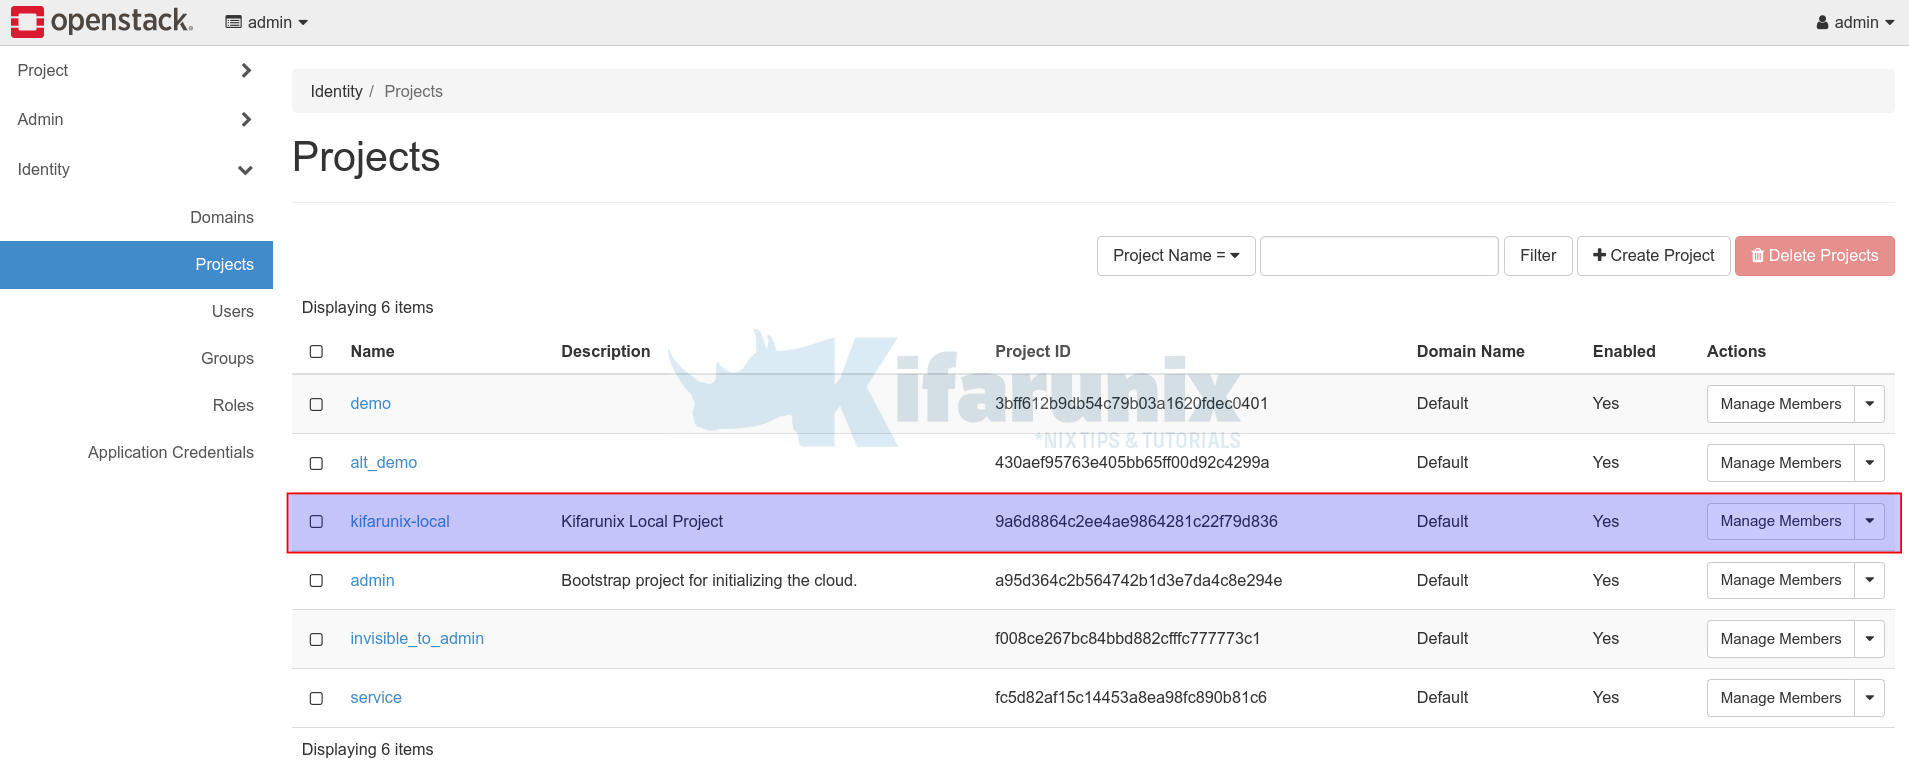
- Under Actions tab, you can be able to update/modify your project.
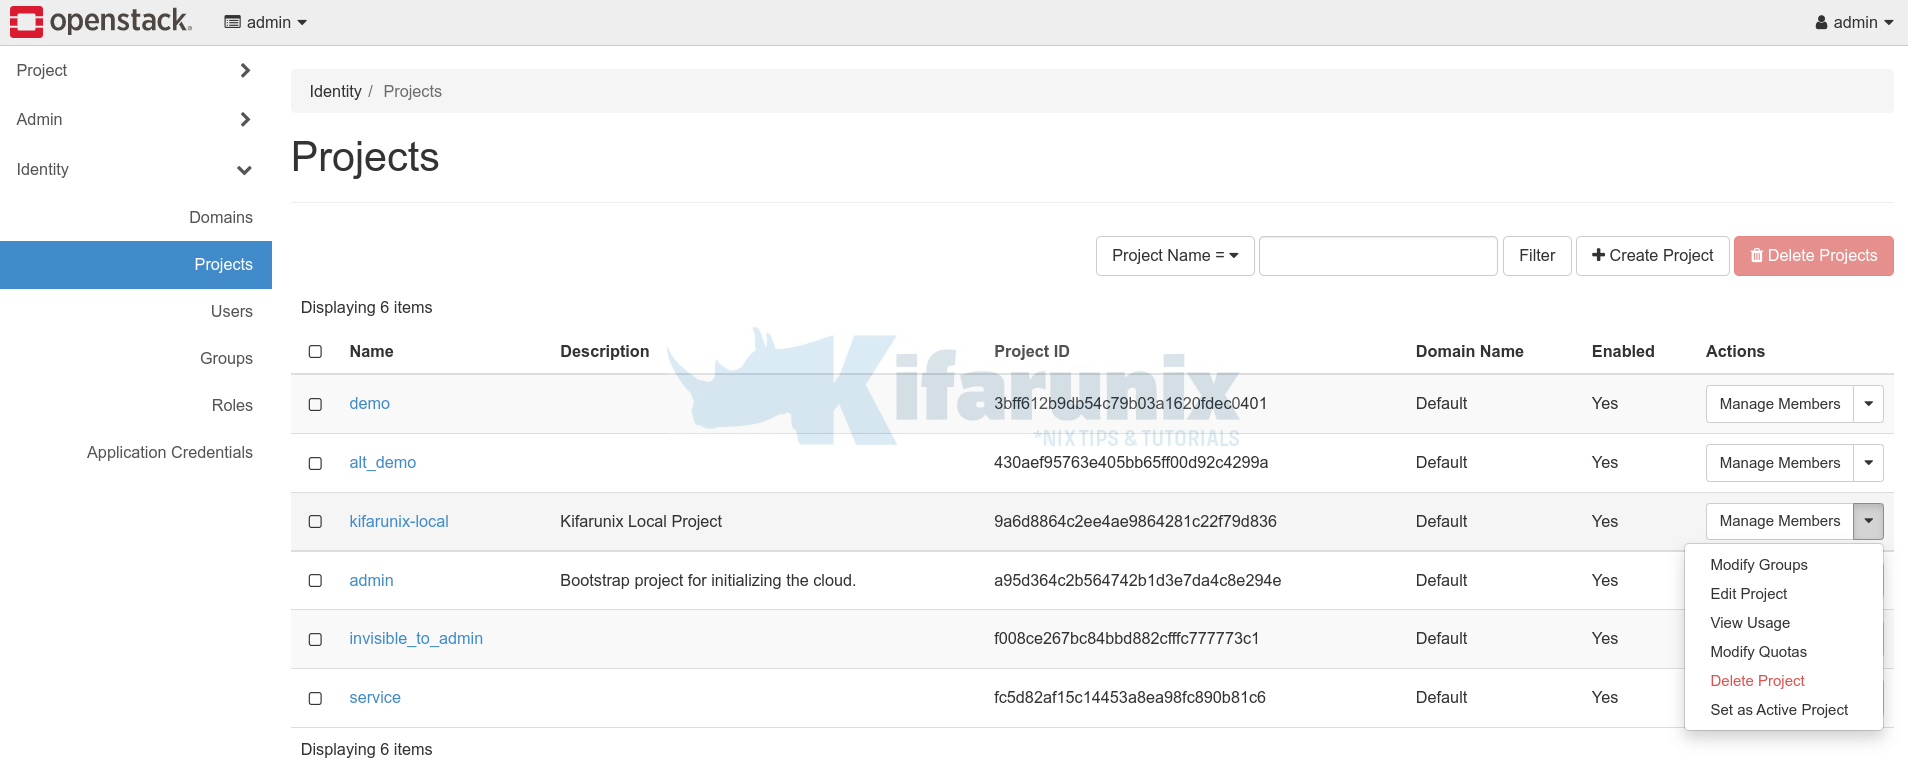
You can as well confirm from the command line;
openstack project listCreate OpenStack project from command line
To create OpenStack project from command line, first load the OpenStack access credentials;
source admin-openrc.shNext, you can use the command below to create OpenStack project from the command line;
openstack project createYou can obtain the command help by passing the -h/--help option.
openstack project create -husage: openstack project create [-h] [-f {json,shell,table,value,yaml}] [-c COLUMN] [--noindent] [--prefix PREFIX] [--max-width <integer>]
[--fit-width] [--print-empty] [--domain <domain>] [--parent <project>] [--description <description>]
[--enable | --disable] [--property <key=value>] [--or-show] [--immutable | --no-immutable] [--tag <tag>]
<project-name>For example, to create an OpenStack project called kifarunix-demo;
openstack project create --domain default --description "Kifarunix-demo Project" --enable kifarunix-demoSample command output;
+-------------+----------------------------------+
| Field       | Value                            |
+-------------+----------------------------------+
| description | Kifarunix-demo Project           |
| domain_id   | default                          |
| enabled     | True                             |
| id          | 10c048c083344f6d98ea99464ffaf4bd |
| is_domain   | False                            |
| name        | kifarunix-demo                   |
| options     | {}                               |
| parent_id   | default                          |
| tags        | []                               |
+-------------+----------------------------------+
List the projects;
openstack project list+----------------------------------+--------------------+
| ID | Name |
+----------------------------------+--------------------+
| 10c048c083344f6d98ea99464ffaf4bd | kifarunix-demo |
| 3bff612b9db54c79b03a1620fdec0401 | demo |
| 430aef95763e405bb65ff00d92c4299a | alt_demo |
| 9a6d8864c2ee4ae9864281c22f79d836 | kifarunix-local |
| a95d364c2b564742b1d3e7da4c8e294e | admin |
| f008ce267bc84bbd882cfffc777773c1 | invisible_to_admin |
| fc5d82af15c14453a8ea98fc890b81c6 | service |
+----------------------------------+--------------------+
Once you create a project, you can give users appropriate access to the project using the command below
openstack role add [-h] [--system <system> | --domain <domain> | --project <project>] [--user <user> | --group <group>]
                          [--group-domain <group-domain>] [--project-domain <project-domain>] [--user-domain <user-domain>] [--inherited]
                          [--role-domain <role-domain>]
                          <role>
For example, to give OpenStack admin user administrative role access to the project;
openstack role add --project kifarunix-demo --user admin adminTo give the Admins group access to the project;
openstack role add --project kifarunix-demo --group admins adminTo find out what rights/roles does a specific user have on a specific OpenStack Project, check from the OpenStack horizon or use command line;
openstack role assignment list --user admin --project kifarunix-demo --namesTo find out what rights/roles does a specific group have on a specific OpenStack Project, check from the OpenStack horizon or use command line;
openstack role assignment list --group admins --project kifarunix-demo --namesTo show for both users/groups;
openstack role assignment list --role admin --project kifarunix-demo --namesHow to Delete/Disable OpenStack Project
You can delete/disable OpenStack Project on Horizon or on command line;
Delete/Disable OpenStack Project on Horizon
- On Horizon, navigate to Identity > Projects.
- Select the project you want to delete, for example kifarunix-demo, by ticking the checkbox besides the project name.
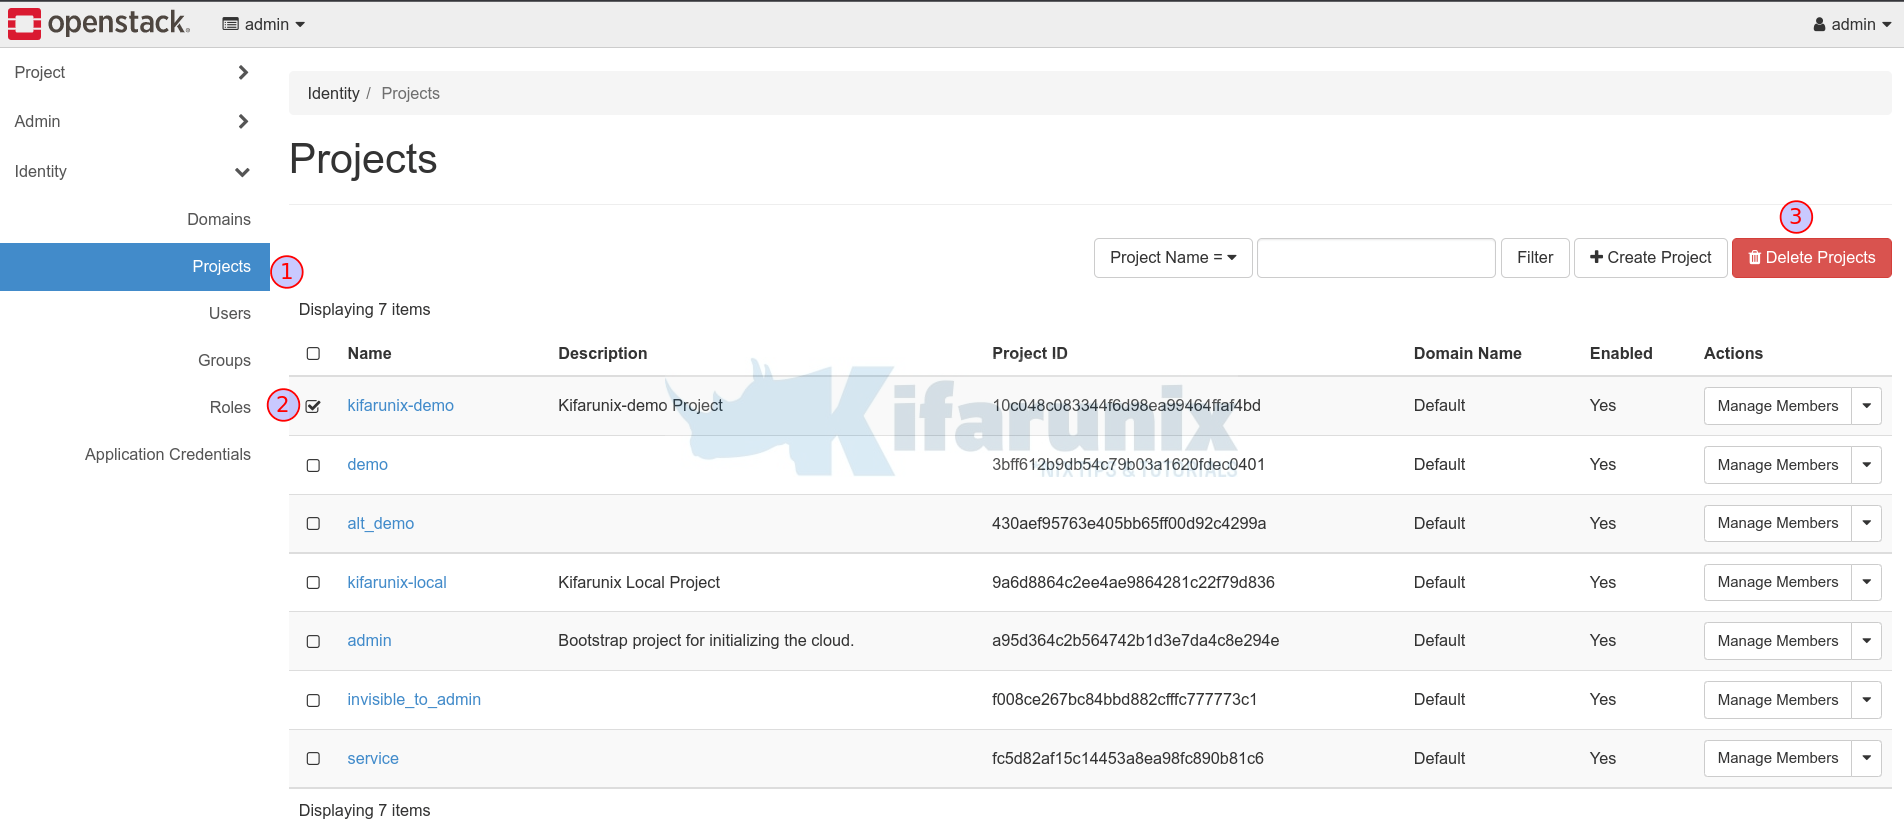
- Click Delete Project
- Similarly, under project actions, click the dropdown and select Delete Project.

To disable the project, click Edit Project > Project information > Uncheck the enable option.
Delete/Disable OpenStack Project on command line
You can delete/disable OpenStack project on command line using openstack project command;
usage: openstack project delete [-h] [--domain <domain>] <project> [<project> ...]E.g to delete kifarunix-local project;
openstack project delete kifarunix-localTo disable the project;
openstack project set --disable kifarunix-demoAnd that is it on how to how to create or delete OpenStack Project from the horizon or command line.
Other tutorials
Install Portainer on Rocky Linux
Install Dozzle Real-Time Log Viewer for Docker Containers on Ubuntu

