In this tutorial, you will learn how to setup and easily access shared folder on Linux VirtualBox VM. VirtualBox supports the ability to share folders/directories between the host and VirtualBox VM making it easy to share files between the host and the guest.
Setup and Access Shared Folder on Linux VirtualBox VM
So, how can you be able to setup and access shared folder on Linux VirtualBox vm?
Install VirtualBox Guest Additions on the VM
VirtualBox guest additions is what gives VirtualBox host and the VM the ability to share folders.
You can check a series of our tutorials on how to install VirtualBox guest additions by following the link below;
How to Install VirtualBox Guest Additions on Linux
Setup Shared Folder Access on VirtualBox VM
- To begin with, ensure that the folder/directory you want to share between the host and the vm is already created.
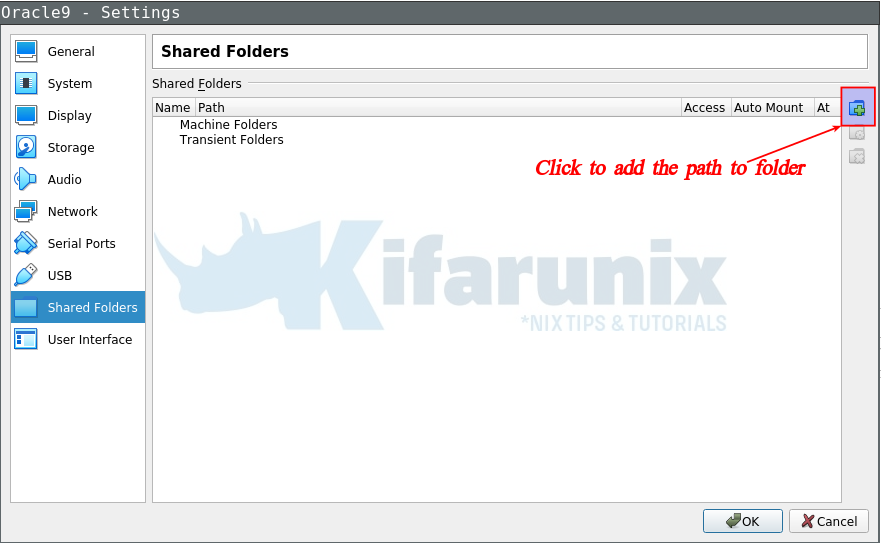
- Next, add the shared folder to the VM through shared folder settings. To access VirtualBox Shared Folder settings, highlight the vm on VirtualBox interface and press Ctrl+s to launch the VM settings. Or simply, from VM interface menu, click on Devices > Shared Folders > Shared Folders Settings…
- Click the + (plus) icon to add the shared folder/directory.
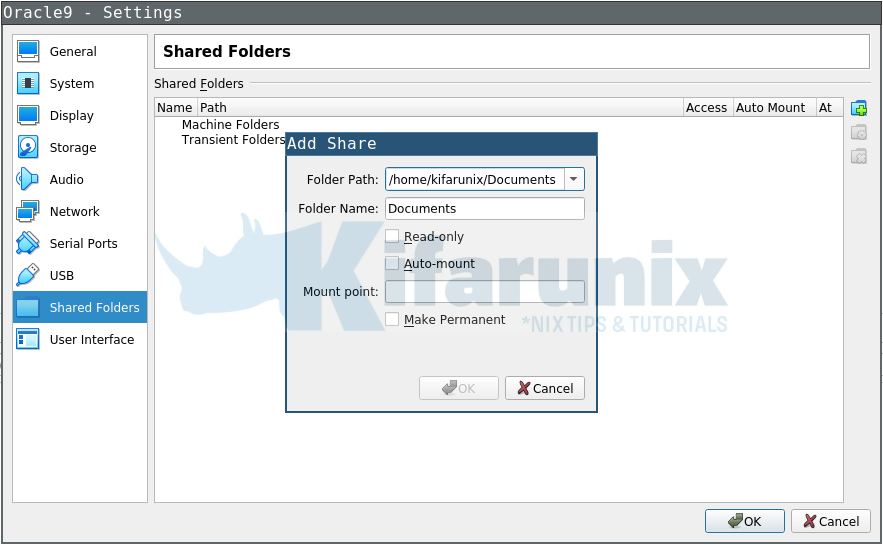
- Select the path to the shared folder
- Enter the name you would wish to call the folder
- Choose whether to mount as read-only.
- Choose whether to auto-mount
- You can leave the mount point blank for the guest vm to mount the shared folder on a convenient location
- You can make the shared folder permanent.
- Click Ok when done setting the shared folder on VirtualBox.
Accessing Shared Folder on VirtualBox VM
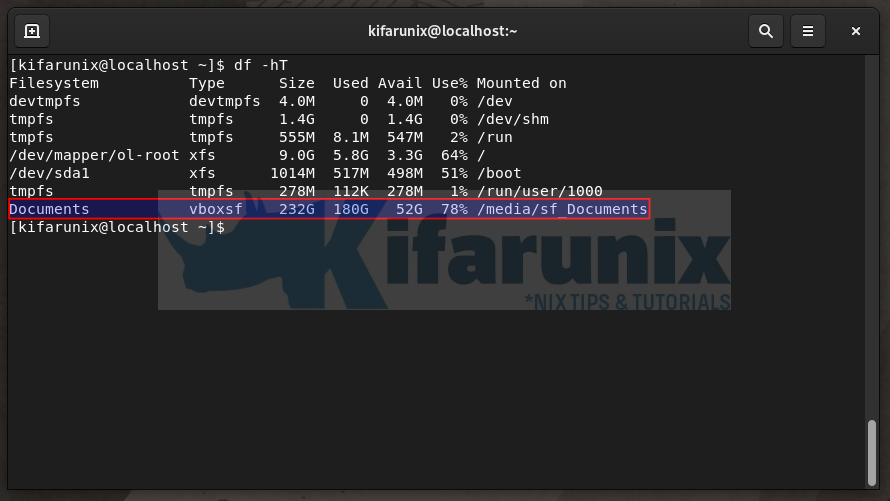
You are now ready to access shared folder on your VirtualBox guest;
Check mounted filesystems;
df -hTAnd that is how you can setup and easily access shared folder on Linuc


