To avoid having to create local ownCloud user accounts, it is possible to configure ownCloud to authenticate users against the directory systems such as OpenLDAP or AD. In this guide, we are going to learn how to configure ownCloud OpenLDAP authentication. ownCloud server used in this demo is running on a CentOS 8 system.
Learn how to setup ownCloud server on CentOS 8 by following the link below;
Install ownCloud Server on CentOS 8
Before you can proceed, ensure that you have an LDAP server up running with user accounts created. Check our guide on how to setup OpenLDAP on CentOS 8.
Install and Setup OpenLDAP on CentOS 8
Configuring ownCloud LDAP Authentication
Install Required Modules
ownCloud requires the PHP LDAP module (php-ldap) in order to support LDAP authentication. To install php-ldap module, (if not already installed), run the command below;
dnf install php-ldap php-processIf you are using a different system distribution, you might want to check how PHP LDAP module is installed.
Install ownCloud LDAP App
Once you have the PHP LDAP module installed, you need to install LDAP user and group backend app on ownCloud.
Download the latest release version of LDAP app from ownCloud Marketplace.
Once the download is complete, extract the App.
tar xzf user_ldap-0.14.0.tar.gzCopy the user_ldap app directory into ownCloud default apps directory.
cp -r user_ldap /var/www/html/owncloud/apps/Change the ownership of the LDAP app to web server user and group.
chown -R apache:apache /var/www/html/owncloud/apps/user_ldapEnable ownCloud LDAP App
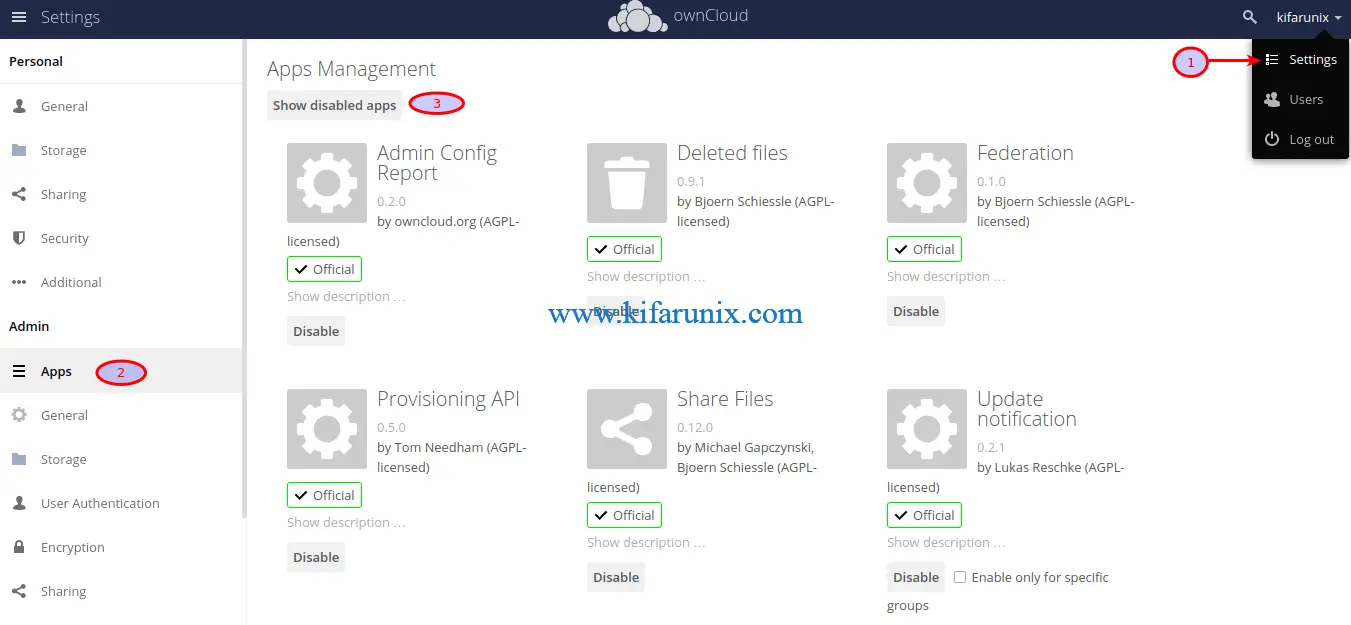
The LDAP app is now installed but it is disabled. To enable it, login to your ownCloud server as admin and navigate to Apps management menu. Click Show disabled apps.
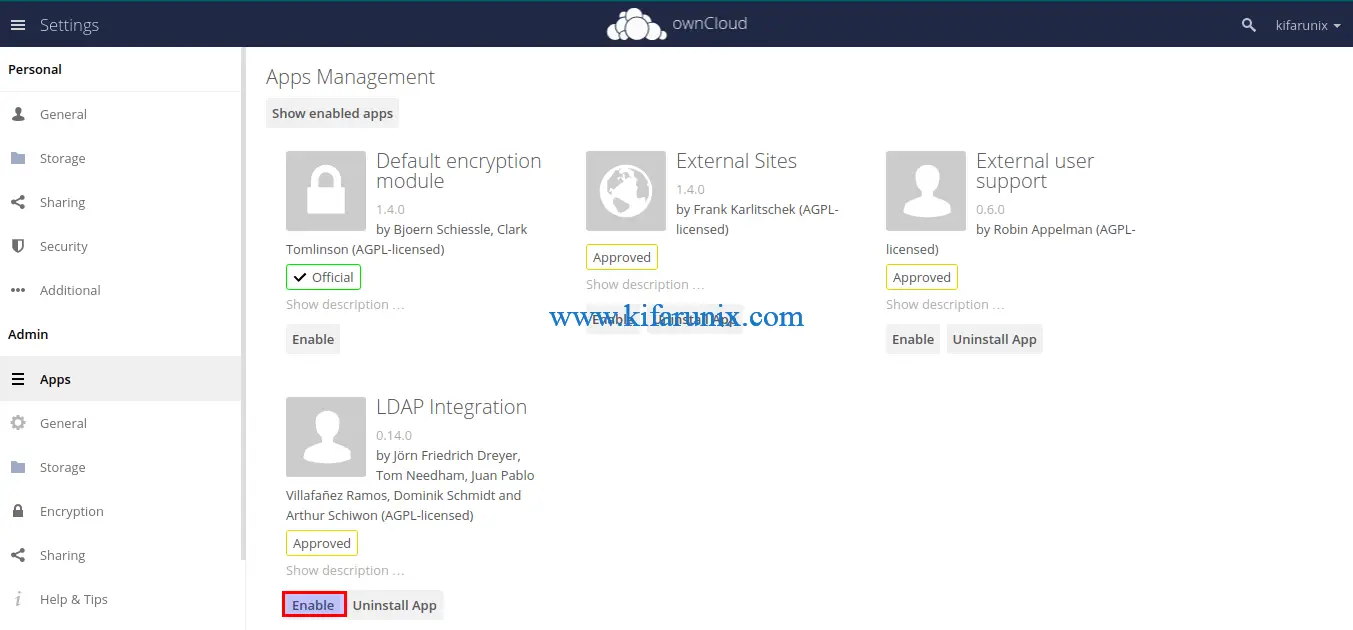
On LDAP Integration App, click enable.
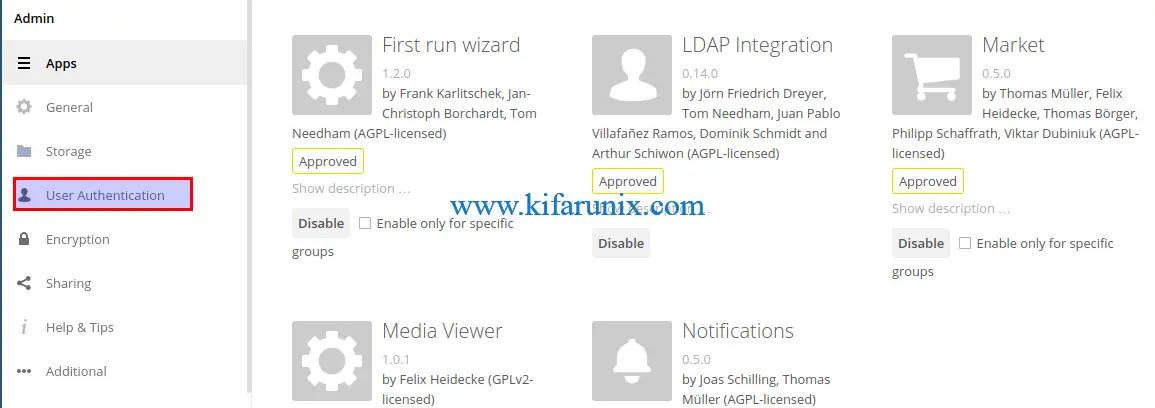
The app will now show on the enabled apps page. You should also be able to see the User Authentication tab the Admins menu on the left panel.
Install OpenLDAP CA Certificate
If you are going to setup LDAP connection over SSL/TLS, you need to install the CA certificate on ownCloud server.
Download the CA certificate from LDAP server;
echo -n | openssl s_client -connect ldapmaster.kifarunix-demo.com:636 -showcerts | awk '/-----BEGIN/,/END CERTIFICATE-----/'Copy the certificate from —–BEGIN CERTIFICATE—– to —–END CERTIFICATE—– and put it on specific file, in this guide we use /etc/pki/tls/cacert.pem.
vim etc/pki/tls/cacert.pem-----BEGIN CERTIFICATE-----
MIIDvzCCAqegAwIBAgIUc8imlOVhEej453dXtvacn7krg1MwDQYJKoZIhvcNAQEL
BQAwbzELMAkGA1UEBhMCS0UxDDAKBgNVBAgMA05haTEMMAoGA1UEBwwDTWFpMRww
...
...
Uy7ivNi2PL6mBwxMpyi0zTopqTXSvi54APm48dd0JPsGLTIgPMc1WvaN7TsUeIBs
Igf9K1e9M0Q+j2XEsTeCYVU/v0Jt0kER0+V/NM0IrDOX+6kRz6DNsZrwcMEf5Yvp
ARWZ
-----END CERTIFICATE-----Next, open the /etc/openldap/ldap.conf configuration file and define the location of the certificate above as follows;
vim /etc/openldap/ldap.conf...
#TLS_CACERT /etc/pki/tls/cert.pem
TLS_CACERT /etc/pki/tls/cacert.pem
...Configure SELinux
If SELinux is running, implement the following policies.
Allow HTTPD scripts and modules to connect to the network.
setsebool -P httpd_can_network_connect 1Allow HTTPD to connect to LDAP
setsebool -P httpd_can_connect_ldap 1Allow nsswitch to allow LDAP logins
setsebool -P authlogin_nsswitch_use_ldap 1Enable NIS
setsebool -P nis_enabled 1You can as well choose to disable SELinux completely.
sed -i 's/=enforcing/=disabled/' /etc/selinux/configIf you choose to disable, reboot to apply the changes.
systemctl rebootConfigure LDAP Authentication
Click on User Authentication to start configuring LDAP server connection details.
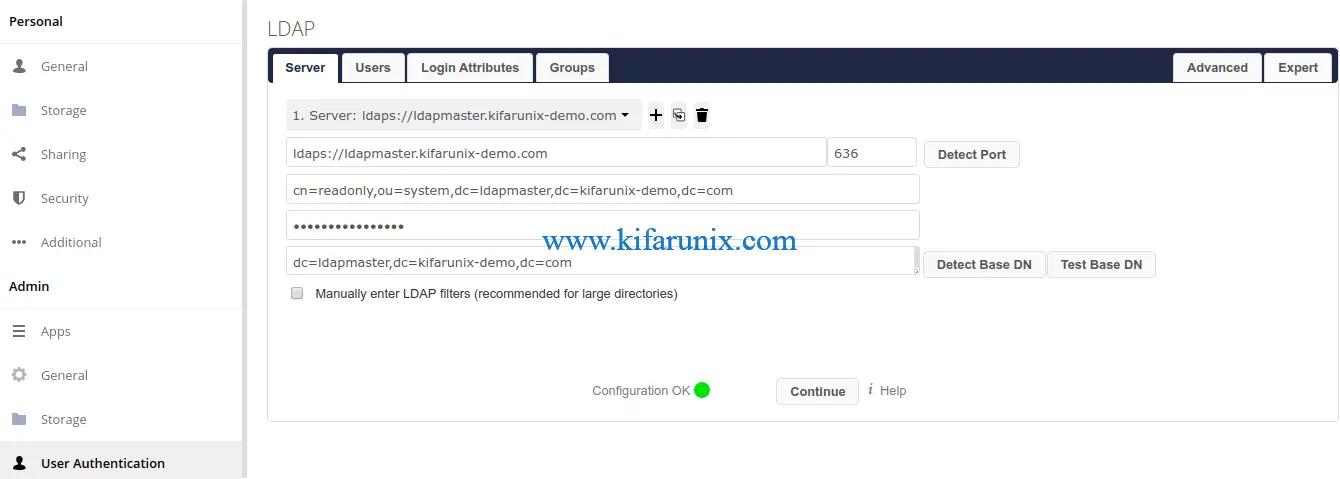
On the Server tab, enter your OpenLDAP URI, the BInd DN and its password, the Base DN. Be sure to replace your domain components accordingly.
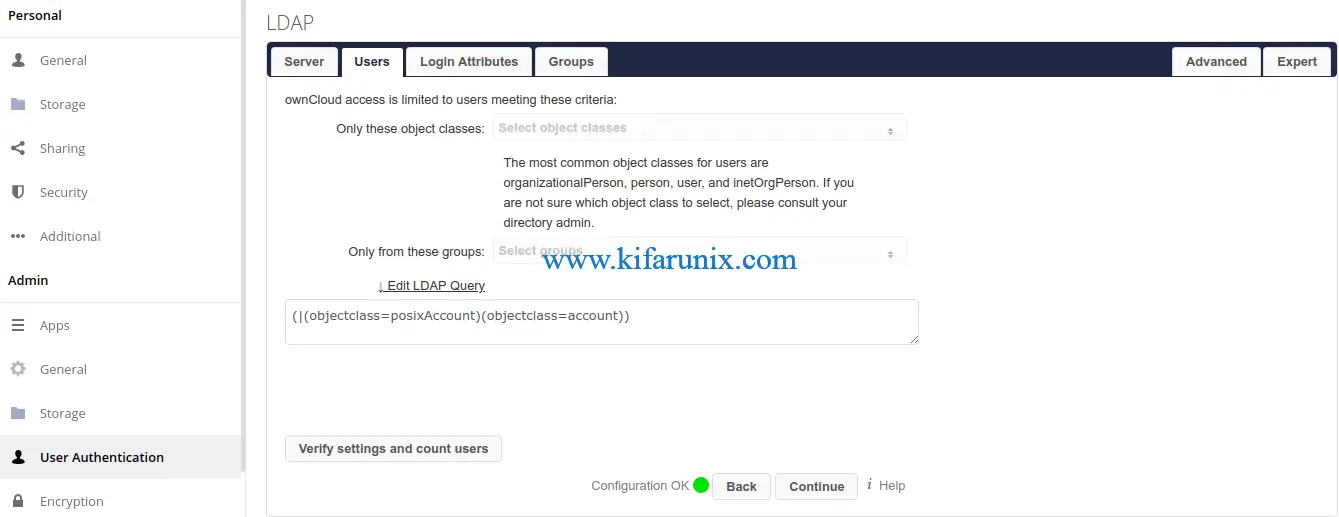
Next, click the Users tab and set the object classes that are used to filter user access.
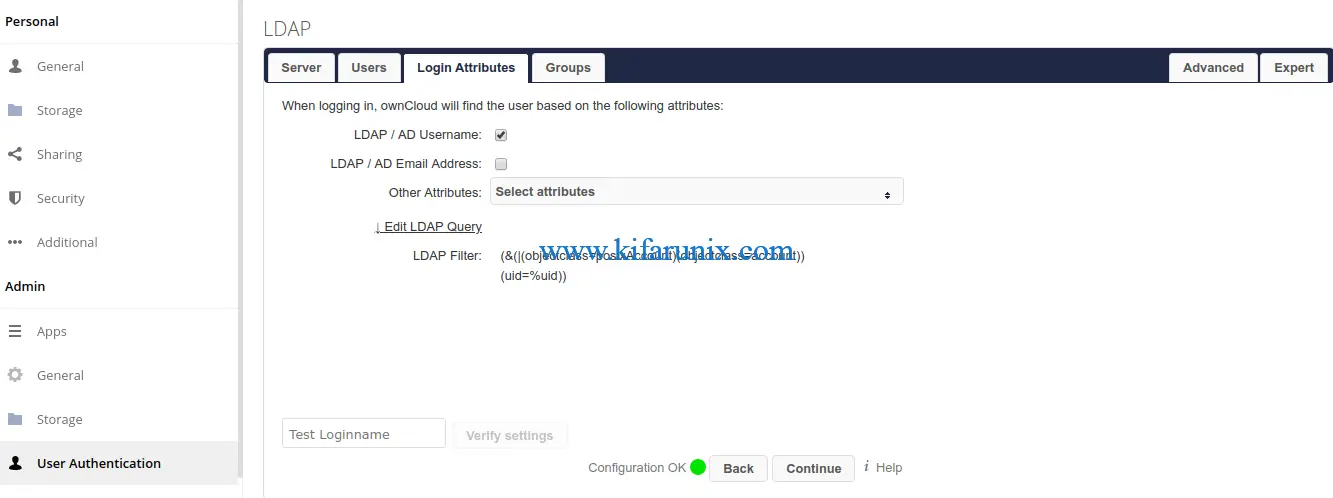
Next, click the Login Attributes tab and define the user attributes that ownCloud will check OpenLDAP against while authenticating the user.
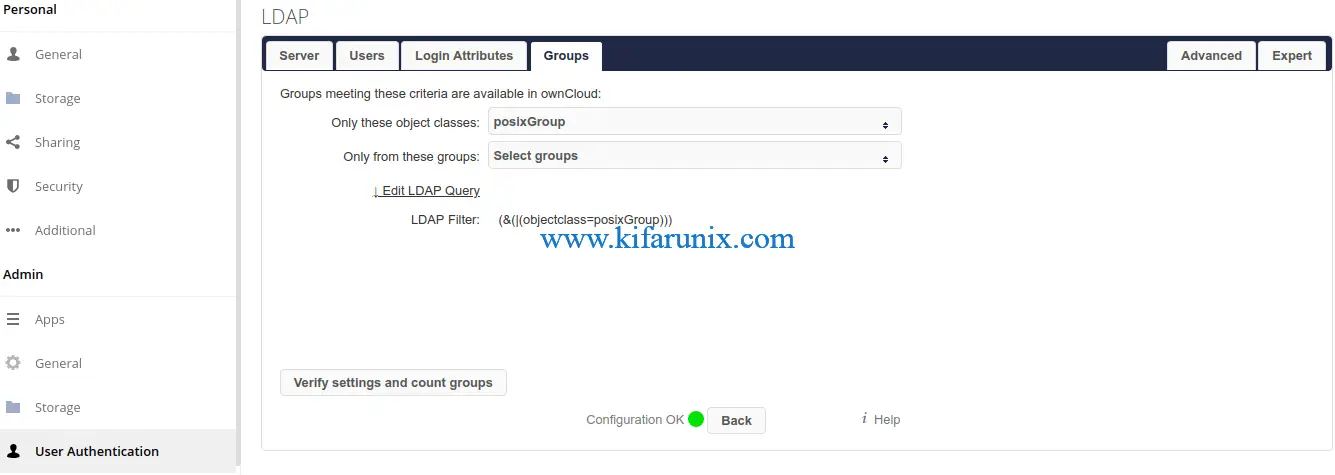
On the Groups tab, define your object class for your OpenLDAP user groups.
You can click on Advanced and Expert tabs for more fundamental LDAP connection settings.
One more setting is to set the LDAP users internal display name. On Expert settings tab, and set the value to uid to have the LDAP users user ID displayed instead of the auto-generated UUID.

Refer to ownCloud User Authentication with LDAP for more information.
Once you are done with the settings, click Test Configuration to confirm is everything is Okay. If all is well, you should get a message below displayed.
The configuration is valid and connection could be established!Synchronizing ownCloud LDAP Users
It is also important to synchronize OpenLDAP users with ownCloud internal user database to ensure that any changes made to the user on the authentication backend, eg OpenLDAP, will also be effected on ownCloud.
This can be done using the occ user:sync command.
sudo -u apache php /var/www/html/owncloud/occ user:sync "OCA\User_LDAP\User_Proxy" -m disable -rFor more explanation on the command line options used, check the occ user:sync command.
Create a cron job for this command to run at least once a day. For example, in this guide, we have a cron job for this task that runs every day at 0600 hrs.
sudo crontab -e0 6 * * * sudo -u apache php /var/www/html/owncloud/occ user:sync "OCA\User_LDAP\User_Proxy" -m disable -rTesting LDAP Users ownCloud Authentication
If everything has gone well so far, then it is time to test if you can login to ownCloud as LDAP user. In this guide, we have a user called, johndoe in our OpenLDAP server.
ldapsearch -H ldapi:/// -Y EXTERNAL -LLL -b "dc=ldapmaster,dc=kifarunix-demo,dc=com" uid=*dn: uid=johndoe,ou=people,dc=ldapmaster,dc=kifarunix-demo,dc=com
objectClass: inetOrgPerson
objectClass: posixAccount
objectClass: shadowAccount
uid: johndoe
cn: John
sn: Doe
loginShell: /bin/bash
uidNumber: 10000
gidNumber: 10000
homeDirectory: /home/johndoe
...Login to ownCloud as OpenLDAP user.
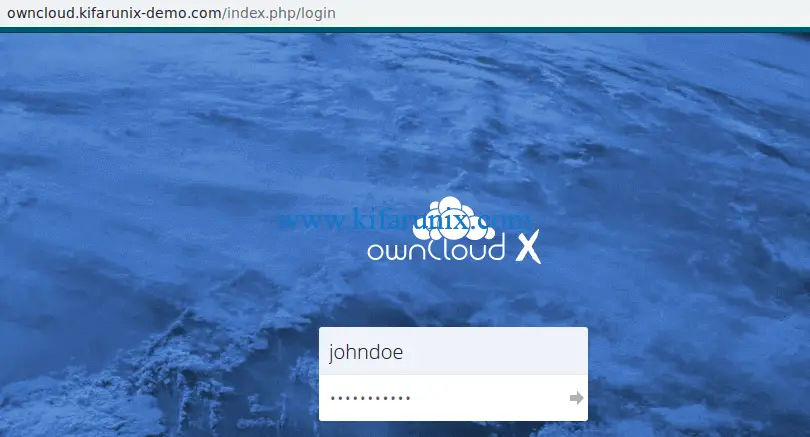
Upon successful login, you should land on ownCloud dashboard.
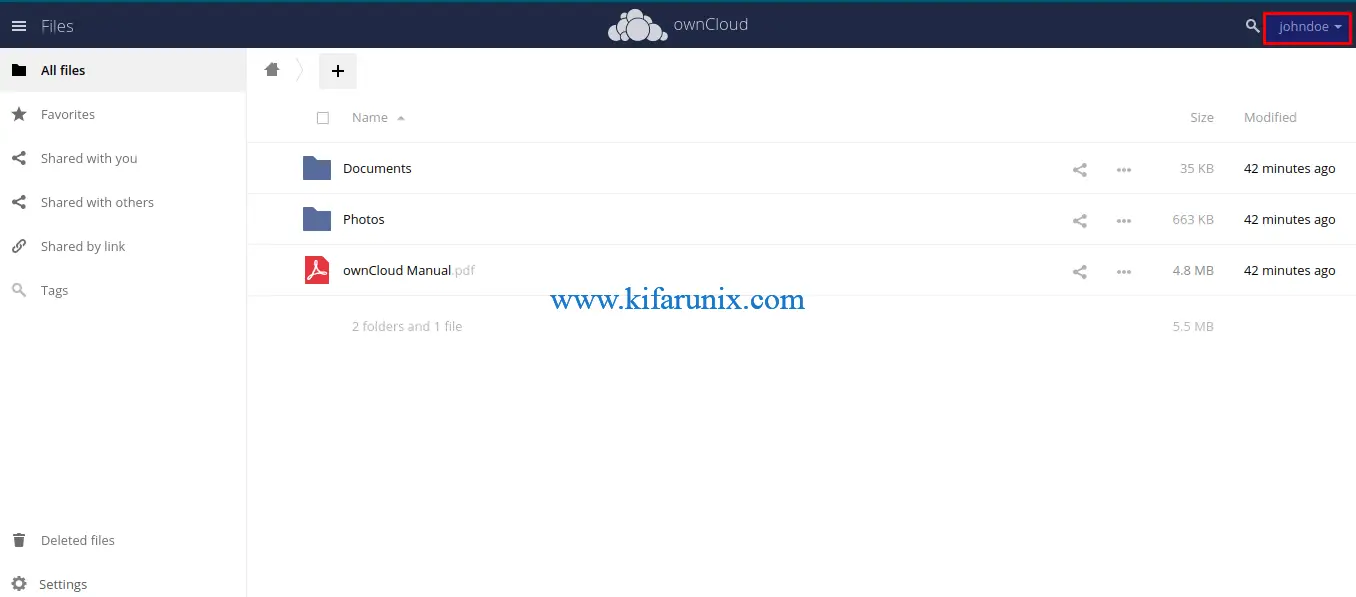
Great. You have successfully setup your ownCloud server for OpenLDAP authentication.
Read more on ownCloud User Authentication with LDAP.
Related Tutorials
Install ownCloud Desktop Client on CentOS 8
Install ownCloud Desktop Client on Debian 10 Buster

