In this guide, we are going to learn how to install ownCloud Server on CentOS 8. If you are here, then we assume that you already know what ownCloud is and what it does.
Installing ownCloud Server on CentOS 8
Install and Setup LAMP Stack
ownCloud requires the LAMP stack components in order to run. For optimal ownCloud performance ensure that you are running;
| Database | MariaDB 10+ |
| Web server | Apache 2.4 |
| PHP | 7.3 |
Therefore , check our guide on installing LAMP stack on CentOS 8 by following the link below;
Install LAMP Stack on CentOS 8
Install other important PHP modules.
dnf install php-{bz2,curl,gd,imagick,intl,zip}Install ownCloud Server
There are two ways through which ownCloud server can be installed on a CentOS 8 system;
- Install ownCloud from ownCloud Repos
- Install ownCloud Using RPM binary package
Install ownCloud from ownCloud Repository
CentOS 8 default repos do not contain ownCloud packages. Therefore, you need to install ownCloud Repository on CentOS 8.
Install the ownCloud repository signing key.
rpm --import https://download.owncloud.org/download/repositories/production/CentOS_8/repodata/repomd.xml.keyInstall ownCloud repository on CentOS 8
dnf config-manager --add-repo http://download.owncloud.org/download/repositories/production/CentOS_8/ce:stable.repoRun system update
dnf updateInstall ownCloud Server
dnf install owncloud-filesInstall ownCloud Using RPM Binary Package
You can as well install ownCloud using its binary package which can be downloaded from download.owncloud.org if you do not want to install the repositories on your system. You simply grab the url of the rpm binary and install it as follows;
dnf localinstall https://download.owncloud.org/download/repositories/production/CentOS_8/noarch/owncloud-files-10.3.2-2.1.noarch.rpmThis installs ownCloud 10.3.2-2.1. Replace the versions accordingly.
Configuring ownCloud on CentOS 8
Create ownCloud Database and Database User
Login to MariaDB database server and create ownCloud database and a database user with all the privileges granted on the ownCloud database.
mysql -u root -pcreate database ownclouddb;grant all on ownclouddb.* to ocadmin@localhost identified by "StrongP@ss";flush privileges;
quitWhen using MariaDB/MySQL as ownCloud database backend, it is recommended that you disable binary logging to avoid data loss when load is high if you are not running any replication.
echo -e "[mysqld]\nskip-log-bin" >> /etc/my.cnfsystemctl restart mariadbVerify that binary logging is disabled.
mysql -u root -pshow variables like 'log_bin';+---------------+-------+
| Variable_name | Value |
+---------------+-------+
| log_bin | OFF |
+---------------+-------+
1 row in set (0.003 sec)Create Apache VirtualHost Configuration file for ownCloud
When installed, ownCloud creates a default web root directory under /var/www/html/owncloud/.
Therefore, if you do not want to use the default Apache configuration, simply create a VirtualHost configuration as shown below. Make the necessary changes.
vi /etc/httpd/conf.d/owncloud.conf<VirtualHost *:80>
ServerName owncloud.kifarunix-demo.com
DocumentRoot /var/www/html/owncloud
<Directory /var/www/html/owncloud>
Options -Indexes +FollowSymLinks
AllowOverride All
Require all granted
</Directory>
ErrorLog /var/log/httpd/owncloud.kifarunix-demo.com_error.log
CustomLog /var/log/httpd/owncloud.kifarunix-demo.com_access.log combined
</VirtualHost>Check Apache configuration syntax for any errors.
apachectl configtestIf you get, Syntax OK, restart Apache.
systemctl restart httpdIf SELinux is running, run the command below to enable Apache to write to ownCloud configuration directory.
setsebool -P httpd_unified 1You can always consult /var/log/audit/audit.log file for any denied requests and use audit2why to see how to fix.
Finalize ownCloud Configuration
To finalize ownCloud configuration setup, access ownCloud from the browser; http://Server_IP_or_hostname.
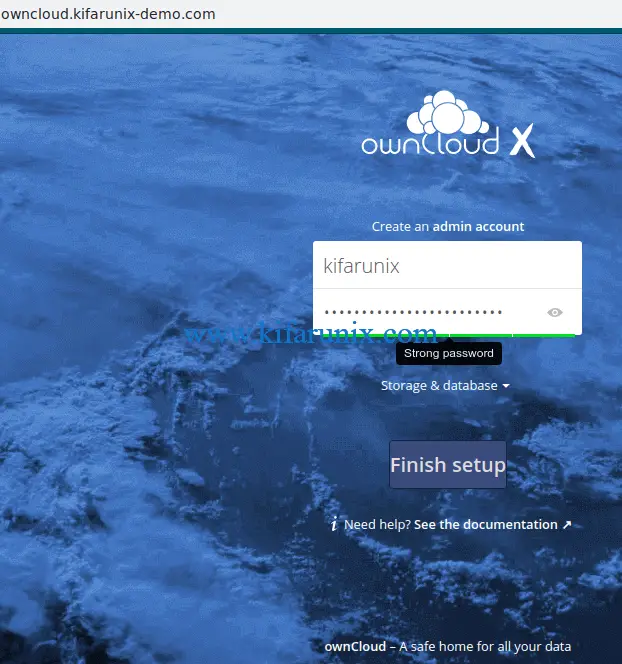
Create ownCloud admin username and password.

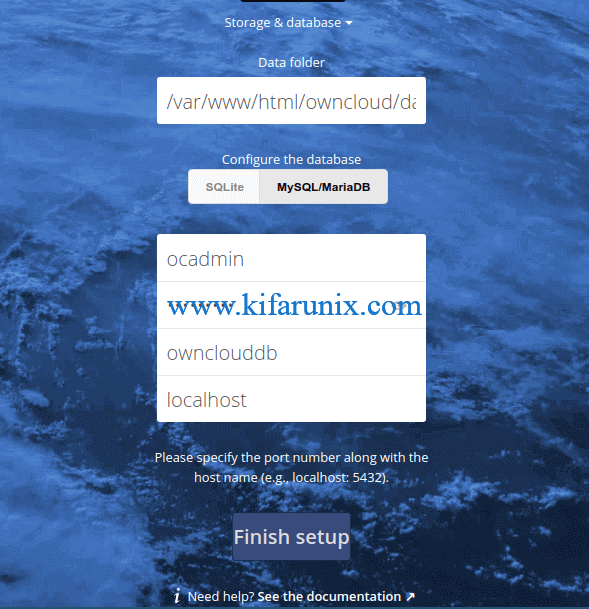
Next, configure your database configuration settings. Click storage & database drop down button.
The ownCloud data directory is set to /var/www/owncloud/data by default. You can leave the default.
Choose your database backend, in this demo, MariaDB is used. Enter the database connection details that were created above.

Next, click Finish Setup to complete the configuration of ownCloud on CentOS 8.
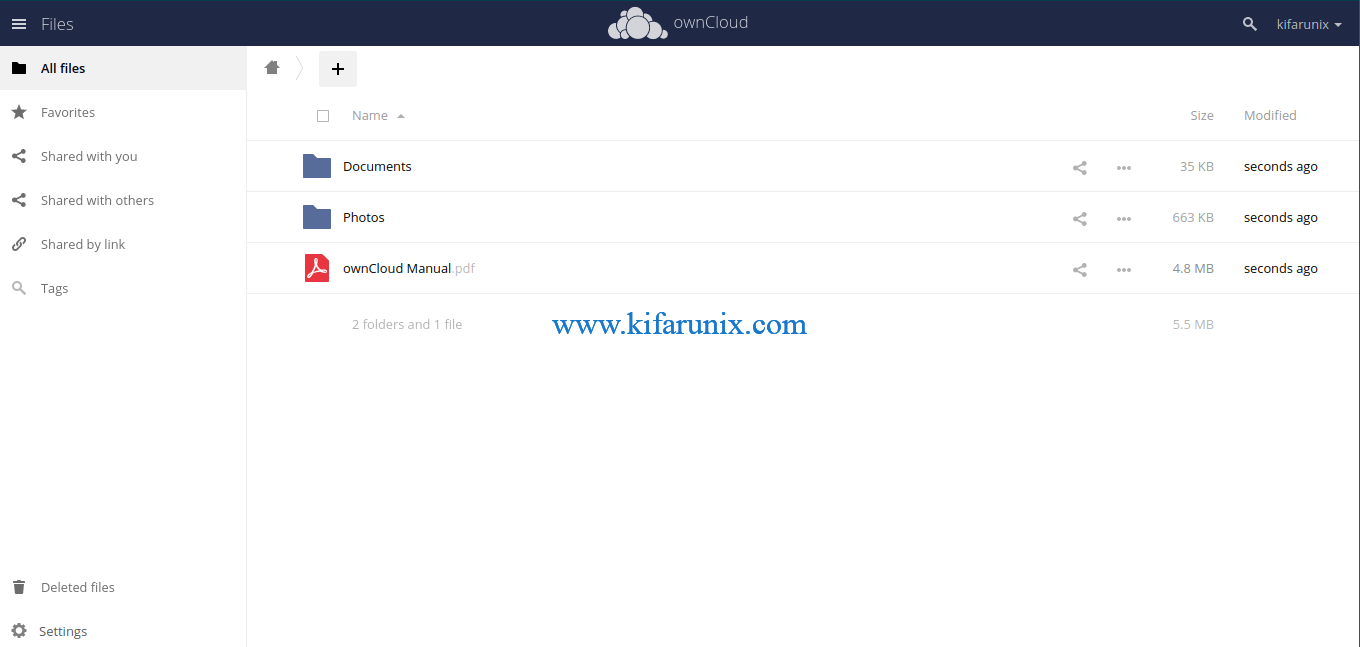
Login with you admin credentials to get to ownCloud dashboard.

ownCloud is now installed successfully on CentOS 8. You can navigate through the dashboard to learn one or two things about ownCloud.
Read more on ownCloud user Manual.
Reference


Hi Is that possible that you could post a second tuto about how to put a secure https nextcloud with nginx ? This could be quite great. Thanks a lot.
Sure, Please check the link; https://kifarunix.com/install-nextcloud-with-nginx-and-ssl-tls-certificates-on-centos-8/
Thanks for the Tutorial. How can I uninstall owncloud compltely? after that I like to also install nextcloud as your another tutorial. thanks a lot