Welcome to our tutorial on how to configure OpenVPN to prompt for credentials on logon on Windows systems.
In most cases, you may want to configure OpenVPN to run automatically on system startup. However, if you are using authentication based OpenVPN setup, it means that for this to work, you need to put your OpenVPN credentials on a file so that they can always be read while automatic connection is being initiated. But, in the cases that the password keeps changing after a specific duration of time, then you would better configure your OpenVPN such that, everytime you login to your system, you are prompted to enter your OpenVPN credentials.
Configuring OpenVPN to Prompt for Credentials on Logon on Windows Systems
Note that this setup was tested on a Windows 7 ultimate system. The procedure, however, applies to other Windows systems including Windows 10.
Also, note that, this setup utilizes, openvpn-gui.exe service rather than the openvpn.exe client command.
Install OpenVPN Client on Windows
Navigate to OpenVPN Community Downloads page and grab the OpenVPN installer for your system.
Once the download is complete, double click the installer to launch the installation of OpenVPN client on your Windows system.
The installation is as easy as clicking Next, Next.
Choose your OpenVPN installation destination folder. In this setup, we set the installation folder to C:\Program Files\OpenVPN.
Once you have set your destination folder, click Install to proceed with installation.
Install OpenVPN Client Configuration file
Once the OpenVPN client is installed, obtain the client configuration file, and place it in the same directory where the OpenVPN binary/executable files resides, C:\Program Files\OpenVPN\bin.
Ensure that the client configuration file has the .ovpn extension.
In my setup, my OpenVPN client configuration file is named kifarunix-demo-vpn.ovpn.
For the purposes of demo, below are the contents of my OpenVPN client configuration file, kifarunix-demo-vpn.ovpn.
client
tls-client
pull
dev tun
proto udp4
remote 192.168.58.5 1194
resolv-retry infinite
nobind
persist-key
persist-tun
key-direction 1
remote-cert-tls server
auth-nocache
comp-lzo
verb 3
auth SHA512
<tls-auth>
#
# 2048 bit OpenVPN static key
#
-----BEGIN OpenVPN Static key V1-----
...
...
-----END OpenVPN Static key V1-----
</tls-auth>
<ca>
-----BEGIN CERTIFICATE-----
MIIDXTCCAkWgAwIBAgIURO2qNFJy57yCdVRJdfZui6MSzs8wDQYJKoZIhvcNAQEL
...
...
Dg==
-----END CERTIFICATE-----
</ca>
<cert>
Certificate:
 ...
 ...
-----BEGIN CERTIFICATE-----
MIIDZDCCAkygAwIBAgIRAOvU4d4QdDYDAOOvMX26OIUwDQYJKoZIhvcNAQELBQAw
...
...
R0t3zU4iQUI=
-----END CERTIFICATE-----
</cert>
<key>
-----BEGIN PRIVATE KEY-----
MIIEuwIBADANBgkqhkiG9w0BAQEFAASCBKUwggShAgEAAoIBAQCjLpmys21XpOW+
...
...
3taMnSk389XsOUF6eZgw
-----END PRIVATE KEY-----
</key>
Create OpenVPN GUI Scheduler Task
To ensure that you are prompted to enter your OpenVPN connection credentials every time you login to your Windows system, you need to create a basic scheduler task.
Launch Task Scheduler Wizard
To create a scheduler task for OpenVPN, open the Task Scheduler wizard by pressing the Windows logo key and type task scheduler.
Click on Task Scheduler program to lauch it.
You can as well launch the scheduler by pressing the Windows Key + R and typing taskschd.msc.

Click Ok to launch the Task Scheduler program.
If prompted on whether you want to allow the program to make changes, click Yes to accept.
Create a Basic Task
To create a task that will launch the openvpn-gui program on logon, click Create Basic Task as highlighted in the screenshot below.
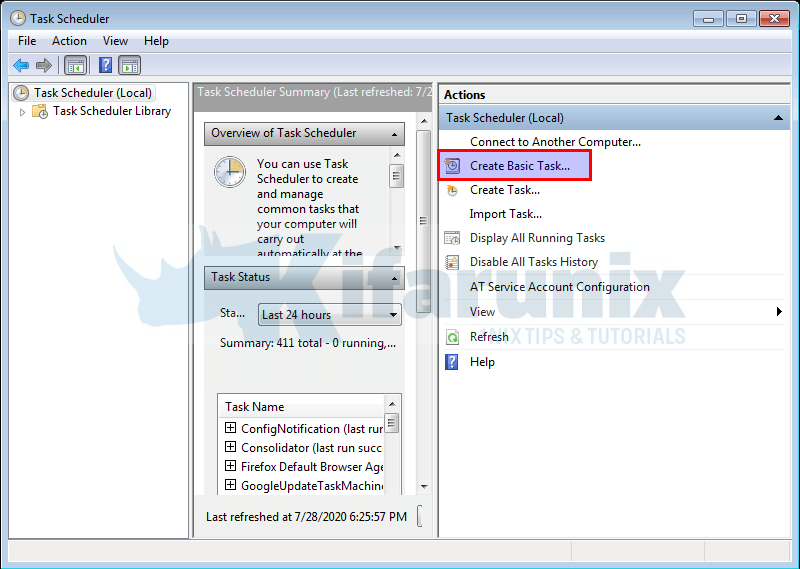
This will launch a basic task wizard.
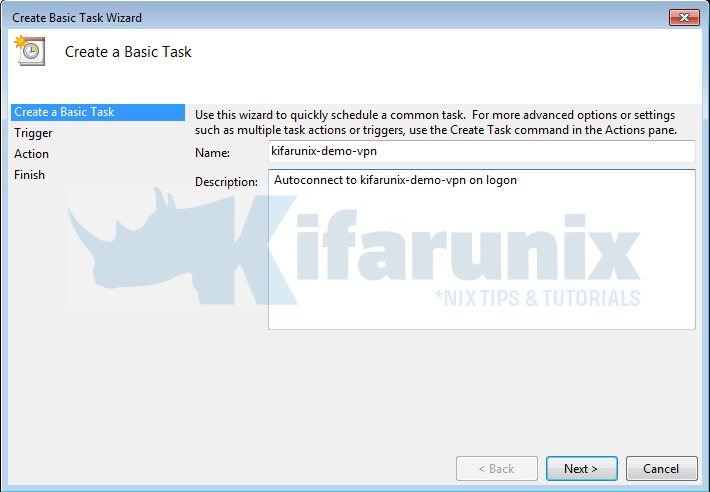
Set the Name of the Task
Set a preferred name of the task and a description, if you like.
Define Task Trigger
Set the task to be triggered on logon, by selecting When I log on.

Define the Task Scheduler Action
Click Next to set the action that the task should perform on logon. In this case, we want it to launch an openvpn-gui.exe program and prompt user to enter OpenVPN authentication credentials, hence, select Start a program.

Specify the Program to Launch
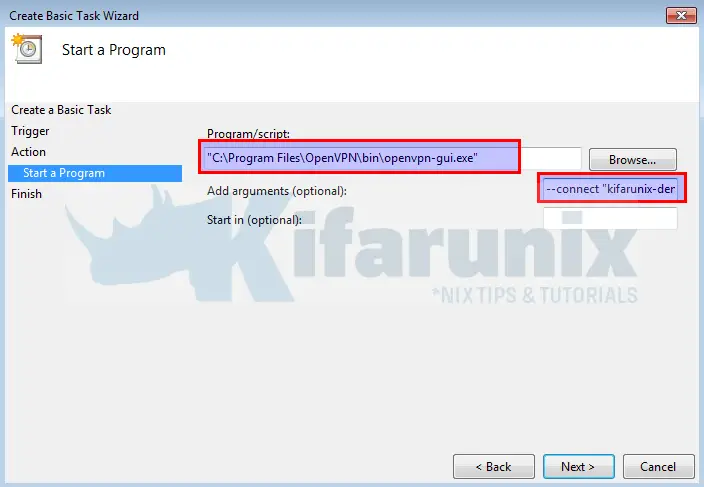
Click Next to specify the program to launch. In this case, we will need to launch the openvpn-gui.exe program and ask it to open our OpenVPN client configuration file, kifarunix-demo-vpn.ovpn.
Specify the full path to the openvpn-gui.exe, which in our case is, C:\Program Files\OpenVPN\bin\openvpn-gui.exe.
Note that our OpenVPN client configuration file, kifarunix-demo-vpn.ovpn, resides in the same directory as the openvpn-gui.exe program.
Therefore, the arguments to pass to the program will be to tell it to connect to vpn using the client configuration file provided, --connect "kifarunix-demo-vpn.ovpn".
Note the double quotes enclosing the client configuration file.
Scheduled Task Summary
Click Next to check the summary of the scheduled task. To open the Task properties dialog when you finish the setup, check the box specified.

Click Finish to proceed.
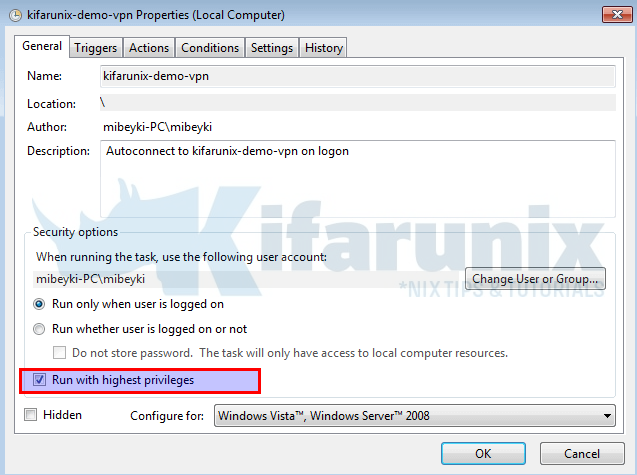
Define the Task Privileges
Usually, connection to vpn requires elevated privileges. Hence, enable the task to run with highest privileges.
Define the Task Conditions
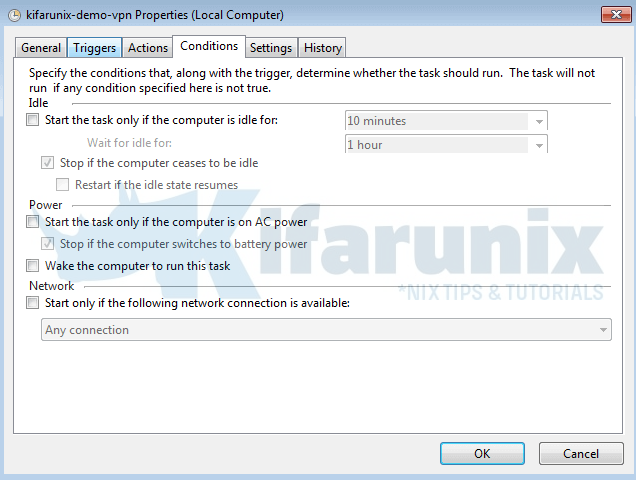
From the task properties dialog, click Conditions tab and uncheck/check the highlighted conditions.
Define the Task Settings
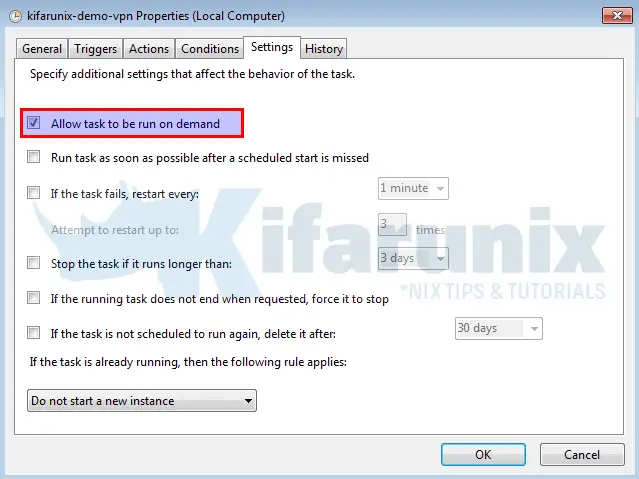
Click Ok on the task dialog once you are done with the setup.
You should now be able to see your task under Task Scheduler Library.
Verify the Task Scheduler OpenVPN GUI Launch
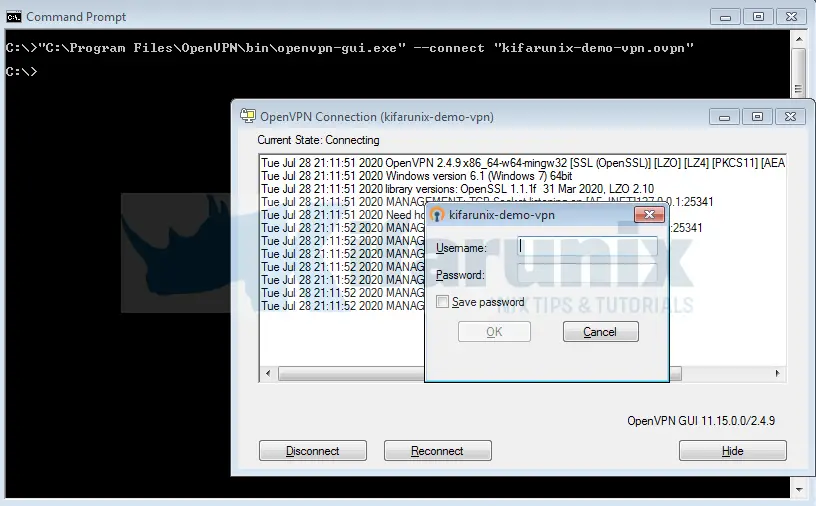
Before you can restart your machine to verify that you scheduled task works as expected, run the task program and its arguments on Command Prompt (CMD);
"C:\Program Files\OpenVPN\bin\openvpn-gui.exe" --connect "kifarunix-demo-vpn.ovpn"This should launch OpenVPN gui and prompt for OpenVPN username and password.
Now, restart your machine to verify whether your program can be launched on logon.
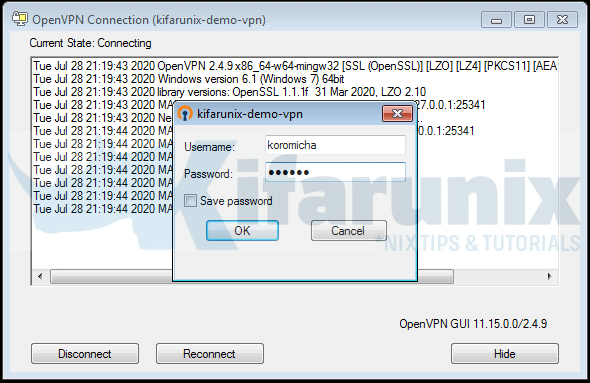
Upon logon, you should get the OpenVPN GUI prompt to enter your OpenVPN connection credentials.
You can then verify that the task is running thereafter by navigating to Task Scheduler Library.

You can as well verify the assigned IP address.
Related Tutorials
Configure OpenVPN LDAP Based Authentication
Configure IPSEC VPN using StrongSwan on Ubuntu 18.04

