Follow through this tutorial to learn how to install NoMachine on Rocky Linux 10. NoMachine is a cross platform, fastest and highest quality remote desktop tool that enables you to access desktop of any other machine with NoMachine installed.
Table of Contents
Install NoMachine on Rocky Linux 10
Download NoMachine Linux Installation Package
NoMachine is not available on default Rocky Linux 10 repositories. However, an RPM binary installer can be downloaded from the NoMachine Linux downloads page.
From the downloads page:
- Depending on your use cases, you can choose the community free version or the enterprise version. We are using the community free version in this guide.
- Next, select NoMachine for your respective OS, which is Linux of course.
- Choose the installer for you respective system architecture (for example NoMachine for Linux RPM (x86_64)) and click the download button to download NoMachine RPM package.
- You can simply right click on the download button and copy the link and pull the RPM using the wget command, or just do direct install.
wget https://download.nomachine.com/download/9.0/Linux/nomachine_9.0.188_11_x86_64.rpmInstall NoMachine on Rocky Linux 10
Like mentioned above, you can install the package directly without downloading the RPM to your machine;
sudo dnf install -y \
https://download.nomachine.com/download/9.0/Linux/nomachine_9.0.188_11_x86_64.rpm
If you have already downloaded the RPM binary, you can simply install it as follows (this assumes the RPM is downloaded to the current working directory, otherwise specify the absolute path);
sudo dnf install nomachine_9.0.188_11_x86_64.rpmSample installation output.
Last metadata expiration check: 0:10:20 ago on Sat 12 Jul 2025 10:17:08 AM UTC.
nomachine_9.0.188_11_x86_64.rpm                                                                                                                                                11 MB/s |  71 MB     00:06
Dependencies resolved.
==============================================================================================================================================================================================================
 Package                                          Architecture                                  Version                                             Repository                                           Size
==============================================================================================================================================================================================================
Installing:
 nomachine                                        x86_64                                        9.0.188-11                                          @commandline                                         71 M

Transaction Summary
==============================================================================================================================================================================================================
Install  1 Package

Total size: 71 M
Installed size: 74 M
Downloading Packages:
Running transaction check
Transaction check succeeded.
Running transaction test
Transaction test succeeded.
Running transaction
  Preparing        :                                                                                                                                                                                      1/1
  Running scriptlet: nomachine-9.0.188-11.x86_64                                                                                                                                                          1/1
  Installing       : nomachine-9.0.188-11.x86_64                                                                                                                                                          1/1
  Running scriptlet: nomachine-9.0.188-11.x86_64                                                                                                                                                          1/1
NX> 700 Starting installation at: Sat, 12 Jul 2025 16:53:43.
NX> 700 Using installation profile: Red Hat.
NX> 700 Installation log is: /usr/NX/var/log/install.log.
NX> 700 Installing nxrunner version: 9.0.188.
NX> 700 Installing nxplayer version: 9.0.188.
NX> 700 To connect the remote printer to the local desktop,
NX> 700 the user account must be a member of the CUPS System Group..
NX> 700 Player install completed with warnings.
NX> 700 Please review the install log for details.
NX> 700 Installing nxnode version: 9.0.188.
NX> 700 Displaying file: /usr/NX/share/documents/node/cups-info

  CUPS Printing Backend

  The  NoMachine Node  setup procedure could not detect your
  CUPS installation: either  CUPS  is not installed on  your
  system or it was installed in a non-standard path. CUPS is
  needed  in order to  enable  printing  support  in your NX
  system.
  Please note that you can enable  printing support for your
  NX system at any time; to do this make sure  that you have
  CUPS installed then run:

    /usr/NX/scripts/setup/nxnode --printingsetup

  to specify the location of the CUPS root path.

NX> 700 Displaying file: /usr/NX/share/documents/node/audio-info

  Audio Backend

  The NoMachine setup procedure could not detect a PulseAudio or a
  PipeWire audio server: either they are not installed on your system
  or either of them was installed in a non-standard path. If PulseAudio
  or PipeWire is not available, NoMachine audio support will try to
  rely on ALSA device. Please note that you can enable PulseAudio
  or PipeWire support at any time; to do this make sure that you
  have PulseAudio or PipeWire installed, then run:

    /usr/NX/scripts/setup/nxnode --audiosetup

  to specify the location of its configuration files.
NX> 700 Installing nxserver version: 9.0.188.
NX> 700 Installation completed at: Sat, 12 Jul 2025 16:53:56.
NX> 700 NoMachine was configured to run the following services:
NX> 700 NX service on port: 4000


Installed:
  nomachine-9.0.188-11.x86_64

Complete!
Setup NoMachine for Remote Connections on Rocky Linux 10
Once NoMachine is installed, you can be able to launch it from the activities tab at the top left corner. Type nomachine on the search bar and you should see NoMachine app.
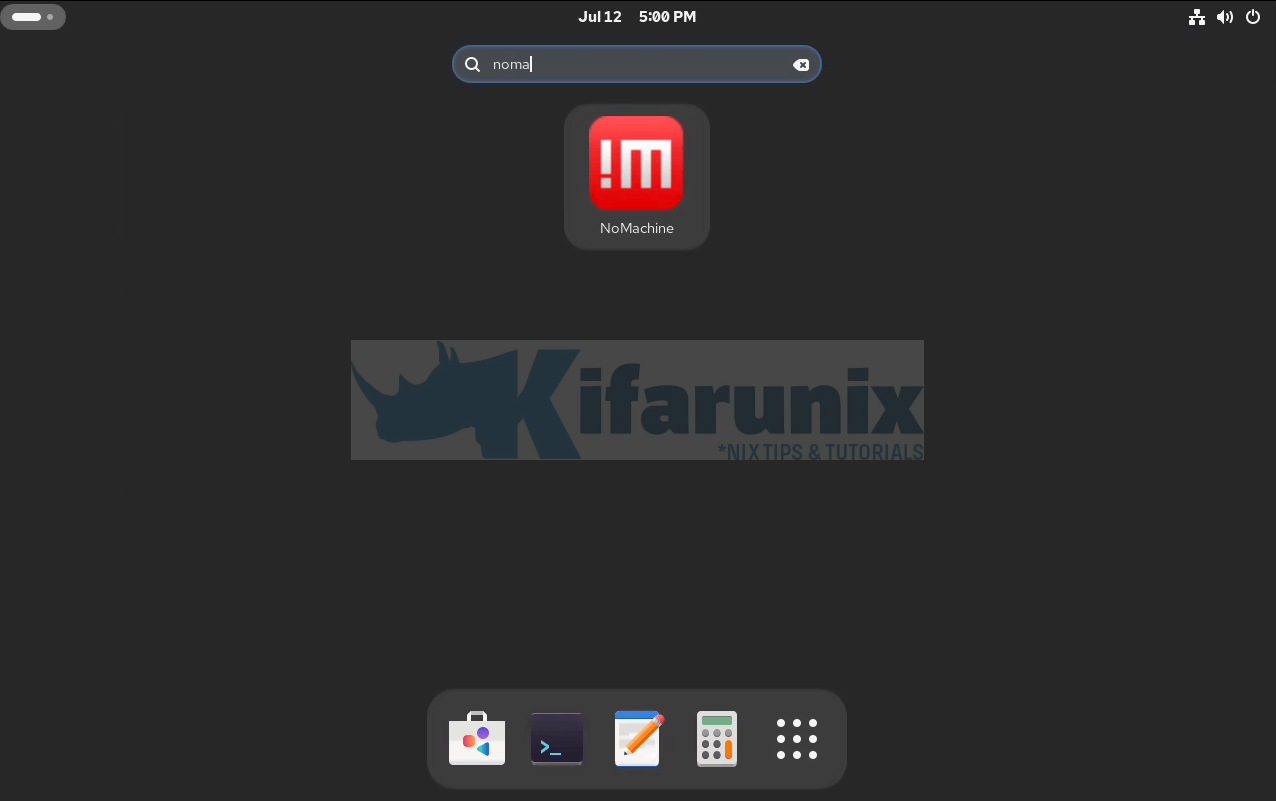
NoMachine application:
- gives you access to server NoMachine management tools and User Interface and advises you when someone is requesting to connect.
- It enables you to check server status, connected users, active transfers, NoMachine Server preferences, restart, stop or shutdown NoMachine server.
For example, if you click on NoMachine, for the first time, you will be welcomed by a NoMachine welcome page. For the NoMachine welcome pages, just click Don’t show this dialogue anymore to avoid having to see them whenver you launch the app.
You will then land on the NoMachine client interface:
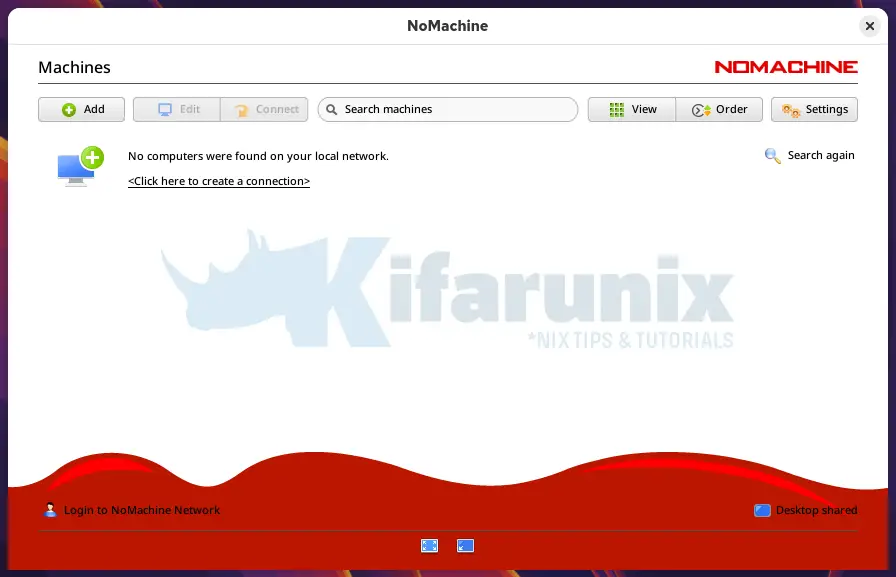
To access the server settings, click the settings icon on the far right.
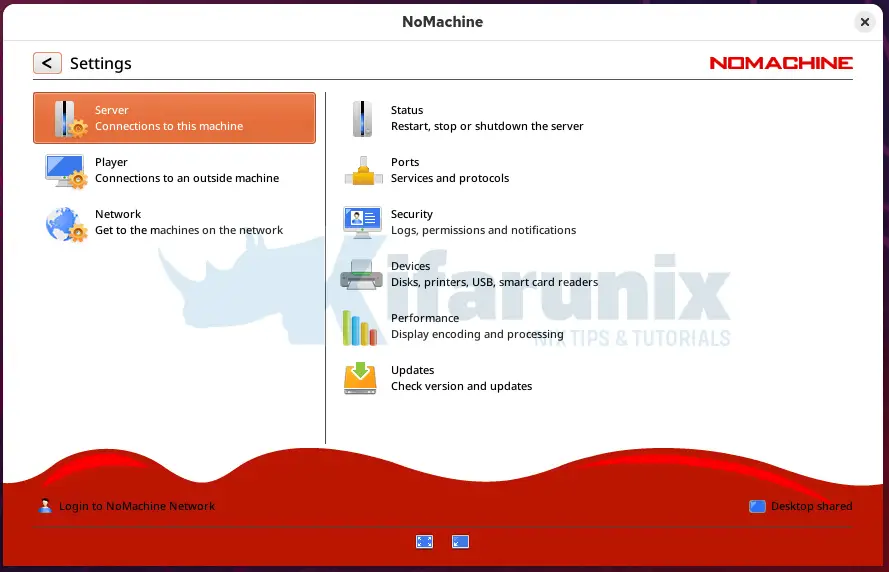
Under the server setting option, there are a number of settings; Status, Ports….
Click on the Status to see the status;
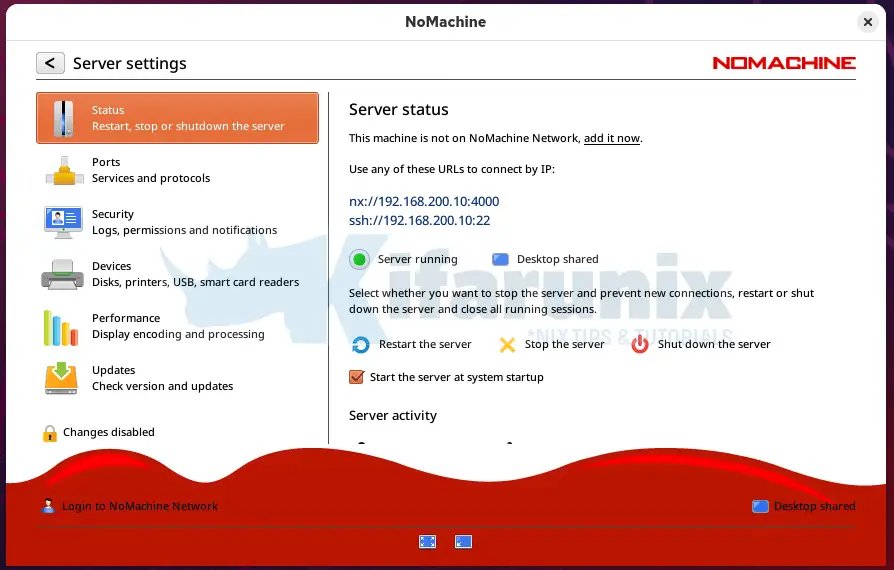
Ensure the check box for starting NoMachine on system start up is checked.
NoMachine Connection Ports
NoMachine uses various ports for connection:
- port 4000/TCP for connection
- 4011-4999/UDP (mostly for transmitting video and audio streams).
- There are other ports like 4080 and 4443 for web connections for enterprise versions.
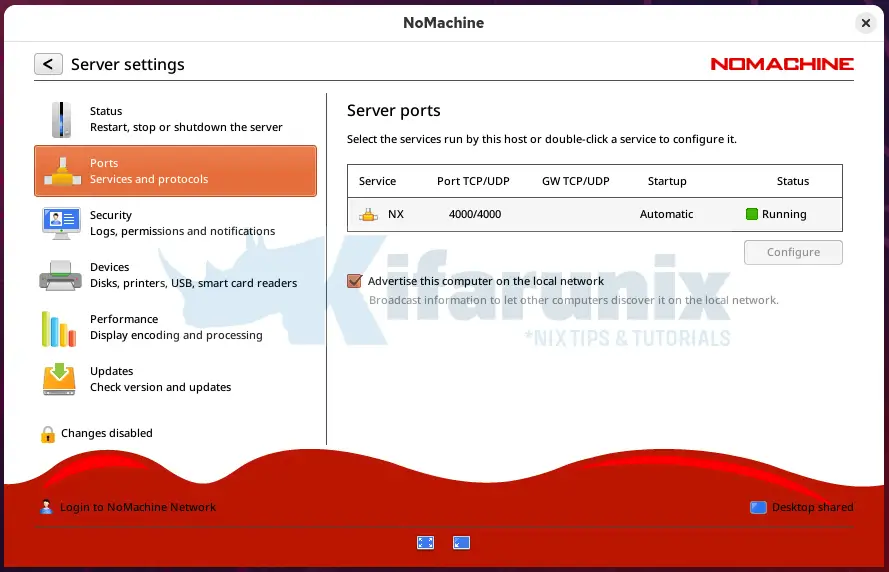
If you click Ports menu on the NoMachine service manager, you will see that NoMachine is listening on port 4000.
Read more on Default ports used by NoMachine 4 or later.
You can disable the local advertisement.
Enable NoMachine Automatic Connections on Rocky Linux 10
If you are running Rocky Linux 10 on a remote environment where there is no human interaction to accepts connections to it, then you need to disable the need to require acceptance to login.
Under the Security tab, scroll down to user acceptance.
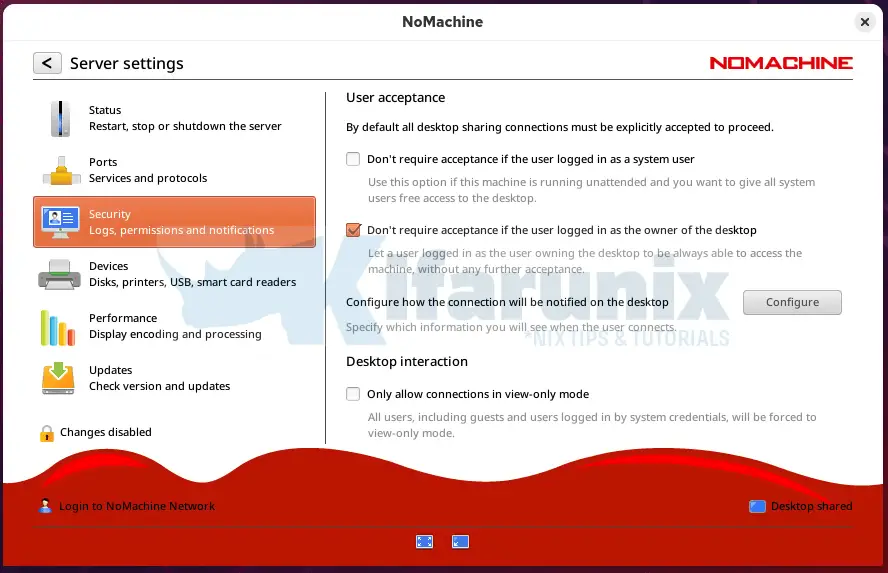
As you can see, we leave the default setting of allowing the remote desktop owner to login without the need to prompt for acceptance.
For other settings such as File transfers, clipboard, scroll down under the Security tab.
Read more about authorizing remote connections on NoMachine authorizing remote connections.
Connecting to Remote Desktop Computer using NoMachine
For NoMachine remote connections to work, both desktop computers must have NoMachine software installed. The remote end you are connecting act as a NoMachine server while the computer you are connecting from acts as a NoMachine client.
Create NoMachine New Connection
Assuming your remote computer has NoMachine already installed and running as a server, on the remote desktop to which you are connecting from, here in referred to as NoMachine client, launch the NoMachine client from system apps menu.
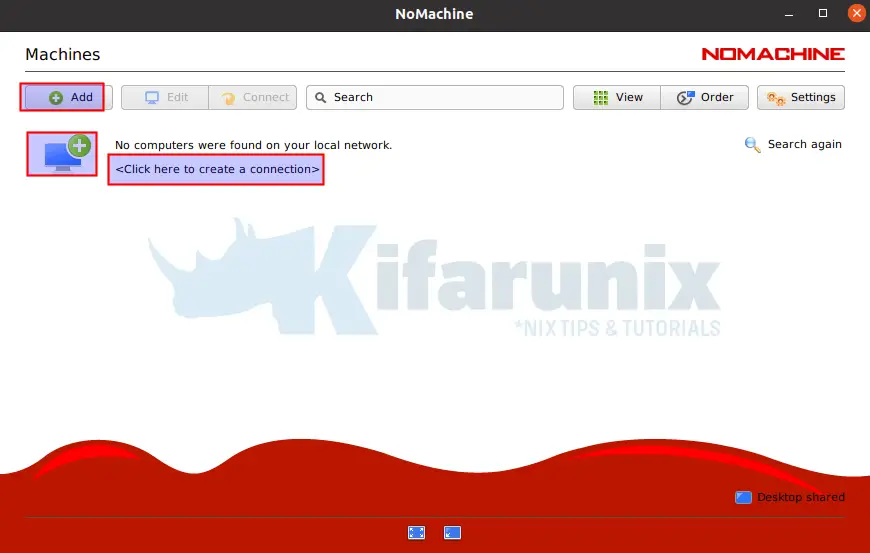
NoMachine try to search for any local NoMachine connections.
If it don’t find any, click on the +Add button to create new connection or simply click on the desktop computer with + sign or simply click <click here to create a connection>.
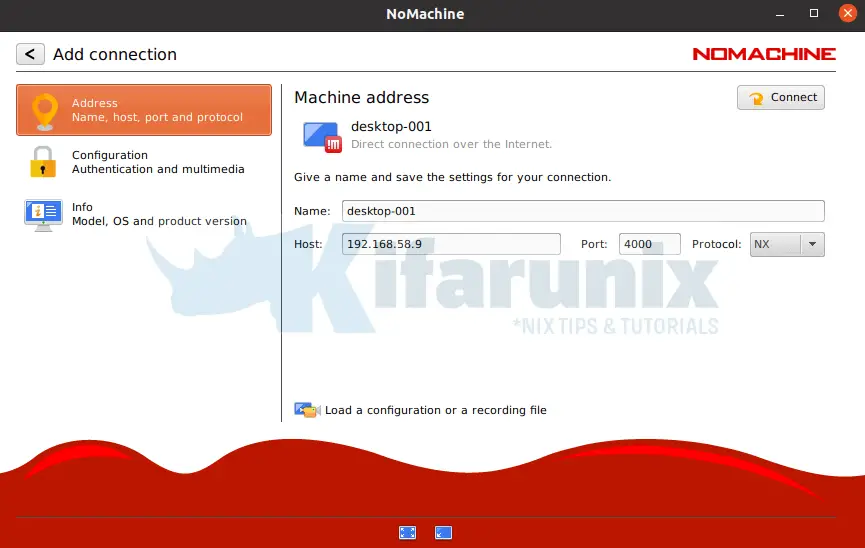
NoMachine Remote Desktop Address
Enter the remote desktop address, the port, the host and the connection protocol.
NoMachine Authentication Method
Select NoMachine authentication method.
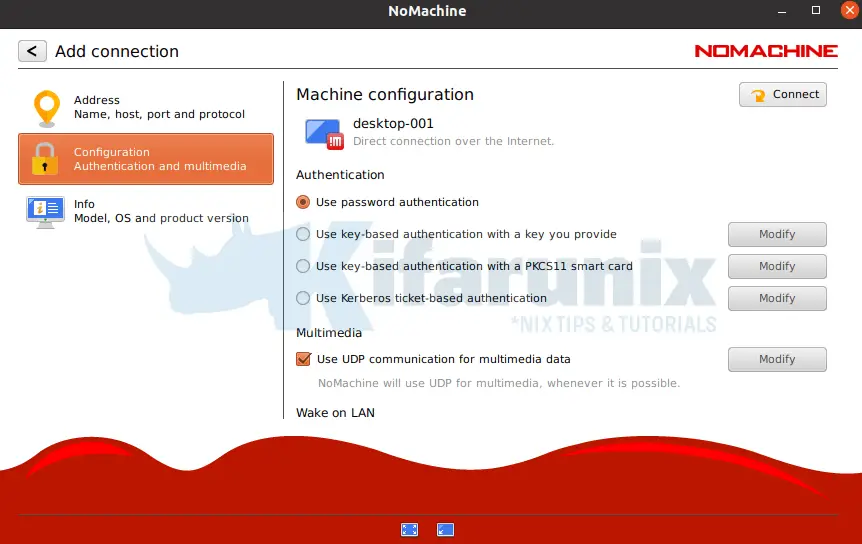
NoMachine Connections
Once you are done, you can click connect button to connect to remote desktop system.
You can as well click the back arrow to see created connections.
Initiating NoMachine Remote Desktop Connection
To initiate a remote connection, select the connection name and click Connect or simply right a connection name and start a connection.
Next, verify the authenticity of the host by selecting yes.
Enter your remote access credentials.
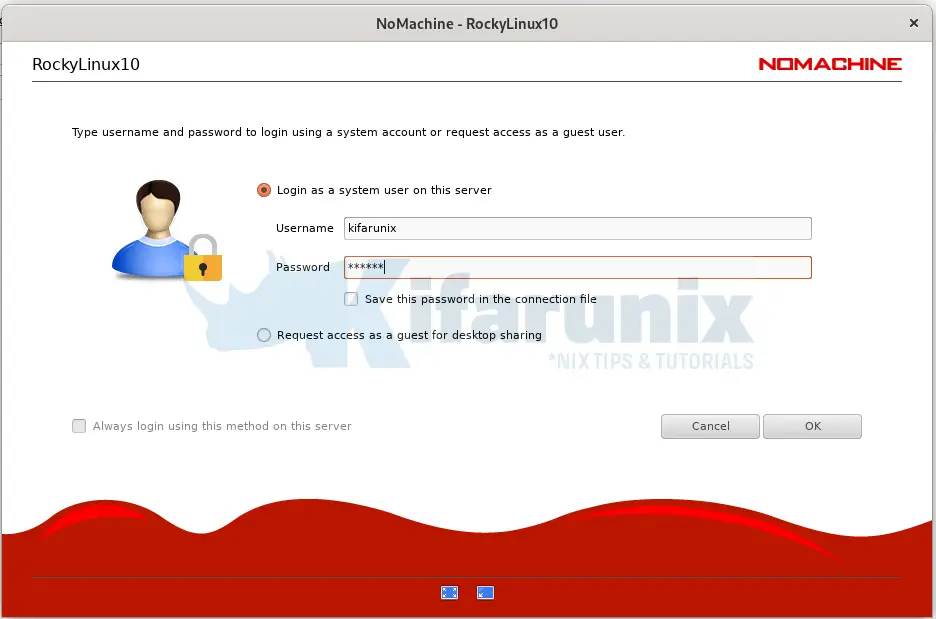
Be sure to allow remote connections if at all you enabled the need for permissions to connect on the remote desktop.
Choose your preferred display resolution and proceed.
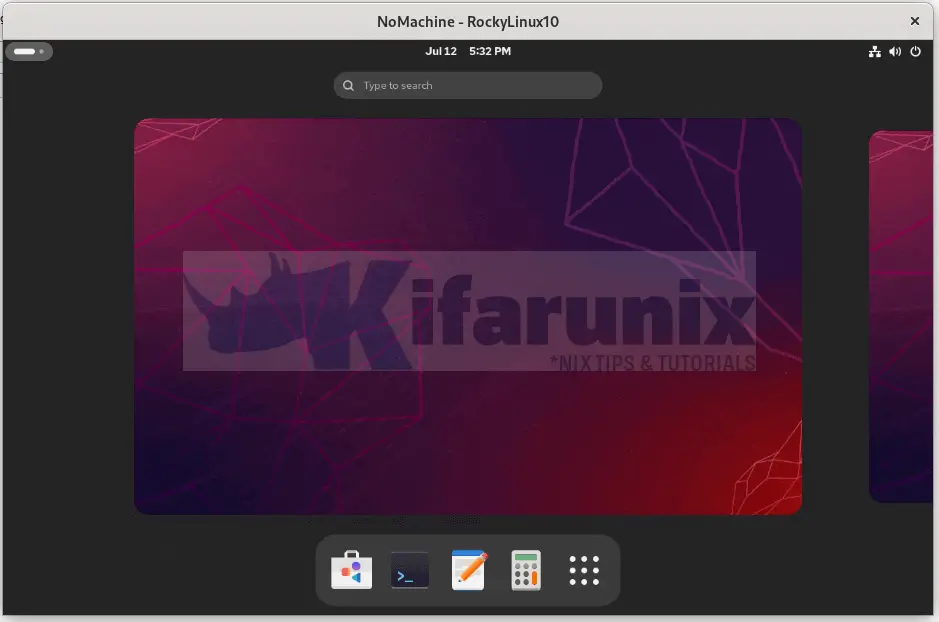
Upon successful login, you should land on the desktop of the remote system. See sample screenshot below for connecting to remote Rocky Linux 10 desktop.
Other Tutorials
Control NoMachine Ports on Firewall

