In this guide, we are going to learn how to install Monitorix on CentOS 8. Monitorix is an open source, system monitoring tool that is used to monitor variou services and system resources as outlined below;
- System load average and usage
- Disk drive temperatures and health
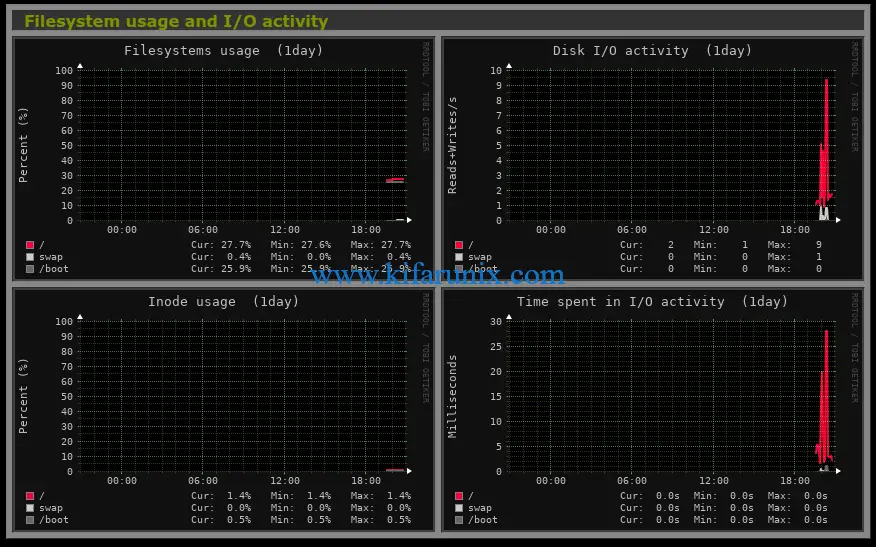
- Filesystem usage and I/O activity
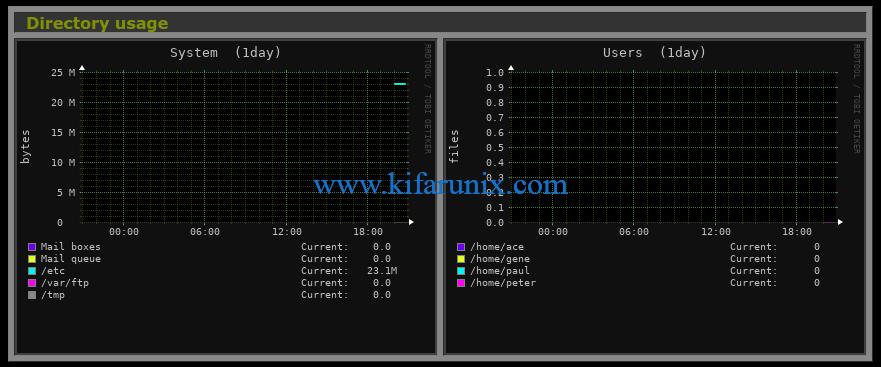
- Directory usage
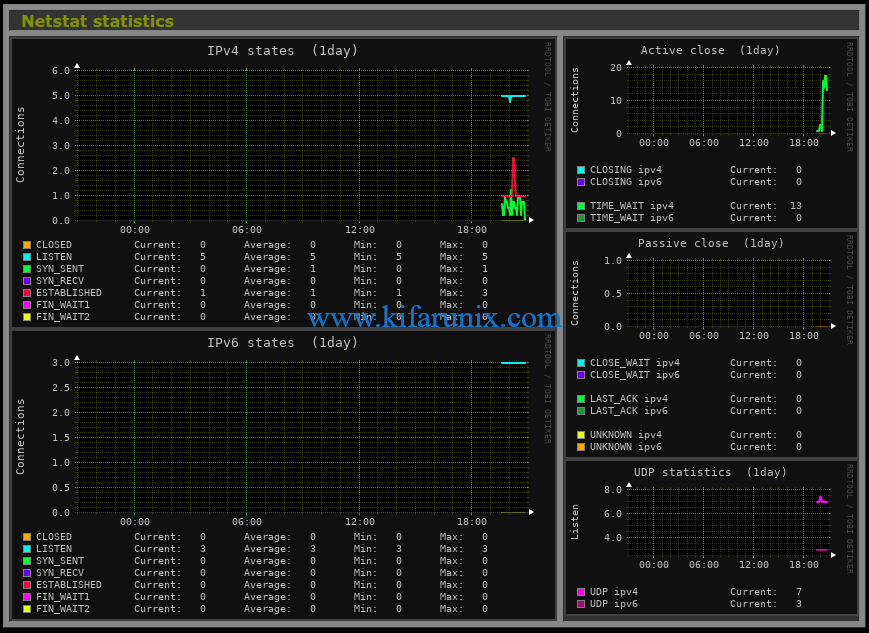
- Netstat statistics
- Users using the system
- Network port traffic
Read more about the features on the Monitorix features page.
Table of Contents
Installing Monitorix on CentOS 8
Run system update
Resynchronize system packages to their latest versions.
dnf updateInstall Monitorix
Install EPEL Repository
dnf install epel-releaseThen install Monitorix.
dnf install monitorixThis installs the latest Monitorix on CentOS 8.
dnf info monitorixInstalled Packages
Name : monitorix
Version : 3.12.0
Release : 1.el8
Architecture : noarch
Size : 2.0 M
Source : monitorix-3.12.0-1.el8.src.rpm
Repository : @System
From repo : epel
Summary : A free, open source, lightweight system monitoring tool
URL : http://www.monitorix.org
License : GPLv2+
Description : Monitorix is a free, open source, lightweight system monitoring tool designed
: to monitor as many services and system resources as possible. It has been
: created to be used under production Linux/UNIX servers, but due to its
: simplicity and small size may also be used on embedded devices as well.
Install other required Perl Dependencies.
dnf install perl-CGI perl-HTTP-Server-Simple perl-rrdtool perl-Config-General perl-LWP-Protocol-https perl-LWP-Protocol-http10 perl-libwww-perlYou can also verify installed version of Monitorix by running;
monitorix -vMonitorix version 3.12.0 (21-Feb-2020)
by Jordi Sanfeliu [email protected]
https://www.monitorix.org/Running Monitorix
Once Monitorix is installed, start and enabled it to run on system boot;
systemctl enable --now monitorixCheck the status;
systemctl status monitorix● monitorix.service - Monitorix
Loaded: loaded (/usr/lib/systemd/system/monitorix.service; enabled; vendor preset: disabled)
Active: active (running) since Thu 2020-03-26 19:39:20 EAT; 1min 2s ago
Docs: man:monitorix(8)
Process: 8790 ExecStart=/usr/bin/monitorix -c /etc/monitorix/monitorix.conf -p /run/monitorix.pid $OPTIONS (code=exited, status=0/SUCCESS)
Main PID: 8791 (/usr/bin/monito)
Tasks: 2 (limit: 5047)
Memory: 29.2M
CGroup: /system.slice/monitorix.service
├─8791 /usr/bin/monitorix -c /etc/monitorix/monitorix.conf -p /run/monitorix.pid >
└─8841 monitorix-httpd listening on 8080 >
Mar 26 19:39:20 monitorix.kifarunix-demo.com systemd[1]: Starting Monitorix...
Configure Monitorix on CentOS 8
To run system monitoring with Monitorix, you need to do some configuration tuning according to your system details. /etc/monitorix/monitorix.conf is default Monitorix configuration file.
Open the Monitorix configuration file for editing;
vim /etc/monitorix/monitorix.confBelow are some of the configuration options of Monitorix that we are changing in this demo. Be sure to replace the settings according to your environment.
- Set a description of the server, the location, the Company name, etc.
title = Kifarunix-demo.com Monitorix - Set the hostname of the host
hostname = monitorix.kifarunix-demo.com
...
title = Kifarunix-demo.com Monitorix
hostname = monitorix.kifarunix-demo.com
theme_color = black
refresh_rate = 150
iface_mode = graph
...
Adjust the rest of the options to suit your needs.
You can find out more about Monitorix configuration options on man monitorix.conf.
Configure Monitorix Web Server
Monitorix is bundled with its own HTTP server. Thus, configure web server access permissions under the <httpd_builtin> section.
See the highlighted lines that shows which networks are allowed to access our Monitorix.
...
<httpd_builtin>
        enabled = y
        host = monitorix.kifarunix-demo.com
        port = 8080
        user = nobody
        group = nobody
        log_file = /var/log/monitorix-httpd
        hosts_deny = all
        hosts_allow = 192.168.2.0/24
        autocheck_responsiveness = y
...
You can as well enable htaccess basic authentication.
...
        <auth>
                enabled = y
                msg = Kifarunix-Demo Monitorix: Restricted access
                htpasswd = /var/lib/monitorix/htpasswd
        >/auth>
</httpd_builtin>
Enable or disable the Monitorix graphs to be displayed.
...
# Graphs (de)activation
# -----------------------------------------------------------------------------
<graph_enable>
        system          = y
        kern            = n
        proc            = y
        hptemp          = n
        lmsens          = n
        gensens         = n
        ipmi            = n
        ambsens         = n
        nvidia          = n
        disk            = n
        fs              = y

...
        int             = y
        verlihub        = n
</graph_enable>
Save and quit the configuration file once done making changes.
If you enabled htaccess basic authentications, you need to create users to be allowed to login. Hence, install Apache Utilities.
dnf install httpd-toolsNext, create users and store them on the specified file, /var/lib/monitorix/htpasswd. For example to create a user called, monitadmin, run the command below. You will be prompted to set the password for the user.
htpasswd -d -c /var/lib/monitorix/htpasswd monitadminYou can add more users to the same file above by just omitting option -c.
If you want, you can further tweak your Monitorix configurations, consult man pages, man monitorix.conf.
Restart Monitorix
Once you are satisfied by the configurations, restart Monitorix service.
systemctl restart monitorixBy default, Monitorix listens on TCP port 8080. You can verify this by running;
ss -altnp | grep 8080LISTEN 0 128 192.168.2.123:8080 0.0.0.0:* users:(("monitorix-httpd",pid=10183,fd=5))If firewalld is running, open the port 8080/tcp on it.
firewall-cmd --add-port=8080/tcp --permanentfirewall-cmd --reloadAccessing Monitorix Web Interface
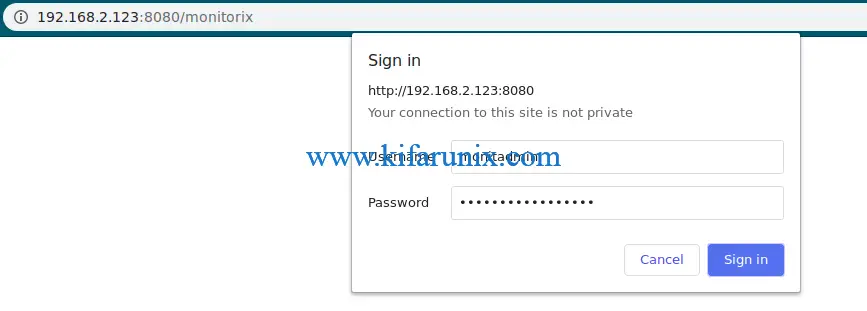
Monitorix can be accessed from a web browser using the address http://server-IP-or-hostname:8080/monitorix.
If you enabled basic authentication, authenticate and proceed to the dashboard.
Monitorix dashboard.
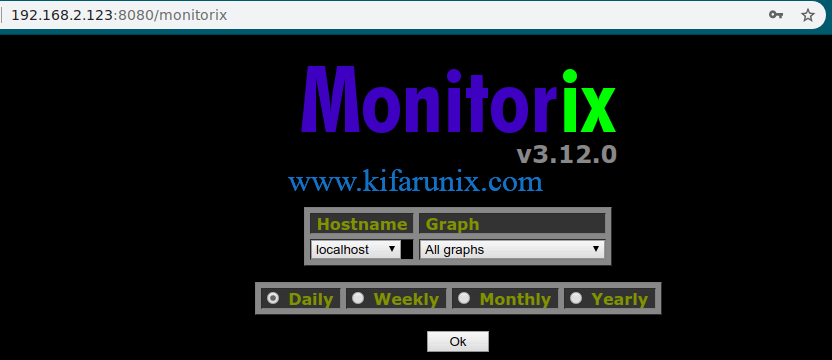
Select the specific graphs you would like to view from drop down on Graphs options.
You can as well view all Graphs for the specified times, daily, weekly, monthly.
To view all daily graphs, simply click Ok.
System load average and usage
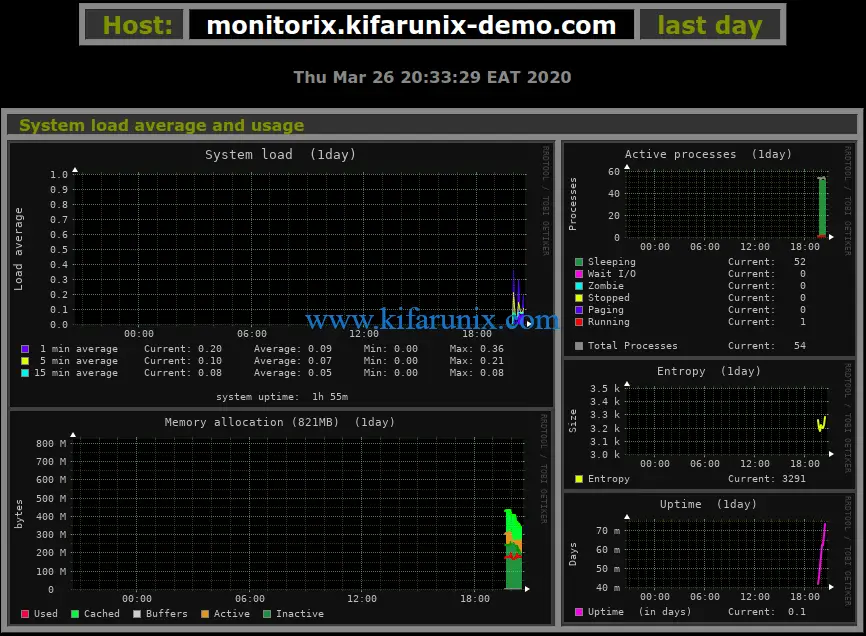
Filesystem usage and I/O activity
Directory usage
Netstat statistics
And many more graphs.
Further Reading
https://www.monitorix.org/documentation.html
Related Tutorials
Install Monitorix on Debian 10

