How can i install Apache web server on Debian 12? Follow through the simple steps in this guide to learn how to install Apache web server.
Table of Contents
Installing Apache Web Server on Debian 12
Have you installed Debian 12 and want to run some web applications on it? You can install Apache, the number HTTP server on the internet and configure it to server your web application.
Run System Update
To ensure you are installing up-to-date packages on Debian 12, update the package cache by running the command below;
sudo apt updateInstalling Apache Web Server on Debian 12
Execute the command below to install Apache web server;
apt install apache2
Reading package lists... Done
Building dependency tree... Done
Reading state information... Done
The following additional packages will be installed:
  apache2-data apache2-utils
Suggested packages:
  apache2-doc apache2-suexec-pristine | apache2-suexec-custom
The following NEW packages will be installed:
  apache2 apache2-data apache2-utils
0 upgraded, 3 newly installed, 0 to remove and 0 not upgraded.
Need to get 577 kB of archives.
After this operation, 1,890 kB of additional disk space will be used.
Do you want to continue? [Y/n] y
Start Apache Service
Once the installation is done, Apache is started and enabled to run on system boot.
Thus, you can confirm the status using the command below;
systemctl status apache2
● apache2.service - The Apache HTTP Server
     Loaded: loaded (/lib/systemd/system/apache2.service; enabled; preset: enabled)
     Active: active (running) since Tue 2023-06-13 22:16:40 EAT; 2min 3s ago
       Docs: https://httpd.apache.org/docs/2.4/
   Main PID: 3835 (apache2)
      Tasks: 55 (limit: 2285)
     Memory: 10.6M
        CPU: 50ms
     CGroup: /system.slice/apache2.service
             ├─3835 /usr/sbin/apache2 -k start
             ├─3837 /usr/sbin/apache2 -k start
             └─3838 /usr/sbin/apache2 -k start

Jun 13 22:16:40 bookworm systemd[1]: Starting apache2.service - The Apache HTTP Server...
Jun 13 22:16:40 bookworm systemd[1]: Started apache2.service - The Apache HTTP Server.
If it is not started nor enabled to run on system boot, run the command below to start Apache service;
systemctl enable --now apache2Verify Apache2 installation
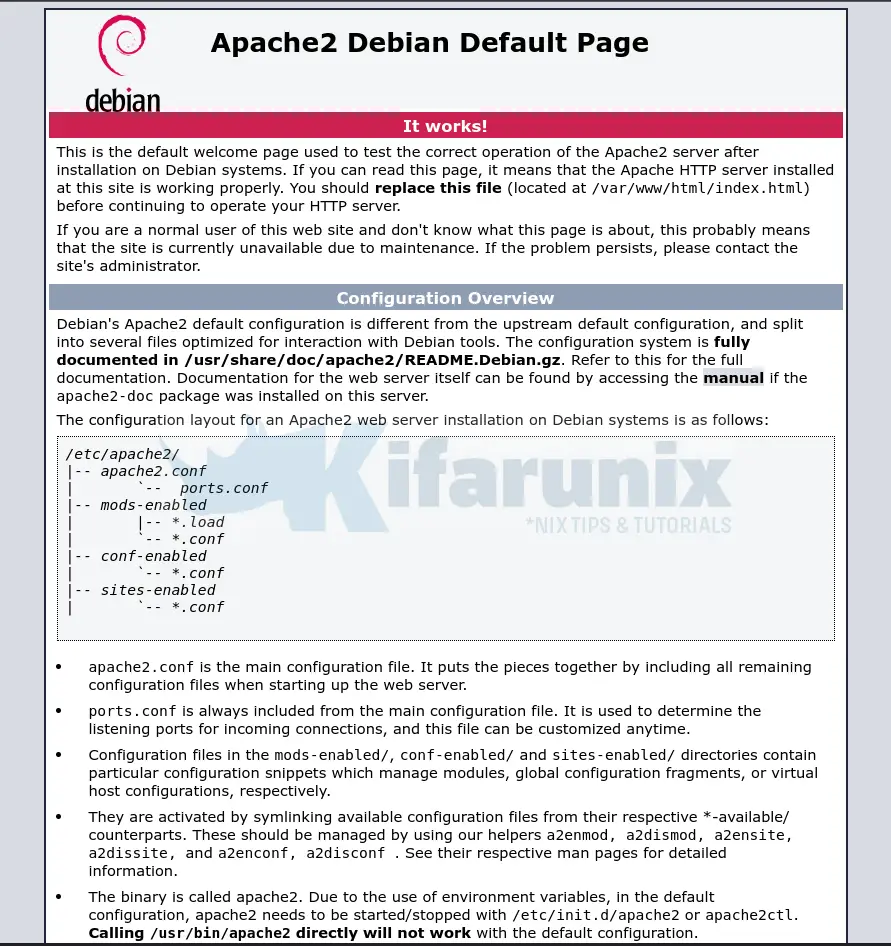
You can now try to access Apache from the browser to verify its installation.
You can use the address http://server-IP.
If Apache is installed and is working correctly, then you see Apache2 Test page;

Creating Custom Site with Apache
You can create and server your own site using Apache.
By default, Apache uses /var/www/html as the document root directory. It is also known as web root directory, is the main directory where the web server looks for files to serve to clients.
So if you want to serve your own page, you can create your application directory under /var/www/.
In this demo, we create a directory called kifarunix where will put our basic site html content.
mkdir /var/www/kifarunixThen this is our html configs;
vim /var/www/kifarunix/index.html
<!DOCTYPE html>
<html>
<head>
    <title>Welcome to Kifarunix.com</title>
    <style>
        body {
            display: flex;
            justify-content: center;
            align-items: flex-start;
            min-height: 100vh;
            text-align: center;
            font-family: Arial, sans-serif;
            margin: 0;
        }
        .container {
            max-width: 600px;
            margin-top: 20vh;
        }
        h1 {
            font-size: 28px;
            margin-bottom: 20px;
        }
        p {
            font-size: 18px;
            line-height: 1.5;
            margin-bottom: 10px;
        }
        a {
            color: #007bff;
        }
    </style>
</head>
<body>
    <div class="container">
        <h1>Welcome to Kifarunix.com</h1>
        <p>This is a sample HTML page for my website.</p>
        <p>Feel free to customize this page with your own content.</p>
        <p>For more information, visit <a href="https://www.kifarunix.com">kifarunix.com</a>.</p>
    </div>
</body>
</html>
Next, update the ownership of the directory;
chown -R www-data: /var/www/kifarunix/Configure Apache to serve your site. Similarly, create your own Apache virtualhost config to server your site content;
cat > /etc/apache2/sites-available/kifarunix.conf << 'EOL'
<VirtualHost *:80>
    ServerName kifarunix.com
    DocumentRoot /var/www/kifarunix

    <Directory /var/www/kifarunix>
        Options Indexes FollowSymLinks
        AllowOverride All
        Require all granted
    </Directory>

    ErrorLog ${APACHE_LOG_DIR}/mywebsite_error.log
    CustomLog ${APACHE_LOG_DIR}/mywebsite_access.log combined
</VirtualHost>
EOL
Check Apache for configuration syntax errors;
apachectl -tThe output should be, Syntax OK if everything is ok.
Next, enable your site;
a2ensite kifarunix.confDisable default Apache site;
a2dissite 000-default.confRestart and Verify Apache Installation
Restart Apache2 service;
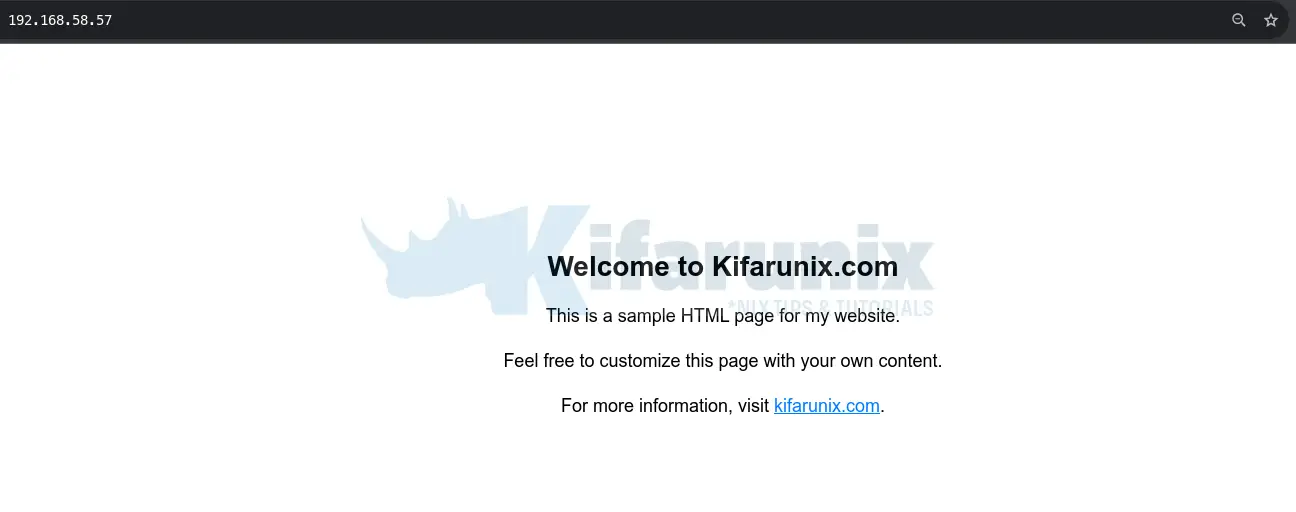
systemctl restart apache2Verify your site processing from web browser, http://server-IP-or-resolvable-domain-name.

Allowing Apache on Firewall
If firewall is on on your system and you want to access your web server externally, open the ports on firewall;
UFW;
ufw allow "WWW"IPTABLES;
iptables -I INPUT -p tcp --dport 80 -j ACCEPTFirewalld;
firewall-cmd --add-port=80/tcp --permanent
firewall-cmd --reload
Configure Apache with HTTPS
If you want to enable HTTPS on Apache, how can you go about it?
Generate SSL/TLS certificates
Firs of all, you need to generate the SSL/TLS certificates.
We will use self signed SSL certs in this guide. The process to use commercial certs is out of scope of this guide.
Generate private key
mkdir /etc/ssl/kifarunixopenssl genrsa -out /etc/ssl/kifarunix/kifarunix-private.key 4096Generate CSR
openssl req -new -key /etc/ssl/kifarunix/kifarunix-private.key \
-out /etc/ssl/kifarunix/kifarunix-csr.pem \
-subj "/C=US/ST=CA/L=San Francisco/O=Organization/CN=kifarunix.com"
Where;
/C=: Country (2-letter ISO code)/ST=: State or province/L=: Locality or city/O=: Organization/CN=: Common Name (e.g., the domain name)
Generate SSL/TLS certificate;
openssl x509 -req -days 3650 -in /etc/ssl/kifarunix/kifarunix-csr.pem \
-signkey  /etc/ssl/kifarunix/kifarunix-private.key -out /etc/ssl/kifarunix/kifarunix-cert.crt
Sample output;
Certificate request self-signature ok
subject=C = US, ST = CA, L = San Francisco, O = Organization, CN = kifarunix.com
Install/Enable Apache SSL Modules
Run the command below to install Apache SSL modules;
When you install Apache, it installs alongside itself the SSL modules.
All you need to do is enable the SSL modules for apache;
a2enmod sslConfirm with;
apachectl -M | grep ssl ssl_module (shared)Configure Apache to use SSL/TLS certs
Now, update your config to use SSL/TLS.
We will update our config above. So update yours accordingly.
vim /etc/apache2/sites-available/kifarunix.conf
<VirtualHost *:80>
    ServerName kifarunix.com
    Redirect permanent / https://kifarunix.com/
</VirtualHost>

<VirtualHost *:443>
    ServerName kifarunix.com

    SSLEngine on
    SSLCertificateFile /etc/ssl/kifarunix/kifarunix-cert.crt
    SSLCertificateKeyFile /etc/ssl/kifarunix/kifarunix-private.key

    DocumentRoot /var/www/kifarunix

    <Directory /var/www/kifarunix>
        Options FollowSymLinks
        AllowOverride All
        Require all granted
    </Directory>

</VirtualHost>
Some of the settings;
Redirect: Redirects any HTTP requests to HTTPSSSLEngine onenables SSL/TLS encryption.SSLCertificateFileandSSLCertificateKeyFilepoint to the paths of your SSL certificate and private key files, respectively.
Save and exit the file.
Enable Apache rewrite modules;
a2enmod rewriteCheck Apache for any errors;
apachectl -tif no errors, restart;
systemctl restart apache2Verify that you can now access your site via HTTPS by visiting the https://domain-name.com.
Similarly, you need to open HTTPS port on firewall. Substitute the commands above with the correct app (UFW) and ports (iptables/firewalld);
UFW;
ufw allow "WWW Secure"IPTABLES;
iptables -I INPUT -p tcp --dport 443 -j ACCEPTFirewalld;
firewall-cmd --add-port=443/tcp --permanent
firewall-cmd --reload
That is all on installing Apache web server on Debian Linux.


openssl x509 -req -days 3650 -in /etc/ssl/kifarunix/kifarunix-csr.pem \
-signkey kifarunix-private.key -out /etc/ssl/kifarunix/kifarunix-cert.crt
should read
openssl x509 -req -days 3650 -in /etc/ssl/kifarunix/kifarunix-csr.pem \
-signkey /etc/ssl/kifarunix/kifarunix-private.key -out /etc/ssl/kifarunix/kifarunix-cert.crt
thank you, -:)