In this tutorial, you will learn how to install Gitlab on AlmaLinux 10. GitLab is an open source end-to-end software development platform with built-in version control, issue tracking, code review, CI/CD, etc. It is is a complete DevOps platform, delivered as a single application.
Table of Contents
How to Install Gitlab on AlmaLinux 10
System Requirements
Below are the bare minimum software and hardware system requirements to install Gitlab with SSL/TLS certificates on AlmaLinux 10.
Hardware Requirements
Ensure the system you want to host with Gitlab has met the following minimum hardware requirements;
- Storage: Enough storage depending on the size of the repositories you want to store in GitLab.
- CPU: At least 4 cores. (supports up to 500 users).
- Memory: At least 4GB RAM (supports up to 500 users).
- Swap: At least 2GB of swap memory.
For other system requirements, the package installer will take care of it, unless you are doing self compilation.
Read more about the requirements of installing Gitlab on Requirements page.
Install Gitlab on AlmaLinux 10
Run system update;
sudo dnf updateCheck if the OS requires a reboot after update;
sudo dnf install dnf-utilsThen run;
sudo needs-restarting -rThe command will tell if the OS requires a reboot or not.
Run the command below to install some required package dependencies.
sudo dnf install curl tzdata ca-certificatesIn this tutorial, we are installing Gitlab Community Edition, CE. There are two ways in which you can install Gitlab CE.
Install Gitlab on AlmaLinux 10 using RPM Binary package
To install Gitlab using RPM binary package, download the binary from the Gitlab packages page and install it manually using YUM or DNF commands;
Replace the value of the VER below with current Gitlab release version.
VER=18.1.1Download the binary for your specific OS architecture. For example, I am running on AMD x86_64 arch.
Use the command below to get OS arch;
uname -mThen download the binary. Note that currently, there is no RPM released for EL10 yet. Hence, we will use the binary for EL9.
wget --content-disposition https://packages.gitlab.com/gitlab/gitlab-ce/packages/el/9/gitlab-ce-${VER}-ce.0.el9.x86_64.rpm/download.rpmInstall Gitlab on AlmaLinux 10
sudo dnf install ./gitlab-ce-${VER}-ce.0.el9.x86_64.rpmTo automatically configure Gitlab during installation, you can provide the EXTERNAL URL address. Note that you can also change the URL later after installation and reconfigure Gitlab.
Be sure to change the URL, gitlab.kifarunix.com, with your respective domain address. If your domain is publicly resolvable, then you can use HTTPS.
sudo EXTERNAL_URL="http://gitlab.kifarunix.com" dnf install ./gitlab-ce-${VER}-ce.0.el9.x86_64.rpm -y
Sample installation output.
Last metadata expiration check: 0:26:00 ago on Wed 25 Jun 2025 06:11:50 PM CEST.
Dependencies resolved.
==============================================================================================================================================================================================================
 Package                                         Architecture                                 Version                                                Repository                                          Size
==============================================================================================================================================================================================================
Installing:
 gitlab-ce                                       x86_64                                       18.1.1-ce.0.el9                                        @commandline                                       1.3 G

Transaction Summary
==============================================================================================================================================================================================================
Install  1 Package

Total size: 1.3 G
Installed size: 3.2 G
Is this ok [y/N]: y
Downloading Packages:
Running transaction check
Transaction check succeeded.
Running transaction test
Transaction test succeeded.
Running transaction
  Preparing        :                                                                                                                                                                                      1/1
  Running scriptlet: gitlab-ce-18.1.1-ce.0.el9.x86_64                                                                                                                                                     1/1
  Installing       : gitlab-ce-18.1.1-ce.0.el9.x86_64                                                                                                                                                     1/1
  Running scriptlet: gitlab-ce-18.1.1-ce.0.el9.x86_64                                                                                                                                                     1/1
It looks like GitLab has not been configured yet; skipping the upgrade script.

       *.                  *.
      ***                 ***
     *****               *****
    .******             *******
    ********            ********
   ,,,,,,,,,***********,,,,,,,,,
  ,,,,,,,,,,,*********,,,,,,,,,,,
  .,,,,,,,,,,,*******,,,,,,,,,,,,
      ,,,,,,,,,*****,,,,,,,,,.
         ,,,,,,,****,,,,,,
            .,,,***,,,,
                ,*,.


     _______ __  __          __
    / ____(_) /_/ /   ____ _/ /_
   / / __/ / __/ /   / __ `/ __ \
  / /_/ / / /_/ /___/ /_/ / /_/ /
  \____/_/\__/_____/\__,_/_.___/


Thank you for installing GitLab!
GitLab was unable to detect a valid hostname for your instance.
Please configure a URL for your GitLab instance by setting `external_url`
configuration in /etc/gitlab/gitlab.rb file.
Then, you can start your GitLab instance by running the following command:
  sudo gitlab-ctl reconfigure

For a comprehensive list of configuration options please see the Omnibus GitLab readme
https://gitlab.com/gitlab-org/omnibus-gitlab/blob/master/README.md

Help us improve the installation experience, let us know how we did with a 1 minute survey:
https://gitlab.fra1.qualtrics.com/jfe/form/SV_6kVqZANThUQ1bZb?installation=omnibus&release=18-1


Installed:
  gitlab-ce-18.1.1-ce.0.el9.x86_64

Complete!
We will configure Gitlab in the next steps.
Install Gitlab on AlmaLinux 10 from DNF/YUM Repository
Heads-up! GitLab’s package repository does not currently support EL10 (e.g., AlmaLinux 10).
Normally, you would run:curl -s https://packages.gitlab.com/install/repositories/gitlab/gitlab-ce/script.rpm.sh | sudo bash
However, on AlmaLinux 10, you’ll need to force the use of the EL9 GitLab repository instead:
curl -s https://packages.gitlab.com/install/repositories/gitlab/gitlab-ce/script.rpm.sh | sudo os=el dist=9 bashNote that when EL10 is supported, you do not need to use the options, os=el dist=9.
Detected operating system as el/9.
Checking for curl...
Detected curl...
Downloading repository file: https://packages.gitlab.com/install/repositories/gitlab/gitlab-ce/config_file.repo?os=el&dist=9&source=script
done.
Installing yum-utils...
gitlab_gitlab-ce-source                                                                                                                                                       859  B/s | 862  B     00:01
gitlab_gitlab-ce-source                                                                                                                                                        11 kB/s | 3.1 kB     00:00
Importing GPG key 0x51312F3F:
 Userid     : "GitLab B.V. (package repository signing key) "
 Fingerprint: F640 3F65 44A3 8863 DAA0 B6E0 3F01 618A 5131 2F3F
 From       : https://packages.gitlab.com/gitlab/gitlab-ce/gpgkey
gitlab_gitlab-ce-source                                                                                                                                                        36 kB/s | 7.0 kB     00:00
Importing GPG key 0xF27EAB47:
 Userid     : "GitLab, Inc. "
 Fingerprint: DBEF 8977 4DDB 9EB3 7D9F C3A0 3CFC F9BA F27E AB47
 From       : https://packages.gitlab.com/gitlab/gitlab-ce/gpgkey/gitlab-gitlab-ce-3D645A26AB9FBD22.pub.gpg
gitlab_gitlab-ce-source                                                                                                                                                        13 kB/s | 3.8 kB     00:00
Importing GPG key 0x82DD593D:
 Userid     : "GitLab, Inc. "
 Fingerprint: 98BF DB87 FCF1 0076 416C 1E0B AD99 7ACC 82DD 593D
 From       : https://packages.gitlab.com/gitlab/gitlab-ce/gpgkey/gitlab-gitlab-ce-CB947AD886C8E8FD.pub.gpg
gitlab_gitlab-ce-source                                                                                                                                                       115  B/s | 175  B     00:01
Package yum-utils-4.7.0-8.el10.noarch is already installed.
Dependencies resolved.
Nothing to do.
Complete!
Generating yum cache for gitlab_gitlab-ce...
Importing GPG key 0x51312F3F:
 Userid     : "GitLab B.V. (package repository signing key) "
 Fingerprint: F640 3F65 44A3 8863 DAA0 B6E0 3F01 618A 5131 2F3F
 From       : https://packages.gitlab.com/gitlab/gitlab-ce/gpgkey
Importing GPG key 0xF27EAB47:
 Userid     : "GitLab, Inc. "
 Fingerprint: DBEF 8977 4DDB 9EB3 7D9F C3A0 3CFC F9BA F27E AB47
 From       : https://packages.gitlab.com/gitlab/gitlab-ce/gpgkey/gitlab-gitlab-ce-3D645A26AB9FBD22.pub.gpg
Importing GPG key 0x82DD593D:
 Userid     : "GitLab, Inc. "
 Fingerprint: 98BF DB87 FCF1 0076 416C 1E0B AD99 7ACC 82DD 593D
 From       : https://packages.gitlab.com/gitlab/gitlab-ce/gpgkey/gitlab-gitlab-ce-CB947AD886C8E8FD.pub.gpg
Generating yum cache for gitlab_gitlab-ce-source...

The repository is setup! You can now install packages.
Once the Gitlab package repo is done, install Gitlab on AlmaLinux 10.
As mentioned above, you could provide your publicly resolvable Gitlab domain on the CLI to automatically configure Gitlab during installation.
sudo dnf install gitlab-ce -yIf this results in such an output with the error:
It looks like there was a problem with public attributes; run gitlab-ctl reconfigure manually to fix.
warning: %posttrans(gitlab-ce-18.1.1-ce.0.el9.x86_64) scriptlet failed, exit status 1
sudo dnf install gitlab-ce -y
gitlab_gitlab-ce 803 B/s | 862 B 00:01
gitlab_gitlab-ce-source 861 B/s | 862 B 00:01
Dependencies resolved.
==============================================================================================================================================================================================================
Package Architecture Version Repository Size
==============================================================================================================================================================================================================
Installing:
gitlab-ce x86_64 18.1.1-ce.0.el9 gitlab_gitlab-ce 1.3 G
Transaction Summary
==============================================================================================================================================================================================================
Install 1 Package
Total download size: 1.3 G
Installed size: 3.2 G
Downloading Packages:
gitlab-ce-18.1.1-ce.0.el9.x86_64.rpm 90 MB/s | 1.3 GB 00:15
--------------------------------------------------------------------------------------------------------------------------------------------------------------------------------------------------------------
Total 90 MB/s | 1.3 GB 00:15
Running transaction check
Transaction check succeeded.
Running transaction test
Transaction test succeeded.
Running transaction
Preparing : 1/1
Running scriptlet: gitlab-ce-18.1.1-ce.0.el9.x86_64 1/1
Installing : gitlab-ce-18.1.1-ce.0.el9.x86_64 1/1
Running scriptlet: gitlab-ce-18.1.1-ce.0.el9.x86_64 1/1
It looks like there was a problem with public attributes; run gitlab-ctl reconfigure manually to fix.
warning: %posttrans(gitlab-ce-18.1.1-ce.0.el9.x86_64) scriptlet failed, exit status 1
Error in POSTTRANS scriptlet in rpm package gitlab-ce
Installed:
gitlab-ce-18.1.1-ce.0.el9.x86_64
Complete!
Then, just remove it. The issues is related to SELinux permissions.
sudo dnf remove gitlab-ceAnd then switch to root directly;
sudo -iAnd reinstall it;
dnf install gitlab-ce -ygitlab_gitlab-ce 795 B/s | 862 B 00:01
gitlab_gitlab-ce-source 866 B/s | 862 B 00:00
Dependencies resolved.
==============================================================================================================================================================================================================
Package Architecture Version Repository Size
==============================================================================================================================================================================================================
Installing:
gitlab-ce x86_64 18.1.1-ce.0.el9 gitlab_gitlab-ce 1.3 G
Transaction Summary
==============================================================================================================================================================================================================
Install 1 Package
Total download size: 1.3 G
Installed size: 3.2 G
Is this ok [y/N]: y
Downloading Packages:
gitlab-ce-18.1.1-ce.0.el9.x86_64.rpm 89 MB/s | 1.3 GB 00:15
--------------------------------------------------------------------------------------------------------------------------------------------------------------------------------------------------------------
Total 89 MB/s | 1.3 GB 00:15
Running transaction check
Transaction check succeeded.
Running transaction test
Transaction test succeeded.
Running transaction
Preparing : 1/1
Running scriptlet: gitlab-ce-18.1.1-ce.0.el9.x86_64 1/1
Installing : gitlab-ce-18.1.1-ce.0.el9.x86_64 1/1
Running scriptlet: gitlab-ce-18.1.1-ce.0.el9.x86_64 1/1
Checking PostgreSQL executables:[2025-06-25T20:33:06+02:00] INFO: Started Cinc Zero at chefzero://localhost:1 with repository at /opt/gitlab/embedded (One version per cookbook)
Cinc Client, version 18.3.0
Patents: https://www.chef.io/patents
Infra Phase starting
[2025-06-25T20:33:06+02:00] INFO: *** Cinc Client 18.3.0 ***
[2025-06-25T20:33:06+02:00] INFO: Platform: x86_64-linux
[2025-06-25T20:33:06+02:00] INFO: Cinc-client pid: 10536
[2025-06-25T20:33:08+02:00] INFO: Setting the run_list to ["recipe[gitlab::config]", "recipe[postgresql::bin]"] from CLI options
[2025-06-25T20:33:08+02:00] INFO: Run List is [recipe[gitlab::config], recipe[postgresql::bin]]
[2025-06-25T20:33:08+02:00] INFO: Run List expands to [gitlab::config, postgresql::bin]
[2025-06-25T20:33:08+02:00] INFO: Starting Cinc Client Run for gitlab.kifarunix.com
[2025-06-25T20:33:08+02:00] INFO: Running start handlers
[2025-06-25T20:33:08+02:00] INFO: Start handlers complete.
Resolving cookbooks for run list: ["gitlab::config", "postgresql::bin"]
...
Running handlers:
[2025-06-25T20:33:51+02:00] INFO: Running report handlers
Running handlers complete
[2025-06-25T20:33:51+02:00] INFO: Report handlers complete
Infra Phase complete, 1/824 resources updated in 12 seconds
gitlab Reconfigured!
Restarting previously running GitLab services
ok: run: alertmanager: (pid 11193) 0s
ok: run: gitaly: (pid 4136) 5268s
ok: run: gitlab-exporter: (pid 11196) 0s
ok: run: gitlab-kas: (pid 11204) 1s
ok: run: gitlab-workhorse: (pid 11213) 0s
ok: run: logrotate: (pid 11221) 1s
ok: run: nginx: (pid 11227) 0s
ok: run: node-exporter: (pid 11233) 1s
ok: run: postgres-exporter: (pid 11238) 0s
ok: run: postgresql: (pid 3500) 5447s
ok: run: puma: (pid 11246) 0s
ok: run: redis: (pid 3368) 5464s
ok: run: redis-exporter: (pid 11252) 1s
ok: run: sidekiq: (pid 11261) 0s
_______ __ __ __
/ ____(_) /_/ / ____ _/ /_
/ / __/ / __/ / / __ `/ __ \
/ /_/ / / /_/ /___/ /_/ / /_/ /
\____/_/\__/_____/\__,_/_.___/
Upgrade complete! If your GitLab server is misbehaving try running
sudo gitlab-ctl restart
before anything else.
If you need to roll back to the previous version you can use the database
backup made during the upgrade (scroll up for the filename).
Installed:
gitlab-ce-18.1.1-ce.0.el9.x86_64
Complete!
Configure Gitlab on AlmaLinux 10
Set External URL for GitLab Server
Edit the /etc/gitlab/gitlab.rb configuration file and replace the value of the external_url parameter with your Gitlab server URL.
sudo grep "^external_url" /etc/gitlab/gitlab.rbOutput;
external_url 'http://gitlab.example.com'Replace the Gitlab external URL domain.
sudo vim /etc/gitlab/gitlab.rbIn my case, I am setting up Gitbal with Let’s Encrypt SSL certificates. Hence, i have enabled HTTPS for the domain.
#external_url 'http://gitlab.example.com'
external_url 'https://gitlab.kifarunix.com'
Enable Gitlab SSL/TLS Settings
Once the Gitlab package is installed, you can configure it to use SSL/TLS certificates. There are two ways in which you can configure Gitlab with SSL/TLS certificates;
- Using free and automated HTTPS with Let’s Encrypt
- Manually configuring HTTPS with your own self signed certificates
If you are following along, I assume you have already have generated Let’s Encrypt SSL certs. My Let’s Encrypt Certificate and Key files are stored under /etc/pki/tls/letsencrypt/;
ls -1 /etc/pki/tls/letsencrypt/fullchain.pem
privkey.pem
You can configure Gitlab to use Let’s Encrypt certs as follows;
sudo vim /etc/gitlab/gitlab.rbNext, scroll down to Gitlab NGINX section and make the following adjustments (as per your setup).
################################################################################
## GitLab NGINX
##! Docs: https://docs.gitlab.com/omnibus/settings/nginx.html
################################################################################

nginx['enable'] = true
nginx['client_max_body_size'] = '250m'
nginx['redirect_http_to_https'] = true
...
...
nginx['ssl_certificate'] = "/etc/pki/tls/letsencrypt/fullchain.pem"
nginx['ssl_certificate_key'] = "/etc/pki/tls/letsencrypt/privkey.pem"

...
...
nginx['ssl_protocols'] = "TLSv1.2 TLSv1.3"
Save the file and exit.
If you want to use your own self signed SSL/TLS certs, you can generate and use them as follows.
Create a directory to store the SSL certs;
mkdir /etc/gitlab/sslNext, generate the self signed SSL certs by running the command below. Be sure to replace the certificates details accordingly in the command below;
openssl req -newkey rsa:4096 -x509 -sha512 \
	-days 3650 \
	-nodes \
	-out /etc/gitlab/ssl/kifarunix-demo.crt \
	-keyout /etc/gitlab/ssl/kifarunix-demo.key \
	-subj "/C=US/ST=California/L=San Francisco/O=Kifarunix-demo Ltd/CN=*.kifarunix-demo.com/"
Copy the public certificate file only into the /etc/gitlab/trusted-certs directory.
mkdir /etc/gitlab/trusted-certscp /etc/gitlab/ssl/kifarunix-demo.crt /etc/gitlab/trusted-certs/And then proceed to update path to the certificate and private keys accordingly in the /etc/gitlab/gitlab.rb file.
Other Gitlab Configurations
There are quite number of configuration options in the /etc/gitlab/gitlab.rb configuration. Go through the configuration and make appropriate changes that suits your needs.
Save and exit the configuration file once you are done with the configurations.
Reconfigure Omnibus GitLab
Once the setup is done, reconfigure Omnibus Gitlab. Reconfiguration is needed whenever there is any configuration changes.
sudo gitlab-ctl reconfigureSample command output;
...
Running handlers:
[2025-06-25T21:01:47+02:00] INFO: Running report handlers
Running handlers complete
[2025-06-25T21:01:47+02:00] INFO: Report handlers complete
Infra Phase complete, 6/831 resources updated in 01 minutes 09 seconds
gitlab Reconfigured!
Are you experiencing long wait to time outs waiting for logrotate socket to appear?
...
* ruby_block[wait for logrotate service socket] action run...
Ensure that the Gitlab runit service supervisor (runsvdir) is running;
systemctl status gitlab-runsvdir.serviceIf it is not running, restart it;
sudo systemctl restart gitlab-runsvdir.serviceConfirm status again!
systemctl status gitlab-runsvdir.serviceAfter that, re-run the reconfiguration.
Obtain Gitlab Default Credentials
After installing GitLab, a default admin/root user is created. If GitLab does not print the default password to the console, you can obtain it from the file, /etc/gitlab/initial_root_password.
sudo grep Password: /etc/gitlab/initial_root_passwordPassword: 5KLL7fXIMWPuaSf1qANpKs6scO0ZwwOxY6UhvRiG4NQ=Reset Gitlab User Password
If you want to reset Gitlab user password, run the command below;
sudo gitlab-rake "gitlab:password:reset"The command will prompt to enter the username and password.
You can specify the username in command line. Replace the username with respective username.
sudo gitlab-rake "gitlab:password:reset[username]"Like;
sudo gitlab-rake "gitlab:password:reset[root]"Check Status of Gitlab Services
Check the status of Gitlab services;
sudo gitlab-ctl statusrun: alertmanager: (pid 11193) 2041s; run: log: (pid 7339) 2630s
run: gitaly: (pid 4136) 7309s; run: log: (pid 3447) 7495s
run: gitlab-exporter: (pid 11196) 2041s; run: log: (pid 7232) 2646s
run: gitlab-kas: (pid 12217) 366s; run: log: (pid 3703) 7478s
run: gitlab-workhorse: (pid 11213) 2040s; run: log: (pid 3912) 7377s
run: logrotate: (pid 11221) 2040s; run: log: (pid 3356) 7506s
run: nginx: (pid 12226) 366s; run: log: (pid 3973) 7371s
run: node-exporter: (pid 11233) 2039s; run: log: (pid 7187) 2654s
run: postgres-exporter: (pid 11238) 2038s; run: log: (pid 7424) 2622s
run: postgresql: (pid 3500) 7485s; run: log: (pid 3522) 7484s
down: prometheus: 2066s, normally up; run: log: (pid 7290) 2636s
run: puma: (pid 12170) 405s; run: log: (pid 3836) 7388s
run: redis: (pid 3368) 7502s; run: log: (pid 3388) 7501s
run: redis-exporter: (pid 11252) 2038s; run: log: (pid 7245) 2642s
run: sidekiq: (pid 12129) 416s; run: log: (pid 3858) 7384s
Managing Gitlab Services
If you need to restart all Gitlab services;
sudo gitlab-ctl restartYou can as well use start|stop command options to control Gitlab services.
To start, stop or restart an individual component, eg nginx;
sudo gitlab-ctl start|stop|restart nginxAccessing Gitlab Web Interface
The basic install of Gitlab on AlmaLinux 10 is now done. All you can do now is to access the Gitlab web interface, https://server-IP-or-domain.
If Firewall is running, you need to open port 443/80 to allow external access.
sudo firewall-cmd --add-port={80,443}/tcp --permanentReload the firewall;
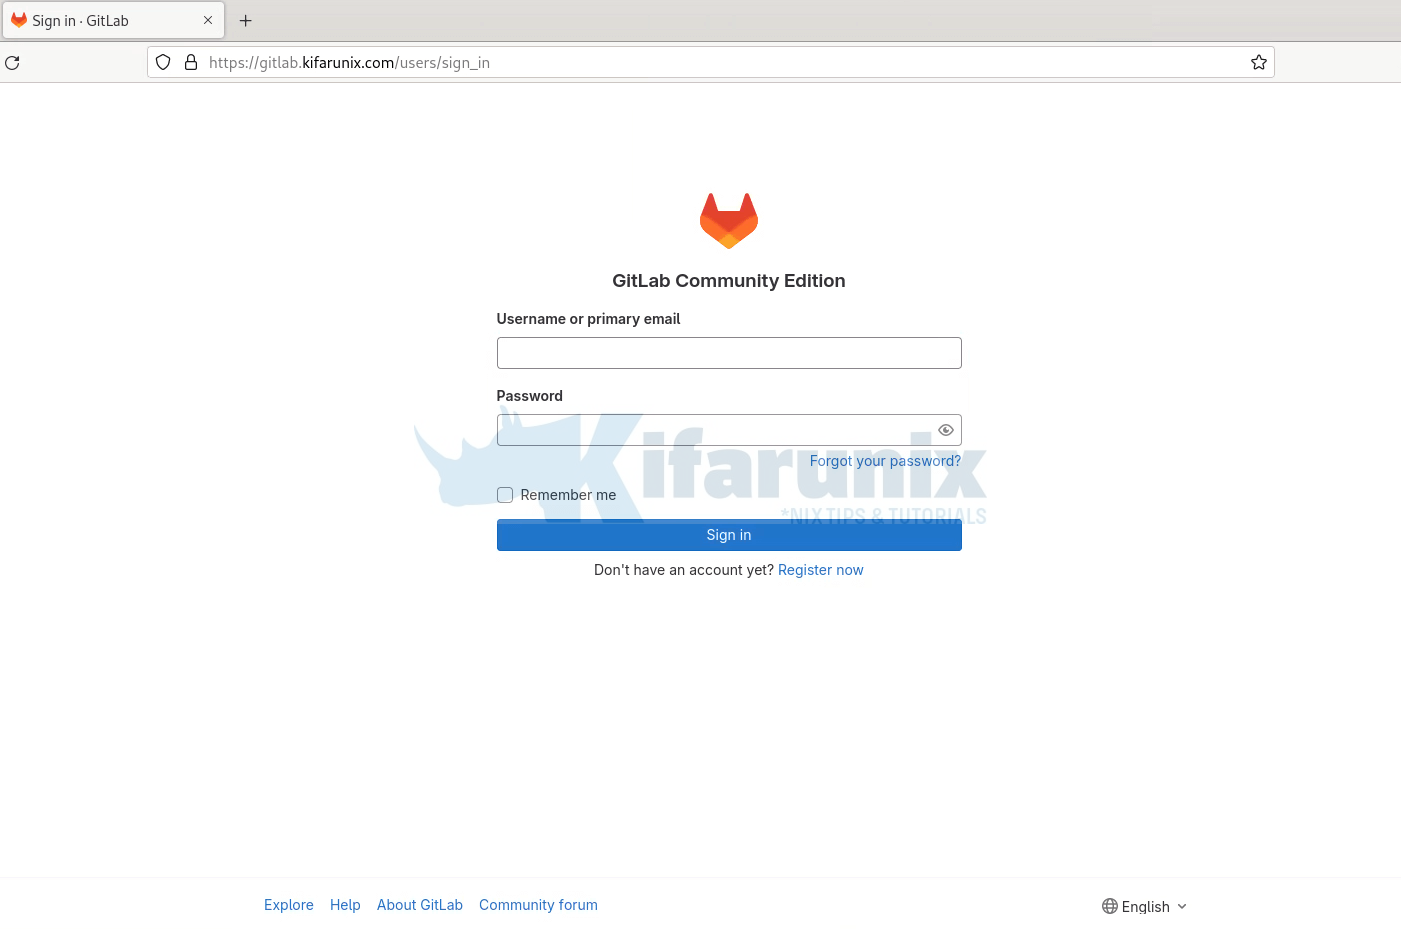
sudo firewall-cmd --reloadAccessing Gitlab Web page;

Login to Gitlab web user interface as root user with password provided above.
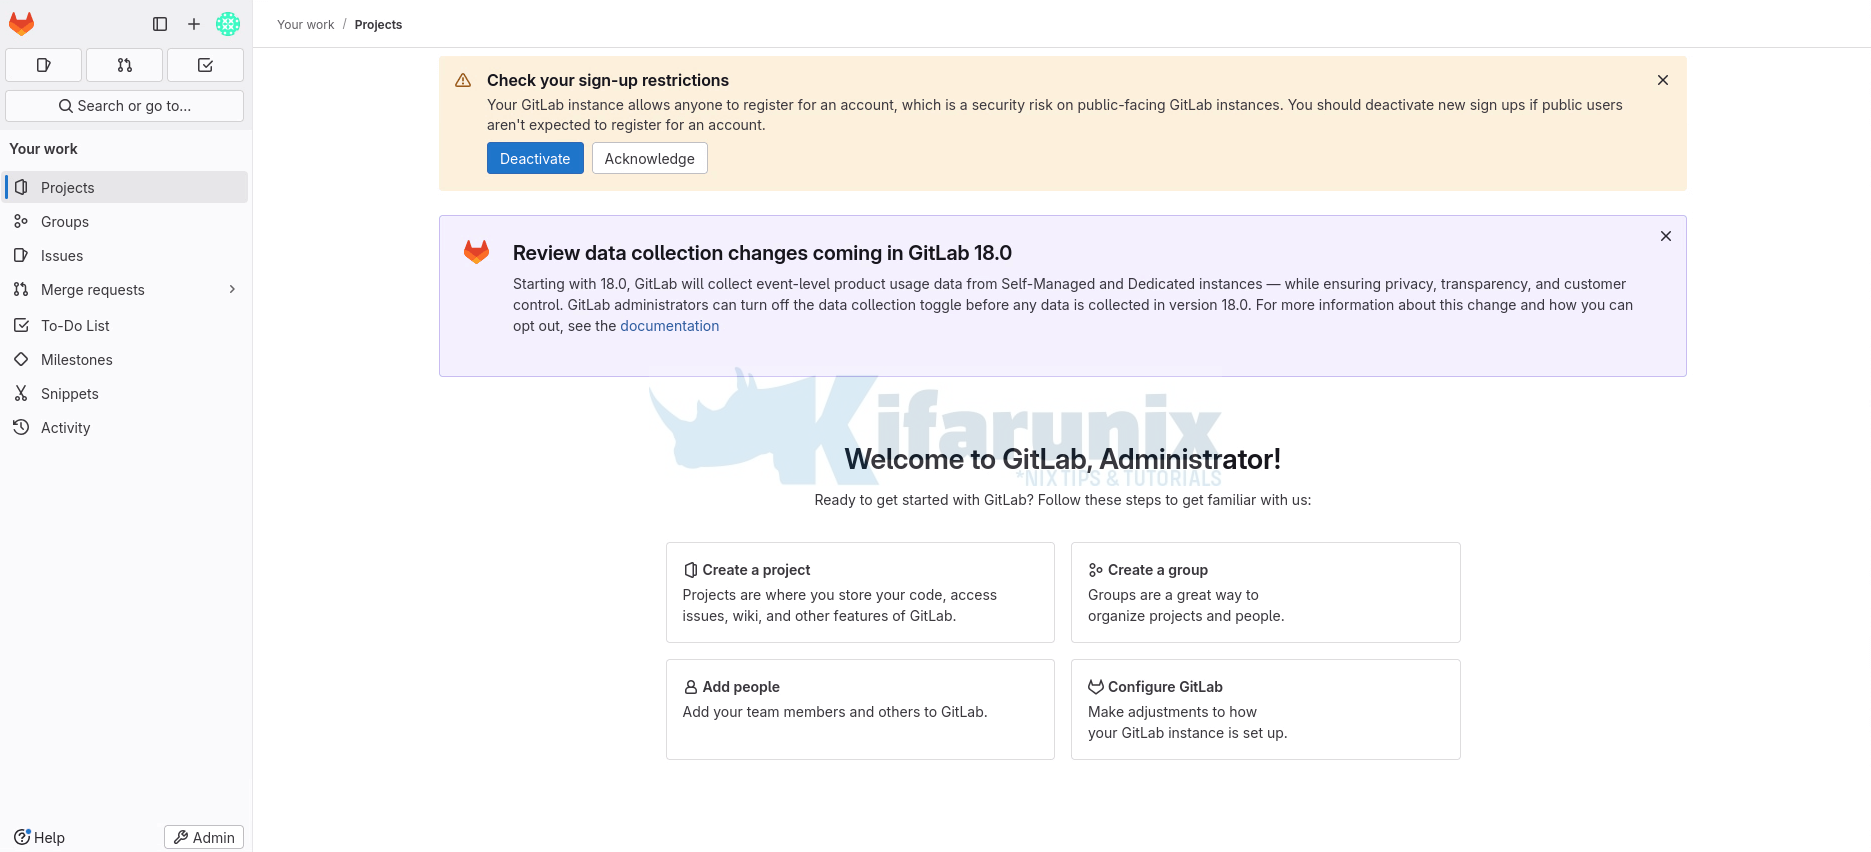
Upon successful login, such an interface welcomes you.

You can disable user self registration by hitting the Deactivate button on the warning shown. Uncheck the user signup options and save the changes.
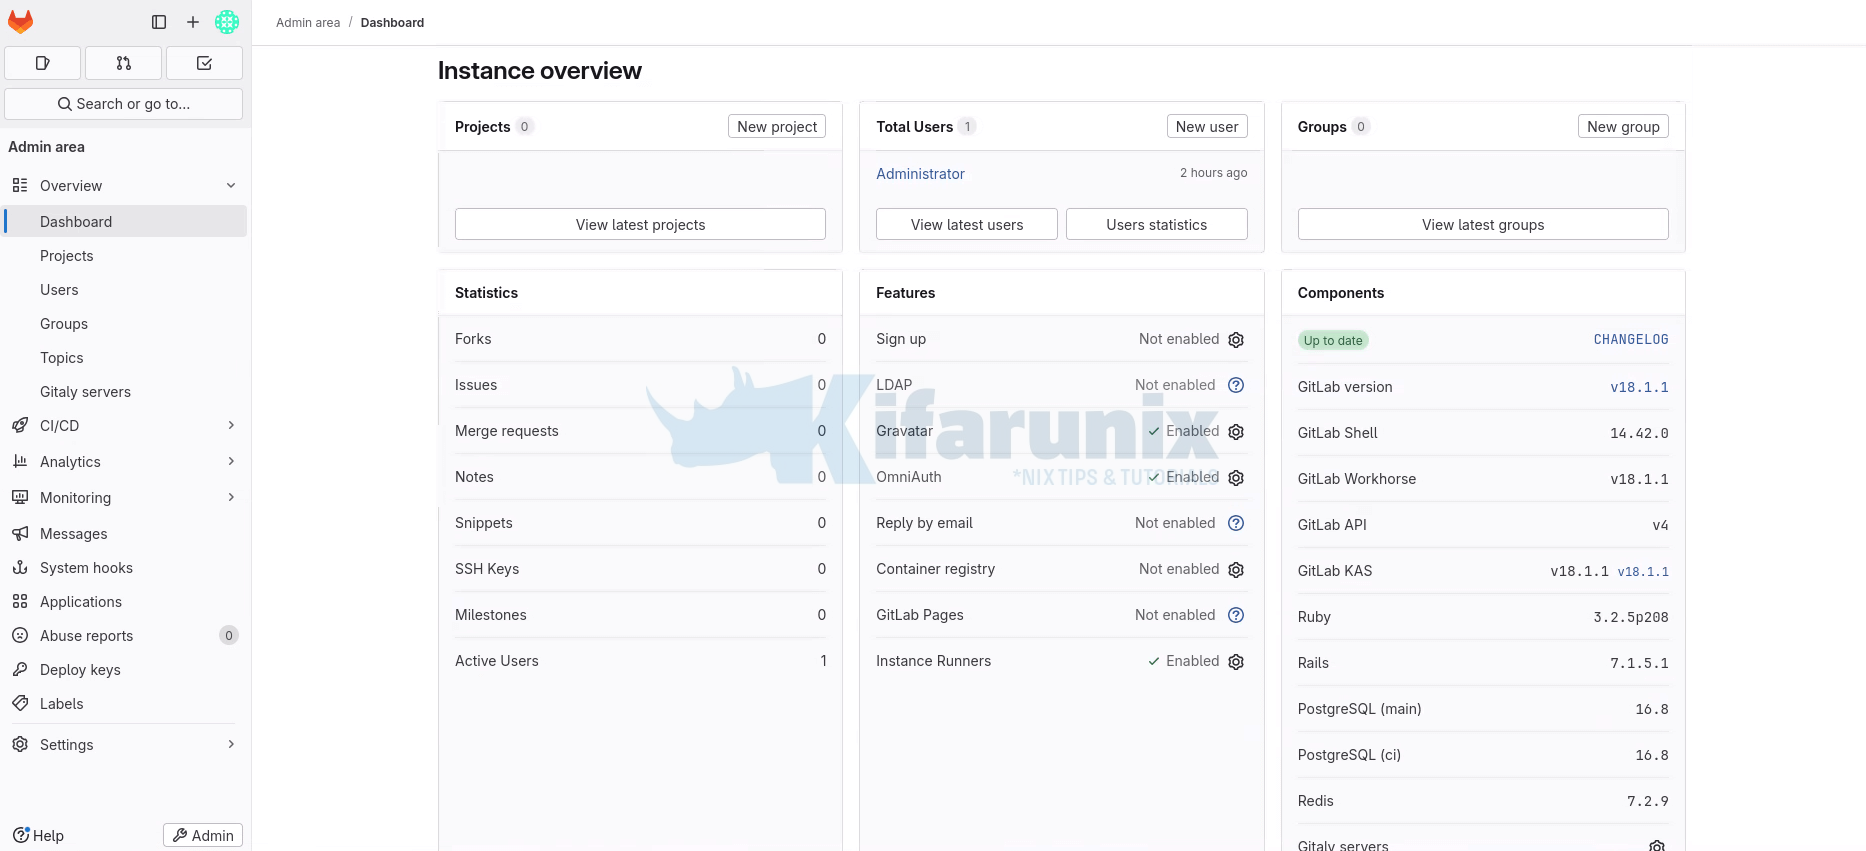
You can access Gitlab web dashboard for user root by clicking Admin Area at the bottom left;

Gitlab is now installed and setup, basically.
That marks the end of our tutorial on how to install Gitlab.
What is next after Installation?
Once Gitlab is up and running, you can now proceed with the next steps outlined on the documentation page.

