Welcome folks to this very tutorial on how to install and setup Zsh and Oh-my-Zsh on Ubuntu 18.04.
Z shell (ZSH) is a Unix shell that can be used as an interactive login shell and as well as a command interpreter for shell scripting. It incorporates features of other shells such as Bash, tcsk, ksh. Some of the features include;
- Smart command TAB auto-completion
- Improved variable/array handling
- Spelling correction
- Enables sharing of command history among all running shells
- Editing of multi-line commands in a single buffer
- It is highly customization
Zsh configuration managed by a delightful, open source and community-driven framework called Oh My Zsh. Oh My Zsh comes bundled with a ton of functions, helpers, plugins and themes that can be used to spice your shell experience.
Table of Contents
Installing ZSH and Oh-My-Zsh on Ubuntu 18.04
Pre-requisites
As a pre-requisite, ensure that the following tools are installed; git, wget, curl
You can install them by running the command below;
sudo apt-get install wget curl git
Install Zsh on Ubuntu
Zsh is available on Ubuntu repositories by default. You can therefore install it using the package manager as shown below;
sudo apt install zsh
Zsh can also be installed from the source by following instructions outlined in INSTALL file in the source code directory. You can get the source code from the locations defined in the Zsh FAQ.
Once the installation is done, you can verify the Zsh version by running the following command;
zsh --version
zsh 5.4.2 (x86_64-ubuntu-linux-gnu)
Configure Zsh
Now that Zsh in installed, make it your default shell by running the command below;
chsh -s $(which zsh)This will the default shell for the current user. If run sudo chsh -s $(which zsh) it will change the default shell for root.
If Zsh is not listed in /etc/shells or if you dont have privileges to run chsh command, then changing your default shell to Zsh will not work. In that case, you may try the solutions suggested here or here.
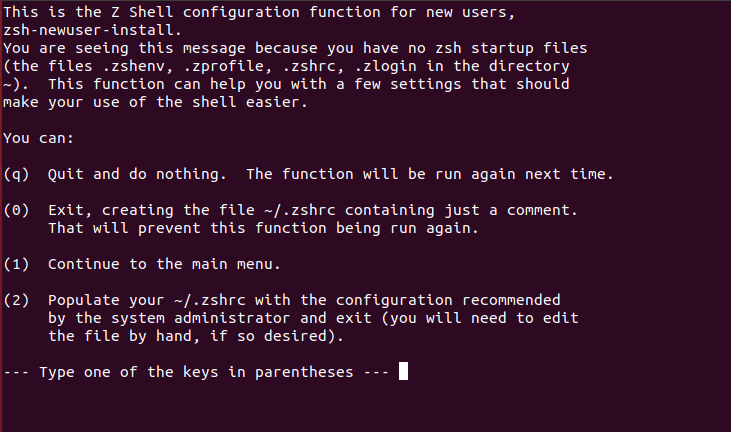
Now, logout and login again in order to use Zsh as your new default shell. You can also just exit the current terminal and open a new one. You will be prompted to set your Zsh start up files. See the screenshot below;

Press option 2 to populate your ~/.zshrc with the default configuration settings.
You can verify that Zsh is actually your default shell by running the following command;
echo $SHELL
/usr/bin/zsh
Install Oh-my-Zsh
In order to manage Zsh, you need to install oh-my-zsh framework. You can use either curl or wget commands to install Oh-my-zsh framework as shown below;
sh -c "$(curl -fsSL https://raw.githubusercontent.com/robbyrussell/oh-my-zsh/master/tools/install.sh)"
or
sh -c "$(wget https://raw.githubusercontent.com/robbyrussell/oh-my-zsh/master/tools/install.sh -O -)"
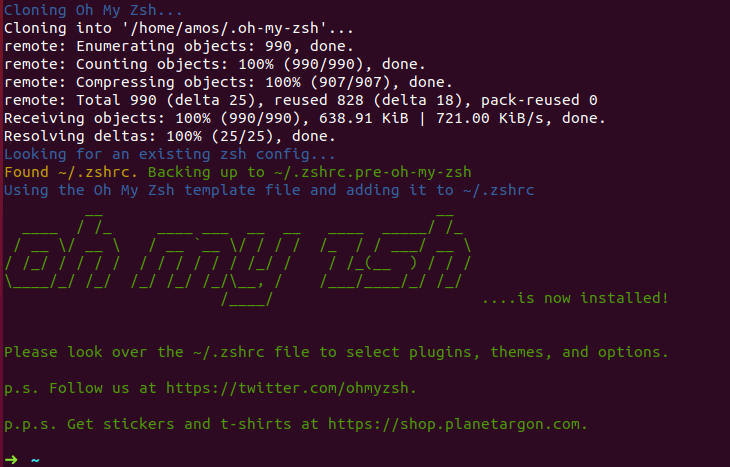
When you run either of the commands above, you should see the output as shown in the screenshot below;

Now that the Zsh management framework is installed, proceed to customize your shell so that you can get the “oh-my-zsh” feeling.
Configuring Oh-My-Zsh
The main configuration file for Zsh is located under $HOME/.zshrc while the Oh-my-Zsh configuration files are located under $HOME/.oh-my-zsh/ directory.
Theme Configuration
Oh-my-Zsh framework comes bundled with several themes located under $HOME/.oh-my-zsh/themes/. Zsh uses the robbyrussel theme.
In order to change the default theme, you need to ediit the ~/.zshrc configuration file and change the value of ZSH_THEME= to your preferred theme. In this case, we are going to use the agnoster theme that is available under oh-my-zsh themes as agnoster.zsh-theme.
To test if agnoster theme is compatible with your terminal and font support, run the command below;
echo "\ue0b0 \u00b1 \ue0a0 \u27a6 \u2718 \u26a1 \u2699" ± ➦ ✘ ⚡ ⚙
Edit the Zsh configuration to set the theme
vim .zshrc
...
# Set name of the theme to load --- if set to "random", it will
# load a random theme each time oh-my-zsh is loaded, in which case,
# to know which specific one was loaded, run: echo $RANDOM_THEME
# See https://github.com/robbyrussell/oh-my-zsh/wiki/Themes
#ZSH_THEME="robbyrussell" < comment out this line
ZSH_THEME="agnoster"
...
Once you have made the changes, save and exit the file and reload the ~/.zshrc to effect the changes.
source ~/.zshrcYou will immediately see the changes as you can see below.

You can also set Zsh to choose the themes randomly by setting the value of ZSH_THEME= to random as in ZSH_THEME="random". With this feature, you can also define a number of random themes to choose from for example;
ZSH_THEME_RANDOM_CANDIDATES=(
  "risto"
  "agnoster"
)
Install Powerline fonts to spice up your fonts;
sudo apt install fonts-powerline
Close the terminal and open a new one again. The prompt shape should have changed.

Enable Oh-My-Zsh Plugins
Just like it is loaded with themes, oh-my-zsh has a lot of plugins located under ~/.oh-my-zsh/plugins. You can also define your custom plugins under ~/.oh-my-zsh/custom/plugins. To enable a plugin, edit the ~/.zshrc and add a plugin under the plugins= parameter.
For example to enable sudo plugin that allows you to enter sudo automatically in case you forgot to type it when running a long command that requires to sudo privileges to excute by pressing ESC twice.
# Which plugins would you like to load?
# Standard plugins can be found in ~/.oh-my-zsh/plugins/*
# Custom plugins may be added to ~/.oh-my-zsh/custom/plugins/
# Example format: plugins=(rails git textmate ruby lighthouse)
# Add wisely, as too many plugins slow down shell startup.
plugins=(
  git
  sudo
)
Once you are done, save the file and source the ~/.zshrc configuration file.

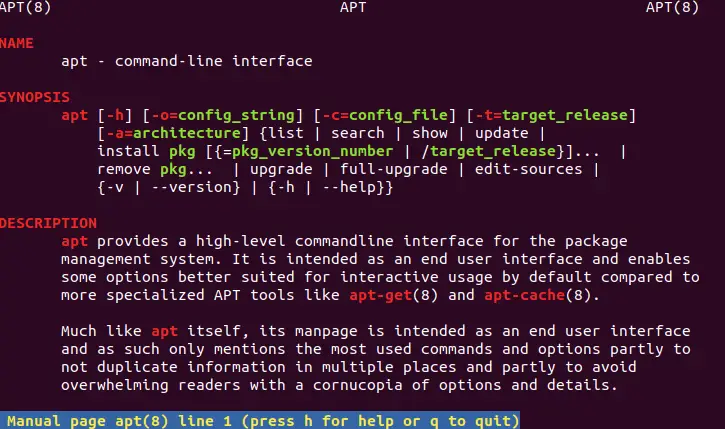
To enable colored man pages plugins, add the plugin’s name to the list and source the ~/.zshrc.
plugins=(
  git
  sudo
  colored-man-pages
)

To enable syntax highlighting custom plugin that can help identify a typo or something similar in your command, install zsh-syntax-highlighting as shown below;
Clone the zsh-syntax-highlighting repository into oh-my-zsh’s custom plugins directory:
git clone https://github.com/zsh-users/zsh-syntax-highlighting.git ${ZSH_CUSTOM:-~/.oh-my-zsh/custom}/plugins/zsh-syntax-highlightingActivate the plugin by adding it to list of plugins in ~/.zshrc
plugins=(
  git
  sudo
  colored-man-pages
  zsh-syntax-highlighting
)
Source ~/.zshrc for the changes to take effect.
source ~/.zshrc
Another awesome plugin is the zsh-autosuggestions plugin which suggests commands as you type, based on command history.
Clone the zsh-autosuggestions repository into oh-my-zsh’s customs plugins directory:
git clone https://github.com/zsh-users/zsh-autosuggestions ${ZSH_CUSTOM:-~/.oh-my-zsh/custom}/plugins/zsh-autosuggestions
Activate the plugin by adding it to list of plugins in ~/.zshrc
plugins=(
  git
  sudo
  colored-man-pages
  zsh-syntax-highlighting
  zsh-autosuggestions
)
Source ~/.zshrc for the changes to take effect.
source ~/.zshrc
If for some reasons, you got a theme issue whereby suggestions text color matches with the background color such that you can’t see the suggestions, you can always adjust the value of ZSH_AUTOSUGGEST_HIGHLIGHT_STYLE variable. Check the configuration.
Well, Zsh is very customizable.
You can customize it the way you want. Feel free to explore this awesome tool. We hope this was informative. Oh-my-Zsh…


Cool guide! thanks.
This tutorial is just perfect, thanks a lot!
Great tutorial!