In this tutorial, you will learn how to configure DokuWiki OpenLDAP authentication. How can I configure DokuWiki to enable authentication against OpenLDAP server. In this guide, we are going to learn how to configure DokuWiki for OpenLDAP authentication.
Configuring DokuWiki for OpenLDAP Authentication
Before you can proceed, ensure that you got OpenLDAP server and DokuWiki installed. Follow the guides below to learn how to setup OpenLDAP and how to install DokuWiki on CentOS 8.
Install and Setup OpenLDAP on CentOS 8
Install Required PHP LDAP Modules
In order to be able to connect to OpenLDAP server, you need to install PHP LDAP module by running the command below;
dnf install php-ldap -yLogin to DokuWiki as Superuser
Once your OpenLDAP and DokuWiki are up and running, login to DokuWiki as a superuser.
Enable DokuWiki LDAP Authentication Plugin
DokuWiki by default, ships with an LDAP Authentication Plugin called authLDAP that allows authentication against an LDAP directory.
All you need to do is to activate the plugin. This can be done on the DokuWiki Extensions Manager.
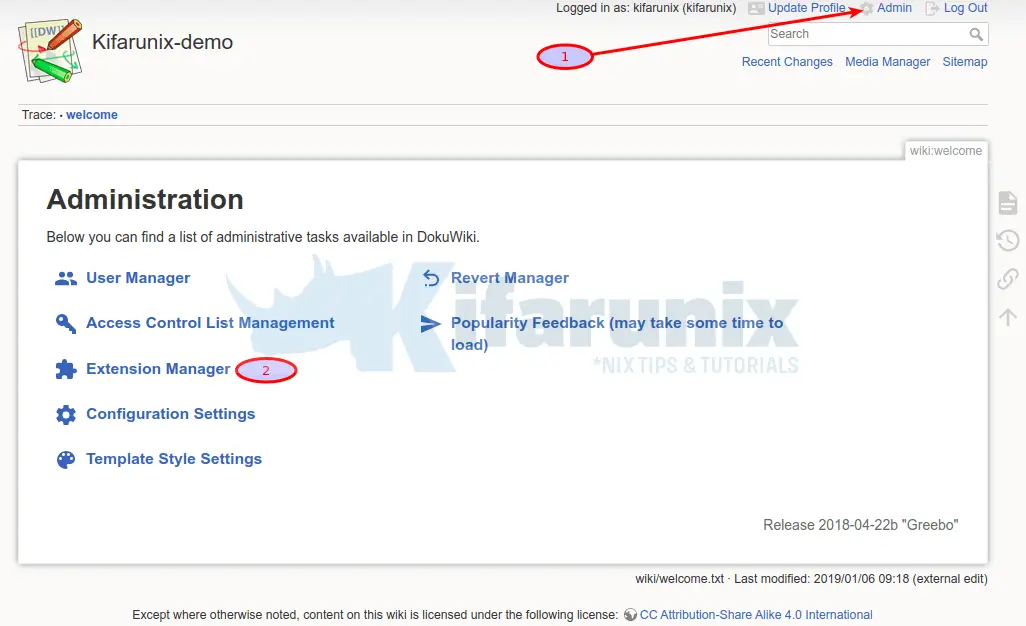
Click Admin tab (with gear icon) at the top of the DokuWiki page and Click Extension Manager on the Administration page that opens up.
On the Extension Manager, Locate LDAP Auth Plugin and beside it, click Enable button to activate the plugin.
Configure DokuWiki OpenLDAP Authentication Settings
Once the plugin is activated, you need to define your OpenLDAP connection settings. This can be done from Configuration Manager.
To access Configuration Manager, go back to DokuWiki Administration page and click Configuration Settings.
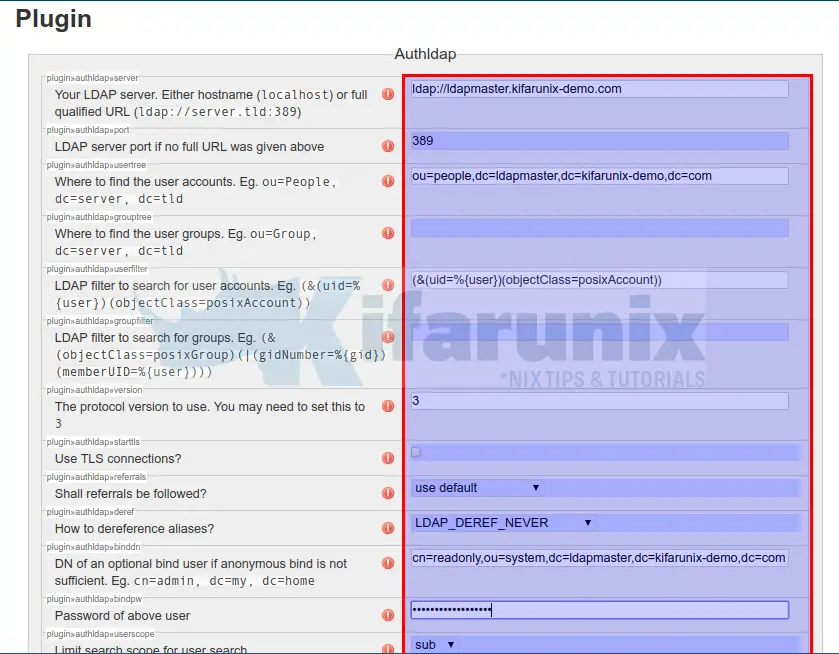
On the Configuration Manager, navigate to Table of Contents on the sidebar > Plugins > authldap. Define your OpenLDAP configuration settings. Be sure to make appropriate changes as per your environment settings.
Define OpenLDAP hostname/URL, the port, the base DN where to find user accounts, the Bind DN user and password and any other relevant setting.
Once you done with configurations, scroll down the page and click save to update your DokuWiki configuration settings.
The changes made are written to the file, /var/www/html/conf/local.php.
less /var/www/html/conf/local.php<?php
/*
* Dokuwiki's Main Configuration File - Local Settings
* Auto-generated by config plugin
* Run for user: kifarunix
* Date: Sat, 01 Feb 2020 15:57:53 +0000
*/
$conf['title'] = 'Kifarunix-demo';
$conf['license'] = 'cc-by-sa';
$conf['useacl'] = 1;
$conf['authtype'] = 'authchained';
$conf['superuser'] = '@admin';
$conf['disableactions'] = 'register';
$conf['plugin']['authldap']['server'] = 'ldap://ldapmaster.kifarunix-demo.com';
$conf['plugin']['authldap']['usertree'] = 'ou=people,dc=ldapmaster,dc=kifarunix-demo,dc=com';
$conf['plugin']['authldap']['userfilter'] = '(&(uid=%{user})(objectClass=posixAccount))';
$conf['plugin']['authldap']['version'] = 3;
$conf['plugin']['authldap']['binddn'] = 'cn=readonly,ou=system,dc=ldapmaster,dc=kifarunix-demo,dc=com';
$conf['plugin']['authldap']['bindpw'] = '<b>aGFja2Vy';
$conf['plugin']['authchained']['authtypes'] = 'authplain:authldap';
// end auto-generated content
Define DokuWiki Default Authentication Method
Once the OpenLDAP settings are defined, proceed to define the default authentication method.
Navigate to Table of Contents > DokuWiki > Authentication.
On the Authentication backend, select authldap and save the changes.
Enable DokuWiki Chained Authentication Plugin
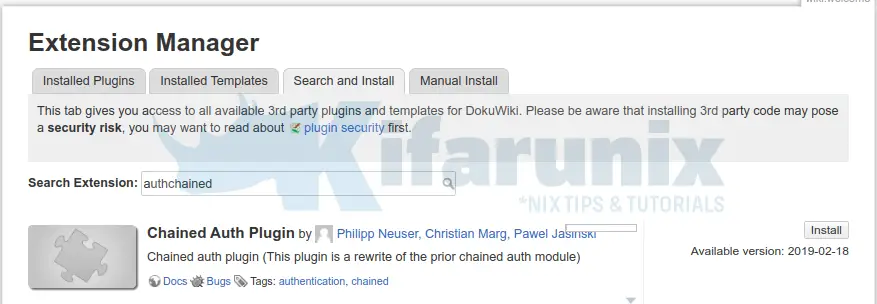
What if OpenLDAP connection fails? Hence, it would good to be able to login using the DokuWiki Superuser account. As such, install and enable Chained Auth Plugin which delegates the authentication to the authentication plugin, which first returns true when checking username and password.
Navigate to Extension Manager and search for the plugin and install it.
Once the plugin is installed successfully, you should be able to see a plugin name, chained authentication plugin under Plugins on the Table of contents.
Next, navigate to Configuration Manager and configure the plugin to enable both plain and LDAP authentication including the fall back authentication backend.
Also, change the default authentication backend to authchained plugin.
Once done with making changes, click the Save button to update the configurations.
Testing DokuWiki OpenLDAP Authentication
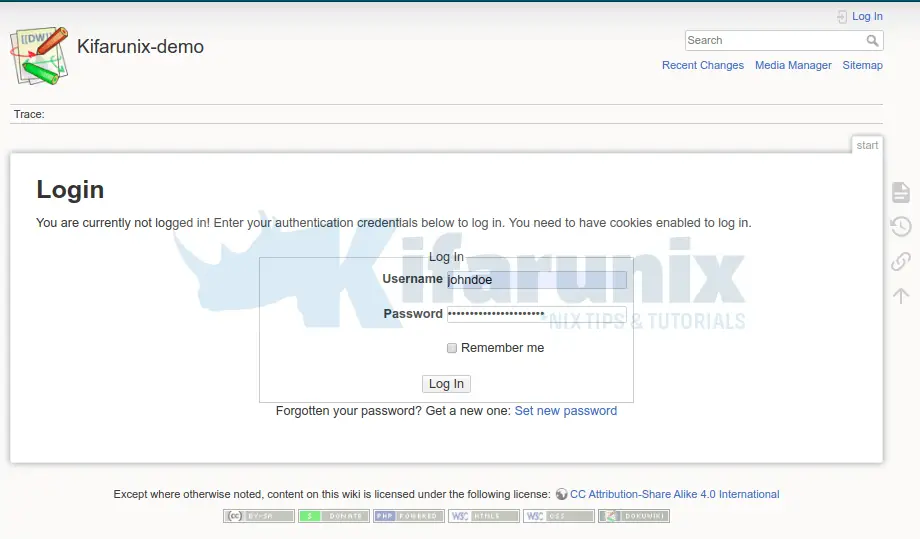
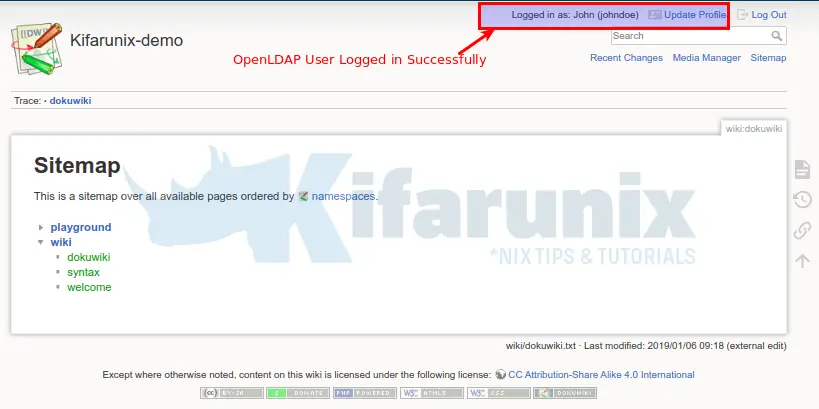
Now, log out of DokuWiki as superuser and login as a user defined on an OpenLDAP server.
And here you go. OpenLDAP user successfully logged in to DokuWiki.
You can further configure Access controls for the users on your DokuWiki.
Reference:
Other Tutorials
Configure ownCloud OpenLDAP Authentication



I feel that is one of the such a lot important info for me. And i’m happy reading your article. However want to remark on some general issues, The website style is perfect, the articles is really great : D. Just right activity, cheers
Wow, that’s what I was searching for, what a stuff! existing here at this blog, thanks admin of this web page.
Good web site you have here.. It’s hard to find good quality writing like yours these days. I truly appreciate people like you! Take care!!
Thank you Kisha. We appreciate your feedback.
Great post.