In this tutorial, you will learn how to quickly and easily install Joomla on Ubuntu 20.04|Ubuntu 18.04 systems. Joomla also spelled as Joomla!, is free and Open Source software, Content Management System (CMS) which enables you to build websites and powerful online applications.
You can read more about Joomla! benefits and core features on Joomla! benefits and core features page.
Installing Joomla on Ubuntu 20.04/18.04
Prerequisites
Joomla is PHP based and as always, you definitely need a LAMP/LEMP stack installed on your Ubuntu 20.04 or Ubuntu 18.04 before you can run Joomla! software. Follow any of the guides below to install either LAMP or LEMP stack.
Install LAMP Stack on Ubuntu 20.04
How to Install LAMP Stack on Ubuntu 18.04 LTS
Install and Setup LEMP Stack on Ubuntu 20.04
How To Setup LEMP Stack on Ubuntu 18.04
Read more on the Joomla! Technical requirements page.
Note, if you want to install PHP 7.4 on Ubuntu 18.04 (default repos provide PHP 7.2), simply install Ondrej third-party PHP PPA repos;
apt install software-properties-commonadd-apt-repository ppa:ondrej/php --yesOnce you install this repo, then you can be able install PHP 7.3 or PHP 7.4 on Ubuntu 18.04.
Install Joomla
Assuming you have already setup LAMP/LEMP stack depending on your setup preferences, proceed to install Joomla! on Ubuntu 20.04|Ubuntu 18.04.
Create Joomla Database and Database User
Joomla! CMS requires a database requires a database for storing data such as articles, menus, categories, and users. If you are using MariaDB or MySQL database, proceed as follows;
Login to MySQL/MariaDB;
mysqlOr
mysql -u root -pNext, create a database and database user. Grant the database user all the rights on the specific Joomla! database. (Be sure to replace the database name, the database user name and the password appropriately).
create database joomladb;create user joomlaadmin@localhost identified by 'changeme';grant all on joomladb.* to joomlaadmin@localhost with grant option;Reload privilege tables and exit;
flush privileges;
quit
Configure PHP for Joomla! CMS
Install other required PHP extensions.
apt install php-gmp php-xml php-gd php-mbstring php-imagick php-zip php-xmlrpcNext, update the following PHP.ini settings with suggested/recommended values;
memory_limit = 256M
upload_max_filesize = 128M
post_max_size = 128M
max_execution_time = 300
output_buffering = Off
Downloading Joomla! Package Files
Next, download the current Joomla! 3.x release package files from the Joomla! 3.x downloads page. As of this writing, Joomla_3.9.23 is the current stable release.
You can simply run the wget command below to pull the Joomla! 3.9.23 package file. Be sure to replace the link for other versions;
wget -P /tmp https://downloads.joomla.org/cms/joomla3/3-9-23/Joomla_3-9-23-Stable-Full_Package.tar.gzExtract Joomla! Package File to Web Root Directory
Once the download completes, extract Joomla! package file to your respective web root directory, /var/www/html/joomla, in our setup;
mkdir /var/www/html/joomlatar xzf /tmp/Joomla_3-9-23-Stable-Full_Package.tar.gz -C /var/www/html/joomla --strip-components=1Once the files are in place, set the proper ownership for the Joomla! directory;
chown -R www-data: /var/www/html/joomlaConfigure Apache/Nginx site configuration for Joomla!
Next, you need to create a site configuration for Joomla! depending on whether you are running Apache or Nginx web server.
For Apache
vim /etc/apache2/sites-available/joomla.conf<VirtualHost *:80>
ServerAdmin [email protected]
DocumentRoot /var/www/html/joomla/
ServerName kifarunix-demo.com
ErrorLog ${APACHE_LOG_DIR}/joomla-error.log
CustomLog ${APACHE_LOG_DIR}/joomla-access.log combined
<Directory /var/www/html/joomla/>
Options FollowSymlinks
AllowOverride All
Require all granted
</Directory>
</VirtualHost>Save and exit the configuration.
For Nginx
vim /etc/nginx/sites-enabled/joomlaserver {
listen 80;
listen [::]:80;
root /var/www/joomla;
index index.php index.html index.htm;
server_name kifarunix-demo.com;
client_max_body_size 100M;
autoindex off;
location ~* /(images|cache|media|logs|tmp)/.*.(php|pl|py|jsp|asp|sh|cgi)$ {
return 403;
error_page 403 /403_error.html;
}
location / {
try_files $uri $uri/ /index.php?$args;
}
location ~ .php$ {
include snippets/fastcgi-php.conf;
fastcgi_pass unix:/run/php/php7.4-fpm.sock;
fastcgi_param SCRIPT_FILENAME $document_root$fastcgi_script_name;
include fastcgi_params;
fastcgi_read_timeout 600;
fastcgi_send_timeout 600;
fastcgi_connect_timeout 600;
}
}Save and exit the configuration file.
Check for syntax on Apache;
apachectl -tSyntax OKCheck for syntax on Nginx;
nginx -tnginx: the configuration file /etc/nginx/nginx.conf syntax is ok
nginx: configuration file /etc/nginx/nginx.conf test is successfulDisable the default sites;
unlink /etc/nginx/sites-enabled/defaulta2dissite 000-default.confEnable the Joomla! sites;
ln -s /etc/nginx/sites-available/joomla /etc/nginx/sites-enabled/joomlaa2ensite joomla.confRestart Nginx (if you are using Nginx)
systemctl restart nginxRestart Apache (if you are using Apache)
systemctl restart apache2Accessing Joomla! Site on Browser
You can now access Joomla! from browser to finalize your site setup. Based on our setup, our URL is http://kifarunix-demo.com.
Be sure to allow external access to the site on firewall, if UFW is running.
ufw allow "Apache Full"The navigate to and access Joomla site from browser.
On the first page, you are welcomed by the Joomla site configuration wizard. Set the name of the site and administrator details.
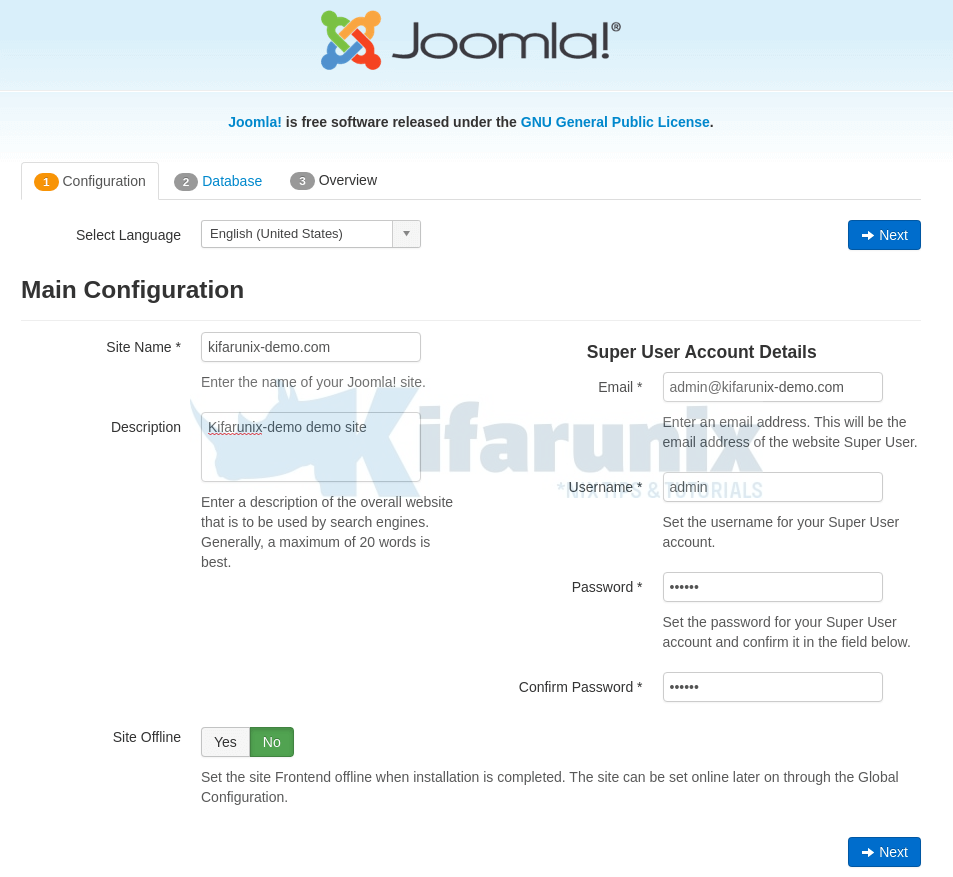
Click Next to configure database connection settings;
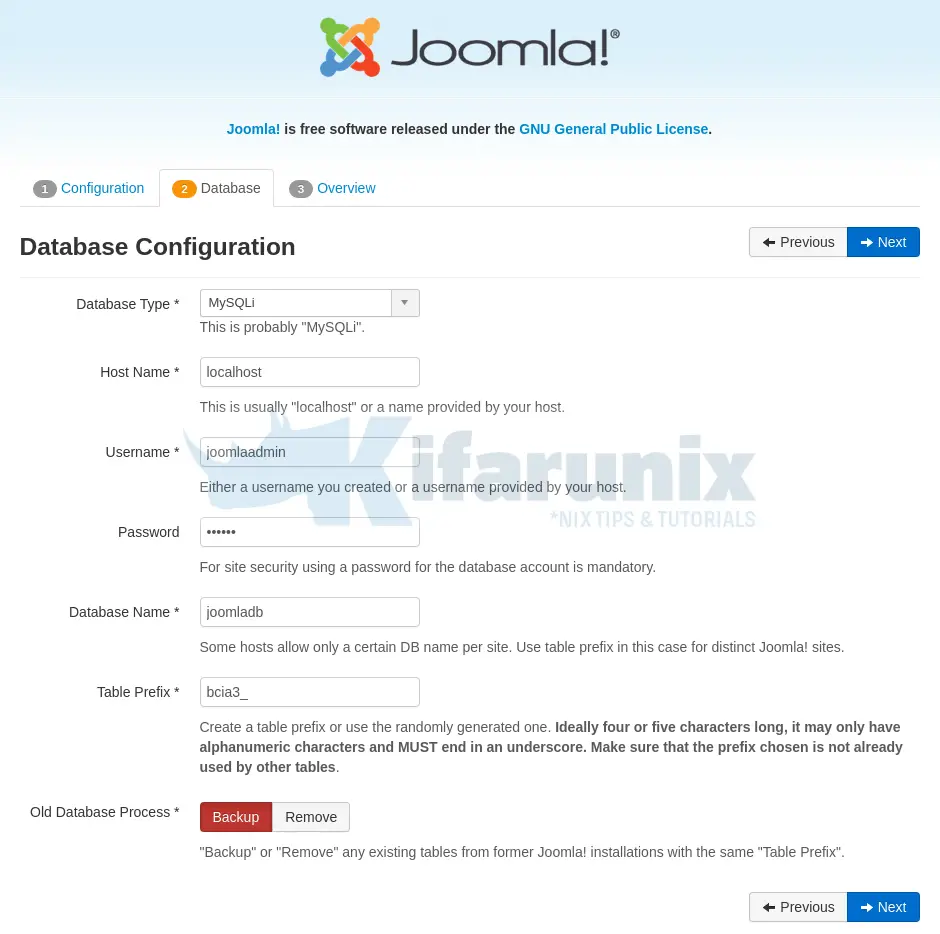
Click Next and go through the setup overview and ensure that everything is fine.
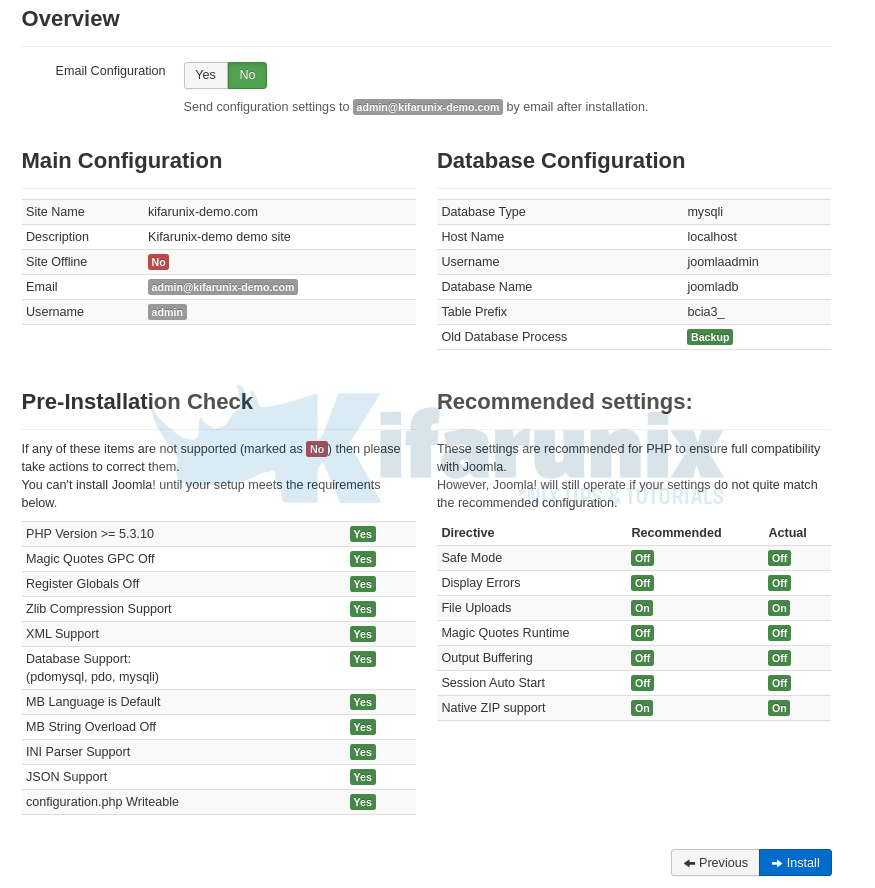
Click Install to Install Joomla!.
Once the installation is done, you should see such a page;
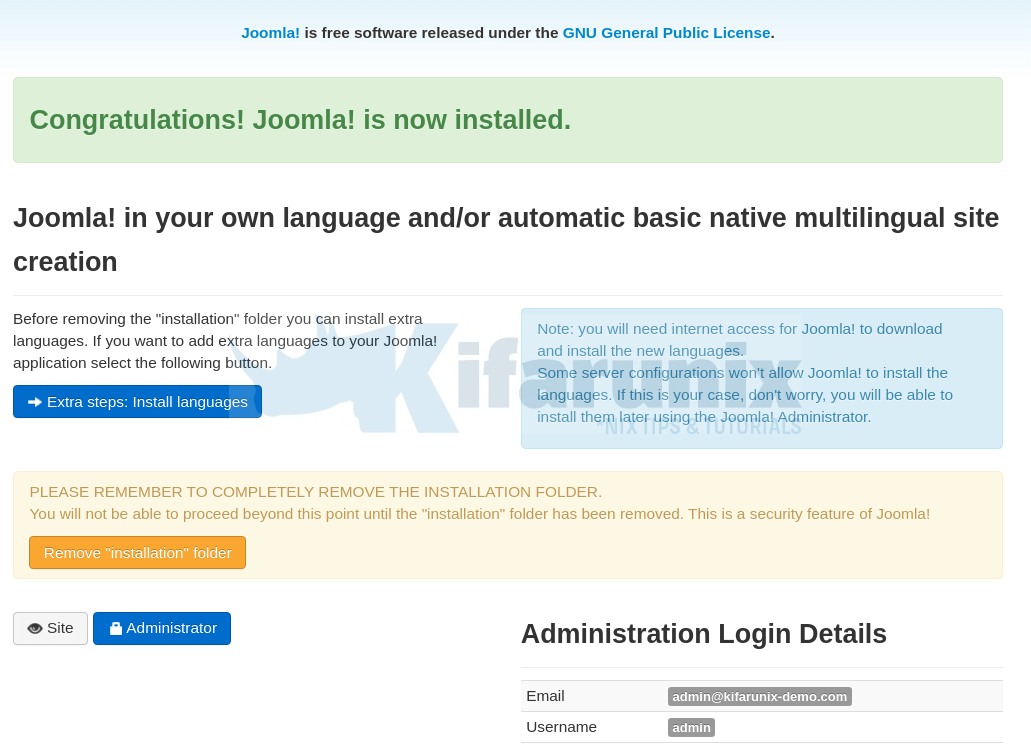
Next, remove installation folder by clicking Remove “installation” folder.
Access your site by clicking on site with an eye icon.
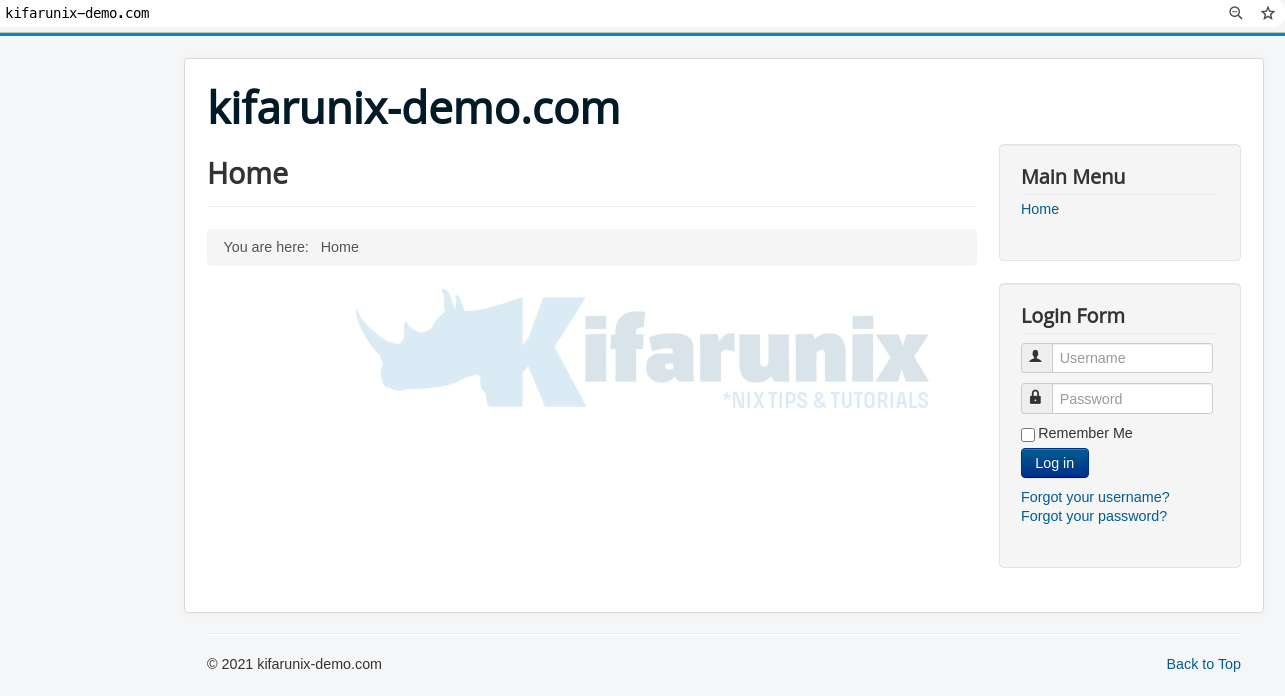
And there you go. You can now proceed to develop your site. That marks the end of our guide on how to install Joomla.
Reference and Further Reading
Other tutorials
Install Automad CMS on Debian 10/Ubuntu 18.04

