How to install Nagios core in Docker? In this tutorial, you will learn how to deploy Nagios as a Docker container. Nagios Core is an open-source IT infrastructure monitoring and alerting engine.
Table of Contents
Deploying Nagios Core as a Docker Container
Install Docker Engine on your Linux host
You need to have installed Docker engine on your Linux host before you can proceed. We will be using Docker CE in this tutorial.
You can check our various guides on how to install Docker on various Linux distros;
Install Docker on Rocky Linux 8
Install Docker CE on Ubuntu 20.04
Install and Use Docker on Debian 10 Buster
Create and Build Nagios Core Docker Image
There could be Nagios docker images out there that have already been created by the community. However, we will build our own image in this setup, just to learn about the whole process.
Thus, create a directory, say under /opt, where you can store all necessary files that we will create for the purposes of creating Nagios core Docker image. The name of the directory could be anything you like!
mkdir /opt/nagios-core-dockerNavigate to the directory above;
cd /opt/nagios-core-docker/Download latest Nagios Core Archive File. As of this writing, Nagios 4.4.9 is the current release version.
wget https://assets.nagios.com/downloads/nagioscore/releases/nagios-4.4.9.tar.gzExtract the source archive;
tar xzf nagios-4.4.9.tar.gzDownload latest Nagios monitoring plugins;
wget https://github.com/nagios-plugins/nagios-plugins/releases/download/release-2.4.2/nagios-plugins-2.4.2.tar.gzExtract the plugins;
tar xzf nagios-plugins-2.4.2.tar.gzYou may also need NRPE plugins (check_nrpe) on the server. Thus, download the latest release version from the releases page;
wget https://github.com/NagiosEnterprises/nrpe/releases/download/nrpe-4.1.0/nrpe-4.1.0.tar.gzExtract the NRPE archive;
tar xzf nrpe-4.1.0.tar.gzYou should now have Nagios and plugins source directory in the current working directory;
ls -d1 */nagios-4.4.9/
nagios-plugins-2.4.2/
nrpe-4.1.0/Next, create Nagios core installation Dockerfile. Dockerfile is a text document that contains all the commands a user could call on the command line to assemble an image.
In the Dockerfile, we are need to define all the commands for the installation and setup of Nagios core server.
In this guide, we will build our Nagios Core Docker image over an Ubuntu 22.04 OS. Hence, the base OS should guide the commands you use.
We will base our setup commands on our Nagios core server installation guide on Ubuntu 22.04;
Install and Setup Nagios on Ubuntu 22.04
Note that we will build Nagios Core from source code.
vim DockerfilePaste the content below;
FROM ubuntu:22.04
RUN apt update -y
RUN echo 'debconf debconf/frontend select Noninteractive' | debconf-set-selections
RUN DEBIAN_FRONTEND=noninteractive
RUN apt install -y \
	autoconf \
	gcc \
	libc6 \
	make \
	wget \
	unzip \
	apache2 \
	apache2-utils \
	php \
	libapache2-mod-php \
	libgd-dev \
	libssl-dev \
	libmcrypt-dev \
	bc \
	gawk \
	dc \
	build-essential \
	snmp \
	libnet-snmp-perl \
	gettext \
	fping \
        iputils-ping \
	qstat \
	dnsutils \
	smbclient
# Building Nagios Core
COPY nagios-4.4.9 /nagios-4.4.9
WORKDIR /nagios-4.4.9
RUN ./configure --with-httpd-conf=/etc/apache2/sites-enabled && \
    make all && \
    make install-groups-users && \
    usermod -aG nagios www-data && \
    make install && \
    make install-init && \
    make install-daemoninit && \
    make install-commandmode && \
    make install-config && \
    make install-webconf && \
    a2enmod rewrite cgi
# Building Nagios Plugins
COPY nagios-plugins-2.4.2 /nagios-plugins-2.4.2
WORKDIR /nagios-plugins-2.4.2
RUN ./configure --with-nagios-user=nagios --with-nagios-group=nagios && \
    make && \
    make install
# Build and Install NRPE Plugins
COPY nrpe-4.1.0 /nrpe-4.1.0
WORKDIR /nrpe-4.1.0
RUN ./configure && \
    make all && \
    make install-plugin
WORKDIR /root
# Copy the Nagios basic auth credentials set in the env file;
COPY .env /usr/local/nagios/etc/
# Add Nagios and Apache Startup script
ADD start.sh /
RUN chmod +x /start.sh

CMD [ "/start.sh" ]
The above will build and install Nagios and Nagios plugins, including check_nrpe plugins on an Ubuntu 22.04 image.
It also copies Nagios basic authentication credentials defined in the environment variables;
vim .envNAGIOSADMIN_USER=nagiosadmin
NAGIOSADMIN_PASSWORD=passwordTo use different credentials, update the above file accordingly. Note that nagiosadmin is the default admin user for accessing Nagios web interface (as specified in the cgi.cfg). You can create or use any other user name and this will be updated in the /usr/local/nagios/etc/cgi.cfg configuration file by commands defined in the start.sh file below.
When you create and run Nagios Docker container using the image we will create, the credentials will be automatically updated based on the values of the environment variables above.
We have also made it in such a way that you can override the Nagios credentials using the NAGIOSADMIN_USER_OVERRIDE and NAGIOSADMIN_PASSWORD_OVERRIDE during runtime using the docker run command.
At the end of the Dockerfile, there is a Nagios and Apache startup script called start.sh.
The script is located in the current working directory and the below are its contents.
cat start.sh
#!/bin/bash
# Load the credentials variables
source /usr/local/nagios/etc/.env

# Override the environment variables if passed as arguments during docker run
if [ -n "$NAGIOSADMIN_USER_OVERRIDE" ]; then
    export NAGIOSADMIN_USER="$NAGIOSADMIN_USER_OVERRIDE"
fi

if [ -n "$NAGIOSADMIN_PASSWORD_OVERRIDE" ]; then
    export NAGIOSADMIN_PASSWORD="$NAGIOSADMIN_PASSWORD_OVERRIDE"
fi

# Update configuration files with the variable values, considering overrides
htpasswd -b -c /usr/local/nagios/etc/htpasswd.users "${NAGIOSADMIN_USER_OVERRIDE:-$NAGIOSADMIN_USER}" "${NAGIOSADMIN_PASSWORD_OVERRIDE:-$NAGIOSADMIN_PASSWORD}"
sed -i "s/nagiosadmin/${NAGIOSADMIN_USER_OVERRIDE:-$NAGIOSADMIN_USER}/g" /usr/local/nagios/etc/cgi.cfg

# Redirect root URL (/) to /nagios
echo 'RedirectMatch ^/$ /nagios' >> /etc/apache2/apache2.conf

# Start Nagios
/etc/init.d/nagios start

#Start Apache
a2dissite 000-default default-ssl
rm -rf /run/apache2/apache2.pid
. /etc/apache2/envvars
. /etc/default/apache-htcacheclean
/usr/sbin/apache2 -DFOREGROUND
With that in place, you can now build your Nagios core 4.4.9 docker image;
docker build -t nagios-core:4.4.9 .After a short while, your Nagios core Docker image should be build.
docker imagesSample output;
REPOSITORY           TAG       IMAGE ID       CREATED          SIZE
nagios-core          4.4.9     7c4a7e95a2b0   9 minutes ago   753MB
ubuntu               22.04     6b7dfa7e8fdb   4 weeks ago     77.8MB
Your image is now ready for use!
Create Nagios Core Docker Container
To confirm whether our image works fine, create and run the Nagios core docker container based on the Nagios image created above for testing.
docker run --name nagios-core-4.4.9 -dp 80:80 nagios-core:4.4.9To override credentials defined in the .env file, use the command;
docker run \
-e NAGIOSADMIN_USER_OVERRIDE=monadmin \
-e NAGIOSADMIN_PASSWORD_OVERRIDE=password \
--name nagios-core-4.4.9 -dp 80:80 nagios-core:4.4.9
Check created containers thereafter;
docker container lsCONTAINER ID IMAGE COMMAND CREATED STATUS PORTS NAMES
afc2c2cacb9f nagios-core:4.4.9 "/start.sh" 5 seconds ago Up 5 seconds 0.0.0.0:80->80/tcp, :::80->80/tcp nagios-core-4.4.9As you can see, all is good!
You can check the logs if any issue;
docker logs --tail 200 <container name>e.g;
docker logs --tail 200 nagios-core-4.4.9Or just check the logs from /var/lib/docker/containers/ folder.
tail -f /var/lib/docker/containers/<container-ID>/<container-ID>.logReplace container-ID with your container ID!
Accessing Nagios Core Web Interface
To check if all is good, you can now access Nagios Core web interface;
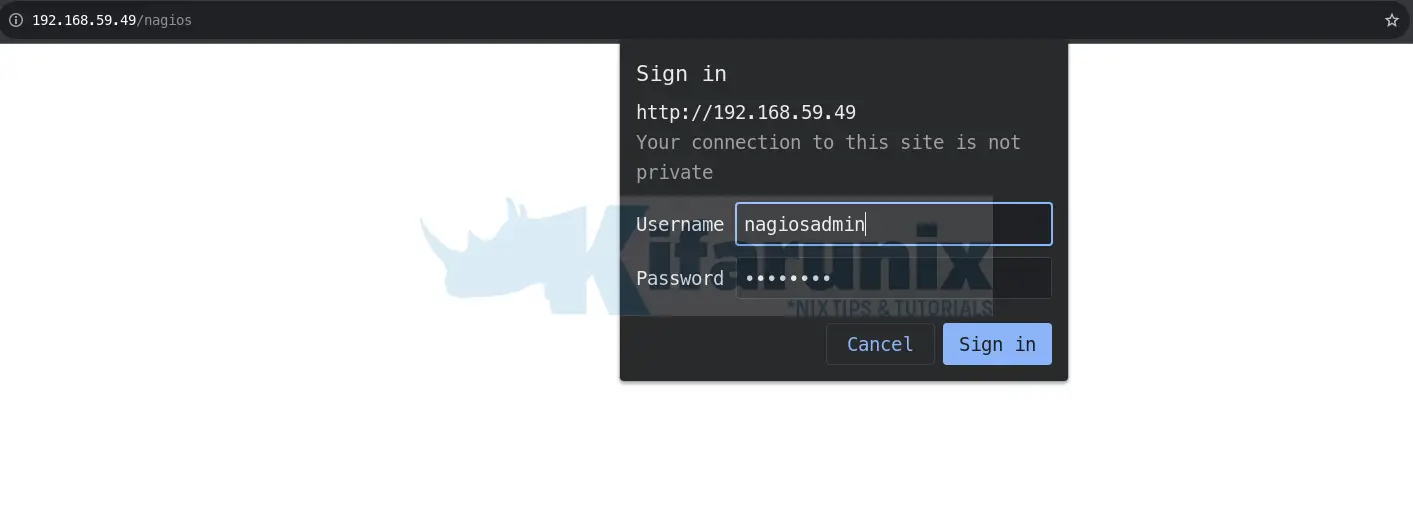
http://docker-host-IP-or-hostname/nagios/When prompted, enter the username and password defined in the environment variables.
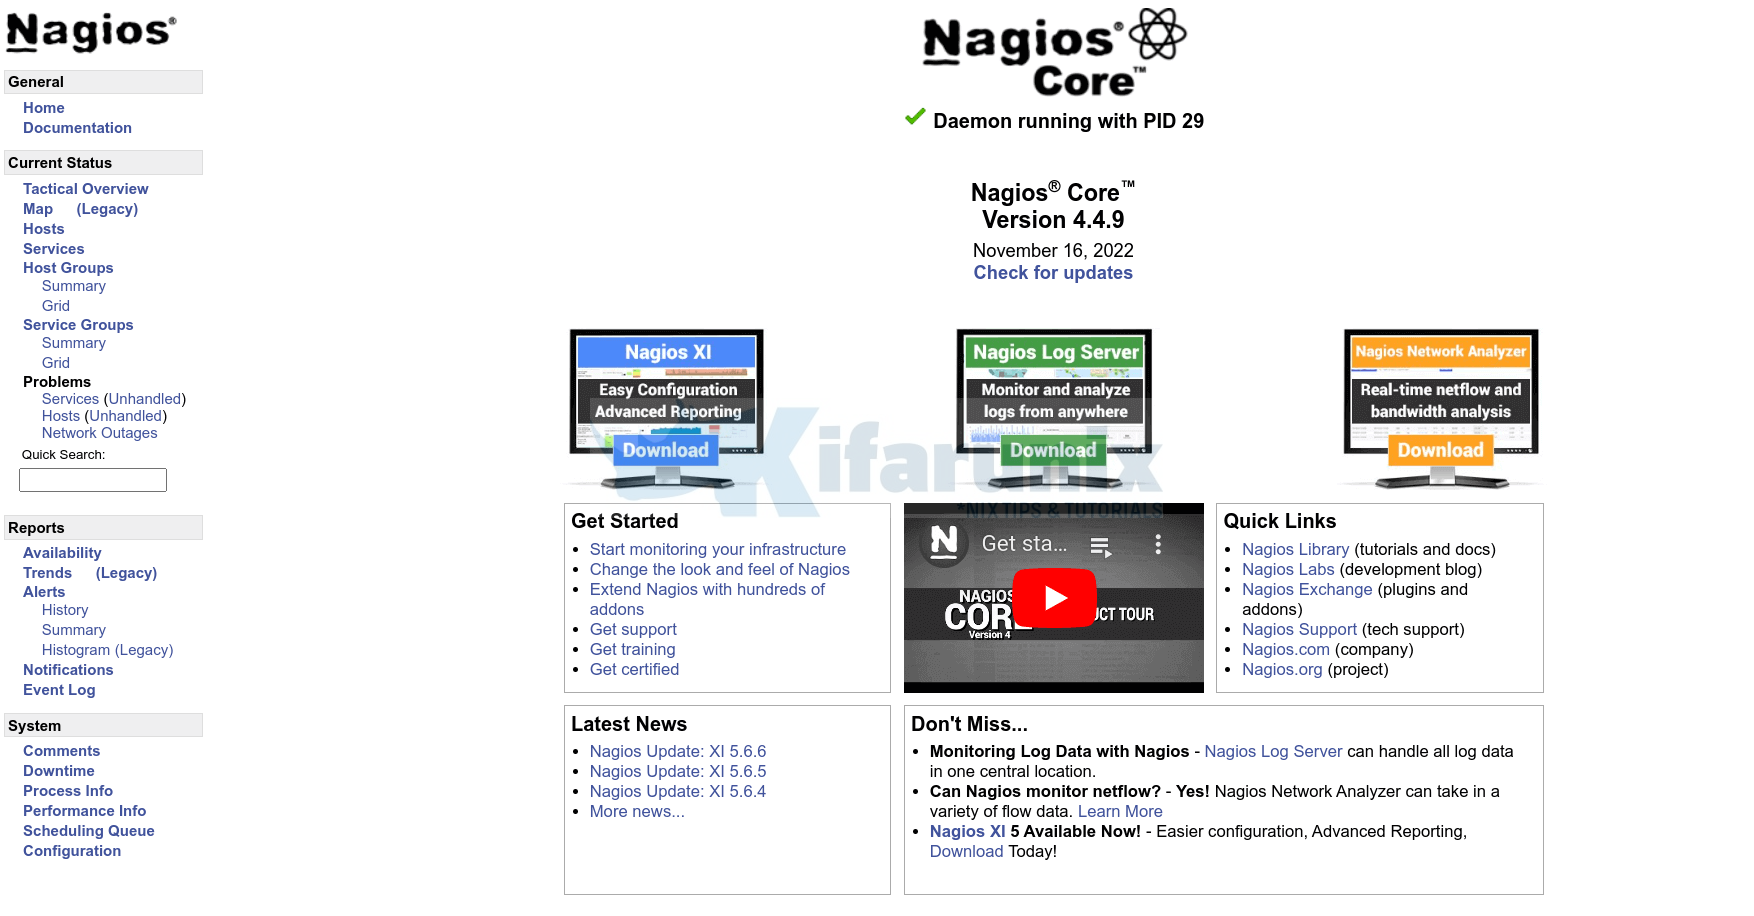
Default Nagios Dashboard
And voila! It seems to be working.
Check the host and services status;
host status (showing status of the docker container itself!)
Service status;
It is almost working, right? -:)
Configure Nagios Docker Container to Monitor your Infrastructure
With the default configuration, you are good to go. But let us make it easy to configure Nagios Docker container for monitoring.
To make it easy to configure Nagios Docker container for monitoring your endpoints, we will copy the main Nagios configuration files listed below into the host;
- cgi.cfg
- nagios.cfg
- objects
- resource.cfg
Next, copy the above configs from the just created Nagios docker container into the directory with the Nagios docker container files;
You can copy files from the Docker container to the host using docker cp command.
docker cp [OPTIONS] CONTAINER:SRC_PATH DEST_PATHe.g;
docker cp nagios-core-4.4.9:/usr/local/nagios/etc /opt/nagios-core-docker/You should now have the configs files/directories above on the docker host.
ls -1 etc/Sample output;
cgi.cfg
htpasswd.users
nagios.cfg
objects
resource.cfg
To begin the configuration, let’s disable SSH service checks for the localhost by commenting out SSH service definition;
vim /opt/nagios-core-docker/etc/objects/localhost.cfg#define service {
#
# use local-service ; Name of service template to use
# host_name localhost
# service_description SSH
# check_command check_ssh
# notifications_enabled 0
#}
Save and exit the file.
To use this configurations on the container, you need to mount them using the -v/--volume option to docker run command.
docker run --help-v, --volume list Bind mount a volumeSo, to use our new configs, remove the old container and start a new one with the new configs;
docker container rm -f nagios-core-4.4.9Check Nagios core Docker container configuration for errors before you can start the container;
docker run --rm -v "/opt/nagios-core-docker/etc:/usr/local/nagios/etc" \
-ti nagios-core:4.4.9 /usr/local/nagios/bin/nagios -v /usr/local/nagios/etc/nagios.cfg
Sample config check output;
Nagios Core 4.4.9
Copyright (c) 2009-present Nagios Core Development Team and Community Contributors
Copyright (c) 1999-2009 Ethan Galstad
Last Modified: 2022-11-16
License: GPL

Website: https://www.nagios.org
Reading configuration data...
   Read main config file okay...
   Read object config files okay...

Running pre-flight check on configuration data...

Checking objects...
	Checked 7 services.
	Checked 1 hosts.
	Checked 1 host groups.
	Checked 0 service groups.
	Checked 1 contacts.
	Checked 1 contact groups.
	Checked 24 commands.
	Checked 5 time periods.
	Checked 0 host escalations.
	Checked 0 service escalations.
Checking for circular paths...
	Checked 1 hosts
	Checked 0 service dependencies
	Checked 0 host dependencies
	Checked 5 timeperiods
Checking global event handlers...
Checking obsessive compulsive processor commands...
Checking misc settings...

Total Warnings: 0
Total Errors:   0

Things look okay - No serious problems were detected during the pre-flight check
Start new container with new configs mounted!
docker run --name nagios-core-4.4.9 -dp 80:80 \
-v "/opt/nagios-core-docker/etc:/usr/local/nagios/etc" \
nagios-core:4.4.9
You can also enable the container to restart on crash or system reboot using the option --restart unless-stopped;
docker run --name nagios-core-4.4.9 --restart unless-stopped \
-dp 80:80 \
-v "/opt/nagios-core-docker/etc:/usr/local/nagios/etc" \
nagios-core:4.4.9
Add Hosts to Monitor
Adding hosts, creating host and service definition templates on Nagios core docker container is just the same as you would on to Nagios installed on a server except that, we are controlling the configurations via bind mounts in this guide.
So take for example, I want to add another host reachable via the IP 192.168.56.146 to Nagios Core for monitoring, I could create a custom configs directory under objects directory;
mkdir /opt/nagios-core-docker/etc/objects/kifarunixIf you are using a custom configuration directory, make Nagios aware of the same!
sed -i '/OBJECT CACHE FILE/i cfg_dir=/usr/local/nagios/etc/objects/kifarunix\n' /opt/nagios-core-docker/etc/nagios.cfgCreate your hosts and hostgroups definition configuration file.
vim /opt/nagios-core-docker/etc/objects/kifarunix/host-hostgroups.cfgdefine host {
use linux-server
host_name elk-stack
alias ELK-STACK-NODE
address 192.168.56.146
}
Note that we use a default host definition template above. You can create your own!
Save and exit the configuration file.
Check the config for errors again!
docker run --rm -v "/opt/nagios-core-docker/etc:/usr/local/nagios/etc" \
-ti nagios-core:4.4.9 /usr/local/nagios/bin/nagios -v /usr/local/nagios/etc/nagios.cfg
Remove and start a new container;
docker container rm -f nagios-core-4.4.9docker run --name nagios-core-4.4.9 -dp 80:80 -v "/opt/nagios-core-docker/etc:/usr/local/nagios/etc" nagios-core:4.4.9When you check on Nagios web interface, you host should now be added!

And there you go!
You can now add services as well.
That brings us to the end of our tutorial on how to deploy Nagios as a Docker container.
Other Tutorials
Install Dozzle Real-Time Log Viewer for Docker Containers on Ubuntu


Thx,
A real good instruction page.
One, I can run without any issue or error and leads to a solution.
regards
glad it helped, Pascal