In this guide, you will to learn how to deploy all-in-one OpenStack with Kolla-Ansible on Ubuntu 18.04.
Kolla provides Docker containers and Ansible playbooks to meet Kolla’s mission. Kolla’s mission is to provide production-ready containers and deployment tools for operating OpenStack clouds. It allows the operators with minimal experience to deploy OpenStack quickly and as experience grows modify the OpenStack configuration to suit the operator’s exact requirements.
Table of Contents
Deploying All-In-One OpenStack with Kolla-Ansible on Ubuntu
System Requirements
Below are the recommended minimum requirements for deploying AIO OpenStack with Kolla-Ansible:
- 2 (or more) network interfaces.
- At least 8gb main memory
- At least 40gb disk space
Below are our deployment system specifics;
| Interfaces | 2 network interfaces: enp1s0: 192.168.122.216/24 enp6s0: no assigned IP address |
| RAM | 8 GB |
| vCPUs | 2 |
| Storage | /dev/vda (root filesystem), /: 50G /dev/vda5 (Volume group, openstack_cinder): 50G |
| Virtualization Platform | KVM |
| Operating System | Ubuntu 18.04 LTS |
| User | non root user with sudo rights |
You can provide as much resources since the more resources you have the better the performance of the stack.
NOTE: We are running the installation as non root user with sudo privileges.
Install Required Packages on Ubuntu 18.04
Before you can proceed, there are a number of required packages that needs to be installed.
Update and upgrade your system packages
sudo apt updatesudo apt upgradeInstall the required packages;
sudo apt install python3-dev python3-venv libffi-dev gcc libssl-dev gitCreate a virtual environment for deploying Kolla-ansible. To avoid conflict between system packages and Kolla-ansible packages, it is recommended that Kolla-ansible be installed in a virtual environment.
You can create a virtual environment by executing the command below. Be sure to replace the path to your virtual environment.
python3 -m venv $HOME/kolla-openstackNext, activate your virtual environment;
source $HOME/kolla-openstack/bin/activateOnce you activate the Kolla-ansible virtual environment, you shell prompt should change. See my shell prompt;
(kolla-openstack) koromicha@kolla-ansible:~$Upgrade pip;
pip install -U pipInstall Ansible on Ubuntu 18.04
Install Ansible from the virtual environment. If you ever log out of the virtual environment, you can always source the path to activate it;
source $HOME/kolla-openstack/bin/activateNext, install Ansible. Kolla requires at least Ansible 2.8 up to 2.9.
pip install 'ansible<2.10'Create an ansible configuration file on your home directory with the following tunables;
vim $HOME/ansible.cfg[defaults]
host_key_checking=False
pipelining=True
forks=100Install Kolla-ansible on Ubuntu 18.04
Install Kolla-ansible on Ubuntu 18.04 using pip from the virtual environment above;
source $HOME/kolla-openstack/bin/activatepip install kolla-ansibleConfigure Kolla-ansible for All-in-one OpenStack Deployment
Next, create Kolla configuration directory;
sudo mkdir /etc/kollaUpdate the ownership of the Kolla config directory to the user with which you activated Koll-ansible deployment virtual environment as.
sudo chown $USER:$USER /etc/kollaCopy the main Kolla configuration file, globals.yml and the OpenStack services passwords file, passwords.yml into the Kolla configuration directory above from the virtual environment.
cp $HOME/kolla-openstack/share/kolla-ansible/etc_examples/kolla/* /etc/kolla/Copy Kolla-ansible deployment inventory to the current working directory. In this tutorial, we are deploying all-in-one OpenStack with Kolla-ansible. Hence, copy the all-in-one ansible inventory file.
cp $HOME/kolla-openstack/share/kolla-ansible/ansible/inventory/all-in-one .Define Kolla-Ansible Global Deployment Options
Open the globals.yml configuration file and define the AIO Kolla global deployment options;
vim /etc/kolla/globals.ymlBelow are the basic options that we enabled for our AIO OpenStack deployment.
grep -vE '^$|^#' /etc/kolla/globals.yml---
config_strategy: "COPY_ALWAYS"
kolla_base_distro: "ubuntu"
kolla_install_type: "binary"
openstack_release: "ussuri"
kolla_internal_vip_address: "192.168.122.206"
kolla_internal_fqdn: "kolla-openstack.kifarunix-demo.com"
kolla_external_vip_address: "{{ kolla_internal_vip_address }}"
kolla_external_fqdn: "{{ kolla_internal_fqdn }}"
network_interface: "enp1s0"
neutron_external_interface: "enp6s0"
neutron_plugin_agent: "openvswitch"
enable_haproxy: "yes"
enable_cinder: "yes"
enable_cinder_backend_lvm: "yes"
keystone_token_provider: 'fernet'
cinder_volume_group: "openstack_cinder"
nova_compute_virt_type: "qemu"
Note that we enabled cinder block storage for openstack and defined the name of the existing volume group.
sudo vgs VG #PV #LV #SN Attr VSize VFree
openstack_cinder 1 0 0 wz--n- <53.06g <53.06gRefer to Kolla-ansible documentation guide to learn more about the global options used above. The configuration is also highly commented. Go through the comments for each option to learn what it is about a specific option.
Generate Kolla Passwords
Kolla passwords.yml configuration file stores various OpenStack services passwords. You can automatically generate the password using the Kolla-ansible kolla-genpwd in your virtual environment.
Ensure that your virtual environment is activated
source $HOME/kolla-openstack/bin/activateNext, generate the passwords;
kolla-genpwdAll generated passwords will be populated to /etc/kolla/passwords.yml file.
Configure All-in-one OpenStack deployment Inventory
You now have our deployment inventory in place. Since we are running an all-in-one deployment, we will leave all the default options defined on the all-in-one inventory file as is.
Deploy All-In-One OpenStack
Since everything is setup, you can now start to deploy OpenStack using Kolla-ansible playbooks.
Again, ensure that your virtual environment is activated.
source $HOME/kolla-openstack/bin/activateBootstrap your localhost configuration before deploying containers using bootstrap-servers subcommand.
kolla-ansible -i all-in-one bootstrap-serversBelow is just a snippet of the bootstrapping command;
...
TASK [baremetal : Restart docker] ******************************************************************************************************************************************
changed: [localhost]

TASK [baremetal : Enable docker] *******************************************************************************************************************************************
ok: [localhost]

TASK [baremetal : Stop time service] ***************************************************************************************************************************************
skipping: [localhost]

TASK [baremetal : Stop time service] ***************************************************************************************************************************************
skipping: [localhost]

TASK [baremetal : Synchronizing time one-time] *****************************************************************************************************************************
skipping: [localhost]

TASK [baremetal : Start time sync service] *********************************************************************************************************************************
skipping: [localhost]

TASK [baremetal : Start time sync service] *********************************************************************************************************************************
skipping: [localhost]

TASK [baremetal : Change state of selinux] *********************************************************************************************************************************
skipping: [localhost]

TASK [baremetal : include_tasks] *******************************************************************************************************************************************
skipping: [localhost]

PLAY RECAP *****************************************************************************************************************************************************************
localhost                  : ok=39   changed=16   unreachable=0    failed=0    skipped=32   rescued=0    ignored=0
This is what the bootstrap command do;
- Customisation of
/etc/hosts - Creation of user and group
- Kolla configuration directory
- Package installation and removal
- Docker engine installation and configuration
- Disabling firewalls
- Creation of Python virtual environment
- Configuration of Apparmor
- Configuration of SELinux
- Configuration of NTP daemon
Run pre-deployment checks;
kolla-ansible -i all-in-one prechecksIf everything is fine, proceed to deploy OpenStack with Kolla-ansible
kolla-ansible -i all-in-one deployThe process might take a while as it involves building containers for different OpenStack services.
If all ends well, you should get 0 failed tasks;
...
PLAY RECAP *****************************************************************************************************************************************************************
localhost                  : ok=366  changed=72   unreachable=0    failed=0    skipped=245  rescued=0    ignored=0
List Running OpenStack Docker Containers
Once the deployment is done, you can list running OpenStack docker containers.
docker psCONTAINER ID IMAGE COMMAND CREATED STATUS PORTS NAMES
c6b248403560 kolla/ubuntu-binary-horizon:ussuri "dumb-init --single-…" 8 minutes ago Up 8 minutes horizon
2beb267813bf kolla/ubuntu-binary-heat-engine:ussuri "dumb-init --single-…" 10 minutes ago Up 10 minutes heat_engine
5870b0231ebd kolla/ubuntu-binary-heat-api-cfn:ussuri "dumb-init --single-…" 10 minutes ago Up 10 minutes heat_api_cfn
66f4ed832ddd kolla/ubuntu-binary-heat-api:ussuri "dumb-init --single-…" 11 minutes ago Up 11 minutes heat_api
f2bb8fada9a7 kolla/ubuntu-binary-neutron-metadata-agent:ussuri "dumb-init --single-…" 14 minutes ago Up 14 minutes neutron_metadata_agent
f9d5336ac7c6 kolla/ubuntu-binary-neutron-l3-agent:ussuri "dumb-init --single-…" 14 minutes ago Up 14 minutes neutron_l3_agent
9d03c6194140 kolla/ubuntu-binary-neutron-dhcp-agent:ussuri "dumb-init --single-…" 14 minutes ago Up 14 minutes neutron_dhcp_agent
a19896229e01 kolla/ubuntu-binary-neutron-openvswitch-agent:ussuri "dumb-init --single-…" 15 minutes ago Up 15 minutes neutron_openvswitch_agent
4fb2a327014a kolla/ubuntu-binary-neutron-server:ussuri "dumb-init --single-…" 15 minutes ago Up 15 minutes neutron_server
c5afee94823a kolla/ubuntu-binary-openvswitch-vswitchd:ussuri "dumb-init --single-…" 25 minutes ago Up 25 minutes openvswitch_vswitchd
84c10bfce945 kolla/ubuntu-binary-openvswitch-db-server:ussuri "dumb-init --single-…" 25 minutes ago Up 25 minutes openvswitch_db
1b4b0189c044 kolla/ubuntu-binary-nova-compute:ussuri "dumb-init --single-…" 49 minutes ago Up 33 minutes nova_compute
410bc4a9ac94 kolla/ubuntu-binary-nova-libvirt:ussuri "dumb-init --single-…" 51 minutes ago Up 33 minutes nova_libvirt
286aabab9557 kolla/ubuntu-binary-nova-ssh:ussuri "dumb-init --single-…" 53 minutes ago Up 33 minutes nova_ssh
f7ade004aba0 kolla/ubuntu-binary-nova-novncproxy:ussuri "dumb-init --single-…" 54 minutes ago Up 34 minutes nova_novncproxy
ce053ee3936c kolla/ubuntu-binary-nova-conductor:ussuri "dumb-init --single-…" 54 minutes ago Up 33 minutes nova_conductor
9ace1abb6b13 kolla/ubuntu-binary-nova-api:ussuri "dumb-init --single-…" 54 minutes ago Up 33 minutes nova_api
93ec899f31e3 kolla/ubuntu-binary-nova-scheduler:ussuri "dumb-init --single-…" 54 minutes ago Up 32 minutes nova_scheduler
71675d26922b kolla/ubuntu-binary-placement-api:ussuri "dumb-init --single-…" About an hour ago Up 33 minutes placement_api
022bc9dd585c kolla/ubuntu-binary-cinder-backup:ussuri "dumb-init --single-…" About an hour ago Up 32 minutes cinder_backup
10f728092b34 kolla/ubuntu-binary-cinder-volume:ussuri "dumb-init --single-…" About an hour ago Up 33 minutes cinder_volume
e34abeac698c kolla/ubuntu-binary-cinder-scheduler:ussuri "dumb-init --single-…" About an hour ago Up 33 minutes cinder_scheduler
d82dbb5a8b94 kolla/ubuntu-binary-cinder-api:ussuri "dumb-init --single-…" About an hour ago Up 32 minutes cinder_api
c214451bc731 kolla/ubuntu-binary-glance-api:ussuri "dumb-init --single-…" About an hour ago Up 34 minutes glance_api
d895ebbc56b9 kolla/ubuntu-binary-keystone-fernet:ussuri "dumb-init --single-…" About an hour ago Up 33 minutes keystone_fernet
8e59bb92ad72 kolla/ubuntu-binary-keystone-ssh:ussuri "dumb-init --single-…" About an hour ago Up 34 minutes keystone_ssh
4e3f928dc21d kolla/ubuntu-binary-keystone:ussuri "dumb-init --single-…" About an hour ago Up 34 minutes keystone
e53e6f4982af kolla/ubuntu-binary-rabbitmq:ussuri "dumb-init --single-…" About an hour ago Up 33 minutes rabbitmq
bc7eeed07ef7 kolla/ubuntu-binary-tgtd:ussuri "dumb-init --single-…" About an hour ago Up 32 minutes tgtd
50fb03637da8 kolla/ubuntu-binary-iscsid:ussuri "dumb-init --single-…" About an hour ago Up 32 minutes iscsid
87d533ef99ee kolla/ubuntu-binary-memcached:ussuri "dumb-init --single-…" About an hour ago Up 34 minutes memcached
8504b79a0988 kolla/ubuntu-binary-keepalived:ussuri "dumb-init --single-…" 2 hours ago Up 34 minutes keepalived
73cbbebc44c2 kolla/ubuntu-binary-haproxy:ussuri "dumb-init --single-…" 2 hours ago Up 34 minutes haproxy
c44ebacd4a1b kolla/ubuntu-binary-mariadb-clustercheck:ussuri "dumb-init --single-…" 2 hours ago Up 33 minutes mariadb_clustercheck
f307c05bc38a kolla/ubuntu-binary-mariadb:ussuri "dumb-init -- kolla_…" 2 hours ago Up 34 minutes mariadb
5693020d43a2 kolla/ubuntu-binary-chrony:ussuri "dumb-init --single-…" 2 hours ago Up 34 minutes chrony
9cb7d0776984 kolla/ubuntu-binary-cron:ussuri "dumb-init --single-…" 2 hours ago Up 34 minutes cron
acf3ce5c1813 kolla/ubuntu-binary-kolla-toolbox:ussuri "dumb-init --single-…" 2 hours ago Up 33 minutes kolla_toolbox
54b6b06d7e03 kolla/ubuntu-binary-fluentd:ussuri "dumb-init --single-…" 2 hours ago Up 34 minutes fluentd
All-in-one OpenStack is now up and running.
All-in-one OpenStack Post Deployment Tasks
Install OpenStack command line administration tools. You can do this from the virtual environment.
source $HOME/kolla-openstack/bin/activatepip install python-openstackclient python-neutronclient python-glanceclientYou can now administer OpenStack from cli. For example, to list the currently available services;
openstack service list+----------------------------------+-------------+----------------+
| ID | Name | Type |
+----------------------------------+-------------+----------------+
| 06864fe8aae14ca9ad3a021af20b6159 | nova_legacy | compute_legacy |
| 3f3b8fdfc1b04d789cbafc820ba6971d | cinderv3 | volumev3 |
| 5cb91155a74d4fe0bed0081f60376b0f | heat | orchestration |
| 789c635f1dc947018aaa962537547985 | glance | image |
| abe33e17f53d4656b71251cbf57cf24c | nova | compute |
| df623a12fe25412b9bd29483560eb4e5 | neutron | network |
| e2318f5d7a424dac9416910e6b1094f6 | placement | placement |
| e6c08f0c6a84421e85c8bff4c73a1b83 | heat-cfn | cloudformation |
| ec383b1d33aa4d64ab55829a44b3c687 | keystone | identity |
| f0d09637e4b84db1a02ce26b005407ca | cinderv2 | volumev2 |
+----------------------------------+-------------+----------------+
Generate OpenStack admin user credentials file (openrc).
kolla-ansible post-deployThis command generates the admin credentials file, /etc/kolla/admin-openrc.sh.
source /etc/kolla/admin-openrc.shCreate OpenStack networks, images, nova keys using init-runonce script. The script downloads a cirros image and registers it. Then it configures networking and nova quotas to allow 40 m1.small instances to be created.
In regards to networking, edit the init-runonce script and configure your public network,that you want to connect to the internet via.
vim kolla-openstack/share/kolla-ansible/init-runonce...
ENABLE_EXT_NET=${ENABLE_EXT_NET:-1}
EXT_NET_CIDR=${EXT_NET_CIDR:-'192.168.122.0/24'}
EXT_NET_RANGE=${EXT_NET_RANGE:-'start=192.168.122.15,end=192.168.122.45'}
EXT_NET_GATEWAY=${EXT_NET_GATEWAY:-'192.168.122.1'}
Next, run the script from the virtual environment.
kolla-openstack/share/kolla-ansible/init-runonce...
+----------------------------+-----------+
| Field | Value |
+----------------------------+-----------+
| OS-FLV-DISABLED:disabled | False |
| OS-FLV-EXT-DATA:ephemeral | 0 |
| disk | 160 |
| id | 5 |
| name | m1.xlarge |
| os-flavor-access:is_public | True |
| properties | |
| ram | 16384 |
| rxtx_factor | 1.0 |
| swap | |
| vcpus | 8 |
+----------------------------+-----------+
Done.
To deploy a demo instance, run:
openstack server create \
--image cirros \
--flavor m1.tiny \
--key-name mykey \
--network demo-net \
demo1
Reconfiguring the Stack
If you want to reconfigure the stack by adding or removing services, edit the globals.yml configuration file and redoply the changes from the virtual environment.
For example, after making changes on the globals config file, reconfigure the stack;
source /path/to/virtual-environment/bin/activateThe redeploy the changes;
kolla-ansible -i all-in-one reconfigureAccessing OpenStack Web Interface (Horizon)
So far so good! OpenStack is up and running. It is time we login to the web interface.
First, check the OpenStack IP address (the Kolla VIP address).
ip add show enp1s02: enp1s0: <BROADCAST,MULTICAST,UP,LOWER_UP> mtu 1500 qdisc fq_codel state UP group default qlen 1000
link/ether 52:54:00:3e:8c:af brd ff:ff:ff:ff:ff:ff
inet 192.168.122.216/24 brd 192.168.122.255 scope global dynamic enp1s0
valid_lft 2697sec preferred_lft 2697sec
inet 192.168.122.206/32 scope global enp1s0
valid_lft forever preferred_lft forever
inet6 fe80::5054:ff:fe3e:8caf/64 scope link
valid_lft forever preferred_lft forever
So, 192.168.122.206, is the IP address with which we access OpenStack from the external browser.
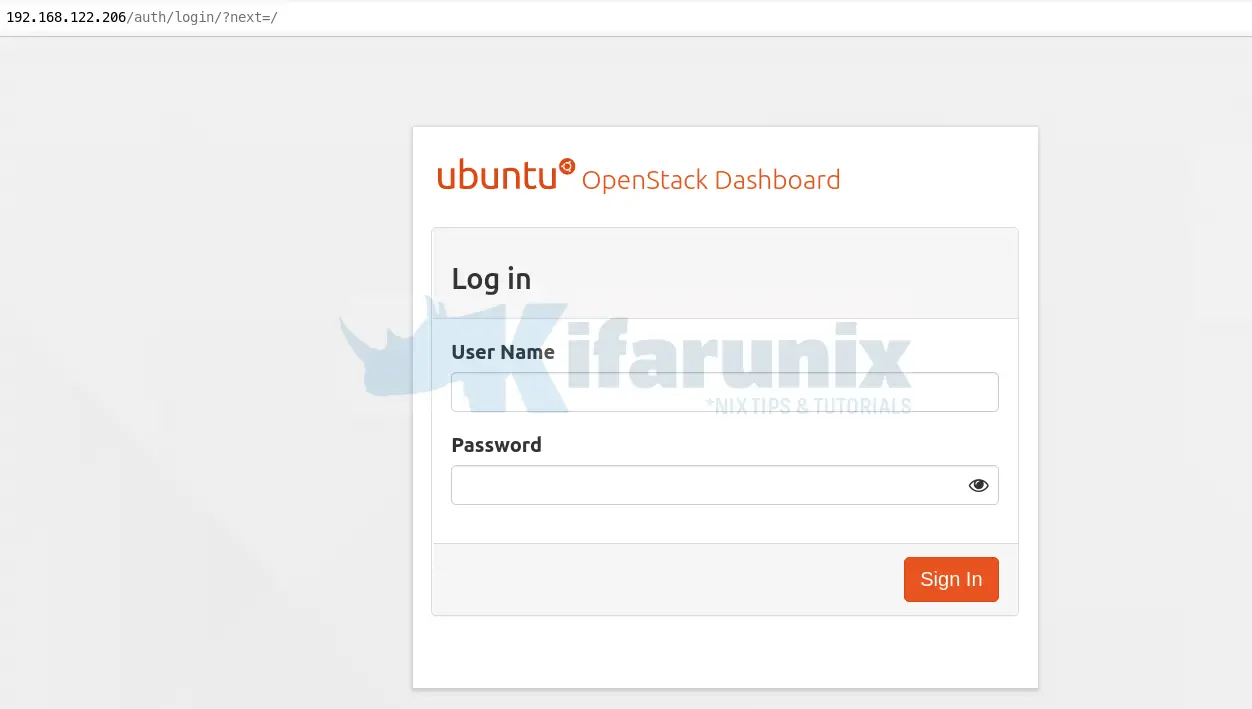
Therefore, to access the OpenStack Horizon from the browser, use the address, http://192.168.122.206.
.This should take you to OpenStack web interface login page;

Login using admin as the username.
You can obtain the admin credentials from the Kolla passwords file, /etc/kolla/passwords.yml. For the Horizon authentication, you need to the Keystone admin password.
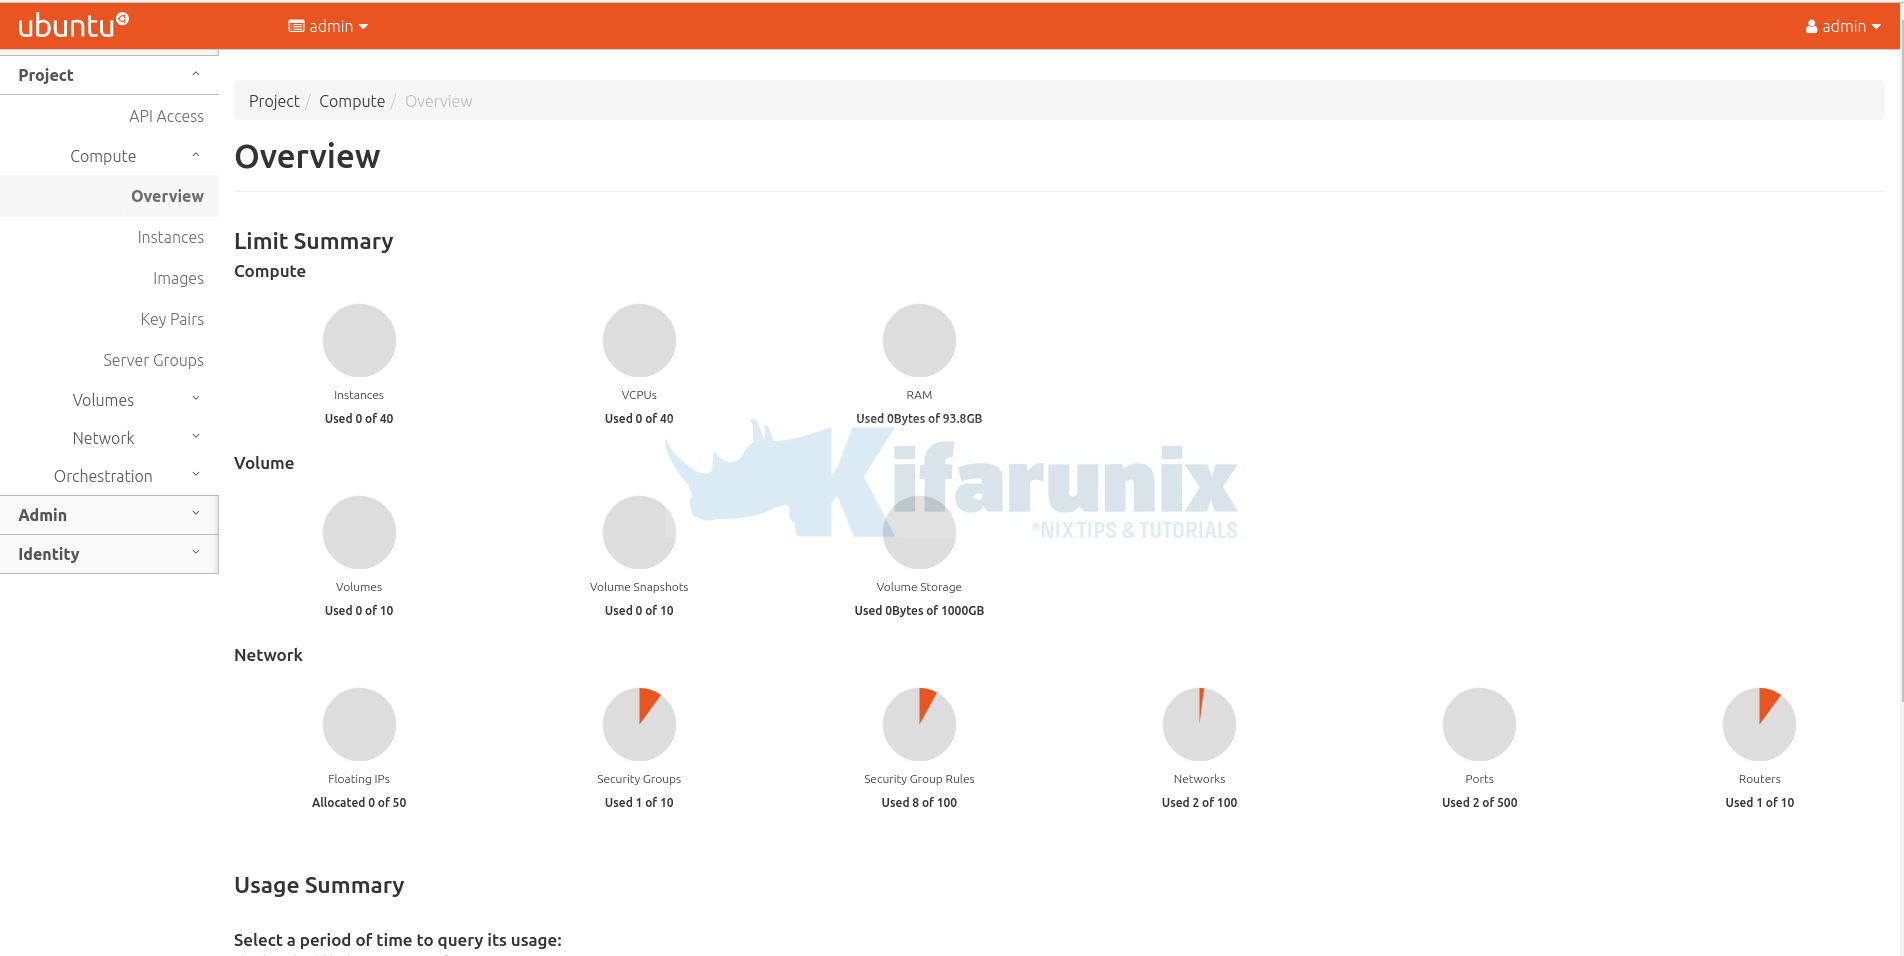
grep keystone_admin_password /etc/kolla/passwords.ymlkeystone_admin_password: vyntMgfyaZnHUcVGqQJ5OqVxbe4ppUJ2exAiB7poWhen you successfully log in, you land on OpenStack horizon dashboard.

Launching an Instance on OpenStack AIO
We already have cirros image registered (Admin > Compute > Images).

Example networks (Admin > Network > Networks) created.

We also have different flavours of the cirros image created;

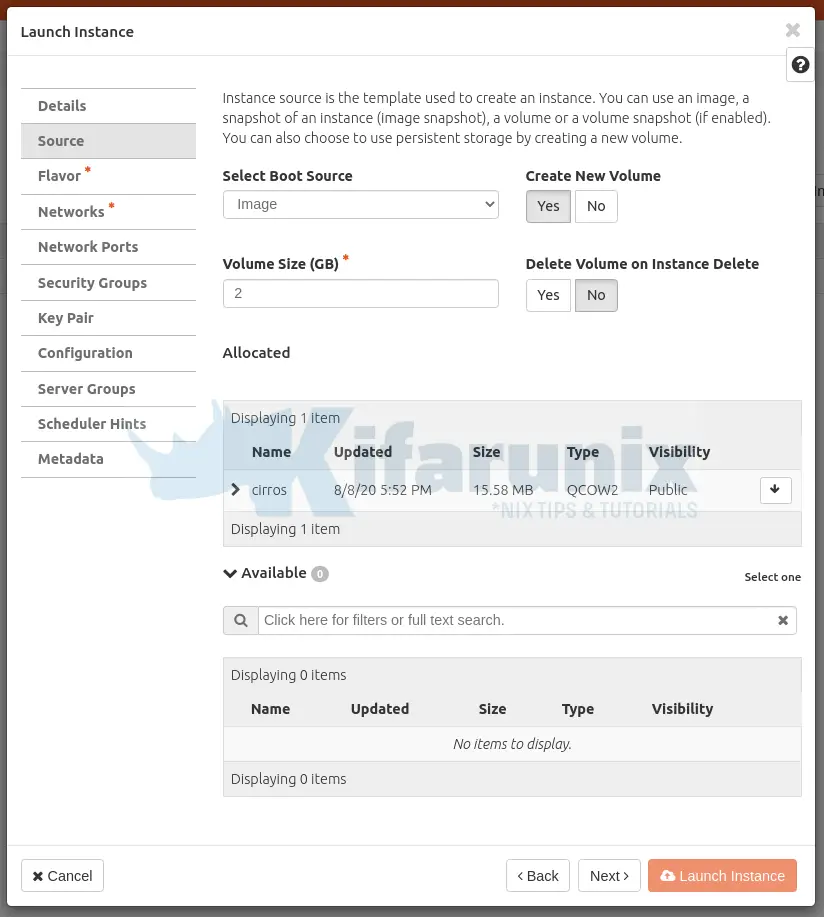
To create and launch an instance, navigate to Project > Compute > Instances. Click Launch Instance.
Set the details of the instance, set the source image, the flavour, the networks and other settings.

Click Launch Instance when done.
The instance takes a few mins to create. When done, it should look like as shown below;

Click on the instance name to see more details including logs, access to console…
You can as well deploy an instance using OpenStack CLI client;
openstack server create \
    --image cirros \
    --flavor m1.tiny \
    --key-name mykey \
    --network demo-net \
    inst002
Check the status of the OpenStack instances;
openstack server list
+--------------------------------------+---------+--------+------------------------+--------+---------+
| ID                                   | Name    | Status | Networks               | Image  | Flavor  |
+--------------------------------------+---------+--------+------------------------+--------+---------+
| c429be25-b8d0-482c-a68a-e11836ab9dc9 | inst002 | ACTIVE | demo-net=10.0.0.240    | cirros | m1.tiny |
| b5467ca7-0224-42e0-b3ed-ffe7cf6a6885 | inst001 | ACTIVE | public1=192.168.122.28 |        | m1.tiny |
+--------------------------------------+---------+--------+------------------------+--------+---------+
For more OpenStack client examples, refer to;
OpenStack command-line interface cheat sheet
Further Reading
OpenStack Administration guides
Reference
OpenStack Kolla-Ansible Quick Start Guide
Related Tutorials
Install and Run MariaDB as a Docker Container
Install and Deploy Kubernetes Cluster on Ubuntu 20.04


at the Run pre-deployment checks :
kolla-ansible -i all-in-one prechecks
I get the error :
TASK [rabbitmq : Check if each rabbit hostname resolves uniquely to the proper IP address] **************************************************************************************************************************************************
failed: [localhost] (item=[{‘cmd’: [‘getent’, ‘ahostsv4’, ‘kolla’], ‘stdout’: ‘10.0.2.4 STREAM kolla\n10.0.2.4 DGRAM \n10.0.2.4 RAW \n172.17.0.1 STREAM \n172.17.0.1 DGRAM \n172.17.0.1 RAW ‘, ‘stderr’: ”, ‘rc’: 0, ‘start’: ‘2020-08-09 21:18:29.463752’, ‘end’: ‘2020-08-09 21:18:29.467348’, ‘delta’: ‘0:00:00.003596’, ‘changed’: False, ‘invocation’: {‘module_args’: {‘_raw_params’: ‘getent ahostsv4 kolla’, ‘warn’: True, ‘_uses_shell’: False, ‘stdin_add_newline’: True, ‘strip_empty_ends’: True, ‘argv’: None, ‘chdir’: None, ‘executable’: None, ‘creates’: None, ‘removes’: None, ‘stdin’: None}}, ‘stderr_lines’: [], ‘failed’: False, ‘item’: ‘localhost’, ‘ansible_loop_var’: ‘item’}, ‘10.0.2.4 STREAM kolla’]) => {“ansible_loop_var”: “item”, “changed”: false, “item”: [{“ansible_loop_var”: “item”, “changed”: false, “cmd”: [“getent”, “ahostsv4”, “kolla”], “delta”: “0:00:00.003596”, “end”: “2020-08-09 21:18:29.467348”, “failed”: false, “invocation”: {“module_args”: {“_raw_params”: “getent ahostsv4 kolla”, “_uses_shell”: false, “argv”: null, “chdir”: null, “creates”: null, “executable”: null, “removes”: null, “stdin”: null, “stdin_add_newline”: true, “strip_empty_ends”: true, “warn”: true}}, “item”: “localhost”, “rc”: 0, “start”: “2020-08-09 21:18:29.463752”, “stderr”: “”, “stderr_lines”: [], “stdout”: “10.0.2.4 STREAM kolla\n10.0.2.4 DGRAM \n10.0.2.4 RAW \n172.17.0.1 STREAM \n172.17.0.1 DGRAM \n172.17.0.1 RAW “}, “10.0.2.4 STREAM kolla”], “msg”: “Hostname has to resolve uniquely to the IP address of api_interface”}
I got below error. Please help me