This guide describes how to scan a web application using Acunetix Scanner.
Table of Contents
Install Acunetix on Ubuntu Linux
If you need to learn how to install Acunetix trial edition on Ubuntu 18.04, check the link below;
How to Install Acunetix on Ubuntu 18.04
Scan a Web Application Using Acunetix WVS
In this guide, we are going to demonstrate how to scan a web application using Acunetix web vulnerability scanner. We will be using a Damn Vulnerable Web Application (DVWA) running on our local server for this exercise.
Want to learn how to install DVWA on Ubuntu 18.04? Follow the link below to check our article on the same.
How to Install and Configure DVWA Lab on Ubuntu 18.04 server
Login to Acunetix web User Interface
Well, assuming you are set and ready to go, login to Acunetix web User Interface and create a new Scan target.

Add a Scan Target to Acunetix WVS
To add a scan target, click Add Target or Create new target tab/link respectively. This will open a window where you can enter the target Address and the scan description.
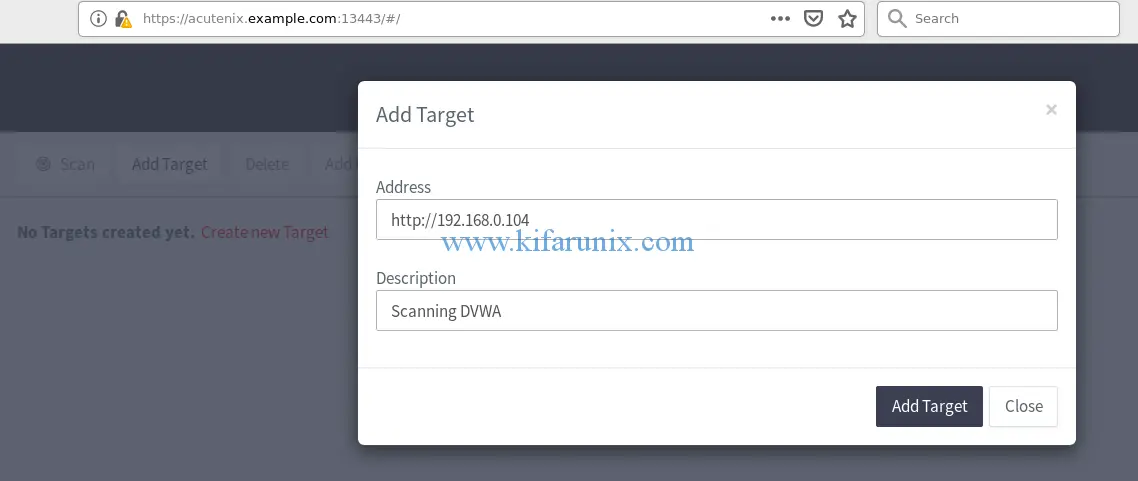
Click Add Target and proceed to define other Target information.
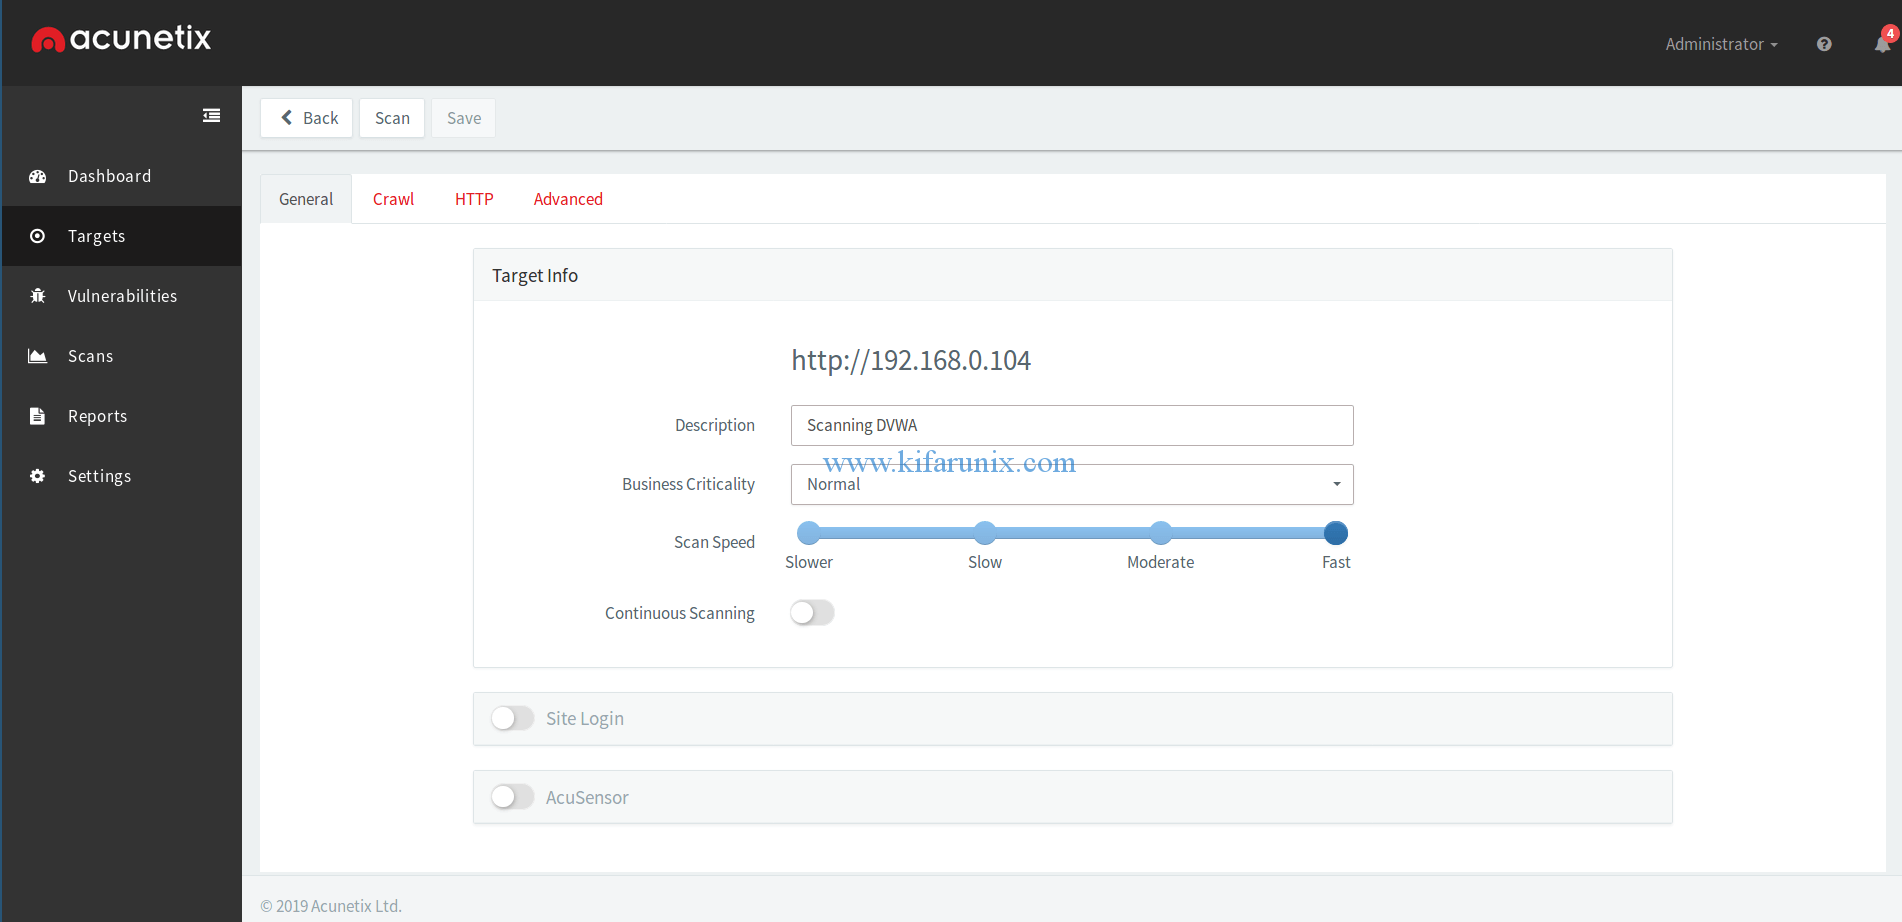
Save the target information. Scroll through the Crawl, HTTP, Advanced tabs to configure more scan settings. Once you are contented with the scan settings, Click Scan button to proceed to define the scan options: Scan type, the type of report and the scan schedule.

Scan the Target on Acunetix WVS
Once you provide information about the target, click Create Scan button to launch the scanning.
Acunetix WVS Scan Results
Once the scan completes, you should be able to see the Acunetix scan results.
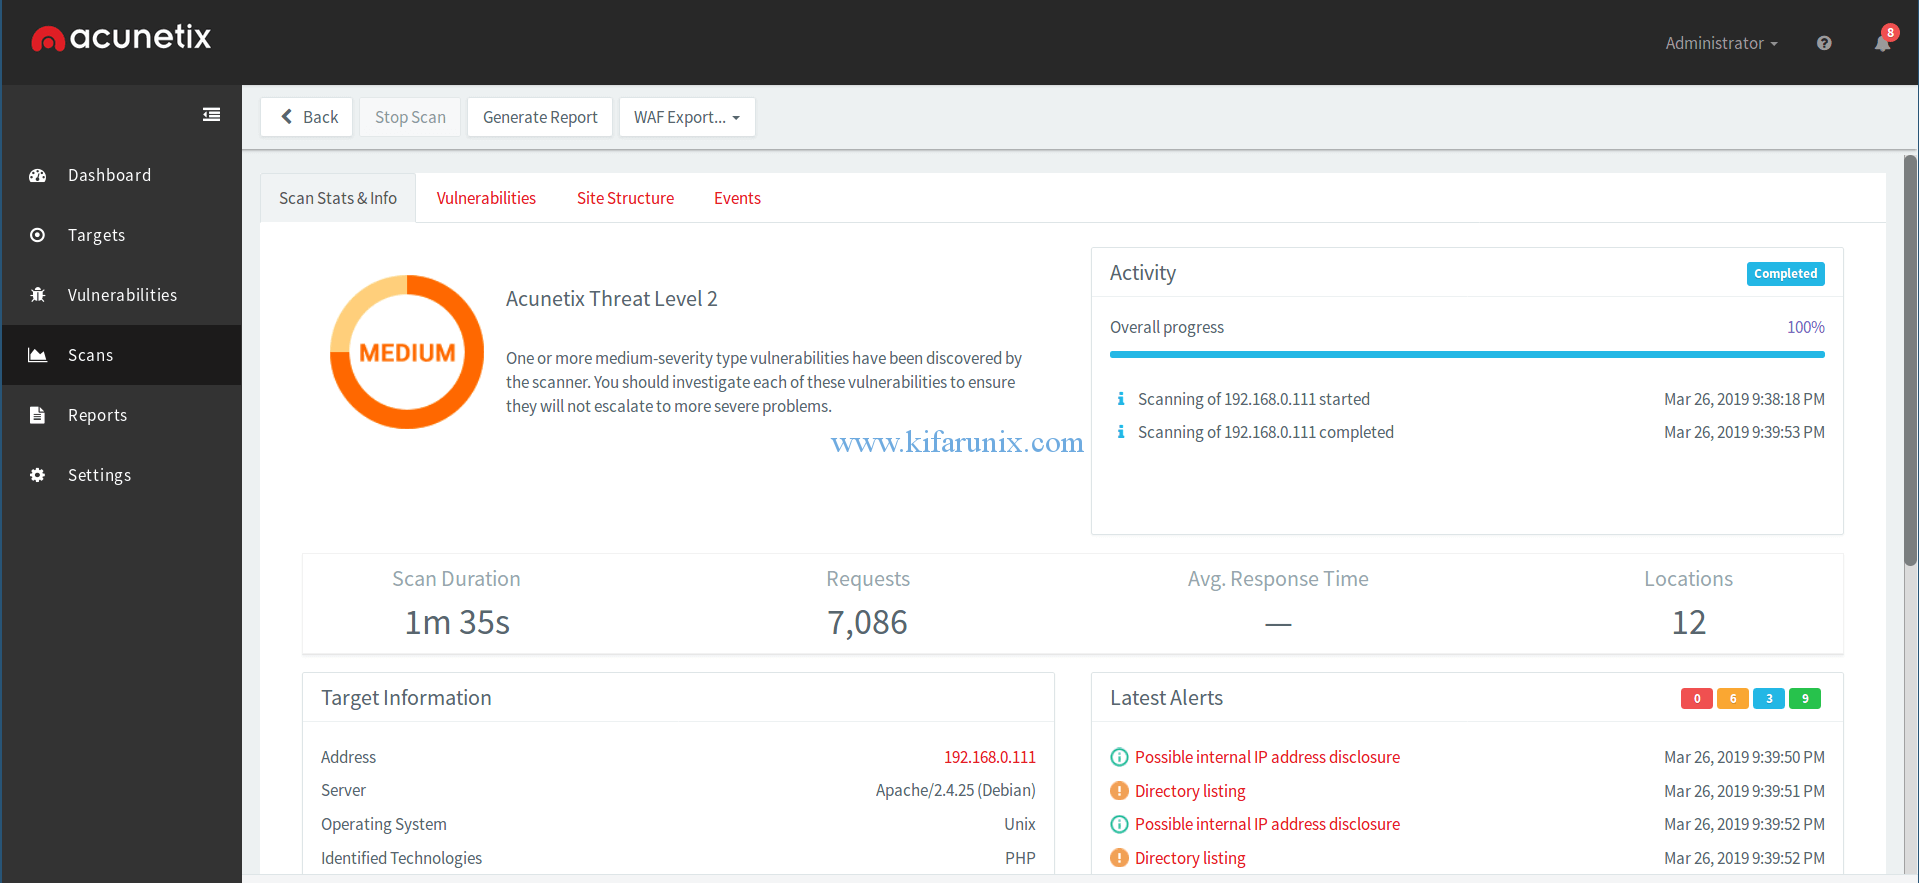
Scroll through the Vulnerabilities, Site Structure, Events to see more scan results details.
To generate the scan report, click on the Generate Report Tab and choose the report template and generate the report.


Acunetix WVS Reports
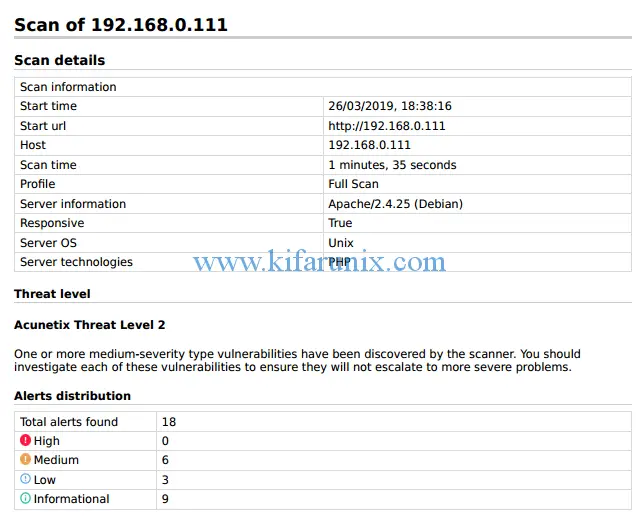
You can download the report in PDF or HTML formats. A sample Executive summary PDF report of out test scan is shown below;
That is all about how to scan a web application using Acunetix Scanner. How about you get the licensed version and enjoy the magics of this awesome scanner. Enjoy threat hunting.

